- The Ultimate Guide to Creating and Customizing Radio Buttons in HTML Forms
- Creating Radio Buttons in HTML
- Pre-selecting and Disabling Radio Buttons
- How to create Radio buttons in HTML forms
- Making Radio Buttons Mandatory in a Form
- JavaScript and Radio Buttons
- Best Practices and Customization
- Other simple code examples for HTML radio buttons
- Conclusion
- Frequently Asked Questions — FAQs
- What are the best practices for using radio buttons in HTML forms?
- Переключатели
The Ultimate Guide to Creating and Customizing Radio Buttons in HTML Forms
Learn how to create and customize radio buttons in HTML forms with this comprehensive guide. Make your forms more user-friendly and accessible. Get started now!
- Creating Radio Buttons in HTML
- Pre-selecting and Disabling Radio Buttons
- How to create Radio buttons in HTML forms
- Making Radio Buttons Mandatory in a Form
- JavaScript and Radio Buttons
- Best Practices and Customization
- Other simple code examples for HTML radio buttons
- Conclusion
- How do you input radio in HTML?
- How do I link a radio button to another page in HTML?
- How to get the value of radio button in HTML?
- How to use radio group in HTML?
Radio buttons are an essential part of HTML forms that allow users to select options from a group of mutually exclusive choices. This post will provide a comprehensive guide to creating and using radio buttons in html forms . We will cover the key points, important points, and helpful points related to radio buttons in HTML.
Creating Radio Buttons in HTML
The element is used to create a radio button in HTML. Radio buttons are typically used in groups, where only one option can be selected at a time. To create a group of radio buttons, give them all the same name attribute. The value attribute specifies the value that will be sent to the server if the radio button is checked.
Here is an example code that demonstrates how to create two radio buttons that are grouped together:
In the above code, both radio buttons are part of the same group as they have the same name attribute. The value attribute is used to specify the value that will be sent to the server if the radio button is checked.
Pre-selecting and Disabling Radio Buttons
The checked attribute can be used to pre-select a radio button. This is useful when a particular option is the most common choice. The disabled attribute can be used to disable a radio button. This is useful when a particular option is not applicable to the user.
Here is an example code that demonstrates how to pre-select a radio button and disable another radio button:
In the above code, the first radio button is pre-selected as it has the checked attribute. The second radio button is disabled as it has the disabled attribute.
How to create Radio buttons in HTML forms
In this HTML tutorial we understand How to create Radio buttons in HTML using HTML input Duration: 10:31
Making Radio Buttons Mandatory in a Form
The required attribute can be used to make a radio button mandatory in a form. This is useful when the user must select one of the options before submitting the form.
Here is an example code that demonstrates how to make Radio Buttons Mandatory in a form:
In the above code, both radio buttons are mandatory as they have the required attribute.
JavaScript and Radio Buttons
JavaScript can be used to link a radio button to another page or to get the selected value of a radio button. This is useful when additional functionality is required.
Here is an example code that demonstrates how to link a radio button to another page and get the selected value:
// Link to another page Male
// Get selected value var gender = document.querySelector('input[name="gender"]:checked').value;
In the above code, the first radio button is linked to another page as it has the onclick attribute. The second code retrieves the selected value of the radio button.
Best Practices and Customization
Best practice is to use radio buttons for mutually exclusive options . This is important to ensure that the user selects only one option. Following accessibility guidelines is also important to ensure that the radio buttons are usable by all users.
The appearance of radio buttons can be customized using CSS. This allows developers to create a unique look and feel for their forms.
Here is an example CSS code that demonstrates how to customize radio buttons :
In the above code, the input[type=»radio»] selector is used to specify the radio buttons. The custom styles can be added in the curly braces.
Other simple code examples for HTML radio buttons
In Html case in point, html input radio code sample
In Html , radio forms html
In Php , for instance, html input radio selected code example
In Html , input radio html
In Html , form tag radio code sample
In Html case in point, input radio
// source : https://developer.mozilla.org/In Html , in particular, html radio input code sample
In Html , for instance, input radio button html
In Html , in particular, input radio button html code example
Conclusion
Radio buttons are an essential part of HTML forms that allow users to select mutually exclusive options. They can be easily created using the element and grouped together using the name attribute. Pre-selection, disabling, and making radio buttons mandatory can be achieved using the checked, disabled, and required attributes. JavaScript can be used to link radio buttons to another page or get the selected value. Best practices include using radio buttons for mutually exclusive options and following accessibility guidelines. Customization of radio buttons can be achieved using CSS.
Frequently Asked Questions — FAQs
What are the best practices for using radio buttons in HTML forms?
Best practice is to use radio buttons for mutually exclusive options and follow accessibility guidelines. Make sure to customize their appearance using CSS for a better user experience.
Переключатели
Переключатели (жарг. радиокнопки) используют, когда необходимо выбрать один единственный вариант из нескольких предложенных. Создаются следующим образом.
Атрибуты переключателей перечислены в табл. 1.
| Атрибут | Описание |
|---|---|
| checked | Предварительное выделение переключателя. По определению, набор переключателей может иметь только один выделенный пункт, поэтому добавление checked сразу к нескольким полям не даст особого результата. В любом случае, будет отмечен элемент, находящийся в коде HTML последним. |
| name | Имя группы переключателей для идентификации поля. Поскольку переключатели являются групповыми элементами, то имя у всех элементов группы должно быть одинаковым. |
| value | Задаёт, какое значение будет отправлено на сервер. Здесь уже каждый элемент должен иметь свое уникальное значение, чтобы можно было идентифицировать, какой пункт был выбран пользователем. |
Создание группы переключателей показано в примере 1.
Пример 1. Создание переключателей
Какое у вас состояние разума?
Не дзен
Дзен
Полный дзен
В результате получим следующее (рис. 1).
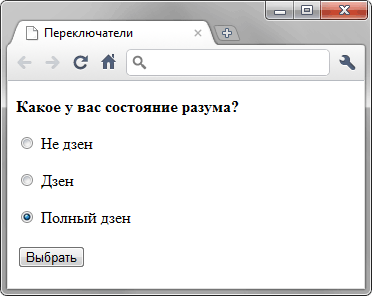
Рис. 1. Вид переключателей в браузере
Заметьте, что в данном примере значение атрибута name для всех переключателей одинаково, именно в таком случае браузер понимает, что переключатели связаны между собой и помечает только один пункт из предложенных. Значение атрибута value же должно различаться, чтобы обработчик формы мог понять, какой вариант выбран пользователем.