- Automated Web Page Creation with PHP
- 1. First we need to create a basic web page template.
- 2. Add Bootstrap
- 3. Set up a container
- 4. Create a web form
- 5. Add the form fields
- 6. Create the form processor file
- 7. Initialize variables
- 8. Use conditionals to change the fonts to their correct values
- 9. Commence building the generator string
- 10. Start adding the page body to the generator string
- 11. Write the generator string to a HTML
- 12. Add a test link
- 13. Create the custom CSS file
- 14. Create and upload wrap.png
- 15. Upload some suitable background images and test your pageBuilder
- Генерация html на PHP
- Saved searches
- Use saved searches to filter your results more quickly
- License
- Paanolf/PageGenerator
- Name already in use
- Sign In Required
- Launching GitHub Desktop
- Launching GitHub Desktop
- Launching Xcode
- Launching Visual Studio Code
- Latest commit
- Git stats
- Files
- README.md
- About
Automated Web Page Creation with PHP
If you subscribe to a service from a link on this page, Reeves and Sons Limited may earn a commission. See our ethics statement.
There are certain times in life when you need a web page to do something more than just sit there being a web page. You need it to earn its keep. One way to do that is to put it to work for you, so you won’t have to hand code every update or page mod. The easiest way to learn how to do something like this is by actually doing it, so in the rest of this article, I’m going to show you one way of implementing a system that will build new web pages for you at the touch of a button. In this scenario, we’ll assume your client is a restaurant that wants to offer vouchers for different special occasions throughout the year. But of course they don’t want to pay you to update it for them, so you’d better make sure to bill them sufficiently for this automation system that will do the updates for them
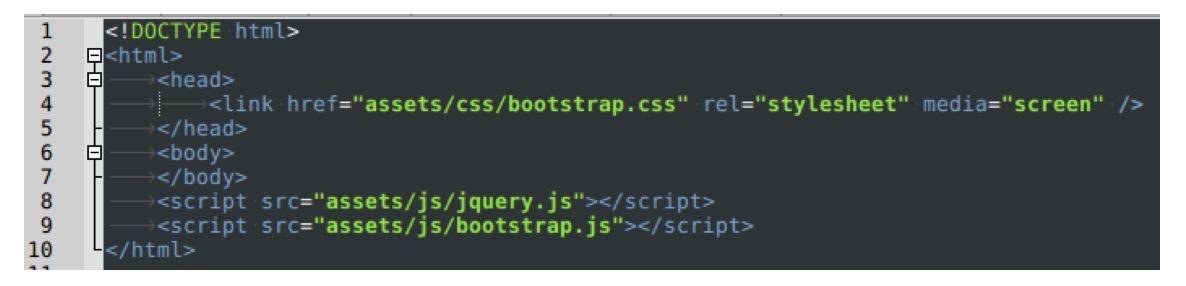
1. First we need to create a basic web page template.

This is just a standard web page skeleton. You can give it a name like “pageBuilder.php” or something. You don’t have to use PHP for this. You could use another programming language, but for this example we’ll keep things simple and do it all in PHP.
2. Add Bootstrap
This will help to make the form look better without any extra work. Of course you’ll need to have Bootstrap for this to work.
3. Set up a container
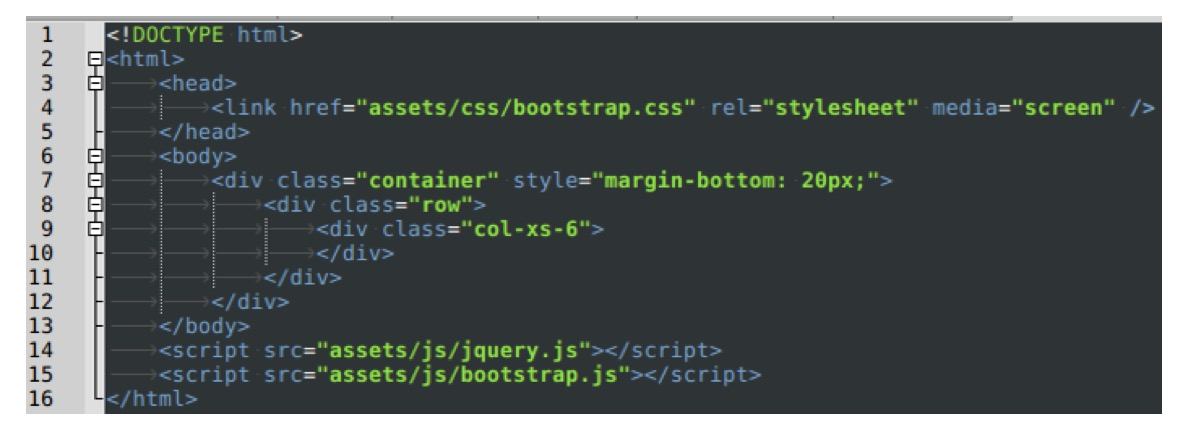
To help keep everything neat and tidy, we should define a container that we’ll store the page contents in.
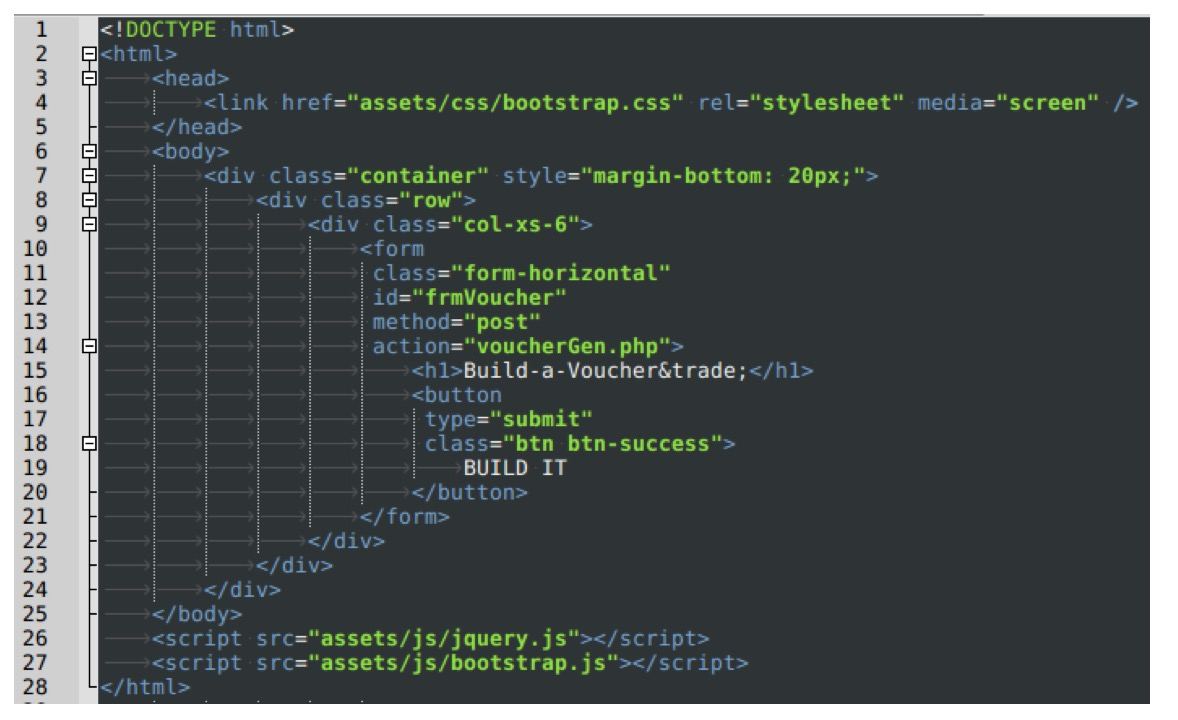
4. Create a web form
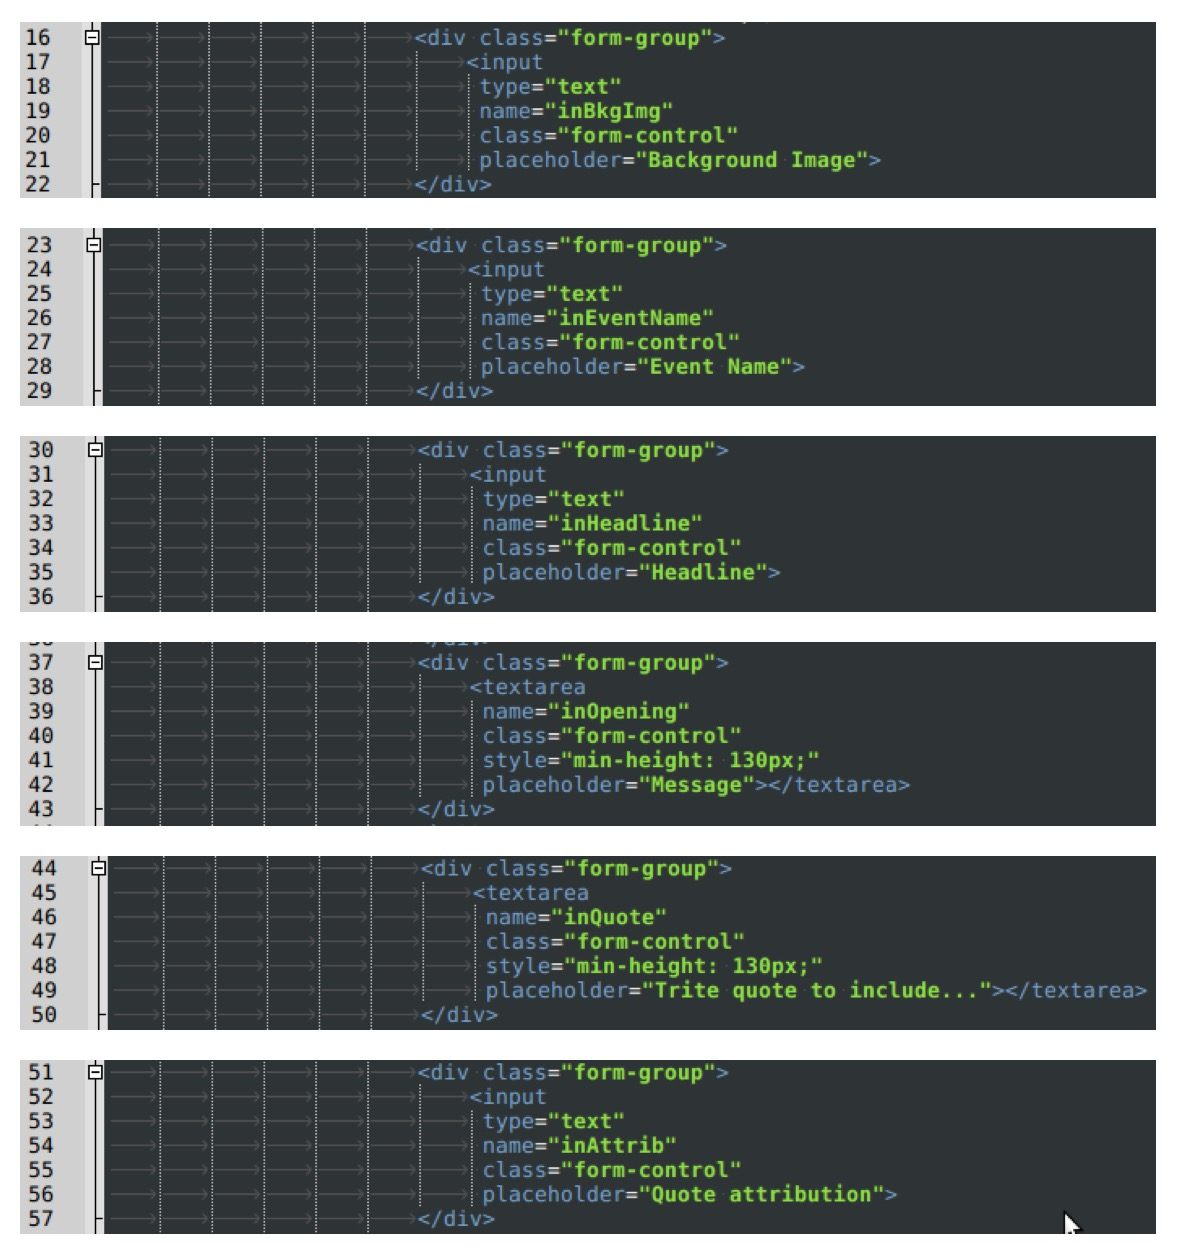
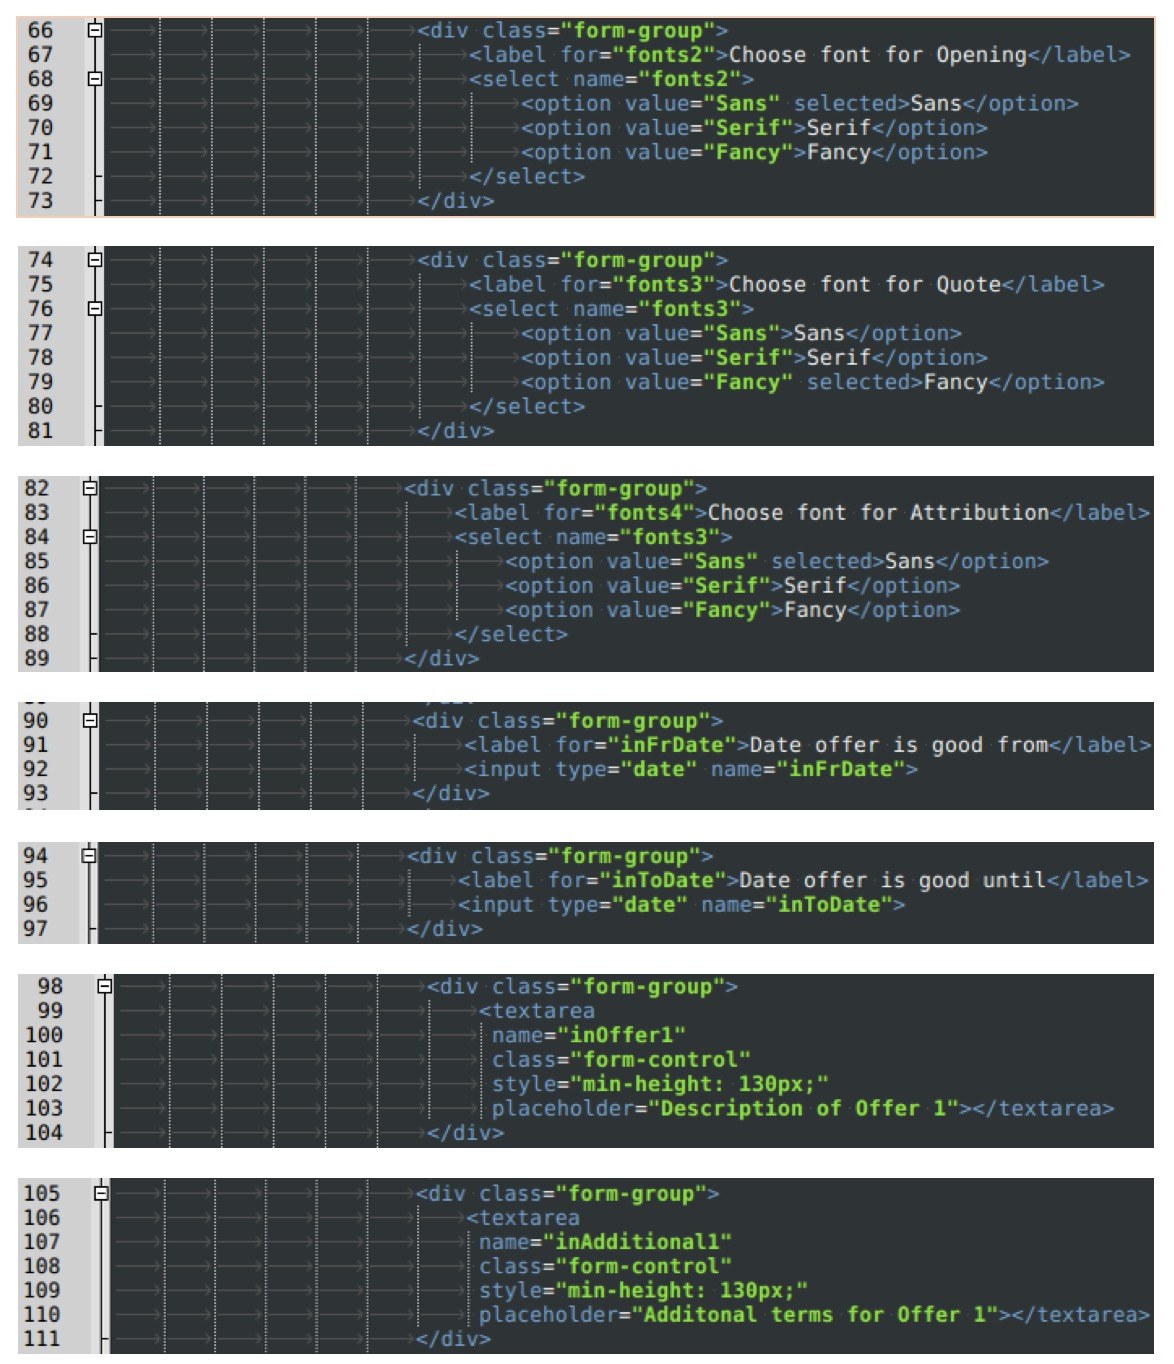
5. Add the form fields
- The background image for the page
- Name of the event being celebrated
- Headline
- Opening statement
- Some trite quote or additional statement
- Attribution for trite quote
- Font style to use for each of the four framing text elements (individually).
- Date range that the vouchers will be valid for
- Offer 1 and Offer 2 that will be advertised on the vouchers.
- Additional voucher messages (terms and conditions, for example)
- Data for the voucher QR codes that will be generated

And after all this effort, we will end up with a page that looks something like this:
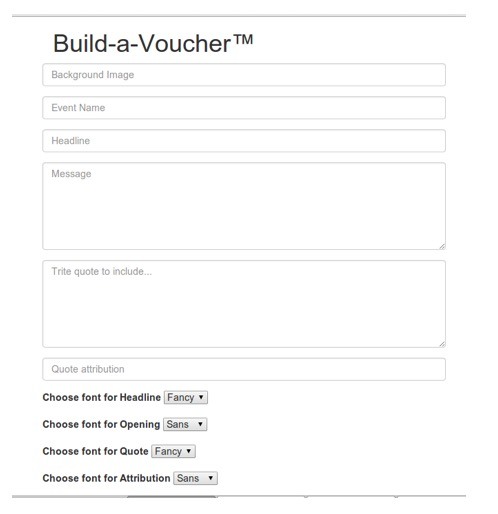
The good news is that half the job is now complete, and it was the most difficult and time-consuming half. The rest is far easier.
6. Create the form processor file
After creating a form, you need some software that will process the submitted data and do something with it. In this case, we’ll be using the submitted data to generate a new HTML page.
Now, keep in mind this is not the same thing as a normal PHP response where the data is used in real time and reflected to the user dynamically. Instead, we are creating a static page that will permanently exist until we overwrite it.
The file needs to be named the same as the action attribute value in the form declaration, so in our example that would be voucherGen.php, and because we did not specify a path, it would need to be stored in the same location as pageBuilder.php for it to work.
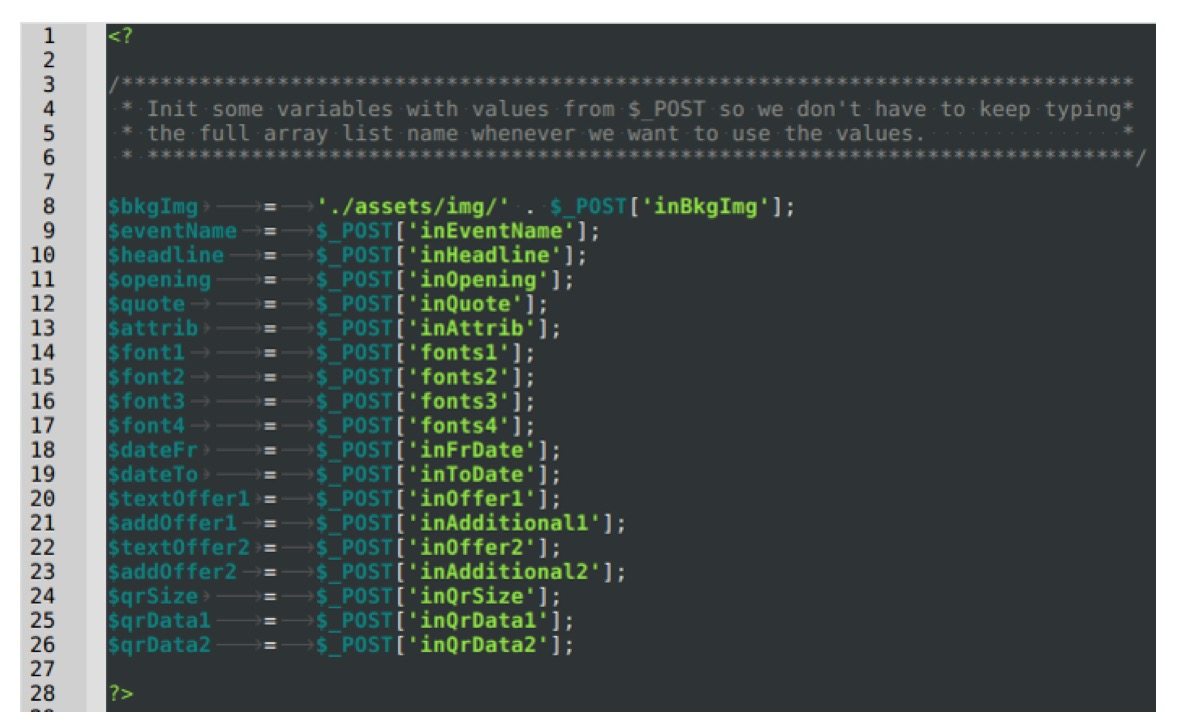
7. Initialize variables
The data submitted from pageBuilder.php was returned as an associative array called $_POST, and all the data values in the array can be accessed via their HTML form control name attributes. Therefore initializing our variables is actually quite easy. It’s also optional, but it just makes the code look a bit more tidy and easier to read. You could certainly work directly with the $_POST values if you prefer.
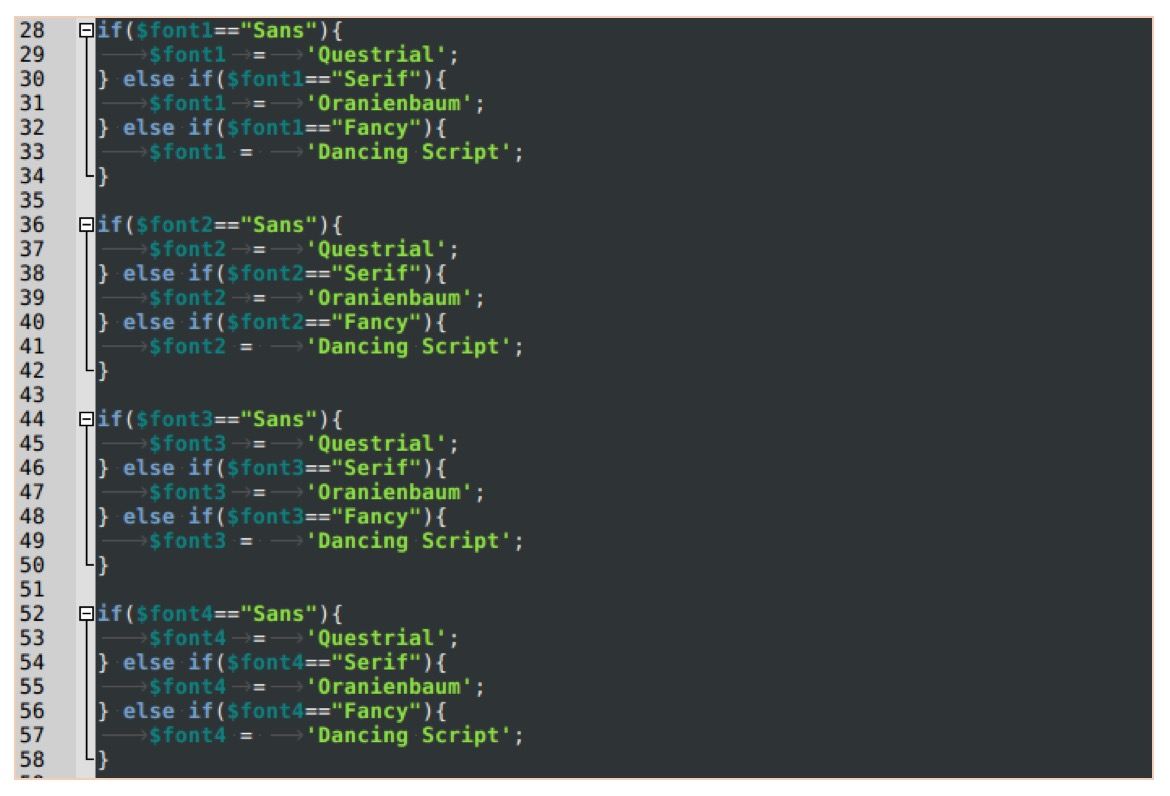
8. Use conditionals to change the fonts to their correct values
Doing this early will save time and trouble later. We just check which values were selected and then replace them with the actual font names.
 9. Commence building the generator string
Really all we need to do here is create one really long string that will contain everything required to create the new page. We will use string concatenation to keep it readable and make it easy to see where the data values have been inserted. This starts with the basic HTML page set up:
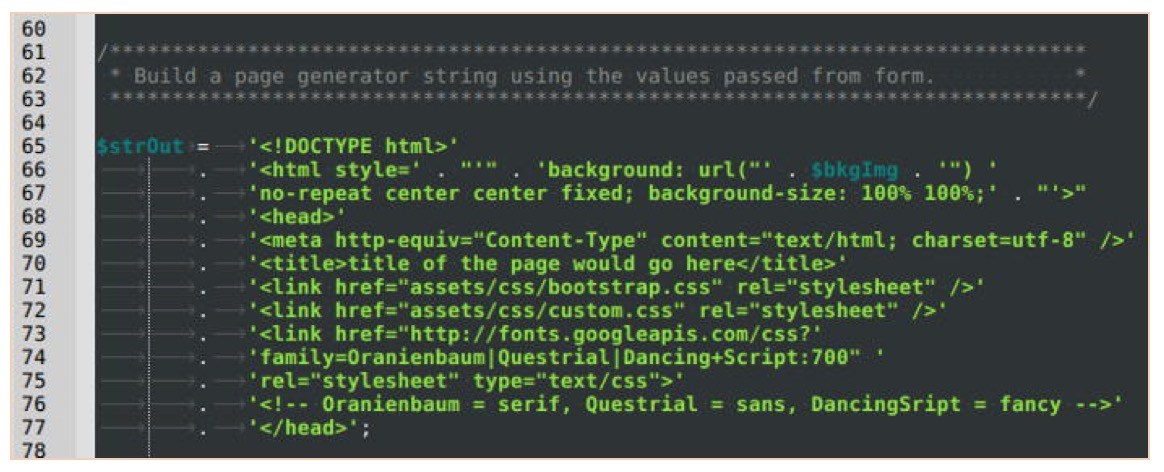
You can probably see where we’re going with this. Note the semi-colon at the end. That’s important. Also any semi-colons that occur within the text (as part of a CSS declaration or a client-side script) must be contained inside quote marks.
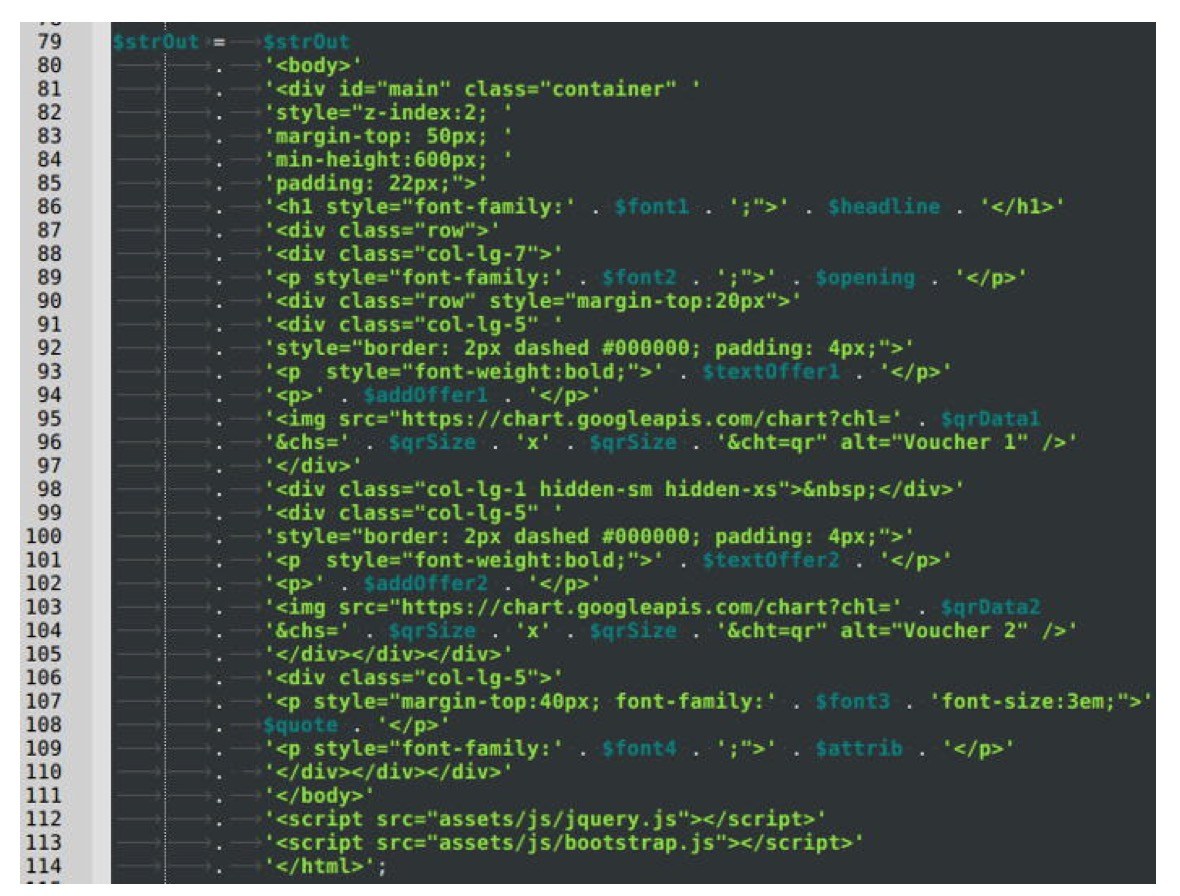
10. Start adding the page body to the generator string
There are more efficient ways to build this string, but I like to make code tidy, so that it’s easy to read. You can use short hand methods to do this, and you also don’t have to do it as a separate process to step 9. I feel it’s easier to understand when the different sections of the page are split this way.
11. Write the generator string to a HTML
In this case we are hard-coding the file name, but you could (and probably should) make this a field in your pageBuilder form.

12. Add a test link
When you click the BUILD IT button, because it doesn’t redirect to a web page like a normal PHP program would, you need to add a link or something to go and see what the result was.

13. Create the custom CSS file
You can store additional styling instructions in this file, but for now the only important one is the styling instruction for the main div.

14. Create and upload wrap.png
For this to work properly, you need to create a single translucent pixel image and name it wrap.png then upload it to the path you specified in the custom.css file.
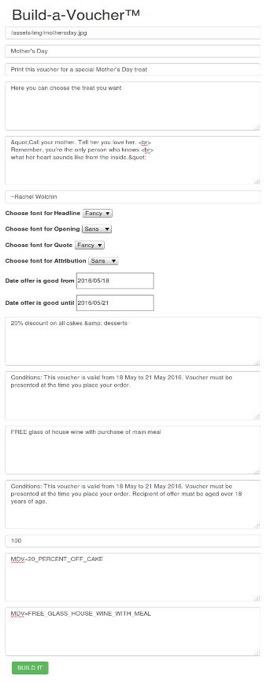
15. Upload some suitable background images and test your pageBuilder
You’ll be thrilled to know we’re almost done, and really it’s now just a matter of testing and fixing up any errors that occur. Choose some nice simple images that are not too busy and that are suitable to relate to special events or occasions (in our example, I’ve gone with Mother’s Day and Father’s Day). Upload the images to the path where you store your images for your website. Then fill in the form, click the button, and see what happens. Here’s an example of the form with all the data fields filled in.
Which should result in creating something quite similar to this:

We already guessed you wouldn’t want to type all that from scratch, so you can download the source code for pageBuilder.php and voucherGen.php in this zip file.
You can apply this technique of creating HTML files as strings and then writing them out to files in all kinds of situations. Just be careful never to put something like this in a recursive loop or you’ll fill up your hard drive and crash the server.
Генерация html на PHP
Предлагаю вашему вниманию свое решение по генерации html на PHP. Задача вроде бы тривиальная, но хотелось бы, чтобы это было расширяемо, кратко, но в тоже время с хорошим функционалом. Получилось вроде не плохо.
Сразу скажу( как многие считают в комментариях), что задача ставилось не написать шаблонизатор (которых и так много) и не заменить шаблонизатор JavaScript. Я прекрасно знаю, что true way это разделять html и данные. Но мне понадобилось писать html в классах, для создания компонентов фреймворка, на подобие CGridView в yii, стоит ли в таких местах выносить html в отдельные файлы решать вам.
Основная цель, избавится от html в классах и функциях.
Простой пример, обычная кнопка:
CHtml::create() ->p() ->a(array('href' => 'http://habrahabr.ru', 'class' => 'btn')) ->text('Перейти') ->render(); Ничего хитрого, можно было бы этим и ограничется, но захотелось циклы:
$arr = array('1' => 'Первый', '2' => 'Второй'); CHtml::create() ->select($options) ->each(CHtml::plainArray($arr, 'value', 'text')) ->option('array("value" => $data->value)') ->text('$data->text') ->end() ->endEach() $arr = array( array('value' => '1', 'text' =>'Первый'), array('value' => '2', 'text' => 'Второй') ); Теги внутри цикла могут содержать функции или строки с eval выражениями, вложенность любая, пример с таблицей:
$columns = array( array('id' => 'NAME', 'label' => 'Имя'), array('id' => 'AGE', 'label' => 'Возраст') ); $data = array( array('NAME' => 'Петр', 'AGE' => 29), array('NAME' => 'Василий', 'AGE' => 32) ); CHtml::create() ->table() ->thead() ->tr() ->each($columns) ->th() ->text(function($column)< return $column['label']; >) ->end() ->endEach() ->end() ->end() ->tbody() ->each($data) ->tr() ->each($columns) ->td() ->text(function($row, $column) < return $row[$column['id']]; >) ->end() ->endEach() ->end() ->endEach() ->render(); Незакрытые теги закрываются автоматически.
Класс можно расширить, вплоть до использования в формах. Расширить можно за счет наследования или внедрения зависимости, за то, как будет выводится каждый тег и его атрибуты используется одна функция, поэтому можно легко переопределить это поведение.
class CMyHtml extends CHtml < public function a($options = array()) < $default = array( 'href' =>'javascript:void(0)' ); return parent::a(array_replace($default, $options)); > > class CForm < private $_lastLabel = ''; public function __construct(CModel $model, CHtml $html = null) < $this->_model = $model; $this->_html = $html ?: CHtml::create(); > public function __call($method, $ps) < $options = $ps ? $ps[0]: array(); if ($method === 'label') < $this->_lastLabel = isset($options['for']) ? $this->_model->getLabel($options['for']) : ''; > if ($method === 'text' && $this->_lastLabel) < $options = $options ?: $this->_lastLabel; $this->_lastLabel = ''; > $this->_html->$method($options); return $this; > > Само решение можно посмотреть и попробовать на github.
Saved searches
Use saved searches to filter your results more quickly
You signed in with another tab or window. Reload to refresh your session. You signed out in another tab or window. Reload to refresh your session. You switched accounts on another tab or window. Reload to refresh your session.
Page Generator in PHP. Allow to generate the HTML code.
License
Paanolf/PageGenerator
This commit does not belong to any branch on this repository, and may belong to a fork outside of the repository.
Name already in use
A tag already exists with the provided branch name. Many Git commands accept both tag and branch names, so creating this branch may cause unexpected behavior. Are you sure you want to create this branch?
Sign In Required
Please sign in to use Codespaces.
Launching GitHub Desktop
If nothing happens, download GitHub Desktop and try again.
Launching GitHub Desktop
If nothing happens, download GitHub Desktop and try again.
Launching Xcode
If nothing happens, download Xcode and try again.
Launching Visual Studio Code
Your codespace will open once ready.
There was a problem preparing your codespace, please try again.
Latest commit
Git stats
Files
Failed to load latest commit information.
README.md
Page Generator in PHP. Allow to generate the HTML code.
It’s simple, just add the class to your project, then include it where you want to use it (or via an autoload) :
require_once 'path/to/the/class/Page.class.php Then initialize a new variable :
$myPage = new Page($title [, $charset = "UTF-8" [, $favicon = '' [, $defaultlib = true]]]); $defaultlib allow to include a starterpack of libraries, frameworks. commonly used
- Currently included :
- Bootstrap : vers. 4.4.1
- JQuery : vers. 3.4.1
- Font-Awesome : vers. 5.8.1
About
Page Generator in PHP. Allow to generate the HTML code.