- overflow
- Синтаксис
- Значения
- Объектная модель
- Браузеры
- overflow
- Кратко
- Пример
- Как пишется
- Как понять
- Значения
- Подсказки
- На практике
- Realetive советует
- Overflowing content
- What is overflow?
- CSS tries to avoid «data loss»
- The overflow property
- Overflow establishes a Block Formatting Context
- Unwanted overflow in web design
- Test your skills!
- Summary
- Found a content problem with this page?
overflow
Свойство overflow управляет отображением содержания блочного элемента, если оно целиком не помещается и выходит за область заданных размеров.
Синтаксис
overflow: auto | hidden | scroll | visible | inherit
Значения
visible Отображается все содержание элемента, даже за пределами установленной высоты и ширины. hidden Отображается только область внутри элемента, остальное будет скрыто. scroll Всегда добавляются полосы прокрутки. auto Полосы прокрутки добавляются только при необходимости. inherit Наследует значение родителя.
HTML5 CSS2.1 IE Cr Op Sa Fx
Duis te feugifacilisi Lorem ipsum dolor sit amet, consectetuer adipiscing elit, sed diem nonummy nibh euismod tincidunt ut lacreet dolore magna aliguam erat volutpat. Ut wisis enim ad minim veniam, quis nostrud exerci tution ullamcorper suscipit lobortis nisl ut aliquip ex ea commodo consequat.
Результат данного примера показан на рис. 1.
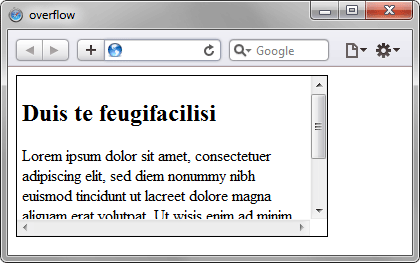
Рис. 1. Применение свойства overflow
Объектная модель
[window.]document.getElementById(» elementID «).style.overflowБраузеры
Internet Explorer до версии 7.0 включительно:
- не поддерживает значение inherit ;
- относительно позиционированные дочерние элементы, значения overflow у которых заданы как auto или scroll ведут себя словно у них задано position : fixed .
- Сочетание overflow со значением scroll со свойствами max-height и float может привести к пропаданию элементов веб-страницы, в браузере выводится пустой экран.
- Для блока, у которого указаны свойства float и overflow со значением scroll , игнорируется ширина, заданная через свойство max-width .
- Высота блока с горизонтальной полосой прокрутки увеличивается на высоту скролбара, хотя по спецификации CSS заданные размеры должны включать в себя и полосы прокрутки.
overflow
Обрезать ли то, что не поместилось в блок? Или показывать скролл?
Время чтения: меньше 5 мин
Кратко
Скопировать ссылку «Кратко» Скопировано
Свойство overflow позволяет буквально определить, что делать с содержимым блочного (то есть для элемента, у которого display определяется как block , inline — block , flex или grid ) элемента, если оно не влезает в размеры — отобразить или обрезать (с полосами прокрутки или без).
Пример
Скопировать ссылку «Пример» Скопировано
Если содержимое блока будет больше, чем границы блока, оно будет «обрезано»:
.article /* Задаём ограничения по размеру блока */ width: 300px; height: 300px; overflow: hidden;>.article /* Задаём ограничения по размеру блока */ width: 300px; height: 300px; overflow: hidden; >
Как пишется
Скопировать ссылку «Как пишется» Скопировано
.selector overflow: hidden;>.selector overflow: hidden; >
Как понять
Скопировать ссылку «Как понять» Скопировано
Синтаксис свойства позволяет задать два значения — для оси x и оси y. Если указано одно значение, оно равнозначно применяется для обеих осей. Аналогичного результата можно добиться, используя самостоятельные CSS-свойства overflow — x и overflow — y .
Значения
Скопировать ссылку «Значения» Скопировано
- visible — содержимое отображается снаружи родительского блока, если его размеры больше размеров «родительского» блока (значение по умолчанию);
- hidden — содержимое, выходящее за пределы «родительского» блока, обрезается по его границам без прокрутки;
- clip — новое значение, похожее по результату на hidden , но границы родительского блока рассчитываются с учётом внутренних отступов;
- scroll — контент обрезается по границам «родительского» блока, но внутри этой области содержимое доступно с помощью прокрутки;
- auto — если содержимое переполняет блок, контент будет доступен для прокрутки.
Подсказки
Скопировать ссылку «Подсказки» Скопировано
💡 Чтобы контент внутри блока можно было скроллить, его содержимое должно явно превышать высоту родительского блока. Этого можно добиться или явно задав ему height , или ограничив высоту родительского блока.
💡 Задавая родительскому блоку фиксированную высоту, учитывайте, что, если не указан box — sizing : border — box , то это значение не учитывает внутренние отступы, заданные с помощью padding , что может спровоцировать появление нежелательной прокрутки.
На практике
Скопировать ссылку «На практике» Скопировано
Realetive советует
Скопировать ссылку «Realetive советует» Скопировано
🛠 При вёрстке «классических» макетов необходимости в управлении полосой прокрутки практически нет. Чтобы избежать появления нежелательных полос прокрутки, минимизируйте явное задание высоты (кроме случаев, где это действительно необходимо).
Ещё один пример, когда будет полезно знание свойства overflow — обрезание текста с многоточием (в сочетании со свойством text — overflow : ellipsis или недокументированного -webkit — line — clamp ):
Overflowing content
Overflow is what happens when there is too much content to fit in an element box. In this guide, you will learn what overflow is and how to manage it.
| Prerequisites: | Basic computer literacy, basic software installed, basic knowledge of working with files, HTML basics (study Introduction to HTML), and an idea of how CSS works (study CSS first steps.) |
|---|---|
| Objective: | To understand overflow and how to manage it. |
What is overflow?
Everything in CSS is a box. You can constrain the size of these boxes by assigning values of width and height (or inline-size and block-size ). Overflow happens when there is too much content to fit in a box. CSS provides various tools to manage overflow. As you go further with CSS layout and writing CSS, you will encounter more overflow situations.
CSS tries to avoid «data loss»
Let’s consider two examples that demonstrate the default behavior of CSS when there is overflow.
The first example is a box that has been restricted by setting a height . Then we add content that exceeds the allocated space. The content overflows the box and falls into the paragraph below.
The second example is a word in a box. The box has been made too small for the word and so it breaks out of the box.
You might wonder why CSS works in such a messy way, displaying content outside of its intended container. Why not hide overflowing content? Why not scale the size of the container to fit all the content?
Wherever possible, CSS does not hide content. This would cause data loss. The problem with data loss is that you might not notice. Website visitors may not notice. If the submit button on a form disappears and no one can complete the form, this could be a big problem! Instead, CSS overflows in visible ways. You are more likely to see there is a problem. At worst, a site visitor will let you know that content is overlapping.
If you restrict a box with a width or a height , CSS trusts you to know what you are doing. CSS assumes that you are managing the potential for overflow. In general, restricting the block dimension is problematic when the box contains text. There may be more text than you expected when designing the site, or the text may be larger (for example, if the user has increased their font size).
The next two lessons explain different approaches to control sizing in ways that are less prone to overflow. However, if you need a fixed size, you can also control how the overflow behaves. Let’s read on!
The overflow property
The overflow property helps you manage an element’s content overflow. Using this property, you can convey to a browser how it should handle overflow content. The default value of the value type is visible . With this default setting, one can see content when it overflows.
To crop content when it overflows, you can set overflow: hidden . This does exactly what it says: it hides overflow. Beware that this can make some content invisible. You should only do this if hiding content won’t cause problems.
Instead, perhaps you would like to add scrollbars when content overflows? Using overflow: scroll , browsers with visible scrollbars will always display them—even if there is not enough content to overflow. This offers the advantage of keeping the layout consistent, instead of scrollbars appearing or disappearing, depending upon the amount of content in the container.
Remove some content from the box below. Notice how the scrollbars remain, even if there is no need for scrolling.
In the example above, we only need to scroll on the y axis, however we get scrollbars in both axes. To just scroll on the y axis, you could use the overflow-y property, setting overflow-y: scroll .
You can also enable scrolling along the x-axis by using overflow-x , although this is not a recommended way to accommodate long words! If you have a long word in a small box, consider using the word-break or overflow-wrap property. In addition, some of the methods discussed in Sizing items in CSS may help you create boxes that scale better with varying amounts of content.
As with scroll , you get a scrollbar in the scrolling dimension whether or not there is enough content to cause a scrollbar.
Note: You can specify x- and y-axis scrolling using the overflow property, passing two values. If two keywords are specified, the first applies to overflow-x and the second applies to overflow-y . Otherwise, both overflow-x and overflow-y are set to the same value. For example, overflow: scroll hidden would set overflow-x to scroll and overflow-y to hidden .
If you only want scrollbars to appear when there is more content than can fit in the box, use overflow: auto . This allows the browser to determine if it should display scrollbars.
In the example below, remove content until it fits into the box. You should see the scrollbars disappear.
Overflow establishes a Block Formatting Context
When you use the values scroll and auto , you create a Block Formatting Context (BFC). This means that the content of an element box with these overflow values acquires a self-contained layout. Content outside such an element box cannot poke into the element box, and nothing from the element box can poke into the surrounding layout. This enables scrolling behavior, as all box content needs to be contained and not overlap to create a consistent scrolling experience.
Unwanted overflow in web design
Modern layout methods (described in CSS layout) manage overflow. They largely work without assumptions or dependencies for how much content there will be on a web page.
This was not always the norm. In the past, some sites were built with fixed-height containers to align box bottoms. These boxes may otherwise have had no relationship to each other. This was fragile. If you encounter a box where content is overlaying other content on the page in legacy applications, you will now recognize that this happens with overflow. Ideally, you will refactor the layout to not rely on fixed-height containers.
When developing a site, always keep overflow in mind. Test designs with large and small amounts of content. Increase and decrease font sizes by at least two increments. Ensure your CSS is robust. Changing overflow values to hide content or to add scrollbars is reserved for a few select use cases (for example, where you intend to have a scrolling box).
Test your skills!
You’ve reached the end of this article, but can you remember the most important information? You can find some further tests to verify that you’ve retained this information before you move on — see Test your skills: Overflow.
Summary
This lesson introduced the concept of overflow. You should understand that default CSS avoids making overflowing content invisible. You have discovered that you can manage potential overflow, and also, that you should test work to make sure it does not accidentally cause problematic overflow.
In the next article, we’ll take a look at the most common values and units in CSS.
Found a content problem with this page?
This page was last modified on Jun 30, 2023 by MDN contributors.