PHP Multiple Checkboxes
Summary: in this tutorial, you will learn how to handle a form with multiple checkboxes in PHP.
How to handle multiple checkboxes on a form
A form may contain multiple checkboxes with the same name. When you submit the form, you’ll receive multiple values on the server under one name.
To get all the values from the checked checkboxes, you need to add the square brackets ( [] ) after the name of the checkboxes.
When PHP sees the square brackets ( [] ) in the field name, it’ll create an associative array of values where the key is the checkbox’s name and the values are the selected values.
The following example shows a form that consists of three checkboxes with the same name ( colors[] ) with different values «red» , «green» , and «blue» .
form action="index.php" method="post"> input type="checkbox" name="colors[]" value="red" id="color_red" /> label for="color_red">Red label> input type="checkbox" name="colors[]" value="green" id="color_green" /> label for="color_red">Green label> input type="checkbox" name="colors[]" value="blue" id="color_blue" /> label for="color_red">Blue label> input type="submit" value="Submit"> form>Code language: HTML, XML (xml)When you check three checkboxes and submit the form, the $_POST[‘colors’] will contain an array of three selected values:
array(3) < [0]=>string(3) "red" [1]=> string(5) "green" [2]=> string(4) "blue" > Code language: plaintext (plaintext)If you don’t check any checkboxes and submit the form, the $_POST array won’t have the colors key. And you can use the isset() function to check if the $_POST[‘colors’] is set:
isset($_POST['colors'])Code language: PHP (php)Alternatively, you can use the filter_has_var() function:
filter_has_var(INPUT_POST, 'colors')Code language: PHP (php)PHP multiple checkboxes example
First, create the following file and directory structure:
. ├── css │ └── style.css ├── img │ └── pizza.svg ├── inc │ ├── .htaccess │ ├── footer.php │ ├── functions.php │ ├── get.php │ ├── header.php │ └── post.php └── index.phpCode language: plaintext (plaintext)| File | Directory | Description |
|---|---|---|
| index.php | . | Contain the main logic that loads get.php or post.php depending on the HTTP request method |
| get.php | inc | Contain the code for showing a form with a checkbox when the HTTP request is GET. |
| post.php | inc | Contain the code for handling POST request |
| header.php | inc | Contain the code for the header |
| footer.php | inc | Contain the code for the footer |
| functions.php | inc | Contain the common functions |
| .htaccess | inc | Prevent direct access to the files in the inc directory |
| style.css | css | Contain the CSS code |
| pizza.svg | img | The pizza image that shows on the form |
Second, add the following code to the header.php :
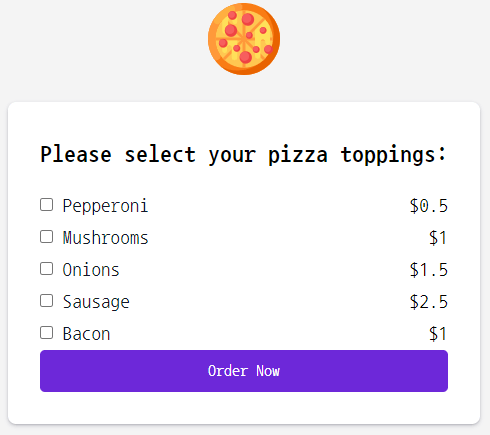
html> html lang="en"> head> meta charset="UTF-8" /> meta name="viewport" content="width=device-width, initial-scale=1.0" /> link rel="preconnect" href="https://fonts.gstatic.com"> link href="https://fonts.googleapis.com/css2?family=Nanum+Gothic+Coding:wght@400;700&display=swap" rel="stylesheet"> link rel="stylesheet" href="css/style.css"> title>PHP Multiple Checkboxes - Pizza Toppings title> head> body class="center"> main> p>img src="img/pizza.svg" height="72" width="72" title="Pizza Toppings"> p>Code language: HTML, XML (xml)Note that the page uses the Nanum Gothic Coding font. The header.php links to the style.css file. At the beginning of the body, it shows the pizza.svg image.
Third, add the following code to the footer.php :
main> body> html>Code language: HTML, XML (xml) The footer.php file contains the closing tags corresponding to the opening tags in the header.php file.
Fourth, define a function checked in the functions.php file:
function checked($needle, $haystack) < if ($haystack) < return in_array($needle, $haystack) ? 'checked' : ''; > return ''; > Code language: PHP (php)The checked() function returns the string ‘checked’ if the $need exists in the array $haystack or an empty string otherwise.
We’ll use this checked() function to refill the selected checkboxes on the form.
Fifth, add the following code to the index.php:
session_start(); require 'inc/header.php'; require 'inc/functions.php'; $pizza_toppings = [ 'pepperoni' => 0.5, 'mushrooms' => 1, 'onions' => 1.5, 'sausage' => 2.5, 'bacon' => 1.0, ]; $request_method = $_SERVER['REQUEST_METHOD']; if ($request_method === 'GET') < require 'inc/get.php'; > elseif ($request_method === 'POST') < require 'inc/post.php'; > require 'inc/footer.php'; Code language: PHP (php)The index.php calls the session_start() function to start (or resume) a session. It loads the code from the header.php, functions.php, and footer.php.
The $pizza_toppings array stores the pizza toppings and prices. In a real application, you may get it from a database or an API.
If the HTTP method is GET, the index.php loads the form from the get.php file. In case the HTTP method is POST, it loads the code from the post.php file.
Sixth, create a form in the get.php file:
"" method="post"> h1>Please select your pizza toppings: h1> ul> foreach ($pizza_toppings as $topping => $price) : ?> li> div> input type="checkbox" name="pizza_toppings[]" value="" id="pizza_topping_" php echo checked($topping, $_SESSION['selected_toppings'] ?? []) ?> /> label for="pizza_topping_"> echo ucfirst($topping) ?> label> div> span> echo '$' . $price ?> span> li> endforeach ?> ul> button type="submit">Order Now button> /form>Code language: JavaScript (javascript)The get.php file uses the $pizza_toppings array to dynamically generate checkboxes. The checked() function checks the checkbox if the value exists in the $_SESSION[‘selected_toppings’] variable.
When the page loads for the first time, the $_SESSION[‘selected_toppings’] is always empty. Later, we’ll add the selected values to it in the post.php.
Finally, place the code to handle form submission in the post.php file:
// sanitize the inputs $selected_toppings = filter_input( INPUT_POST, 'pizza_toppings', FILTER_SANITIZE_STRING, FILTER_REQUIRE_ARRAY ) ?? []; // select the topping names $toppings = array_keys($pizza_toppings); $_SESSION['selected_toppings'] = []; // for storing selected toppings $total = 0; // for storing total // check data against the original values if ($selected_toppings) < foreach ($selected_toppings as $topping) < if (in_array($topping, $toppings)) < $_SESSION['selected_toppings'][] = $topping; $total += $pizza_toppings[$topping]; > > > ?> if ($_SESSION['selected_toppings']) : ?> h1>Order Summary h1> ul> foreach ($_SESSION['selected_toppings'] as $topping) : ?> li> span> echo ucfirst($topping) ?> span> span> echo '$' . $pizza_toppings[$topping] ?> span> li> endforeach ?> li class="total">span>Total span>span> echo '$' . $total ?> span> li> ul> else : ?> p>You didn't select any pizza toppings. p> endif ?> menu> a class="btn" href="" title="Back to the form">Change Toppings a> menu>Code language: HTML, XML (xml)The post.php file sanitizes the form input using the filter_input() function:
// sanitize the inputs $selected_toppings = filter_input( INPUT_POST, 'pizza_toppings', FILTER_SANITIZE_STRING, FILTER_REQUIRE_ARRAY ) ?? [];Code language: PHP (php)It checks selected pizza toppings against the original values in the $pizza_toppings array and adds the selected values to the $_SESSION[‘selected_toppings’] variable. Also, it calculates the total price based on the selected pizza toppings.
$toppings = array_keys($pizza_toppings); $_SESSION['selected_toppings'] = []; // for storing selected toppings $total = 0; // for storing total // check data against the original values if ($selected_toppings) < foreach ($selected_toppings as $topping) < if (in_array($topping, $toppings)) < $_SESSION['selected_toppings'][] = $topping; $total += $pizza_toppings[$topping]; > > >Code language: PHP (php)The markup part shows the order summary if one or more pizza toppings are selected.
Summary
- Add square brackets ( [] ) at the end of the checkbox name when a form has multiple checkboxes with the same name.
- PHP creates an associative array to stored values of the selected checkboxes if checkboxes have the same name that ends with [] .
Обработка чекбоксов в PHP
В этой статье мы расскажем о input type checkbox HTML , и том, как они обрабатываются в PHP .
Одиночный чекбокс
Создадим простую форму с одним чекбоксом:
В PHP скрипте ( checkbox-form.php ) мы можем получить выбранный вариант из массива $_POST . Если $_POST[‘formWheelchair’] имеет значение » Yes «, то флажок для варианта установлен. Если флажок не был установлен, $_POST[‘formWheelchair’] не будет задан.
Вот пример обработки формы в PHP :
Для $_POST[‘formSubmit’] было установлено значение “ Yes ”, так как это значение задано в атрибуте чекбокса value :
Вместо “ Yes ” вы можете установить значение » 1 » или » on «. Убедитесь, что код проверки в скрипте PHP также обновлен.
Группа че-боксов
Иногда нужно вывести в форме группу связанных PHP input type checkbox . Преимущество группы чекбоксов заключается в том, что пользователь может выбрать несколько вариантов. В отличие от радиокнопки, где из группы может быть выбран только один вариант.
Возьмем приведенный выше пример и на его основе предоставим пользователю список зданий:
Обратите внимание, что input type checkbox имеют одно и то же имя ( formDoor[] ). И что каждое имя оканчивается на [] . Используя одно имя, мы указываем на то, что чекбоксы связаны. С помощью [] мы указываем, что выбранные значения будут доступны для PHP скрипта в виде массива. То есть, $_POST[‘formDoor’] возвращает не одну строку, как в приведенном выше примере; вместо этого возвращается массив, состоящий из всех значений чекбоксов, которые были выбраны.
Например, если я выбрал все варианты, $_POST[‘formDoor’] будет представлять собой массив, состоящий из: . Ниже приводится пример, как вывести значение массива:
Если ни один из вариантов не выбран, $_POST[‘formDoor’] не будет задан, поэтому для проверки этого случая используйте » пустую » функцию. Если значение задано, то мы перебираем массив через цикл с помощью функции count() , которая возвращает размер массива и выводит здания, которые были выбраны.
Если флажок установлен для варианта » Acorn Building «, то массив будет содержать значение ‘ A ‘. Аналогично, если выбран » Carnegie Complex «, массив будет содержать C .
Проверка, выбран ли конкретный вариант
Часто требуется проверить, выбран ли какой-либо конкретный вариант из всех доступных элементов в группе HTML input type checkbox . Вот функция, которая осуществляет такую проверку:
function IsChecked($chkname,$value) < if(!empty($_POST[$chkname])) < foreach($_POST[$chkname] as $chkval) < if($chkval == $value) < return true; >> > return false; >
Чтобы использовать ее, просто вызовите IsChecked ( имя_чекбокса, значение ). Например:
if(IsChecked('formDoor','A')) < //сделать что-то . >//или использовать в расчете . $price += IsChecked('formDoor','A') ? 10 : 0; $price += IsChecked('formDoor','B') ? 20 : 0; Скачать пример кода
Скачать PHP код примера формы с PHP input type checkbox .
Мультичекбокс в PHP. Массив чекбоксов
Чекбокс — элемент формы, который позволяет отмечать галочкой интересующий пункт пользователя. Разберем способы взаимодействия чекбоксов с формой (выгрузка с отмеченными галочками) + массив чекбоксов в PHP при отправке формы.
Немного теории чекбоксов
- Обычный чекбокс задается так: Подписка
- Чтобы чекбокс был нажатым, достаточно поставить атрибут checked=»checked» .
- Чтобы понять, что чекбокс передается при POST отправке формы достаточно сделать так: if (isset($_POST[‘news’])) < echo $_POST['news']; >В этом случае, если галочка отмечена, выведется значение Да.
Теперь представим, что у нас много чекбоксов, для универсальности работы, добавим в них одно имя в виде массива news_add[]:
Теперь имя чекбоксов в массиве и если мы передадим их значения с формы, то нужно как-то узнать, значение какого чекбокса было нажато, для этого используем for цикл:
//обрабатываем какие чекбоксы нажаты, а какие нет
//имя чекбоксов в виде массива news_add
if (isset($_POST[‘addcatbutfsdfs’])) $news_add = $_POST[«news_add»];
$news_addthis = »;
for($a = 0; $a
$news_addthis .= $news_add[$a].’##’;
>
echo ‘Нажаты: ‘.$news_addthis; >
?>
Таким образом, за счет этого обработчика мы легко можем определить через цикл нажатые галочки. В том же цикле можно сразу произвести нужные действия с выбранными чекбоксами.
Также вы заметили функцию ac_checbox() , она поможет определить при каждой POST отправке нажатый чекбокс (опять же через цикл) и выделить его галочкой:
//отмечаем нажатый чекбокс
function ac_checbox($ac_post, $ac_value) for($a = 0; $a
?>
В функцию передаются 2 параметра: POST массива чекбоксов и значение (value), которое надо проверить на «выбранность» пользователем.