- How to fill cells with colors using openpyxl in Python
- Installing openpyxl
- Fill cells with colors using openpyxl in python- PatternFill
- Working with styles
- Cell Styles and Named Styles
- Cell Styles
- Copying styles
- Colours
- aRGB colours
- Indexed Colours
- Openpyxl — как менять шрифт и цвет в ячейке?
- Python openpyxl – Excel Formatting Cells
- Library
- Python & Excel – Cell Formatting
- Color – Pattern (solid) Fill
- Color – Gradient Fill
- Borderlines
- Text Alignment
How to fill cells with colors using openpyxl in Python
Over the years, Microsft Excel has become an essential part of all types of work. Did you know that Python has a library that is designed specifically to allow you to work with excel sheets? Yes, you heard that right! Python provides a library called openpyxl for working directly with excel sheets. this allows you to create, read, write and format Excel sheets using python codes.
In this tutorial, you will learn about one important feature of openpyxl, which is how to fill cells with colors.
Installing openpyxl
Firstly, make sure that you install the openpyxl library. You can do that by running the below command on your terminal.
Fill cells with colors using openpyxl in python- PatternFill
Whenever you are working with an Excel sheet, you might want to highlight some parts of the sheet. Using colored cells for such parts makes it easy to identify them distinctively.
This can be done by using the openpyxl’s PatternFill class from the styles method.
You can specify the following arguments through PatternFill;
patternType, Color, bgColor, fill_type, start_color, end_color
from openpyxl import Workbook from openpyxl.styles import PatternFill def fill_colors(path): wb = Workbook() sheet = wb.active peach = "00FFCC99" for rows in sheet.iter_rows(min_row=4, max_row=6, min_col=3, max_col=9): for cell in rows: cell.fill = PatternFill(start_color=peach, end_color=peach,fill_type = "solid") wb.save(path) if __name__ == "__main__": fill_colors("CodeSpeedy.xlsx") 
- Firstly we import the necessary modules.
- Once this is done, we create an excel sheet to work on in the default path.
- Further, we use the for loop to specify the rows and columns across which we want to fill the cells with color.
- We then loop through these cells and use PatternFill to fill the color as shown.
- Once done, we must not forget to save the sheet using the save() method of the Workbook class.
You can further create your own patterns and fill colors accordingly to make it more pleasant. An example is as follows;
from openpyxl import Workbook from openpyxl.styles import PatternFill def fill_colors(path): wb = Workbook() sheet = wb.active cyan = "00FFFF" for rows in sheet.iter_rows(min_row=4, max_row=6, min_col=3, max_col=9): for cell in rows: if cell.row % 2 !=0: cell.fill = PatternFill(start_color=cyan, end_color=cyan,fill_type = "solid") wb.save(path) if __name__ == "__main__": fill_colors("CodeSpeedy.xlsx") Working with styles
Styles are used to change the look of your data while displayed on screen. They are also used to determine the formatting for numbers.
Styles can be applied to the following aspects:
- font to set font size, color, underlining, etc.
- fill to set a pattern or color gradient
- border to set borders on a cell
- cell alignment
- protection
The following are the default values
>>> from openpyxl.styles import PatternFill, Border, Side, Alignment, Protection, Font >>> font = Font(name='Calibri', . size=11, . bold=False, . italic=False, . vertAlign=None, . underline='none', . strike=False, . color='FF000000') >>> fill = PatternFill(fill_type=None, . start_color='FFFFFFFF', . end_color='FF000000') >>> border = Border(left=Side(border_style=None, . color='FF000000'), . right=Side(border_style=None, . color='FF000000'), . top=Side(border_style=None, . color='FF000000'), . bottom=Side(border_style=None, . color='FF000000'), . diagonal=Side(border_style=None, . color='FF000000'), . diagonal_direction=0, . outline=Side(border_style=None, . color='FF000000'), . vertical=Side(border_style=None, . color='FF000000'), . horizontal=Side(border_style=None, . color='FF000000') . ) >>> alignment=Alignment(horizontal='general', . vertical='bottom', . text_rotation=0, . wrap_text=False, . shrink_to_fit=False, . indent=0) >>> number_format = 'General' >>> protection = Protection(locked=True, . hidden=False) >>>
Cell Styles and Named Styles
There are two types of styles: cell styles and named styles, also known as style templates.
Cell Styles
Cell styles are shared between objects and once they have been assigned they cannot be changed. This stops unwanted side-effects such as changing the style for lots of cells when only one changes.
>>> from openpyxl.styles import colors >>> from openpyxl.styles import Font, Color >>> from openpyxl import Workbook >>> wb = Workbook() >>> ws = wb.active >>> >>> a1 = ws['A1'] >>> d4 = ws['D4'] >>> ft = Font(color="FF0000") >>> a1.font = ft >>> d4.font = ft >>> >>> a1.font.italic = True # is not allowed # doctest: +SKIP >>> >>> # If you want to change the color of a Font, you need to reassign it:: >>> >>> a1.font = Font(color="FF0000", italic=True) # the change only affects A1
Copying styles
Styles can also be copied
>>> from openpyxl.styles import Font >>> from copy import copy >>> >>> ft1 = Font(name='Arial', size=14) >>> ft2 = copy(ft1) >>> ft2.name = "Tahoma" >>> ft1.name 'Arial' >>> ft2.name 'Tahoma' >>> ft2.size # copied from the 14.0
Colours
Colours for fonts, backgrounds, borders, etc. can be set in three ways: indexed, aRGB or theme. Indexed colours are the legacy implementation and the colours themselves depend upon the index provided with the workbook or with the application default. Theme colours are useful for complementary shades of colours but also depend upon the theme being present in the workbook. It is, therefore, advisable to use aRGB colours.
aRGB colours
RGB colours are set using hexadecimal values for red, green and blue.
>>> from openpyxl.styles import Font >>> font = Font(color="FF0000")
The alpha value refers in theory to the transparency of the colour but this is not relevant for cell styles. The default of 00 will prepended to any simple RGB value:
>>> from openpyxl.styles import Font >>> font = Font(color="00FF00") >>> font.color.rgb '0000FF00'
There is also support for legacy indexed colours as well as themes and tints.
>>> from openpyxl.styles.colors import Color >>> c = Color(indexed=32) >>> c = Color(theme=6, tint=0.5)
Indexed Colours
| Index | |||||
|---|---|---|---|---|---|
| 0-4 | 00000000 | 00FFFFFF | 00FF0000 | 0000FF00 | 000000FF |
| 5-9 | 00FFFF00 | 00FF00FF | 0000FFFF | 00000000 | 00FFFFFF |
| 10-14 | 00FF0000 | 0000FF00 | 000000FF | 00FFFF00 | 00FF00FF |
| 15-19 | 0000FFFF | 00800000 | 00008000 | 00000080 | 00808000 |
| 20-24 | 00800080 | 00008080 | 00C0C0C0 | 00808080 | 009999FF |
| 25-29 | 00993366 | 00FFFFCC | 00CCFFFF | 00660066 | 00FF8080 |
| 30-34 | 000066CC | 00CCCCFF | 00000080 | 00FF00FF | 00FFFF00 |
| 35-39 | 0000FFFF | 00800080 | 00800000 | 00008080 | 000000FF |
| 40-44 | 0000CCFF | 00CCFFFF | 00CCFFCC | 00FFFF99 | 0099CCFF |
| 45-49 | 00FF99CC | 00CC99FF | 00FFCC99 | 003366FF | 0033CCCC |
| 50-54 | 0099CC00 | 00FFCC00 | 00FF9900 | 00FF6600 | 00666699 |
| 55-60 | 00969696 | 00003366 | 00339966 | 00003300 | 00333300 |
| 60-63 | 00993300 | 00993366 | 00333399 | 00333333 |
Openpyxl — как менять шрифт и цвет в ячейке?

Привет всем! В продолжение статей, посвященных работе с Openpyxl сегодня попробуем разобраться: как менять шрифт и цвет в ячейке?
Начнем разбираться — и в практических целях создадим Excel-файл, в котором создадим ячейку с текстом, который будет:
- Иметь некоторый размер
- Цвет
- Подчеркивание
- Наклон
- Текст будет жирным
import openpyxl #Подключаем библиотеку from openpyxl import Workbook from openpyxl.styles import PatternFill#Подключаем стили для ячеек from openpyxl.workbook import Workbook from openpyxl.styles import Font, Fill#Подключаем стили для текста from openpyxl.styles import colors#Подключаем цвета для текста и ячеек wb = openpyxl.Workbook() #Создали книгу work_sheet = wb.create_sheet(title=’Test sheet’) #Создали лист с названием и сделали его активным work_sheet['A1'] = 'Test text' work_sheet_a1 = work_sheet['A5']#Создали переменную, в которой содержится ячейка A1 с уже имеющимся текстом work_sheet_a1.font = Font(size=23, underline='single', color='FFBB00', bold=True, italic=True) #Применяем к тексту следующие параметры: размер — 23, подчеркивание, цвет = FFBB00 (цвет текста указывается в RGB), жирный, наклонный. Если нам не нужен жирный шрифт — используем конструкцию: bold=False. Аналогично действуем, если нам не нужен наклонный шрифт: italic=False. Важно: если есть необходимость — в стилях заложена возможность использования стандартных цветов, но код в этом случае будет выглядеть иначе: work_sheet_a1.font = Font(size=23, underline='single', color = colors.RED, bold=True, italic=True) #где color = colors.RED — прописанный в стилях цвет work_sheet_a1.fill = PatternFill(fill_type='solid', start_color='ff8327', end_color='ff8327')#Данный код позволяет делать оформление цветом ячейки
import openpyxl #Подключаем библиотеку
from openpyxl import Workbook
from openpyxl.styles import PatternFill#Подключаем стили для ячеек
from openpyxl.workbook import Workbook
from openpyxl.styles import Font, Fill#Подключаем стили для текста
from openpyxl.styles import colors#Подключаем цвета для текста и ячеек
wb = openpyxl.Workbook() #Создали книгу
work_sheet = wb.create_sheet(title=’Test sheet’) #Создали лист с названием и сделали его активным
work_sheet[‘A1’] = ‘Test text’
work_sheet_a1 = work_sheet[‘A5′]#Создали переменную, в которой содержится ячейка A1 с уже имеющимся текстом
work_sheet_a1.font = Font(size=23, underline=’single’, color=’FFBB00′, bold=True, italic=True) #Применяем к тексту следующие параметры: размер — 23, подчеркивание, цвет = FFBB00 (цвет текста указывается в RGB), жирный, наклонный. Если нам не нужен жирный шрифт — используем конструкцию: bold=False. Аналогично действуем, если нам не нужен наклонный шрифт: italic=False.
Важно: если есть необходимость — в стилях заложена возможность использования стандартных цветов, но код в этом случае будет выглядеть иначе:
work_sheet_a1.font = Font(size=23, underline=’single’, color = colors.RED, bold=True, italic=True) #где color = colors.RED — прописанный в стилях цвет
work_sheet_a1.fill = PatternFill(fill_type=’solid’, start_color=’ff8327′, end_color=’ff8327′)#Данный код позволяет делать оформление цветом ячейки
Важно: для работы с оформлением колонок или строк используется другой алгоритм, о котором мы поговорим позднее.
Ниже — видео, в котором все более наглядно 🙂
Кстати, ниже — код простой программки, которая создает страницу, и записывает в ячейки текст, размером от единицы до указанного.
import openpyxl #Подключаем библиотеку
from openpyxl.styles import Font, Fill
wb = openpyxl.Workbook() #Создали книгу
work_sheet = wb.create_sheet(title='Test sheet') #Создали лист с названием и сделали его активным
work_sheet[cell] = 'Test text'
work_sheet_a1 = work_sheet[cell]
work_sheet_a1.font = Font(size=i)
Спасибо за внимание! По теме, которая звучит как «Openpyxl — как менять шрифт и цвет в ячейке» — пока сказать больше нечего 🙂 Не забываем делать репосты 🙂
Python openpyxl – Excel Formatting Cells
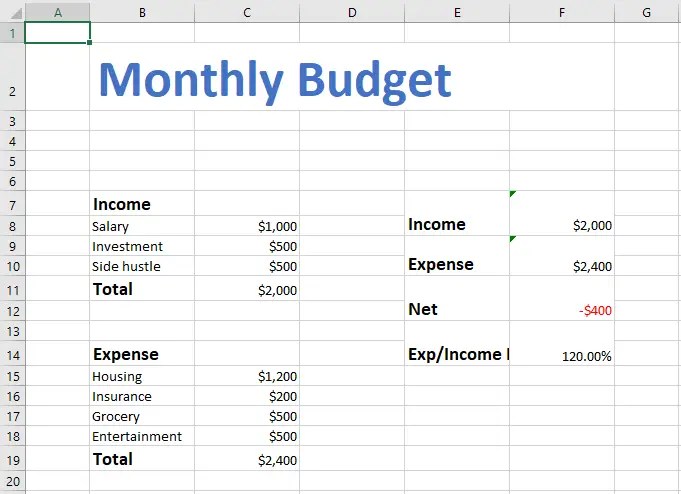
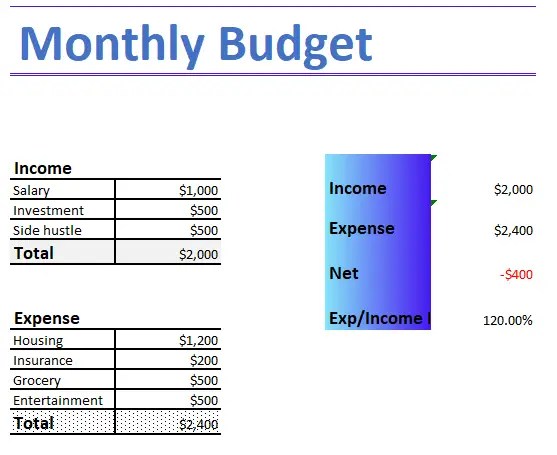
This tutorial will show you how to use the Python openpyxl library to customize Excel formatting such as cell color, alignment, borderlines, etc. We’ll continue with the previous example to make our monthly budget spreadsheet look prettier.
Library
The only library required is openpyxl, type the following in the command prompt window to install the library:
Python & Excel – Cell Formatting
Collectively, these attributes are called styles but I still prefer calling them just formats. One thing to note is that we can apply styles to only one cell at a time. So we’ll need to do a loop in order to format a range of cells.
Color – Pattern (solid) Fill
There are two types of cell color formatting: Pattern Fill and Gradient Fill.
We use Pattern Fill to make a solid color or a pattern for the cell. A Pattern Fill refers to the following formatting in Excel:
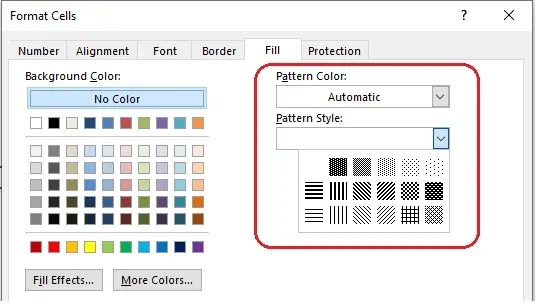
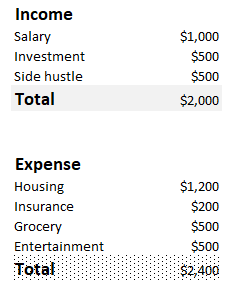
The below code changes cells B11:C11 to a light gray background and changes cells B19:C19 to a dotted background known as 6.25% Gray (found in the Pattern Style dropbox). To make the formatting easier to see, we’ll hide all gridlines in Excel by setting ws.sheet_view.showGridLines to False.
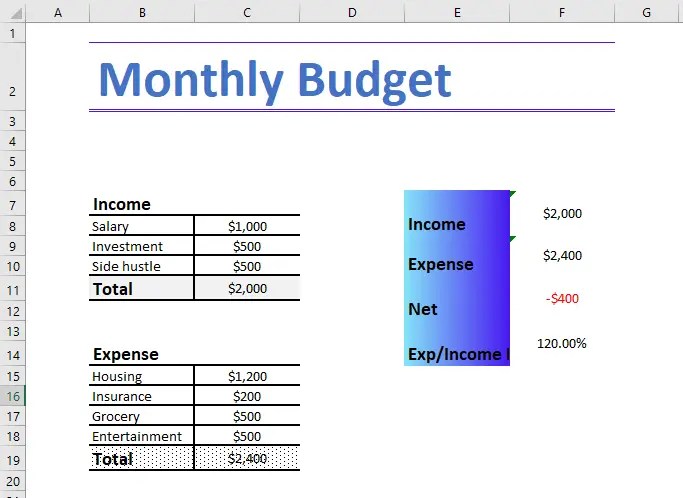
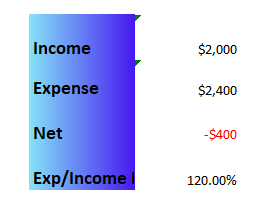
Color – Gradient Fill
A Gradient Fill usually takes two colors and interpolates colors between them and fills the cell background. The following code takes a cyan color (’85E4F7′) and a light blue color (‘4617F1’) for the gradient fill. You can change the two RGB hex code inside the stop argument to any color to create your own gradient fill.
Borderlines
Borderlines refer to the four sides of a cell. With openpyxl, we can control the style (solid vs dash, etc), thickness, color, and position of the borderlines. We need two objects to model a cell’s borderline: Border and Side.
A Border can contain one or multiple Sides. Then we assign the cell.border attribute to a Border object to create the borderlines.
Text Alignment
We use the Alignment object to model text/number alignment within a cell, then assign the cell.alignment attribute to the object.