- OpenCV на python: наложение текста и графики
- 1. Вывод текста поверх картинки в OpenCV
- 2. Вывод отрезка, окружности и прямоугольника в OpenCV
- OpenCV на python: наложение текста и графики : 4 комментария
- Python OpenCV | cv2.putText() method
- Put Text on Image in OpenCV Python using cv2.putText() with Examples
- Put Text on Image in OpenCV Python : cv2.putText()
- Syntax
- Examples of cv2.putText() in Python OpenCV
- Import Required Libraries
- Utility Function to Create Empty Image
- Example – 1: Put Text on Image with cv2.putText()
- Example – 2: Put Text on Multiple Lines in cv2.putText()
- Example – 3: Put Text with Background Color on Image in cv2.putText()
- Conclusion
- OpenCV putText() – Writing Text on Images
- What is the OpenCV putText() method?
- Adding text on an image using OpenCV – cv2.putText() method
- Conclusion
OpenCV на python: наложение текста и графики
На предыдущем уроке мы научились получать поток кадров с веб-камеры и применять к ним различные преобразования. Сегодня рассмотрим еще несколько полезных функций, которые помогут нам выводить в кадр важную информацию.
1. Вывод текста поверх картинки в OpenCV
Для наложения текста на кадр воспользуемся функцией:
putText( кадр, текст, координаты, тип шрифта, масштаб шрифта, цвет [, толщина пера [, тип линии [, центр координат]]])
- кадр — изображение, на которое мы накладываем текст;
- текст — понятное дело, текст, который мы собираемся вывести в кадр;
- координаты — кортеж из двух координат нижнего левого угла текста, например (5,10);
- тип шрифта — одна из констант, указанных ниже;
- масштаб шрифта — у шрифта есть некий стандартный размер, который довольно таки большой. Этот параметр позволяет уменьшать или увеличивать шрифт относительно стандартного. Например, для увеличения в два раза — пишем 2, для уменьшения в 2 раза — 0.5;
- цвет — кортеж из трех чисел от 0 до 255, которые задают цвет в модели RGB. Нужно помнить, что в этом кортеже, цвета идут задом на перед: BGR. Синий цвет — (255,0,0);
- толщина пера — необязательный параметр;
- тип линии — необязательный параметр, одно из трех значений: LINE_8 пунктир мелкий, LINE_4 — пунктир крупный, LINE_AA — сглаженная линия;
- центр координат — необязательный параметр. По-умолчанию координаты текста отсчитываются от верхнего левого угла. Если этот параметр равен True, то будут от нижнего левого угол.
- FONT_HERSHEY_SIMPLEX
- FONT_HERSHEY_PLAIN
- FONT_HERSHEY_DUPLEX
- FONT_HERSHEY_COMPLEX
- FONT_HERSHEY_TRIPLEX
- FONT_HERSHEY_COMPLEX_SMALL
- FONT_HERSHEY_SCRIPT_SIMPLEX
- FONT_HERSHEY_SCRIPT_COMPLEX
Напишем программу, которая выведет в кадр текст «Hello world!» с координатами 20,20, желтым цветом.
import cv2 import video if __name__ == '__main__': cv2.namedWindow( "result" ) cap = video.create_capture(0) color_yellow = (0,255,255) while True: flag, img = cap.read() try: cv2.putText(img, "Hello world!", (20,20), cv2.FONT_HERSHEY_SIMPLEX, 1, color_yellow, 2) cv2.imshow('result', img) except: cap.release() raise ch = cv2.waitKey(5) if ch == 27: break cap.release() cv2.destroyAllWindows()2. Вывод отрезка, окружности и прямоугольника в OpenCV
Перейдем к геометрическим фигурам. Для вывода отрезка используем функцию:
line( кадр, координаты начала, координаты конца, цвет [, толщина пера [, тип линии [, сдвиг]]])
помимо известных уже аргументов есть и один новый:
- сдвиг — необязательный параметр. Отвечает за смещение координат по формуле x = x*2^-сдвиг. Применяется для создания сглаженных линий.
Следующая функции рисует окружность:
circle( кадр, координаты центра, радиус, цвет [, толщина пера [, тип линии [, сдвиг]]])
Тут всё просто, так что переходим к прямоугольнику:
rectangle( кадр, координаты 1, координаты 2, цвет [, толщина пера [, тип линии [, сдвиг]]])
- координаты 1 — координаты верхнего левого угла;
- координаты 2 — координаты нижнего правого угла.
Теперь вставим в нашу программу все три функции.
import cv2 import video if __name__ == '__main__': cv2.namedWindow( "result" ) cap = video.create_capture(0) color_red = (0,0,255) color_yellow = (0,255,255) color_purple = (255,0,255) while True: flag, img = cap.read() try: # рисуем окружность cv2.circle(img, (190, 70), 10, color_red, -1) # рисуем прямоугольник cv2.rectangle(img, (180,140), (370,180), color_red, thickness=2, lineType=8, shift=0) # рисуем пять отрезков for i in range(5): cv2.line(img, (180,85+i*5), (370,85+i*5), color_purple, thickness=2, lineType=8, shift=0) # выводим текст cv2.putText(img, "Hello world!", (185,170), cv2.FONT_HERSHEY_SIMPLEX, 1, color_yellow, 2) cv2.imshow('result', img) except: cap.release() raise ch = cv2.waitKey(5) if ch == 27: break cap.release() cv2.destroyAllWindows()Запускаем программу. Должно получиться что-то подобное:

На следующем уроке будем изучать работу с цветовыми фильтрами — основу для многих функций детектирования.
OpenCV на python: наложение текста и графики : 4 комментария
Ошибка
Traceback (most recent call last):
File «C:\Users\emose\OneDrive\Рабочий стол\sdfasd — копия — копия.py», line 1, in
import cv2
ModuleNotFoundError: No module named ‘cv2’
Python OpenCV | cv2.putText() method
OpenCV-Python is a library of Python bindings designed to solve computer vision problems. cv2.putText() method is used to draw a text string on any image.
Syntax: cv2.putText(image, text, org, font, fontScale, color[, thickness[, lineType[, bottomLeftOrigin]]])
Parameters:
image: It is the image on which text is to be drawn.
text: Text string to be drawn.
org: It is the coordinates of the bottom-left corner of the text string in the image. The coordinates are represented as tuples of two values i.e. (X coordinate value, Y coordinate value).
font: It denotes the font type. Some of font types are FONT_HERSHEY_SIMPLEX, FONT_HERSHEY_PLAIN, , etc.
fontScale: Font scale factor that is multiplied by the font-specific base size.
color: It is the color of text string to be drawn. For BGR, we pass a tuple. eg: (255, 0, 0) for blue color.
thickness: It is the thickness of the line in px.
lineType: This is an optional parameter.It gives the type of the line to be used.
bottomLeftOrigin: This is an optional parameter. When it is true, the image data origin is at the bottom-left corner. Otherwise, it is at the top-left corner.
Return Value: It returns an image.

Image used for all the below examples:
Put Text on Image in OpenCV Python using cv2.putText() with Examples

In this article, we will understand how to put text on images in OpenCV using cv2.putText() function. There are many scenarios where you may have to write text on an image either to annotate or maybe just for doing debugging, etc. Here we will explain to you cv2.putText() syntax along with few examples so that it can be understood clearly, especially for beginners.
Put Text on Image in OpenCV Python : cv2.putText()
We can put text on images in OpenCV python quite easily by using cv2.putText() function. The syntax of this function is shown below –
Syntax
cv2.putText(img, text, org, fontFace, fontScale, color, thickness)
- img – It is the image on which the text has to be written.
- text – It is the text that needs to be put on the image
- org – Bottom-left corner of the text string in the image.
- fontFace – The font of the text. See the font types available in OpenCV here.
- fontScale – This value scales the size of the text by multiplying its base size.
- color – The color of the text.
- thickness – The thickness of the line of text.
Examples of cv2.putText() in Python OpenCV
Import Required Libraries
Before starting the examples let us first import the required libraries as shown below –
import cv2 import numpy as np import matplotlib.pyplot as plt %matplotlib inline
Utility Function to Create Empty Image
We will write a utility function that helps to create an empty image of the size 512×512 and 3 color channels. We will use this blank image to write text onto it.
def generate_empty_image(): return np.ones(shape=(512,512,3), dtype=np.int16)
Let us see this function in action by calling it below.
sample_img = generate_empty_image() plt.imshow(sample_img)
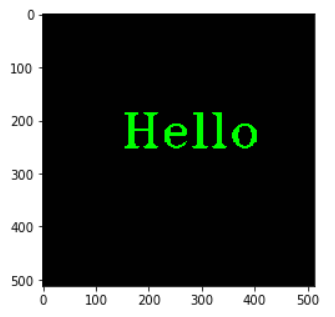
Example – 1: Put Text on Image with cv2.putText()
In this first example, we will write a simple text on the blank image whose color is green, font is FONT_HERSHEY_TRIPLEX, font scale is 3 and thickness is 3.
img = generate_empty_image() cv2.putText(img=img, text='Hello', org=(150, 250), fontFace=cv2.FONT_HERSHEY_TRIPLEX, fontScale=3, color=(0, 255, 0),thickness=3) plt.imshow(img)
Example – 2: Put Text on Multiple Lines in cv2.putText()
OpenCV putText() function does not support writing text on multiple lines out of the box. We have to use certain workarounds to achieve this.
In the below example, we split the text based on the newline character and then write each of the lines on the image in a loop.
img1 = generate_empty_image() text = "How\nAre\nYou" y_start = 150 y_increment = 100 for i, line in enumerate(text.split('\n')): y = y_start + i*y_increment cv2.putText(img=img1, text=line, org=(150, y), fontFace=cv2.FONT_HERSHEY_SCRIPT_COMPLEX, fontScale=4, color=(255,255,0), thickness=3) plt.imshow(img1) 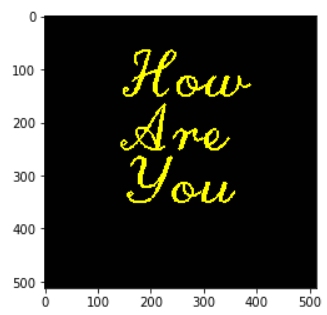
Example – 3: Put Text with Background Color on Image in cv2.putText()
OpenCV cv2.putText() does not have any built-in capabilities to have a background color for the text. But there is a workaround for achieving this effect.
We can create a small rectangle of the desired color on the image and put text on the rectangle.
In the below example, we have created a black color rectangle and have written the text inside it by calculating the various coordinates.
img3 = cv2.imread('cat.jpg') x,y,w,h = 0,0,400,250 # Create background rectangle with color cv2.rectangle(img3, (x,x), (x + w, y + h), (0,0,0), -1) # Add text cv2.putText(img=img3, text="CAT",org=(x + int(w/10),y + int(h/1.5)), fontFace=cv2.FONT_HERSHEY_DUPLEX, fontScale=4, color=(255,0,0), thickness=7) plt.imshow(img3) 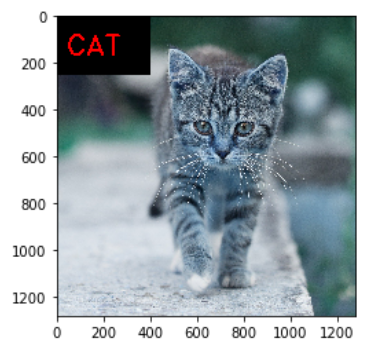
Conclusion
Hope you found this quick tutorial on writing text on images in OpenCV quite helpful. We covered the syntax of the cv2.putText() function along with various examples for a better understanding of beginners.
OpenCV putText() – Writing Text on Images
Hello fellow learner! In this tutorial, we will learn how to write string text on Images in Python using the OpenCV putText() method. So let’s get started.
What is the OpenCV putText() method?
OpenCV Python is a library of programming functions mainly aimed at real-time computer vision and image processing problems.
OpenCV contains putText() method which is used to put text on any image. The method uses following parameters.
- img: The Image on which you want to write the text.
- text: The text you want to write on the image.
- org: It is the coordinates of the Bottom-Left corner of your text. It is represented as a tuple of 2 values (X, Y). X represents the distance from the left edge and Y represents the distance from the top edge of the image.
- fontFace: It denotes the type of font you want to use. OpenCV supports only a subset of Hershey Fonts.
- FONT_HERSHEY_SIMPLEX
- FONT_HERSHEY_PLAIN
- FONT_HERSHEY_DUPLEX
- FONT_HERSHEY_COMPLEX
- FONT_HERSHEY_TRIPLEX
- FONT_HERSHEY_COMPLEX_SMALL
- FONT_HERSHEY_SCRIPT_SIMPLEX
- FONT_HERSHEY_SCRIPT_COMPLEX
- FONT_ITALIC
- FILLED
- LINE_4
- LINE_8 (Default)
- LINE_AA
Adding text on an image using OpenCV – cv2.putText() method
Lets use the below image to write a “Good Morning” message using OpenCV putText() method.

# importing cv2 library import cv2 # Reading the image image = cv2.imread("Wallpaper.jpg") # Using cv2.putText() new_image = cv2.putText( img = image, text = "Good Morning", org = (200, 200), fontFace = cv2.FONT_HERSHEY_DUPLEX, fontScale = 3.0, color = (125, 246, 55), thickness = 3 ) # Saving the new image cv2.imwrite("New Wallpaper.jpg", new_image)
Conclusion
In this tutorial, you learned about how to use OpenCV putText() method to write text on image. Thanks for reading!!

