- 5 Ways to Crop Images in HTML/CSS
- What Are the Benefits of Cropping an Image?
- Concentrate On A Subject
- Remove Too Much Visual Information
- Cropping for Composition
- Unusual Shapes
- Crop Using Width, Height, and Overflow CSS Properties
- Crop Using object-fit and object-position
- Aspect Ratio Cropping with calc() and padding-top
- Crop Using CSS Transforms
- Crop with the clip-path() Function
- Fully Automated Image Resize and Cropping with Cloudinary
- Get started with automated resize and cropping today!
- Магия CSS: Методы обрезки изображений при помощи CSS и SVG
- Где это может пригодиться?
- Пример 1
- Пример 2
- Пример 3
- 3 простых и быстрых техники CSS для обрезки картинок
- Техника 1 — использование отрицательных полей (Negative Margins)
5 Ways to Crop Images in HTML/CSS
Cropping is the process of removing certain regions of an image and reducing image size accordingly. It can be used to focus on specific elements in an image, remove extraneous details, or reframe the subject to attract attention to a specific part of an image.
You can crop images using plain HTML5 and CSS code, without using JavaScript or any other scripting language. We’ll show several techniques for achieving this, most of which take advantage of CSS properties like width, height, overflow, object-fit, object-position, and padding-top. Another option is to use Cloudinary to automatically crop images with smart detection of relevant objects in the image.
What Are the Benefits of Cropping an Image?
Concentrate On A Subject
Cropping an image enables you to zoom in or out on a subject. You can use this technique to engage a subject and increase the photo’s magnification. As a result, you shift the focus to the subject.
Remove Too Much Visual Information
Too much visual information can create a distracting effect. Instead of attracting the subject’s attention, it distracts, and as a result, the viewer ignores the image. Cropping images can help you shift the focus to the main topic, remove unnecessary information and inappropriate positions, and prevent random objects from interfering with the frame.
Cropping for Composition
You can use image cropping techniques for image composition. For example, you can split the image into 3×3 grids, align elements on the grid lines, and crop according to the Rule of Thirds. In portraits, you can match the eyes to the grid lines, and in other images, you can shift the focus to the main theme.
Unusual Shapes
Ideally, users should view a web page while following messages and call to action (CTAs) prompts. They should not stop to analyze the design. Unusual shapes, like diamonds and stars, can make viewers pause to consider the reason behind the shape, shifting their focus from the message to the design. You can crop these shapes into a circle or any shape that keeps your audience engaged with the message.
Crop Using Width, Height, and Overflow CSS Properties
In addition to the well-known width and height properties, CSS containers have an overflow property you can use to crop images.
To enable the overflow property, wrap the image in a
element with a specified width and height, and set overflow to hidden. This ensures that the container keeps its structure, and that overflow of images included in the container will be hidden behind it.
To define the crop region, use the margins property. This attribute has four values, but you only need to fill in the first and last, because they represent the top and left pixel position.
The following code shows how to crop an image of width 300px and height 300px to a square half the size.
Crop Using object-fit and object-position
The object-fit CSS property is also useful for cropping images. It has 5 possible values—the cover value is the most useful for cropping. This maintains the aspect ratio of the image, ensuring it fits the dimensions of the content box.
You can use the object-fit property in conjunction with object-position to adjust the area of the image to crop. The object-position property requires two values: x% and y% to position the image (the default position is 50% 50%).
The code below uses the class cropped-ofp to crop an original image of 300px by 300px to half its original size, and positions it in the bottom left quadrant with object-position equal to 25% 25%.
src=»https://example.com/myimage.png»> .cropped-ofp
For your reference, here are other options you can use for object-fit, which can also be used to crop images:
- contain—scales the image to fit the container while maintaining its aspect ratio. Typically the image will not fill the container, unless its aspect ratio is identical to the container’s.
- fill—resizes the image to fit the container. If the aspect ratio of the image is different from that of the container, the image is stretched or squeezed to fit.
- none—displays the image in the container without resizing it.
- scale-down—works similar to none or contain, but actually scales down the image, instead of just displaying it in a smaller size. This will result in a smaller file size.
Aspect Ratio Cropping with calc() and padding-top
This technique lets you crop an image to a desired aspect ratio. It requires a few steps:
- Define an image with height set to 0 and padding-top equal to the width of the container. Set position to relative.
Crop Using CSS Transforms
The CSS transform property lets you perform several image operations on an element, including rotate, scale, skew, and translate (reposition the element in the grid).
You can use the transform property to crop images by combining the scale and translate operations. Here is an example:
Crop with the clip-path() Function
The CSS clip-path() property is especially designed to show only part of an image, which is exactly what we need for cropping. The “clipped” region is displayed, while the rest of the image is hidden.
A nice thing about this property is that it lets you specify the shape and position of the crop. It uses coordinates to define points in a two-dimensional space, which you can use to create and position shapes on the image, and define the crop shape.
CSS clip-path() accepts one of the following functions as its accepted values:
- inset()—defines an inset rectangle
- circle()—defines a circle
- ellipse()—defines an ellipse shape
- path()—accepts an SVG path string, which can define an arbitrary shape
- polygon()—defines a polygon using multiple points
Here is an example showing how to use inset() to crop the image to a rectangle:
.cropped-image-clip-rectangle
Here is an example showing how to use polygon() function to crop the image to a triangle shape:
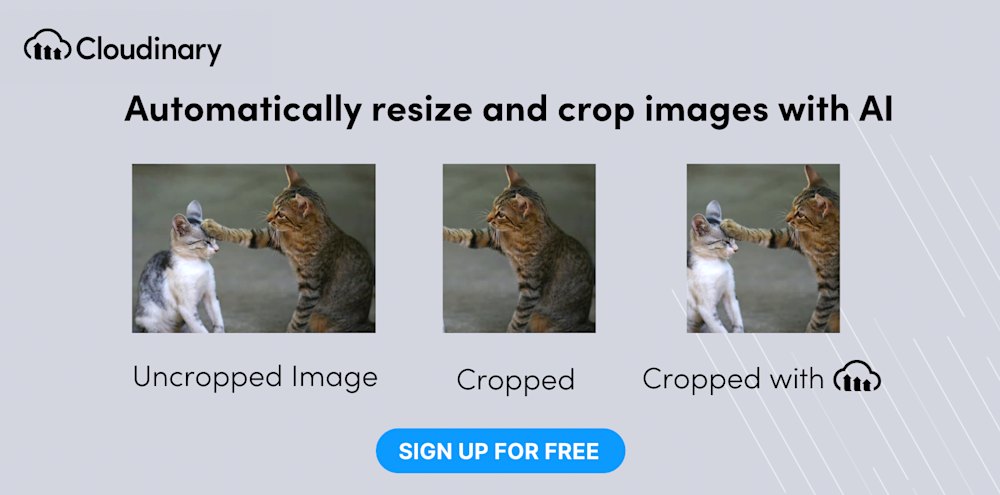
Fully Automated Image Resize and Cropping with Cloudinary
A cloud-based service for managing images and videos, Cloudinary offers a generous free-forever subscription plan. While on that platform, you can upload your images, apply built-in effects, filters, and modifications. You can also resize images automatically, focusing on the most important elements with AI or adapt them to your website design without having to manually crop or scale them.
You can set the target dimensions of your resized image by specifying width, height, and/or the target aspect ratio as qualifiers of your resize transformation.
You can change the dimensions of an uploaded image by setting the image’s height, width, and/or aspect ratio, and Cloudinary automatically resizes or crops the image to fit into the requested size.
For example, this original image is 1200 x 1200 pixels:

Resizing the image to 200 x 200 pixels, using crop, scale, fill and pad results in the following images:

Get started with automated resize and cropping today!
- Get a free Cloudinary account
- Create a simple image tag.
- Deliver the crop transformations using the following dynamic URLs:
# focus on the model in portrait crop CloudinaryImage("https://res.cloudinary.com/demo/image/upload/docs/model.jpg").image(height=200, width=200, crop="crop") # detect the face for thumbnail crop CloudinaryImage("https://res.cloudinary.com/demo/image/upload/docs/model.jpg").image(height=200, width=200, crop="crop") # crop to a banner automatically focusing on region of interest CloudinaryImage("https://res.cloudinary.com/demo/image/upload/docs/model.jpg").image(height=200, width=200, crop="crop") Магия CSS: Методы обрезки изображений при помощи CSS и SVG

Всем привет, меня зовут Анна Блок и сегодня мы поговорим о том, как обрезать изображения, не используя графических программ.
Где это может пригодиться?
Прежде всего, на сайтах, где контент с изображениями, вероятнее всего, не будет подрезаться под какой-либо конкретный блок.
Яркий пример: блог на WordPress.
Предположим, вы хотите, чтобы обложка вашей статьи имела пропорции 1:1 (квадрат). Ваши действия:
- Скачаете подходящую картинку из интернета;
- Обрежете ее в фотошопе до нужных пропорции;
- Опубликуете статью.
Зайдя на сайт, вы увидите тот результат, который ожидали.
Но, предположим вы забыли обрезать картинку в фотошопе и выгрузили рандомное изображение в качестве обложки из интернета, что будет тогда?! Правильно, верстка сломается. А если вы совсем не использовали CSS, то картинка HD разрешения и вовсе может перекрыть весь обзор на текст. Поэтому важно уметь делать обрезку изображений при помощи CSS стилей.
Давайте разберем разные ситуации того, как это можно реализовать не только при помощи CSS, но и SVG.
Пример 1

Попробуем обрезать изображение которое размещено при помощи background-image. Создадим небольшую HTML-разметку
Переходим к стилизации CSS. Через background-image добавляем изображение, указываем рамки для нашего изображения, центрируем изображение при помощи background-position и задаем background-size :
Ознакомиться подробнее с HTML и CSS можно тут:
Это был первый и самый простой метод по обрезке изображения. Теперь давайте рассмотрим второй пример.
Пример 2

Предположим, у нас есть всё тот же контейнер box внутри которого находится тег img с изображением, которое мы сейчас будем стилизовать.

Далее мы будем стилизовать два элемента: класс box и тег img .
Начнем работу со связкой свойств position: relative для box и для position: absolute для img .
Также разместим наше изображение по центру относительно того объекта, который мы создадим. И используем свойство, которое довольно редко используются: object-fit .
На мой взгляд, это лучший метод. Он идеально подойдет для блогов, если вы используете изображения для постов совершенно разных пропорций.
Ознакомиться подробнее с HTML и CSS можно тут:
Пример 3

Также создавать обрезку для изображений мы можем в момент, если мы вставляем их в SVG элементы. Для примера возьмем круг. SVG мы можем создать при помощи тегов. Создаем обрамляющий тег svg внутри которого будет находится тег circle и тег pattern . В теге pattern пишем тег image . В нем мы указываем атрибут xlink:href и добавляем изображение. Также добавим атрибуты ширины и высоты. Но на этом не все. Нам потребуется добавить значение fill . Чтобы наша работа считала законченной мы добавим вспомогательный атрибут preserveAspectRatio в тег image , который позволит заполнить наше изображение «от и до» по всему кругу.
Я не могу назвать этот метод универсальным. Зато его можно использовать в исключительных случаях. Например, если мы затронули тему блога, то идеально такой метод мог бы вписаться для аватарки автора который пишет статью.
Ознакомиться подробнее с HTML и CSS можно тут:
Итоги:
Мы разобрали 3 метода обрезки изображения на сайтах: при помощи background-image , используя тег img и связанный с паттерном svg со встраиванием растровых изображений при помощи тега image . Если вы знаете ещё какие-то методы по обрезке изображения при помощи SVG, то делитесь ими в комментариях. Не только мне, но и другим будет полезно узнать о них.
Не забывай задавать свои вопросы по вёрстке или фронтенд-разработке у профессионалов на FrontendHelp в режиме онлайн.
Смотреть видео:
3 простых и быстрых техники CSS для обрезки картинок


18.01.2010 11.02.2014 по 2Web 100 618
В этой статье мы расскажем вам о 3 быстрых и простых методах CSS, которые вы cможете использовать, чтобы показать только часть картинки на вашей страничке.
Все использованные здесь методы, фактически нуждаются только в паре строчек CSS кода. Однако, это не обрезание в прямом смысле этого слова (CSS пока не может сделать этого), мы просто скрываем и показываем только ту часть картинки, которую мы хотим увидеть.
Эти методики могут быть очень полезны, если вы хотите привести картинку к определенному размеру, то есть хотите создать, например, её превьюшку (уменьшенная копия изображения) в секции новостей или что-то подобное.
Техника 1 — использование отрицательных полей (Negative Margins)
Посмотреть пример
По этой технике картинку необходимо поместить в родительский элемент, в нашем случае, это параграф (тэг
) . Родительский абзац должен быть плавающим(floating) элементом (или с заданной шириной). Эта техника не будет работать на элементах с атрибутом «в полную ширину» (full width).
Затем мы задаем отрицательные поля для всех четырех сторон: верх( top ), право( right ), низ( bottom ) и лево( left ). Отрицательные поля определяют: насколько срезано в каждом направлении наше изображение, находящееся в родителе(параграфе). Получаем только часть от первоначальной картинки — обрезок. Затем, когда мы заменяем родительское свойство overflow на hidden , мы скрываем поля, которые находятся за нашим обрезком. Цель достигнута. Вам, правда, придется повозиться со значениями, чтобы по-настоящему почувствовать, как это работает.
Итак, HTML выглядит примерно так: