- Kotlin Android – Set OnClickListener for Button
- Code – Button.setOnClickListener()
- Example – Kotlin Androide Button.setOnClickListener()
- Conclusion
- Урок 4. Kotlin. Обработка нажатия кнопок и взаимодействие с view в android
- Продолжаем курс по разработке андроид-приложений на языке Kotlin для начинающих программистов.
- Автоматический импорт
- Отображение сообщения по нажатию кнопки
- Реализация счетчика по нажатию кнопки Count
- Запустите приложение на устройстве.
- Android Button using Kotlin and XML
- Android Button Overview
- Creating a Button in XML Layout
- Button Click Listeners
- Android Button using Kotlin
- 1. Project Structure
- 2. Kotlin Button Code
Kotlin Android – Set OnClickListener for Button
Android Button widget is a UI element generally used to receive user actions as input. You can click on a Button, long press, etc.
In this tutorial, we shall learn to set OnClickListener for Button.
Code – Button.setOnClickListener()
Following code helps you to set on-click listener for Button.
// get reference to button val btn_click_me = findViewById(R.id.btn_click_me) as Button // set on-click listener btn_click_me.setOnClickListener
What we have done here is, we got the reference to the Button and then used setOnClickListener method to trigger an action when the button is clicked.
Example – Kotlin Androide Button.setOnClickListener()
Now we shall look into the layout xml file and Activity(Kotlin file) to set OnClickListener for a Button.
Create an Android Application with Kotlin Support and replace activity_main.xml and MainActivity.kt with the following content.
activity_main.xml
MainActivity.kt
package com.tutorialkart.myapplication import android.support.v7.app.AppCompatActivity import android.os.Bundle import android.widget.Button import android.widget.Toast class MainActivity : AppCompatActivity() < override fun onCreate(savedInstanceState: Bundle?) < super.onCreate(savedInstanceState) setContentView(R.layout.activity_main) // get reference to button val btn_click_me = findViewById(R.id.btn_click_me) as Button // set on-click listener btn_click_me.setOnClickListener < // your code to perform when the user clicks on the button Toast.makeText(this@MainActivity, "You clicked me.", Toast.LENGTH_SHORT).show() >> >
Build and Run the Android Application. You would see the Android screen as shown in the following screenshot.
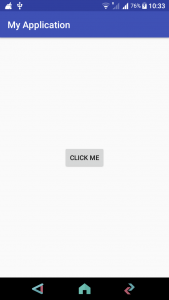
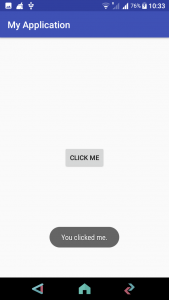
Button.setOnClickListener() will be triggered and the code in this setOnClickListener<> block will run.
Conclusion
In this Android Tutorial – Kotlin Button OnclickListener, we have learnt to set OnClickListener for Button in Kotlin Android using Button. setOnClickListener() method.
Урок 4. Kotlin. Обработка нажатия кнопок и взаимодействие с view в android
Продолжаем курс по разработке андроид-приложений на языке Kotlin для начинающих программистов.
На прошлом уроке мы добавили кнопки на главном экране вашего приложения, но пока эти кнопки ничего не делают. В этом уроке сделаем так, чтобы кнопки реагировали, когда пользователь нажимает их.
Автоматический импорт
Перед добавлением поведения к кнопкам необходимо включить автоматический импорт, чтобы Android Studio автоматически импортировала все классы, необходимые для кода Котлин.
- В Android Studio откройте Редактор настроек. Перейдите к File >Other Settings >Default Settings.

- Выберите Auto Imports. В разделе Java убедитесь, что пункт Add Unambiguous Imports on the fly отмечен флажком.

- Закройте редактор настроек.


Отображение сообщения по нажатию кнопки

На этом шаге мы добавим функцию отображения тоста – короткого сообщения на экране. Функция будет выполняться при нажатии кнопки с надписью TOAST.
- Откройте класс MainActivity.kt. (раскройте ветвь app >java >com.example.android.myfirstapp чтобы найти MainActivity). Этот класс описывает поведение главного экрана нашего приложения.Пока что класс содержит только одну функцию, onCreate(). Функция onCreate() выполняется, когда активити стартует.
- Посмотрите внимательно на функцию onCreate(). Обратите внимание на вызов функции setContentView(). Эта строка устанавливает файл ресурсов activity_main.xml в качестве разметки активити главного экрана.
setContentView(R.layout.activity_main);
- Добавим новую функцию toastMe() в класс MainActivity. Функция toastMe() принимает один аргумент – View. Это представление, получающее событие нажатия кнопки.Функция создает и отображает всплывающее уведомление. Вот ее код:
В языке Kotlin, если явно не используется никакого модификатора доступа, то по умолчанию применяется public . Далее идет слово fun, обозначающее функцию, и ее имя. В скобках передаваемый функции аргумент – его имя и тип разделены двоеточием. Далее объявляется переменная val myToast. Словом val обозначаются переменные «только для чтения», значение которых обычно задается только один раз. Обычные изменяемые переменные обозначаются в языке Kotlin словом var. Далее переменной myToast присваивается результат вызова метода makeText java-класса Toast. Метод makeText принимает контекст, сообщение и длительность отображения тоста, и возвращает тост в переменную myToast. Тост затем отображается методом show().
Функция toastMe является примером использования java-кода в kotlin-классе.
- Откройте файл макета activity_main.xml и добавьте свойство android:onClick кнопкеToast. Значением свойства установите toastMe.
- Запустите приложение и нажмите кнопку TOAST, вы должны увидеть на экране короткое сообщение с текстом “Hellо Toast!”.
Таким образом, что для того, чтобы сделать элемент экрана интерактивным вам нужно:
- Реализовать функцию, определяющую поведение экранного элемента при нажатии на него. Эта функция должна быть public, не возвращать никаких значений, и принимать View в качестве аргумента.
- Установить имя функции в качестве значения свойства onClick в экранном элементе.
Реализация счетчика по нажатию кнопки Count

Функция, отображающая тост, очень проста. Она не взаимодействует с другими элементами экрана. На следующем шаге мы будем по нажатию кнопки находить и обновлять другие view-элементы экрана. Напишем функцию для кнопки Count, которая при нажатии будет увеличивать значение текстового поля на 1.
private lateinit var textView: TextView
textView = findViewById(R.id.textView)
- В теле класса ActivityMain.kt, добавим функцию countMe(). Эта функция будет вызываться при нажатии кнопки Count, поэтому она должна быть public, не иметь возвращаемых значений, и получать View в качестве аргумента.
- Функция готова. Теперь нужно вызвать ее при нажатии кнопки COUNT. Для этого нужно установить имя функции в качестве значения свойстваonClick кнопки в файле макета.
Запустите приложение на устройстве.
При нажатии кнопки COUNT значение текстового поля увеличивается на единицу.
На этом урок подошел к концу. На следующем уроке мы добавим в приложение второй экран, который будет отображать информацию на основании данных с первого экрана.
Исходный урока код можно скачать по ссылке.
Вот ссылка на подробный справочник по языку Kotlin на русском языке – советуем с ним ознакомиться.
До встречи на следующем уроке. Всем добра)


На прошлом уроке мы познакомились с нижней панелью навигации BottomNavigationView. В этом уроке реализуем
Android Button using Kotlin and XML

While we believe that this content benefits our community, we have not yet thoroughly reviewed it. If you have any suggestions for improvements, please let us know by clicking the “report an issue“ button at the bottom of the tutorial.
Android Button Overview
Android Button class extends TextView. Button is a UI widget that is used to get click interactions from the user to trigger an action in the application. A button can be created in the XML layout as well as the Kotlin Activity class in the Android Studio Project.
Creating a Button in XML Layout
- android:id is used to set the unique identifier on the Button.
- The android:text is used to set the text inside the button. By default text is displayed in capital letters.
- android:onClick is used to define the Kotlin function to be invoked in the activity when the button is clicked. It is a click listener.
- The android:background is used to set the background color/drawable on the Button.
Tip: To prevent displaying all letters in captial, use the attribute android:textAllCaps=»false»
For more details on how to customize your Buttons in XML Layout refer to the Android Buttons Tutorial.
Button Click Listeners
We can set button listeners programmatically too. Following are the two major listeners:
- setOnClickListener — triggers when a button is clicked.
- setOnLongClickListner — triggers when a button is pressed for a longer duration.
Following code snippets has the setOnClickListener set over a button.
button.setOnClickListener(object : View.OnClickListener < override fun onClick(v: View?) < //your implementation goes here >>) The above code can be converted in a lambda expression to make it short.
Similarly, a setOnLongClickListener can be defined in the following manner.
button.setOnLongClickListener < textView.text = "Androidly Button Long click" true >//or button.setOnLongClickListener
In the above code, the last statement in each of the expressions is the return statement.
- If the setOnLongClickListener returns true, it means that the setOnClickListener won’t be triggered.
- If the setOnLongClickListener returns false, it means that the setOnClickListener will be triggered.
This is known as consuming events. The first case consumes the event.
Android Button using Kotlin
We’ll be developing an application that increments the counter of the TextView on a Button click. We will use Kotlin to create the button. We’ll also learn about the different Button click handlers.
1. Project Structure

Create a new Android Studio Project. Ensure that in the initial setup, you enable Kotlin Support. Once you’re done, following is the Project Structure that you shall see.
2. Kotlin Button Code
The activity_main.layout file looks like the following code.

We’ve used LinearLayout that holds the views linearly (horizontally or vertically). It’s recommended to set the strings in the strings.xml file instead of hardcoding them. To fetch a string resource we use @string/name_of_string . The function addOne(view: View) is defined in the MainActivity.kt Kotlin class. The code for the MainActivity.kt class is given below.
package net.androidly.androidlybuttons import android.support.v7.app.AppCompatActivity import android.os.Bundle import android.support.v4.content.ContextCompat import android.view.View import android.view.ViewGroup import android.widget.Button import android.widget.LinearLayout import kotlinx.android.synthetic.main.activity_main.* class MainActivity : AppCompatActivity(), View.OnClickListener < override fun onCreate(savedInstanceState: Bundle?) < super.onCreate(savedInstanceState) setContentView(R.layout.activity_main) var androidlyButton = Button(this) androidlyButton.apply < layoutParams = LinearLayout.LayoutParams(LinearLayout.LayoutParams.MATCH_PARENT, ViewGroup.LayoutParams.WRAP_CONTENT) text = "Double the value" setAllCaps(false) textSize = 20f >androidlyButton.setOnClickListener(this) linearLayout.addView(androidlyButton) androidlyButton = Button(this) androidlyButton.apply < layoutParams = LinearLayout.LayoutParams(LinearLayout.LayoutParams.WRAP_CONTENT, ViewGroup.LayoutParams.WRAP_CONTENT) text = "RESET" textSize = 20f setTextColor(ContextCompat.getColor(this@MainActivity, R.color.colorPrimaryDark)) setOnLongClickListener < txtCounter.text = 0.toString() true >> androidlyButton.setOnClickListener(this) linearLayout.addView(androidlyButton) > override fun onClick(v: View?) < when (v?.id) < R.id.btnDouble -> < txtCounter.text = (txtCounter.text.toString().toInt() * 2).toString() >R.id.btnReset -> < txtCounter.text = (-100).toString() >else -> < >> > fun addOne(view: View) < txtCounter.text = (txtCounter.text.toString().toInt() + 1).toString() >> - import kotlinx.android.synthetic.main.activity_main.* statement automatically gets the view IDs from the xml in our class. Hence saving us from using findViewById.
- The fun addOne(view: View) is triggered when the btnIncrementByOne is clicked. The (view: View) parameter must be defined in the function declaration.
- Create a Button programmatically and set it in the parent view(LinearLayout here) using the following code.
var androidlyButton = Button(this) linearLayout.addView(androidlyButton) 
Thanks for learning with the DigitalOcean Community. Check out our offerings for compute, storage, networking, and managed databases.