- JAVA__HOME должен указывать на JDK, а не на JRE
- 2. ПроблемаJAVA_HOME
- 3. JDK или JRE
- 3.1. Ошибка компиляции из-за JRE вместо JDK
- Maven — Environment Setup
- Step 2 — Set JAVA Environment
- Step 3 — Download Maven Archive
- Step 4 — Extract the Maven Archive
- Step 5 — Set Maven Environment Variables
- Step 6 — Add Maven bin Directory Location to System Path
- Step 7 — Verify Maven Installation
- How to Install Maven on Windows
- Step 1: Download and Install Java
- Step 2: Set Up Java Environment Variable
- Step 3: Download Maven and Set up Maven Environment Variable
- Step 4) Update the Path Variable
- Step 5) Test the Maven Installation
JAVA__HOME должен указывать на JDK, а не на JRE
Maven — мощный инструмент для создания кода. Мы посмотрим изнутри, чтобы понять, почему происходит эта ошибка, и посмотрим, как ее устранить.
2. ПроблемаJAVA_HOME
После установки Maven выполняетсяwe have to set the JAVA_HOME environment variable, so the tool knows where to find the JDK commands. Цели Maven запускают соответствующие команды Java в исходном коде проекта.
Например, наиболее распространенным сценарием является компиляция кода путем выполнения командыjavac.
ЕслиJAVA_HOME is not pointing to a valid JDK installation, Maven выдает ошибку при каждом выполнении:
mvn -version # Output. The JAVA_HOME environment variable is not defined correctly This environment variable is needed to run this program NB: JAVA_HOME should point to a JDK, not a JRE3. JDK или JRE
Как Maven проверяет путьJAVA_HOME?
Перед запуском любых целей введитеMaven checks for the existence of the java command по пути, указанномуJAVA_HOME, или запросив у ОС установку JDK по умолчанию. If the executable is not found, Maven terminates with the error.
Вот проверка исполняемого файлаmvn для Linux (Apache Maven v3.5.4):
if [ -z "$JAVA_HOME" ] ; then JAVACMD=`which java` else JAVACMD="$JAVA_HOME/bin/java" fi if [ ! -x "$JAVACMD" ] ; then echo "The JAVA_HOME environment variable is not defined correctly" >&2 echo "This environment variable is needed to run this program" >&2 echo "NB: JAVA_HOME should point to a JDK not a JRE" >&2 exit 1 fiЭта проверка на первый взгляд может показаться разумной, но мы должны учитывать, чтоboth JDK and JRE have a bin folder and both contain an executable java file.
Следовательно, этоpossible to configure JAVA_HOME to point to a JRE installation, hiding this particular error and causing problems at a later stage.. В то время как основная цель JRE — запуск кода Java,the JDK can also compile and debug among other important differences.
По этой причине командаmvn compile не сработает, как мы увидим в следующем подразделе.
3.1. Ошибка компиляции из-за JRE вместо JDK
Как обычно с настройками по умолчанию, они очень полезны, если у нас есть «стандартная» конфигурация.
Например, если мы устанавливаем Java 11 в системе Ubuntu 18.04 и не устанавливаем переменную средыJAVA_HOME, Maven все равно с радостью найдет наш JDK и будет использовать его для различных целей, включая компиляцию.
Но если нам удалось настроить нестандартную конфигурацию (не говоря уже о том, чтобы навести беспорядок) в нашей системе, полезности Maven уже недостаточно. Это может даже вводить в заблуждение.
Предположим, у нас есть следующая конфигурация в Ubuntu 18.04:
Если мы сделаем нашу основную проверку:
Maven — Environment Setup
First of all, open the console and execute a java command based on the operating system you are working on.
| OS | Task | Command |
|---|---|---|
| Windows | Open Command Console | c:\> java -version |
| Linux | Open Command Terminal | $ java -version |
| Mac | Open Terminal | machine: < joseph$ java -version |
Let’s verify the output for all the operating systems −
Java(TM) SE Runtime Environment 18.9 (build 11.0.11+9-LTS-194)
Java HotSpot(TM) 64-Bit Server VM 18.9 (build 11.0.11+9-LTS-194, mixed mode)
Java(TM) SE Runtime Environment 18.9 (build 11.0.11+9-LTS-194)
Java HotSpot(TM) 64-Bit Server VM 18.9 (build 11.0.11+9-LTS-194, mixed mode)
Java(TM) SE Runtime Environment 18.9 (build 11.0.11+9-LTS-194)
Java HotSpot(TM) 64-Bit Server VM 18.9 (build 11.0.11+9-LTS-194, mixed mode)
If you do not have Java installed on your system, then download the Java Software Development Kit (SDK) from the following link http://www.oracle.com. We are assuming Java 11.0.11 as the installed version for this tutorial.
Step 2 — Set JAVA Environment
Set the JAVA_HOME environment variable to point to the base directory location where Java is installed on your machine. For example.
| OS | Output |
|---|---|
| Windows | Set the environment variable JAVA_HOME to C:\Program Files\Java\jdk11.0.11 |
| Linux | export JAVA_HOME = /usr/local/java-current |
| Mac | export JAVA_HOME = /Library/Java/Home |
Append Java compiler location to the System Path.
| OS | Output |
|---|---|
| Windows | Append the string C:\Program Files\Java\jdk11.0.11\bin at the end of the system variable, Path. |
| Linux | export PATH = $ PATH: $ JAVA_HOME/bin/ |
| Mac | not required |
Verify Java installation using the command java -version as explained above.
Step 3 — Download Maven Archive
| OS | Archive name |
|---|---|
| Windows | apache-maven-3.8.4-bin.zip |
| Linux | apache-maven-3.8.4-bin.tar.gz |
| Mac | apache-maven-3.8.4-bin.tar.gz |
Step 4 — Extract the Maven Archive
Extract the archive, to the directory you wish to install Maven 3.8.4. The subdirectory apache-maven-3.8.4 will be created from the archive.
| OS | Location (can be different based on your installation) |
|---|---|
| Windows | C:\Program Files\Apache Software Foundation\apache-maven-3.8.4 |
| Linux | /usr/local/apache-maven |
| Mac | /usr/local/apache-maven |
Step 5 — Set Maven Environment Variables
Add M2_HOME, M2, MAVEN_OPTS to environment variables.
Set the environment variables using system properties.
M2_HOME=C:\Program Files\Apache Software Foundation\apache-maven-3.8.4 M2=%M2_HOME%\bin MAVEN_OPTS=-Xms256m -Xmx512m
Open command terminal and set environment variables.
export M2_HOME=/usr/local/apache-maven/apache-maven-3.8.4 export M2=$M2_HOME/bin
export MAVEN_OPTS=-Xms256m -Xmx512m
Open command terminal and set environment variables.
export MAVEN_OPTS=-Xms256m -Xmx512m
Step 6 — Add Maven bin Directory Location to System Path
Now append M2 variable to System Path.
| OS | Output |
|---|---|
| Windows | Append the string ;%M2% to the end of the system variable, Path. |
| Linux | export PATH= $ M2: $ PATH |
| Mac | export PATH= $ M2: $ PATH |
Step 7 — Verify Maven Installation
Now open console and execute the following mvn command.
| OS | Task | Command |
|---|---|---|
| Windows | Open Command Console | c:\> mvn —version |
| Linux | Open Command Terminal | $ mvn —version |
| Mac | Open Terminal | machine:~ joseph$ mvn —version |
Finally, verify the output of the above commands, which should be as follows −
Apache Maven 3.8.4 (9b656c72d54e5bacbed989b64718c159fe39b537)
Maven home: C:\Program Files\Apache Software Foundation\apache-maven-3.8.4
Java version: 11.0.11, vendor: Oracle Corporation, runtime: C:\Program Files\Java\jdk11.0.11\
Default locale: en_IN, platform encoding: Cp1252
OS name: «windows 10», version: «10.0», arch: «amd64», family: «windows»
Apache Maven 3.8.4 (9b656c72d54e5bacbed989b64718c159fe39b537)
Java home: /usr/local/java-current/jre
Apache Maven 3.8.4 (9b656c72d54e5bacbed989b64718c159fe39b537)
Java home: /Library/Java/Home/jre
How to Install Maven on Windows


Maven is a build and dependency management tool for java based application development. Just like other Java-based development tools, it is not installed as windows service, rather it is configured using windows environment variables. These variables can be accessed from the below location:
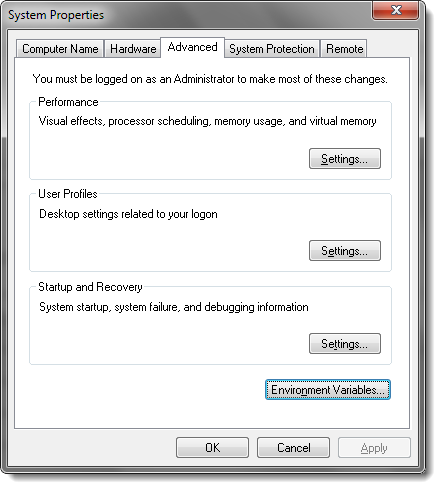
All Control Panel Items > System > Advanced system settings > Environment Variables
There are certain steps which we need to perform to set up Maven, such as installing Java on the system, setting up environment variable and downloading Eclipse IDE. In this chapter, we will go through these steps one by one to set Maven in Windows.
Step 1: Download and Install Java
Install Java, if it is not already installed on your system. Java latest version can be installed from here. In case you face any issue please go through the steps to Download and Install Java.
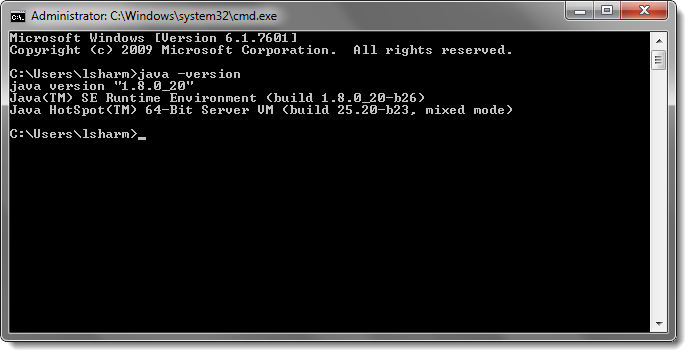
- To check the Java version installed on your machine, please go to Run and type ‘cmd‘ to launch the command prompt.
- Now type ‘Java -version‘ and press Enter.
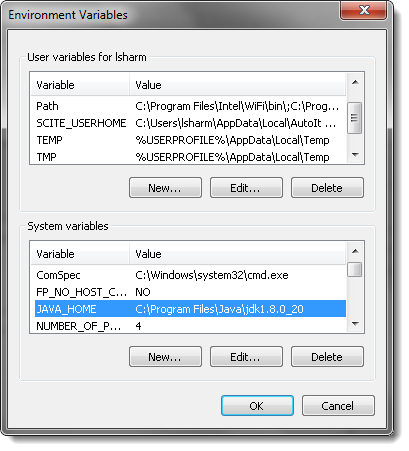
Step 2: Set Up Java Environment Variable
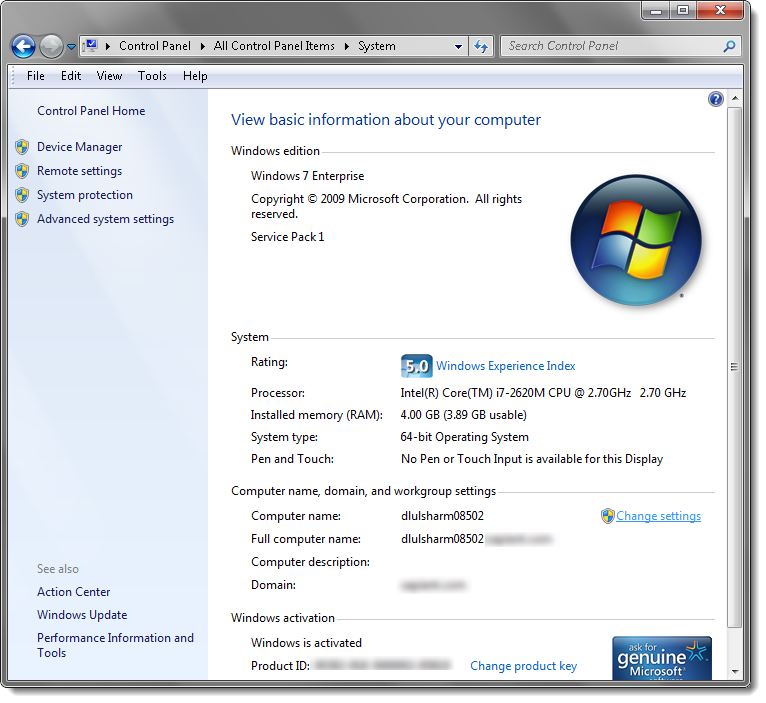
Once the Java installation is done, set up the Java Environment Variable. To set the Java environment variable, open System Settings.
- Go to My Computer and select Properties by Right-Clicking on empty space in My Computer.
- Click on ‘Change settings‘.

- Write ‘JAVA_HOME‘ in the Variable name box and enter ‘C:\Program Files\Java\jdk1.8.0_20‘ JDK path in the Variable value box and click OK.
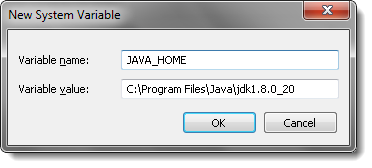
- Entry for newly created Java variable will be displayed under ‘System Variables..’
Step 3: Download Maven and Set up Maven Environment Variable
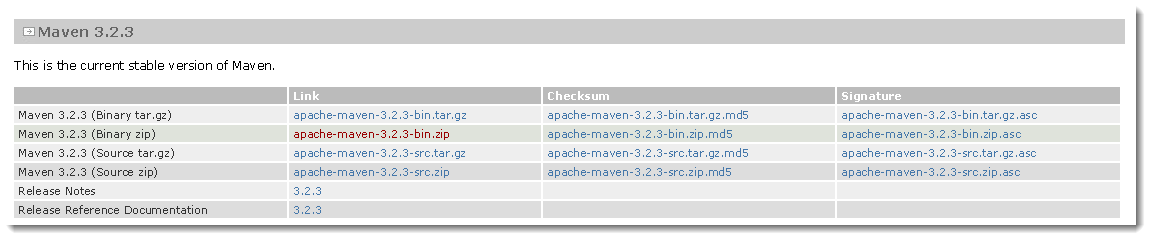
2) Extract it to some location. I have extracted it to ‘C:/apache-maven-3.2.3‘. You can choose your own location.
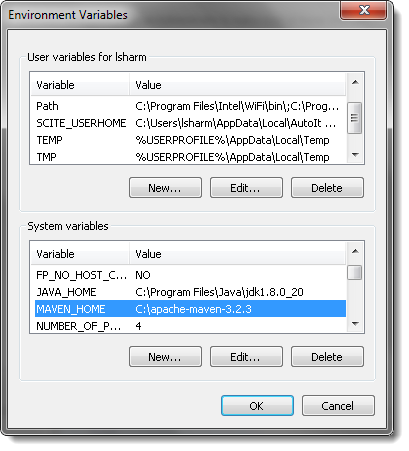
- Set up the Maven Environment Variable the same way we set up the Java Environment Variable above.
Write ‘MAVEN_HOME‘ in the Variable name box then enter ‘8C:\apache-maven-3.2.3*’ Maven path in the Variable value box and click OK.

Entry for newly created Maven variable will be displayed under ‘System Variables..’
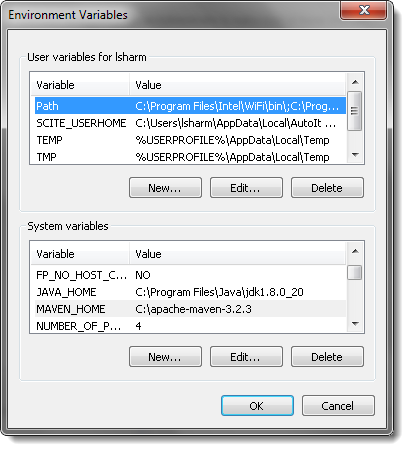
Step 4) Update the Path Variable
To run Maven from the command prompt, this is necessary to update the Path Variable with Maven’s installation ‘bin‘ directory.
- Go to My Computer and select Properties by Right-Clicking on empty space in My Computer.
2) Click on ‘Change Settings‘.
4) Click on the Edit button under ‘User Variables for UserName‘, where UserName is your machine name.
- Write ‘PATH‘ in the Variable name box then enter ‘C:\apache-maven-3.2.3\bin‘ Maven path in the Variable value box and click OK.
Step 5) Test the Maven Installation
Maven installation is complete. Now, let’s test it from windows command prompt. Go to Run and type ‘cmd‘ in the application location search box. A new command prompt will be opened. Type mvn -version in command prompt.