- Tutorial: Create your first Kotlin application
- Create a new project
- Write code
- Run code from IntelliJ IDEA
- Package as JAR
- Run the JAR
- Run from IntelliJ IDEA
- Run from CLI
- Think. Do. Learn.
- How to create a desktop app using Kotlin and Compose Desktop
- Начните работу с Kotlin/JVM
- Создать проект
- Создайте приложение
- Запустить приложение
- What’s next?
Tutorial: Create your first Kotlin application
You can choose to build your app with one of the four supported build tools.
The instructions are provided for Gradle and Kotlin as DSL. To learn how to accomplish the same using other build tools, use the Build tool switcher at the top of the page.
The instructions are provided for Gradle and Groovy as DSL. To learn how to accomplish the same using other build tools, use the Build tool switcher at the top of the page.
The instructions are provided for Maven. To learn how to accomplish the same using other build tools, use the Build tool switcher at the top of the page.
The instructions are provided for IntelliJ IDEA build tool. To learn how to accomplish the same using other build tools, use the Build tool switcher at the top of the page.
Create a new project
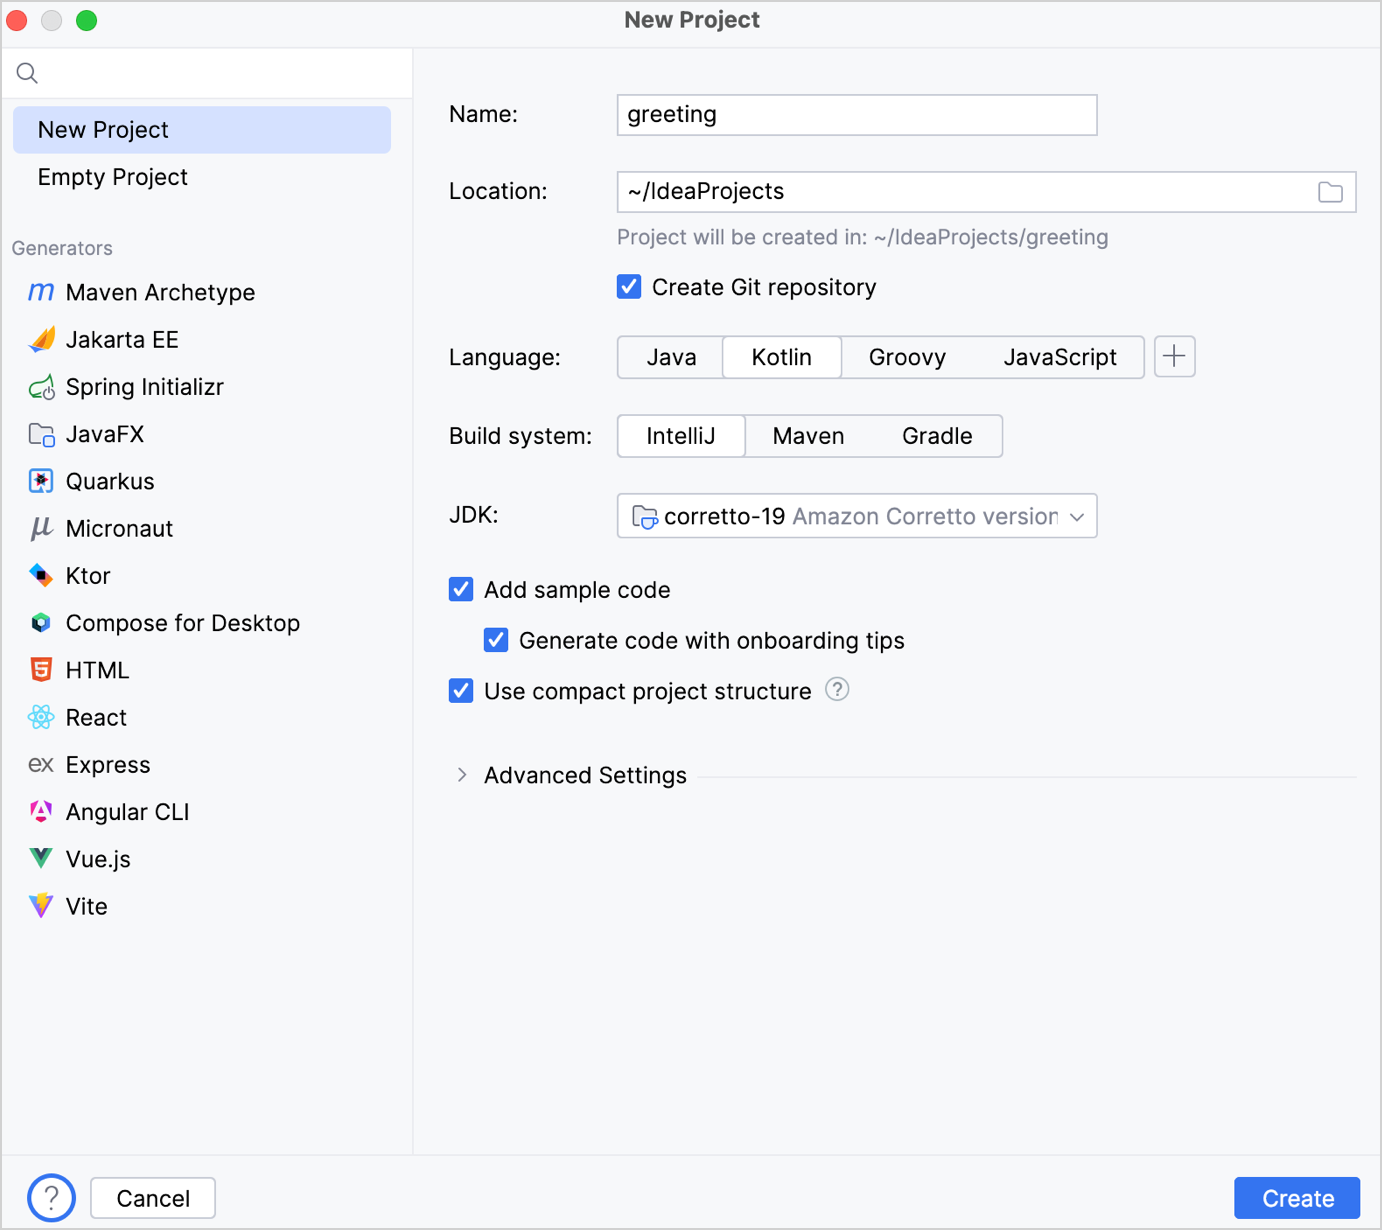
In IntelliJ IDEA, a project helps you organize everything that is necessary for developing your application in a single unit.
- On the Welcome screen, click New Project . Otherwise, from the main menu, select File | New | Project .
- From the list on the left, select New Project .
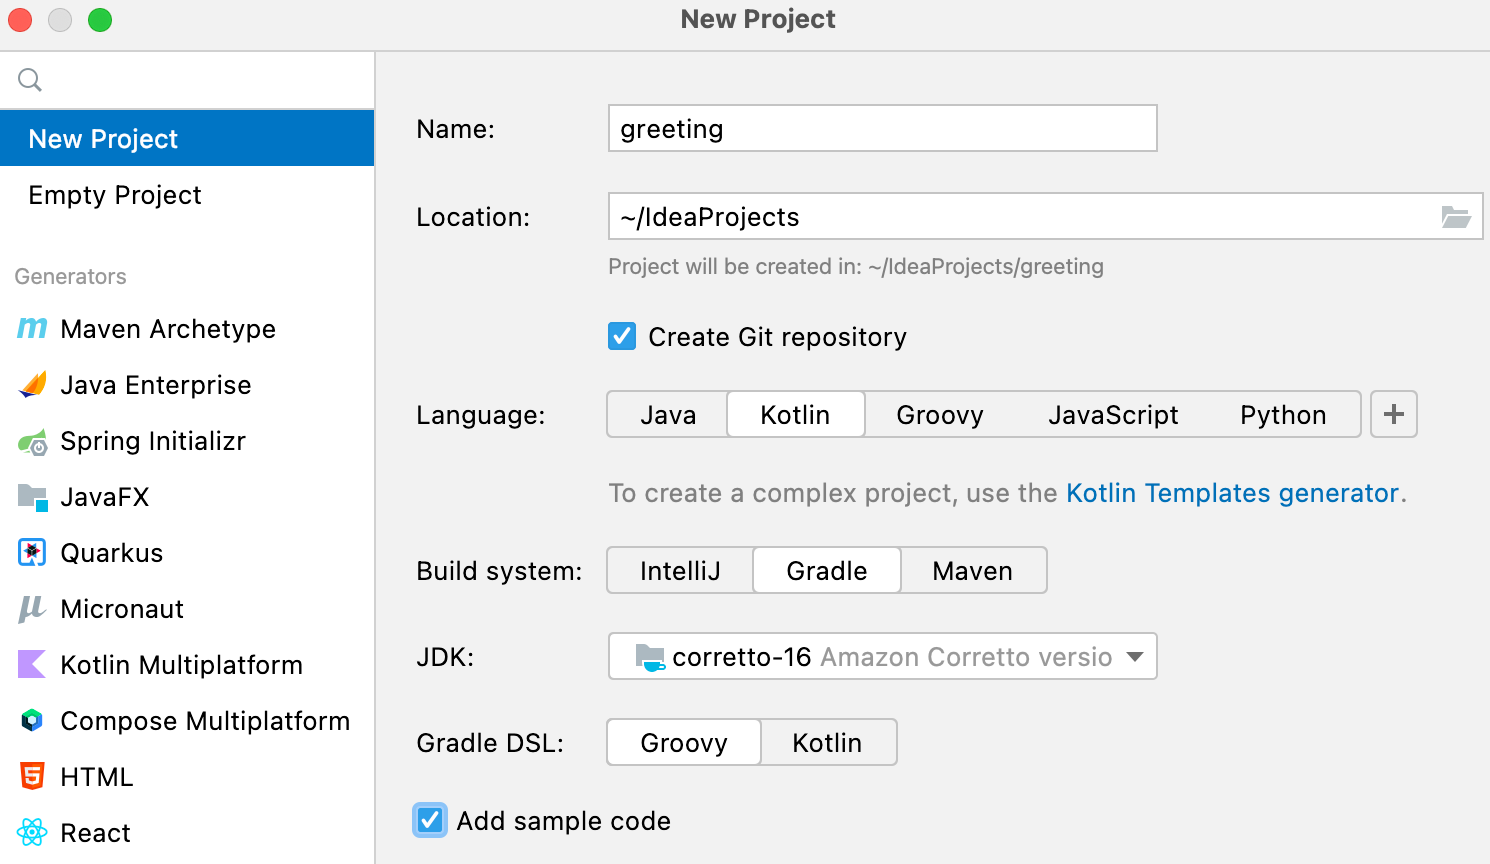
- Name your new project and change its location if necessary.
- Select the Create Git repository checkbox to place the new project under version control. You will be able to do it later at any time.
- From the Language list, select Kotlin .
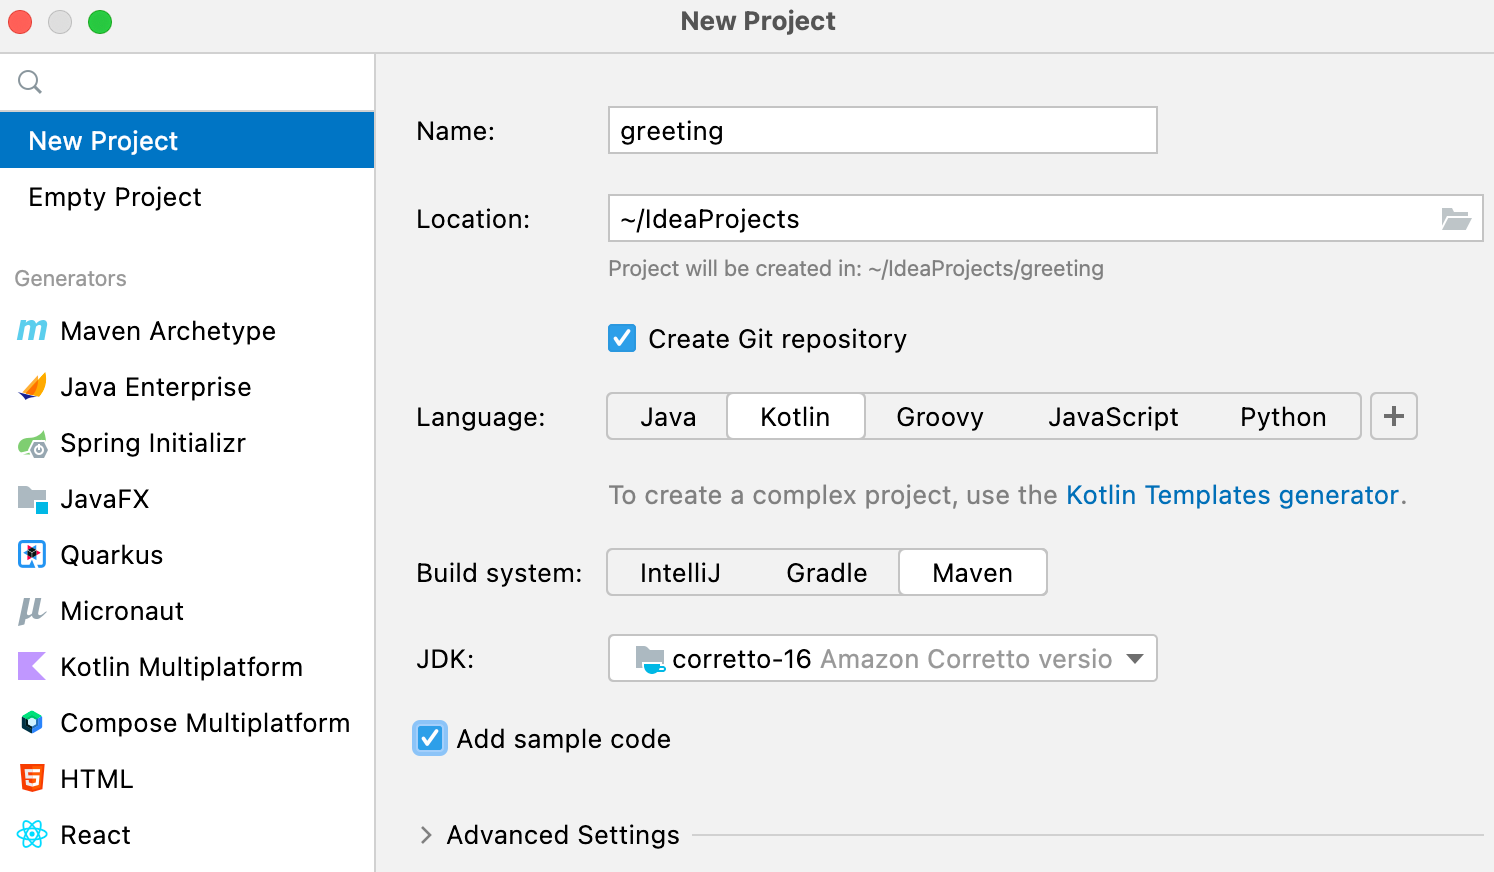
- Select the Gradle IntelliJ Maven build system.
- Choose the Groovy Kotlin language for the build script.
- From the JDK list, select the JDK that you want to use in your project. If the JDK is installed on your computer, but not defined in the IDE, select Add JDK and specify the path to the JDK home directory. If you don’t have the necessary JDK on your computer, select Download JDK .
- Enable the Add sample code option to create a file with a sample Hello World! application.


- Click Create .


Write code
Source code is the central part of your project. In source code, you define what your application will be doing. Real projects may be very big and contain hundreds of thousands lines of code. In this tutorial we are going to start with a simple three-line application that asks the user their name and greets them.
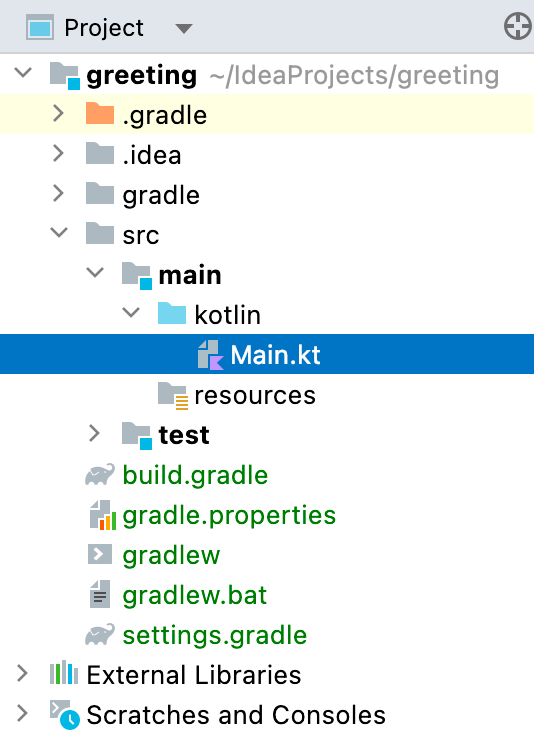
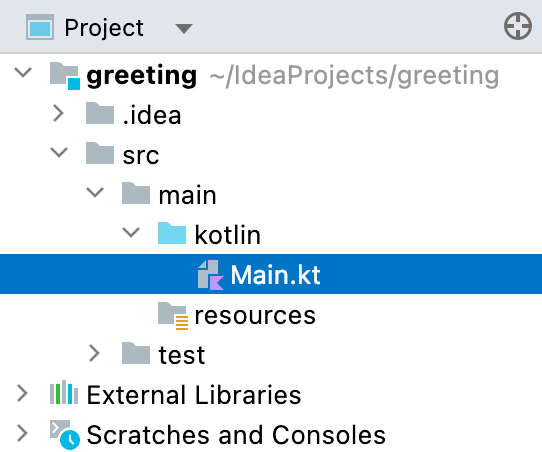
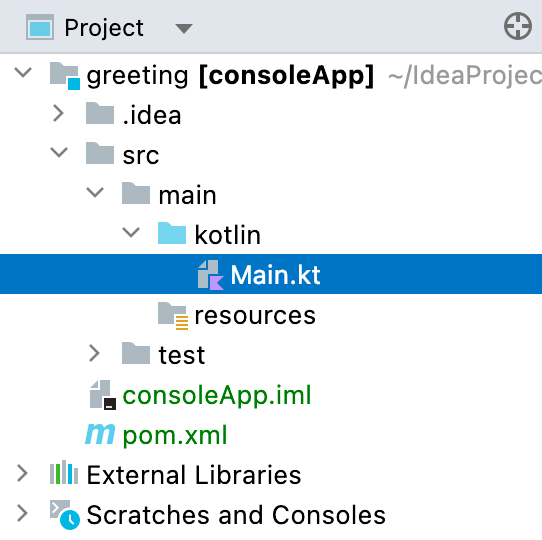
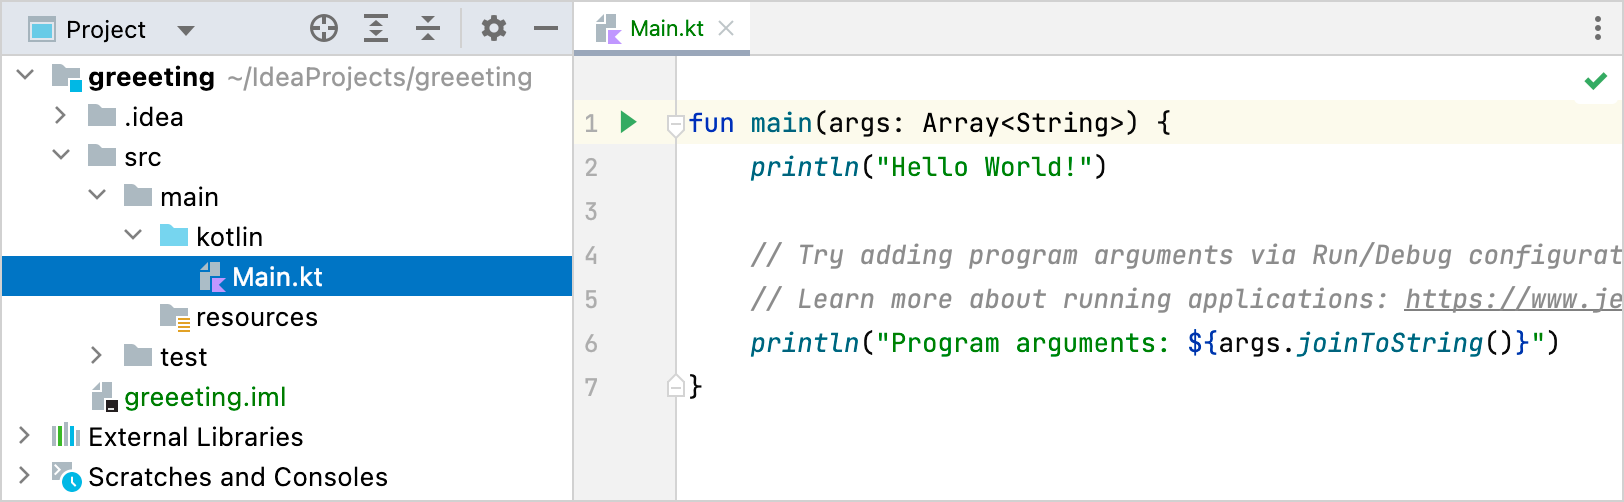
- In the Project tool window on the left, expand the node named after your project and open the /src/main/kotlin/main.kt file.


- The file only contains the main() function with print statements. This function is the entry point of your program. Replace the Hello World! sample with the following code snippet:


 This feature is called live templates. To learn about other available live templates or configure your own, go to Settings | Editor | Live Templates | Kotlin .
Now we have a working code that reads the username from the console, stores it in a read-only variable, and outputs a greeting using the stored value.
Run code from IntelliJ IDEA
Let’s verify that our program works as expected.
IntelliJ IDEA allows you to run applications right from the editor. You don’t need to worry about the technical aspect because IntelliJ IDEA automatically does all the necessary preparations behind the scenes.

- Click the Run icon in the gutter and select Run ‘MainKt’ or press Ctrl+Shift+F10 .
When the program has started, the Run tool window opens, where you can review the output and interact with the program.

Package as JAR
At this point, you know how to write code and run it from IntelliJ IDEA, which is convenient in the development process. However, this is not the way the users are supposed to run applications. For the users to run it on their computers, we are going to build and package the application as a jar file.
JAR is a file format for distributing applications as a single file.
Building the app includes the following steps:
- Compiling the sources – in this step, you translate the code you’ve just written into JVM bytecode. The compiled sources have the .class extension.
- Bundling the dependencies – for the application to function correctly, we need to provide the libraries it depends on. The only required library for this project is Kotlin runtime, but still, it needs to be included. Otherwise, the users will have to provide it themselves every time they run the program, which is not very convenient.
Both the compiled sources and the dependencies end up in the resulting .jar file. The result of the build process such as .jar file is called an artifact .
The instructions are provided for Gradle and Kotlin as DSL. To learn how to accomplish the same using other build tools, use the Build tool switcher at the top of the page.
The instructions are provided for Gradle and Groovy as DSL. To learn how to accomplish the same using other build tools, use the Build tool switcher at the top of the page.
The instructions are provided for Maven. To learn how to accomplish the same using other build tools, use the Build tool switcher at the top of the page.
The instructions are provided for IntelliJ IDEA build tool. To learn how to accomplish the same using other build tools, use the Build tool switcher at the top of the page.
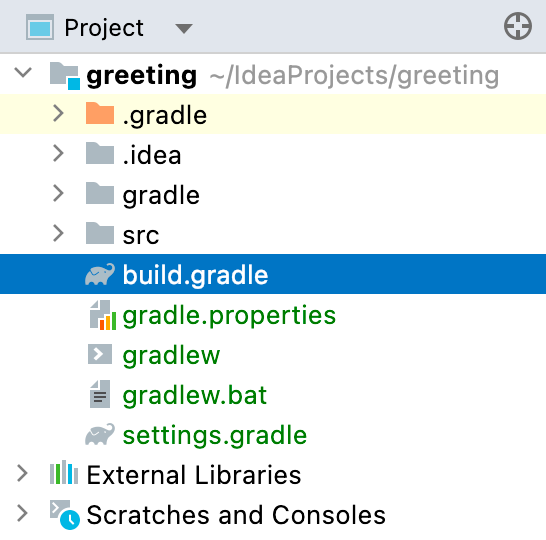
- Open the build.gradle.kts build.gradle script.

 The build script is the file that tells the build tool how exactly to build the project. The build script is the file that tells the build tool how exactly to build the project. It is written in Kotlin just like the source code of your program.
 - In the build script, add the following task definition:

tasks.jar < manifest < attributes["Main-Class"] = "MainKt" >configurations[«compileClasspath»].forEach < file: File ->from(zipTree(file.absoluteFile)) > duplicatesStrategy = DuplicatesStrategy.INCLUDE >

The manifest section specifies the entry point of the program, and the rest tells the build tool to recursively scan the project for dependencies and include them in the build.
The resulting JAR appears in the build/libs directory.

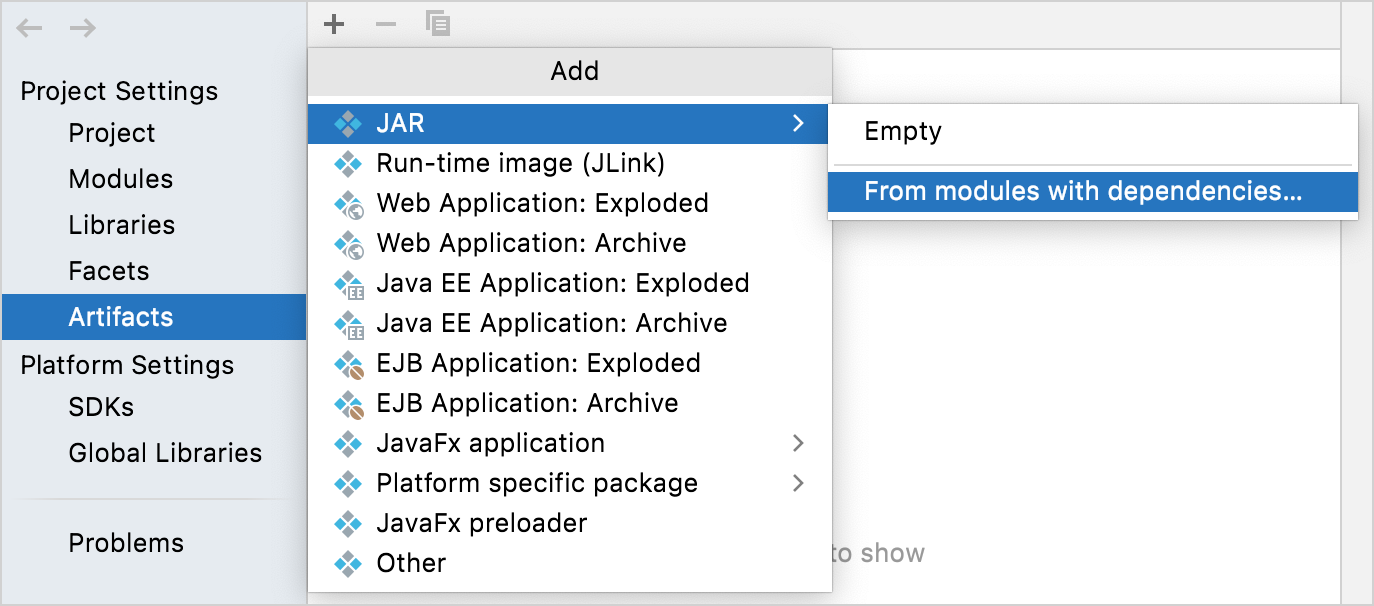
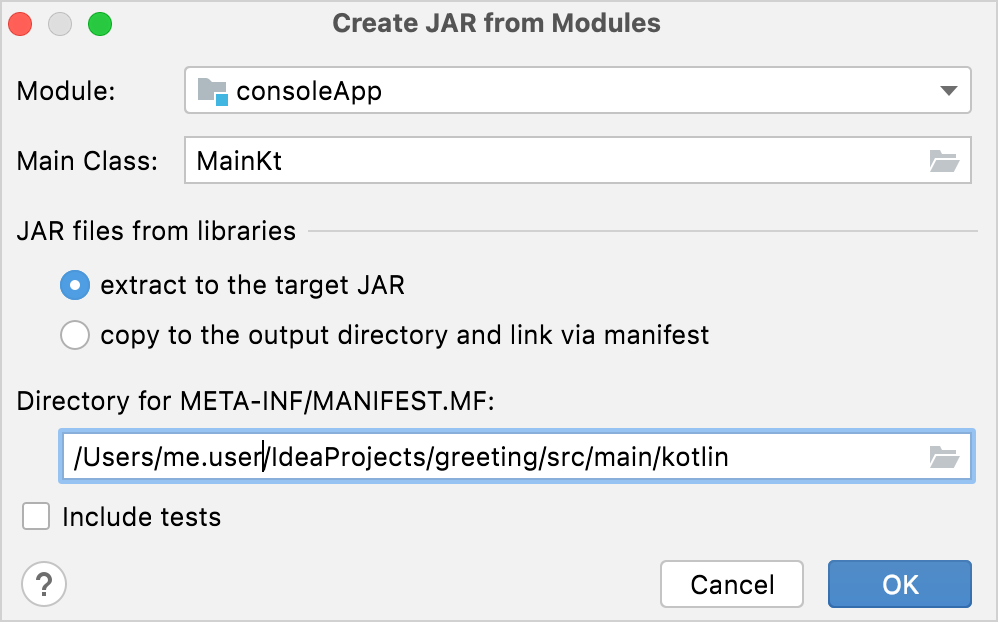
- Go to File | Project Structure Ctrl+Alt+Shift+S and open the Artifacts tab.
- Click Add , then JAR , then From modules with dependencies .

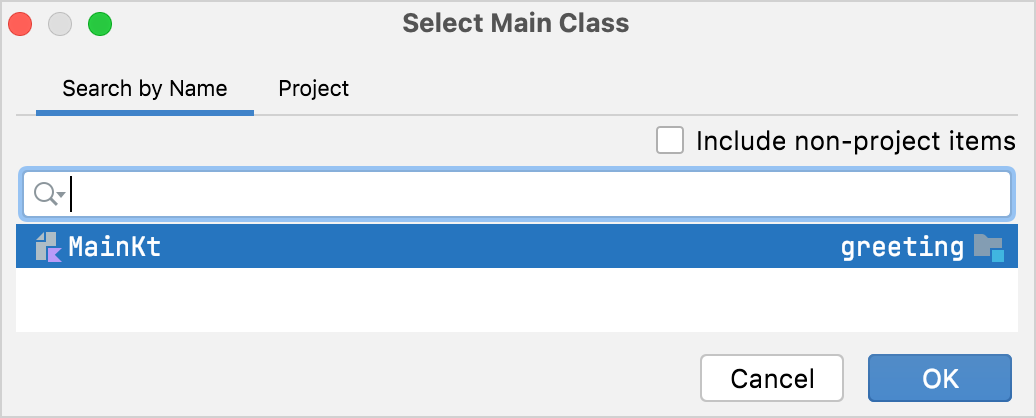
- In the Main Class field, click the Browse button, and select Main.kt as the main class. Specify the absolute path to /src/main/resources as the manifest directory, for example: /Users/me.user/IdeaProjects/greeting/src/main/resources

- Click OK in the Create JAR from Modules dialog.


- Click OK in the Project Structure dialog.
- From the main menu, select Build | Build Artifacts , then click Build .


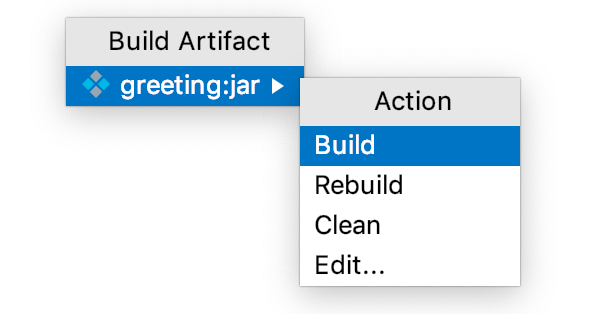
The resulting JAR appears in the out/artifacts directory.

Run the JAR
Run from IntelliJ IDEA
- In the Project tool window, right-click the .jar file and select Run . This is a quick way to run a .jar file from IntelliJ IDEA.
Run from CLI
- Open the terminal and from the containing folder, run: java -jar consoleApp.jar java -jar greeting.jar java -jar greeting-1.0-SNAPSHOT.jar This is how the users of your application would run it. JDK 1.8 or later is required to run the .jar
Think. Do. Learn.
How to create a desktop app using Kotlin and Compose Desktop
Let’s quickly and simply create a desktop app using Kotlin and Compose for Desktop.
- In IntelliJ IDEA, install the Compose Multiplatform plugin (Settings > Plugins, then search for and install ‘Compose Multiplatform IDE Support’ by JetBrains). Restart IJ to load the plugin.
- In IntelliJ IDEA, click ‘New Project’, select ‘Kotlin’ on the left, then select ‘Compose Desktop Application’, then click ‘Next’
- Leave the defaults alone, then click ‘Finish’
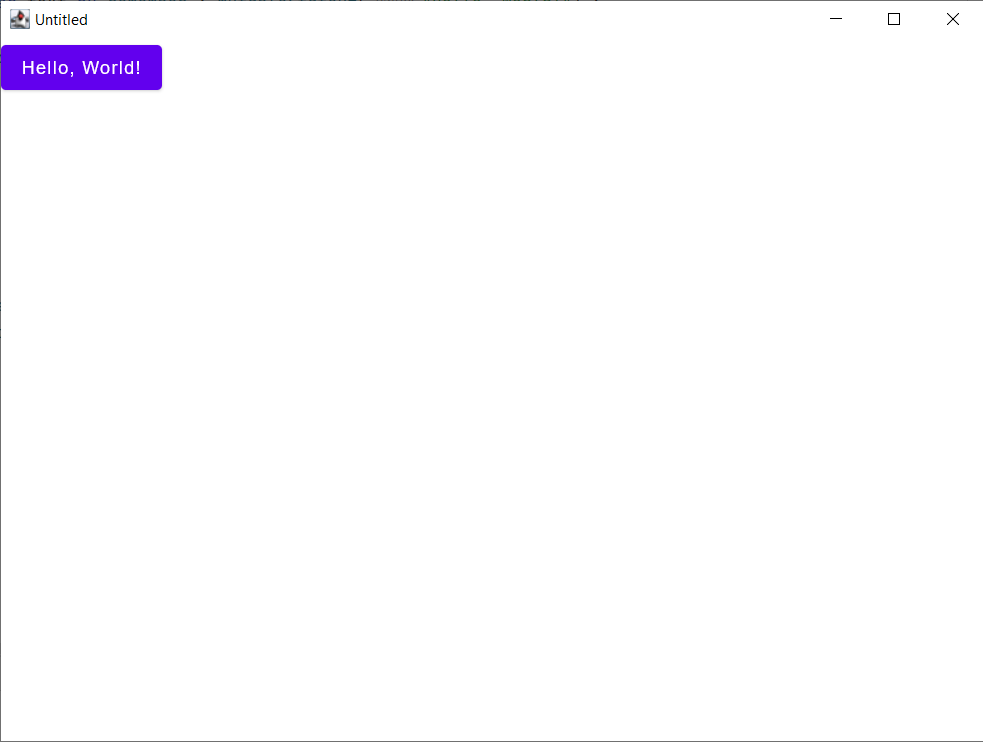
- After the project loads, run ‘Main.kt’ to ensure that you have everything working. It should look similar to the following picture:
- Let’s add an app bar. Replace the code in Main.kt with the following:
import androidx.compose.material.MaterialTheme import androidx.compose.desktop.ui.tooling.preview.Preview import androidx.compose.material.Button import androidx.compose.material.Icon import androidx.compose.material.IconButton import androidx.compose.material.Scaffold import androidx.compose.material.Text import androidx.compose.material.TopAppBar import androidx.compose.material.icons.Icons import androidx.compose.material.icons.filled.Add import androidx.compose.material.icons.filled.Favorite import androidx.compose.material.icons.filled.Menu import androidx.compose.runtime.Composable import androidx.compose.runtime.getValue import androidx.compose.runtime.mutableStateOf import androidx.compose.runtime.remember import androidx.compose.runtime.setValue import androidx.compose.ui.window.Window import androidx.compose.ui.window.application @Composable @Preview fun App() < var text by remember < mutableStateOf("Hello, World!") >MaterialTheme < Scaffold( topBar = < MyTopAppBar() >) < Button(onClick = < text = "Hello, Desktop!" >) < Text(text) >> > > fun main() = application < Window(onCloseRequest = ::exitApplication) < App() >> @Composable fun MyTopAppBar() < TopAppBar( title = < Text("Simple TopAppBar") >, navigationIcon = < IconButton(onClick = < /* doSomething() */ >) < Icon(Icons.Filled.Menu, contentDescription = null) >>, actions = < // RowScope here, so these icons will be placed horizontally IconButton(onClick = < /* doSomething() */ >) < Icon(Icons.Filled.Favorite, contentDescription = "Localized description") >IconButton(onClick = < /* doSomething() */ >) < Icon(Icons.Filled.Add, contentDescription = "Localized description") >> ) > 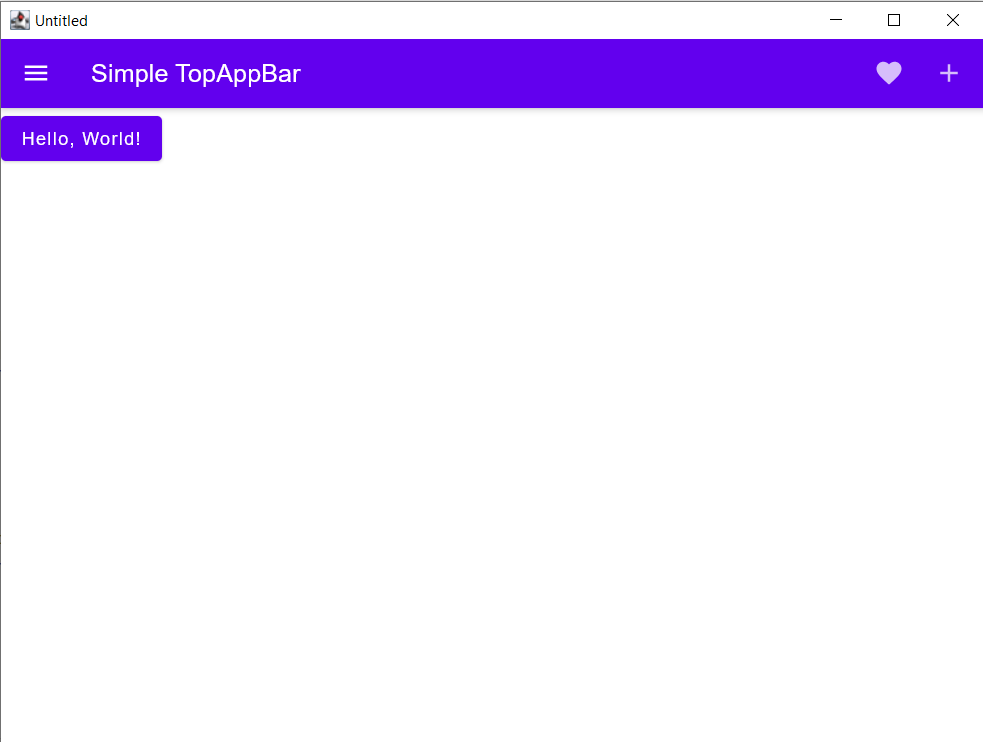
To learn more about the available GUIs and views, see https://developer.android.com/jetpack/compose/layouts
Now, let’s create the executable file and run the app on the desktop!
- In the terminal, at the root of the project, run ./gradlew createDistributable
- Confirm that your runnable app is in ‘build/compose/binaries/main/app/’
- If you are on Windows, then run the EXE (or MSI) file. The other supported targets/platforms are macOS (.dmg, .pkg) and Linux (.deb, .rpm)
Congrats for making your first Kotlin desktop app! Feel free to reach out for any questions, comments, or support. 🙂
Начните работу с Kotlin/JVM
В этом руководстве показано,как использовать IntelliJ IDEA для создания консольного приложения.
Для начала сначала загрузите и установите последнюю версию IntelliJ IDEA .
Создать проект
- В IntelliJ IDEA выберите Файл | Новый | Проект .
- На панели слева выберите New Project .
- Назовите новый проект и при необходимости измените его местоположение. Установите флажок «Создать репозиторий Git» , чтобы поместить новый проект под контроль версий. Вы сможете сделать это позже в любое время.
- В списке языков выберите Kotlin .
- Выберите систему сборки IntelliJ . Это собственный конструктор, который не требует загрузки дополнительных артефактов. Если вы хотите создать более сложный проект, требующий дополнительной настройки, выберите Maven или Gradle. Для Gradle выберите язык скрипта сборки: Kotlin или Groovy.
- В списке JDK выберите JDK , который вы хотите использовать в своем проекте.
- Если JDK установлен на вашем компьютере, но не определен в IDE, выберите Добавить JDK и укажите путь к домашнему каталогу JDK.
- Если на вашем компьютере нет необходимого JDK, выберите Загрузить JDK .
- Включите параметр «Добавить пример кода» , чтобы создать файл с образцом «Hello World!» заявление.
- Click Create.
Создайте приложение
- Если вы выбрали систему сборки Gradle, в вашем проекте есть файл сценария сборки build.gradle(.kts) .Он включает плагин kotlin(«jvm») и зависимости, необходимые для вашего консольного приложения. Убедитесь, что вы используете последнюю версию плагина:
plugins < kotlin("jvm") version "1.7.20" application >
src каталог содержит Котлин исходные файлы и ресурсы. main.kt файл содержит пример кода , который будет печатать Hello World! .
- name локальной переменной с ключевым словом val . Он получит свое значение из ввода, где вы введете свое имя – readln() . Функция readln() доступна начиная с Kotlin 1.6.0 .
Убедитесь, что у вас установлена последняя версия плагина Kotlin . - Используйте строковый шаблон, добавив знак доллара $ перед этим именем переменной непосредственно в текстовом выводе, например: $name .
fun main() < println("What's your name?") val name = readln() println("Hello, $name!") >
Запустить приложение
Теперь приложение готово к запуску. Самый простой способ сделать это — щелкнуть зеленый значок «Выполнить» в поле и выбрать « Выполнить» «MainKt» .
Введите свое имя и примите приветствие от приложения!
Поздравляем! Вы только что запустили свое первое Kotlin-приложение.
What’s next?
Создав это приложение, вы можете начать глубже погружаться в синтаксис Kotlin: