- Классы
- Одновременное использование разных классов
- Вопросы для проверки
- How To Create Classes With CSS
- Prerequisites
- How CSS Class Selectors Work
- Creating a CSS Class Using a Class Selector
- Adding CSS Classes to Images
- Conclusion
- Tutorial Series: How To Build a Website With CSS
- How to Define a CSS Class Style
- Expert Q&A
- You Might Also Like
Классы
Классы применяют, когда необходимо определить стиль для индивидуального элемента веб-страницы или задать разные стили для одного тега. При использовании совместно с тегами синтаксис для классов будет следующий.
Внутри стиля вначале пишется желаемый тег, а затем, через точку пользовательское имя класса. Имена классов должны начинаться с латинского символа и могут содержать в себе символ дефиса (-) и подчеркивания (_). Использование русских букв в именах классов недопустимо. Чтобы указать в коде HTML, что тег используется с определённым классом, к тегу добавляется атрибут class=»Имя класса» (пример 8.1).
Пример 8.1. Использование классов
HTML5 CSS 2.1 IE Cr Op Sa Fx
Для искусственного освещения помещения применяются люминесцентные лампы. Они отличаются высокой световой отдачей, продолжительным сроком службы, малой яркостью светящейся поверхности, близким к естественному спектральным составом излучаемого света, что обеспечивает хорошую цветопередачу.
Результат данного примера показан на рис. 8.1.

Рис. 8.1. Вид текста, оформленного с помощью стилевых классов
Первый абзац выровнен по ширине с текстом чёрного цвета (этот цвет задаётся браузером по умолчанию), а следующий, к которому применен класс с именем cite — отображается синим цветом и с линией слева.
Можно, также, использовать классы и без указания тега. Синтаксис в этом случае будет следующий.
При такой записи класс можно применять к любому тегу (пример 8.2).
Пример 8.2. Использование классов
HTML5 CSS 2.1 IE Cr Op Sa Fx
Согласно , шумовой характеристикой рабочих мест при постоянном шуме являются уровни звуковых давлений в децибелах в октавных полосах. Совокупность таких уровней называется , номер которого численно равен уровню звукового давления в октавной полосе со среднегеометрической частотой 1000 Гц.
Результат применения классов к тегам и показан на рис. 8.2.
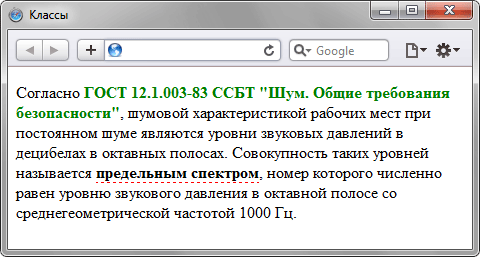
Рис. 8.2. Вид тегов, оформленных с помощью классов
Классы удобно использовать, когда нужно применить стиль к разным элементам веб-страницы: ячейкам таблицы, ссылкам, абзацам и др. В примере 8.3 показано изменение цвета фона строк таблицы для создания «зебры».
Пример 8.3. Использование классов
HTML5 CSS 2.1 IE Cr Op Sa Fx
Название Цвет Твердость по Моосу АлмазБелый 10 Рубин Красный 9 АметистГолубой 7 Изумруд Зеленый 8 СапфирГолубой 9
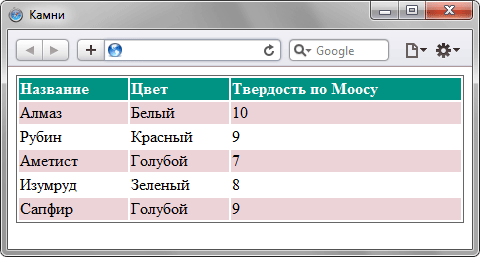
Рис. 8.3. Результат применения классов
Одновременное использование разных классов
К любому тегу одновременно можно добавить несколько классов, перечисляя их в атрибуте class через пробел. В этом случае к элементу применяется стиль, описанный в правилах для каждого класса. Поскольку при добавлении нескольких классов они могут содержать одинаковые стилевые свойства, но с разными значениями, то берётся значение у класса, который описан в коде ниже.
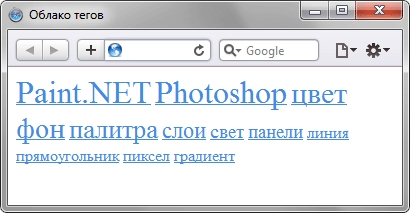
В примере 8.4 показано использование разных классов для создания облака тегов.
Пример 8.4. Сочетание разных классов
HTML5 CSS 2.1 IE Cr Op Sa Fx
Paint.NET Photoshop цвет фон палитра слои свет панели линия прямоугольник пиксел градиент Результат данного примера показан на рис. 8.4.
В стилях также допускается использовать запись вида .layer1.layer2 , где layer1 и layer2 представляют собой имена классов. Стиль применяется только для элементов, у которых одновременно заданы классы layer1 и layer2 .
Вопросы для проверки
1. Какое имя класса написано правильно?
2. Какой цвет будет у слова «потока» в коде?
При использовании следующего стиля?
4. Какое имя класса следует добавить к тегу , чтобы текст был одновременно жирным и красного цвета, если имеется следующий стиль?
How To Create Classes With CSS
In this tutorial, you will create a CSS class selector, which will allow you to apply CSS rules only to HTML elements that are assigned the class. CSS class selectors are useful when you want to apply different style rules for different instances of the same HTML element.
Prerequisites
To follow this tutorial, make sure you have set up the necessary files and folders as instructed in a previous tutorial in this series How To Set Up You CSS and HTML Practice Project.
How CSS Class Selectors Work
A CSS class selector allows you to assign style rules to HTML elements that you designate with that class rather than all instances of a certain element. Unlike HTML elements (such as
, or ), whose names are predetermined, class names are chosen by the developer when they create the class. Class names are always preceded by a . , which can help you distinguish between tag selectors and class selectors in CSS files.
A CSS rule for a class selector is written in the same way as a rule for a tag selector, with the exception of the . prepended to the class name:
To use a class when adding HTML content to your webpage, you must specify it in the opening tag of an HTML element using the class attribute in your HTML document like so:
h1 class=".red-text">Content.element> Creating a CSS Class Using a Class Selector
Let’s begin exploring CSS classes in practice. Erase everything in your styles.css file and add the following code snippet to specify a rule for the class red-text :
After adding the code snippet to your styles.css file, save the file.
Return to your index.html and erase everything but the first line of code that links to your CSS stylesheet. Then add the following HTML code snippet:
p class="red-text">Here is the first sample of paragraph text.p> Note that the class name is not prepended here with a . as it is when being used as a selector for a CSS rule. Your entire index.html file should have the following contents:
. . . link rel="stylesheet" href="css/styles.css"> p> In this code snippet you have added text using the HTML
tag. But you have also specified the red-text class by adding the highlighted class attribute class=»red-text» inside the opening HTML tag.
Save your index.html file and load it in the browser. (For instructions on loading an HTML file, please visit our tutorial step How To View An Offline HTML File In Your Browser).
You should receive a webpage with red text:

Let’s add an additional CSS class to explore styling different pieces of
text content with different classes. Add the following code snippet to your styles.css file (after your CSS rule for “red-text”):
.yellow-background-text background-color: yellow; > This CSS rule declares that the class yellow-background-text is assigned the yellow value for the background-color property. Any HTML text element assigned this class will have a yellow background. Note that the use of the word text in the class yellow-background-*text* is for human readability purposes only. You do not need to include the word text in your class names for classes assigned to HTML text.
To apply this new CSS class, return to your index.html file and add the following line of code to the bottom:
p class="yellow-background-text"> Here is the second sample of paragraph text.p> In this code snippet, you have added some text content with the
element and specified the yellow-background-text class. Save the file and reload it in your browser. You should have a webpage with two different sentences, the first one red and the second one with a yellow background:

Note that you can add more than one class to an HTML tag. Try adding both classes to a single text element by adding the following line to your index.html file:
p class="red-text yellow-background-text">Here is a third sample of text.p> Note that the class names are only separated by a space. Save the file and reload it in the browser. You should receive something like this:

Your third line of text should now be styled according to the property values set in the red-text class and the yellow-background-text class and have a red font and yellow background.
Adding CSS Classes to Images
CSS classes can also be applied to other HTML elements, such as images. To explore using CSS classes for images, erase the content in your styles.css file and add the following code snippet:
.black-img border: 5px dotted black; border-radius: 10%; > .yellow-img border: 25px solid yellow; border-radius: 50%; > .red-img border: 15px double red; > Here you have created CSS rules for three different classes that can be applied to the HTML tag. Before you move on, let’s briefly study what we’ve declared in each ruleset:
- The first CSS rule declares that the class black-img should have a black , dotted border five pixels wide and a border-radius sized at 10%, which gives the element rounded corners.
- The second CSS rule declares that the class yellow-img should have a yellow , solid border 25 pixels wide and a border-radius sized at 50%, which gives the element a circular shape.
- The third CSS rule declares that the class red-img should have a red , double border 15 pixels wide. You have not set a border-radius, so the border will conform to the element’s shape.
Save the styles.css file. Then erase everything from your index.html file (except for the first line of code: ) and add the following code snippet:
img src="https://css.sammy-codes.com/images/small-profile.jpeg" class="black-img"> img src="https://css.sammy-codes.com/images/small-profile.jpeg" class="yellow-img"> img src="https://css.sammy-codes.com/images/small-profile.jpeg" class="red-img"> Each of these three lines of HTML code add an image to the HTML document and assign it one of the three classes you just added to the styles.css file. Note that you are sourcing the image from an online location. You can also use your own image by specifying the file path as instructed in our tutorial How To Add Images To Your Webpage With HTML.
Save your index.html file and load it in the browser. You should receive something like this:

Your webpage should now display three images, each styled with the different specifications of their assigned class.
To continue exploring CSS classes, trying creating new classes with different rulesets and applying them to different types of HTML content. Note that properties and values specified in class declaration blocks will only work on elements that they are intended for. For example, a font-color declaration will not change the color of an image border. Likewise, a height declaration will not change the size of the font.
Conclusion
You have now explored how to create classes, assign them specific property values, and apply them to text and image content. You will return to using classes when you begin building the website in the second half of this tutorial series.
In the next tutorial, you will create CSS ID selectors, which work similarly as class selectors with the exception of some unique features.
Thanks for learning with the DigitalOcean Community. Check out our offerings for compute, storage, networking, and managed databases.
Tutorial Series: How To Build a Website With CSS
This tutorial is part of a series on creating and customizing this website with CSS, a stylesheet language used to control the presentation of websites. You may follow the entire series to recreate the demonstration website and gain familiarity with CSS or use the methods described here for other CSS website projects.
Before proceeding, we recommend that you have some knowledge of HTML, the standard markup language used to display documents in a web browser. If you don’t have familiarity with HTML, you can follow the first ten tutorials of our series How To Build a Website With HTML before starting this series.
How to Define a CSS Class Style
wikiHow is a “wiki,” similar to Wikipedia, which means that many of our articles are co-written by multiple authors. To create this article, volunteer authors worked to edit and improve it over time.
This article has been viewed 77,346 times.
Classes are a nice feature in HTML that allows you to assign a certain name to an element. They can be styled using CSS. If you don’t know how to use those features, this article will help you.


Create the basic HTML skeleton. As a reminder, it’s an opening HTML tag, an opening head tag, a closing head tag, an opening body tag, a closing body tag, and a closing html tag.


Give the HTML element a class. Do this by inserting «class=»classname» inside the opening tag for your element.


Expert Q&A
You can do the exact same thing with ID styles. To call an ID style in CSS, put «#idname < >» in your CSS document.

You Might Also Like


How to Insert a Hyperlink Using Rich Text or HTML: 3 Methods