- How to install Jupyter Notebook on Windows?
- Installing Jupyter Notebook using Anaconda:
- Installing Jupyter Notebook using pip:
- Installing the classic Jupyter Notebook interface#
- Prerequisite: Python#
- Installing Jupyter using Anaconda and conda#
- Alternative for experienced Python users: Installing Jupyter with pip#
- Using Jupyter Notebook#
- Opening the Jupyter Notebook application#
- Using example notebooks#
- Creating a new Jupyter Notebook#
How to install Jupyter Notebook on Windows?
Jupyter Notebook is an open-source web application that allows you to create and share documents that contain live code, equations, visualizations, and narrative text. Uses include data cleaning and transformation, numerical simulation, statistical modeling, data visualization, machine learning, and much more.
Jupyter has support for over 40 different programming languages and Python is one of them. Python is a requirement (Python 3.3 or greater, or Python 2.7) for installing the Jupyter Notebook itself.
Jupyter Notebook can be installed by using either of the two ways described below:
- Using Anaconda:
Install Python and Jupyter using the Anaconda Distribution, which includes Python, the Jupyter Notebook, and other commonly used packages for scientific computing and data science. To install Anaconda, go through How to install Anaconda on windows? and follow the instructions provided. - Using PIP:
Install Jupyter using the PIP package manager used to install and manage software packages/libraries written in Python. To install pip, go through How to install PIP on Windows? and follow the instructions provided.
Installing Jupyter Notebook using Anaconda:
Anaconda is an open-source software that contains Jupyter, spyder, etc that are used for large data processing, data analytics, heavy scientific computing. Anaconda works for R and python programming language. Spyder(sub-application of Anaconda) is used for python. Opencv for python will work in spyder. Package versions are managed by the package management system called conda.
To install Jupyter using Anaconda, just go through the following instructions:
- Launch Anaconda Navigator:
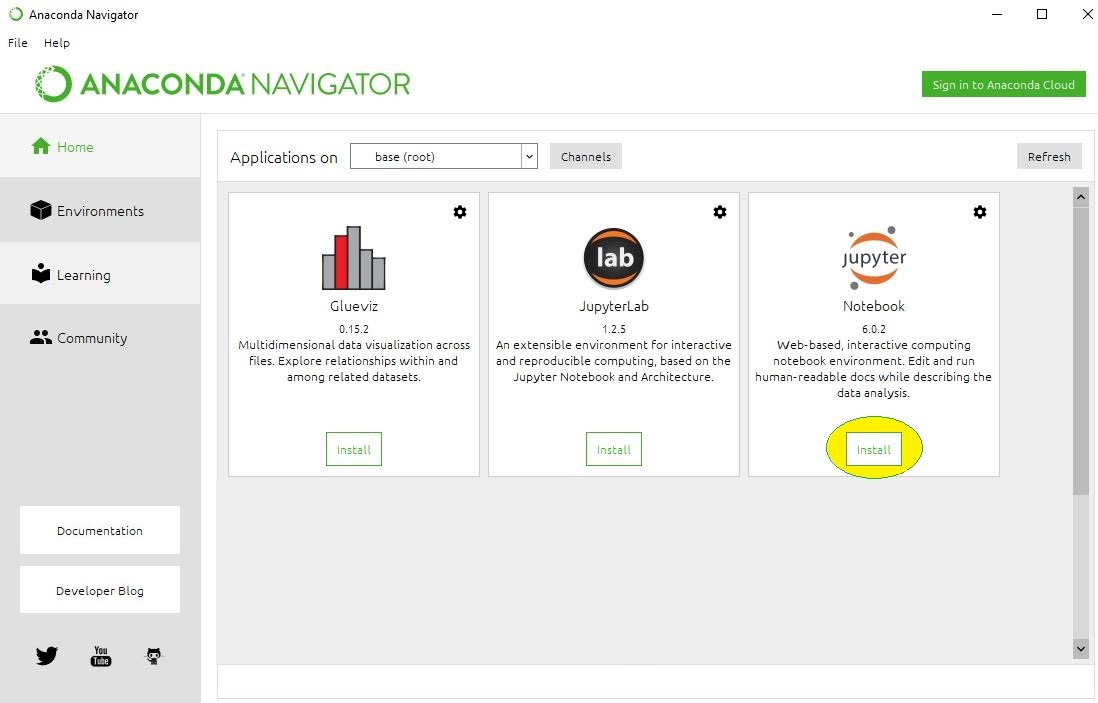
- Click on the Install Jupyter Notebook Button:
- Beginning the Installation:
- Loading Packages:
- Finished Installation:
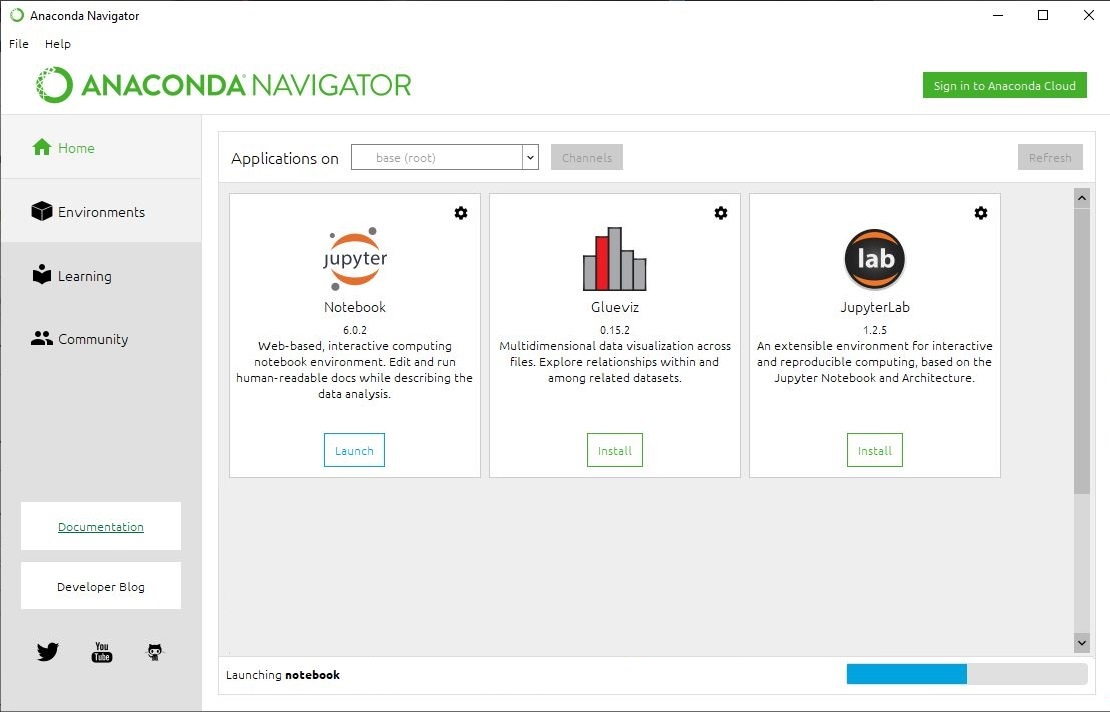
Launching Jupyter:
Installing Jupyter Notebook using pip:
PIP is a package management system used to install and manage software packages/libraries written in Python. These files are stored in a large “on-line repository” termed as Python Package Index (PyPI).
pip uses PyPI as the default source for packages and their dependencies.
To install Jupyter using pip, we need to first check if pip is updated in our system. Use the following command to update pip:
python -m pip install --upgrade pip
After updating the pip version, follow the instructions provided below to install Jupyter:
python -m pip install jupyter

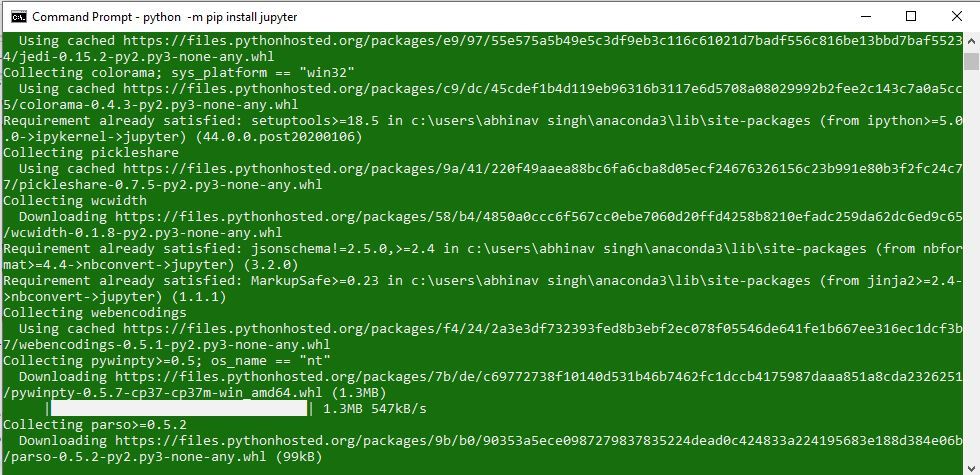


Launching Jupyter:
Use the following command to launch Jupyter using command-line:
Installing the classic Jupyter Notebook interface#
This section includes instructions on how to get started with Jupyter Notebook. But there are multiple Jupyter user interfaces one can use, based on their needs. Please checkout the list and links below for additional information and instructions about how to get started with each of them.
This information explains how to install the Jupyter Notebook and the IPython kernel.
Prerequisite: Python#
While Jupyter runs code in many programming languages, Python is a requirement for installing the Jupyter Notebook. The Python version required differs between Jupyter Notebook releases (e.g. Python 3.6+ for Notebook v6.3, and Python 3.7+ for Notebook v7) .
We recommend using the Anaconda distribution to install Python and Jupyter. We’ll go through its installation in the next section.
Installing Jupyter using Anaconda and conda#
For new users, we highly recommend installing Anaconda. Anaconda conveniently installs Python, the Jupyter Notebook, and other commonly used packages for scientific computing and data science.
Use the following installation steps:
- Download Anaconda. We recommend downloading Anaconda’s latest Python 3 version (currently Python 3.9).
- Install the version of Anaconda which you downloaded, following the instructions on the download page.
- Congratulations, you have installed Jupyter Notebook. To run the notebook:
Alternative for experienced Python users: Installing Jupyter with pip#
Jupyter installation requires Python 3.3 or greater, or Python 2.7. IPython 1.x, which included the parts that later became Jupyter, was the last version to support Python 3.2 and 2.6.
As an existing Python user, you may wish to install Jupyter using Python’s package manager, pip , instead of Anaconda.
First, ensure that you have the latest pip; older versions may have trouble with some dependencies:
Then install the Jupyter Notebook using:
(Use pip if using legacy Python 2.)
Congratulations. You have installed Jupyter Notebook. See Running the Notebook for more details.
Upgrading Jupyter Notebook
Using Jupyter Notebook#
The Jupyter Notebook application allows you to create and edit documents that display the input and output of a Python or R language script. Once saved, you can share these files with others.
NOTE: Python and R language are included by default, but with customization, Notebook can run several other kernel environments.
This page provides a brief introduction to Jupyter Notebooks for AEN users.
For the official Jupyter Notebook user instructions, see Jupyter documentation.
For information on the notebook extensions available in AEN, see Using Jupyter Notebook extensions .
Opening the Jupyter Notebook application#
- Log in to AEN.
- Select the project you want to work on, or create a new project and open it.
- On the project home page, click the Jupyter Notebook icon:
Jupyter Notebook opens in a new browser window:
TIP: You can see the same File Manager in the Terminal, Workbench, and Viewer applications.
Using example notebooks#
The Examples folder in Jupyter Notebook contains several types of Notebook examples created in Python—and one with R language—kernel environments.
Open any example notebook to experiment and see how it works.
Creating a new Jupyter Notebook#
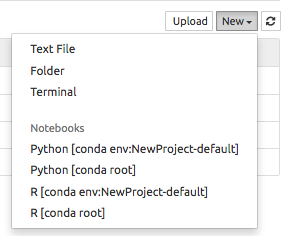
- An the top right of the Files tab, click the New button.
- Select the kernel environment to create your new notebook in. NOTE: Customizable Python and R Language kernel environments are automatically created for you during project creation.
- Your project’s default conda env kernels are a cloned copy of the root environment. You can customize them and install and delete additional packages.
- Root environment is managed by your Administrator. You cannot make or save any changes to it.
- You can switch between Python, R language and any other custom kernels in the notebook as you work in your notebook. For more information, see Using the Synchronize Environments extension .
The new notebook is saved in the related project directory and displayed.





 Jupyter Notebook opens in a new browser window:
 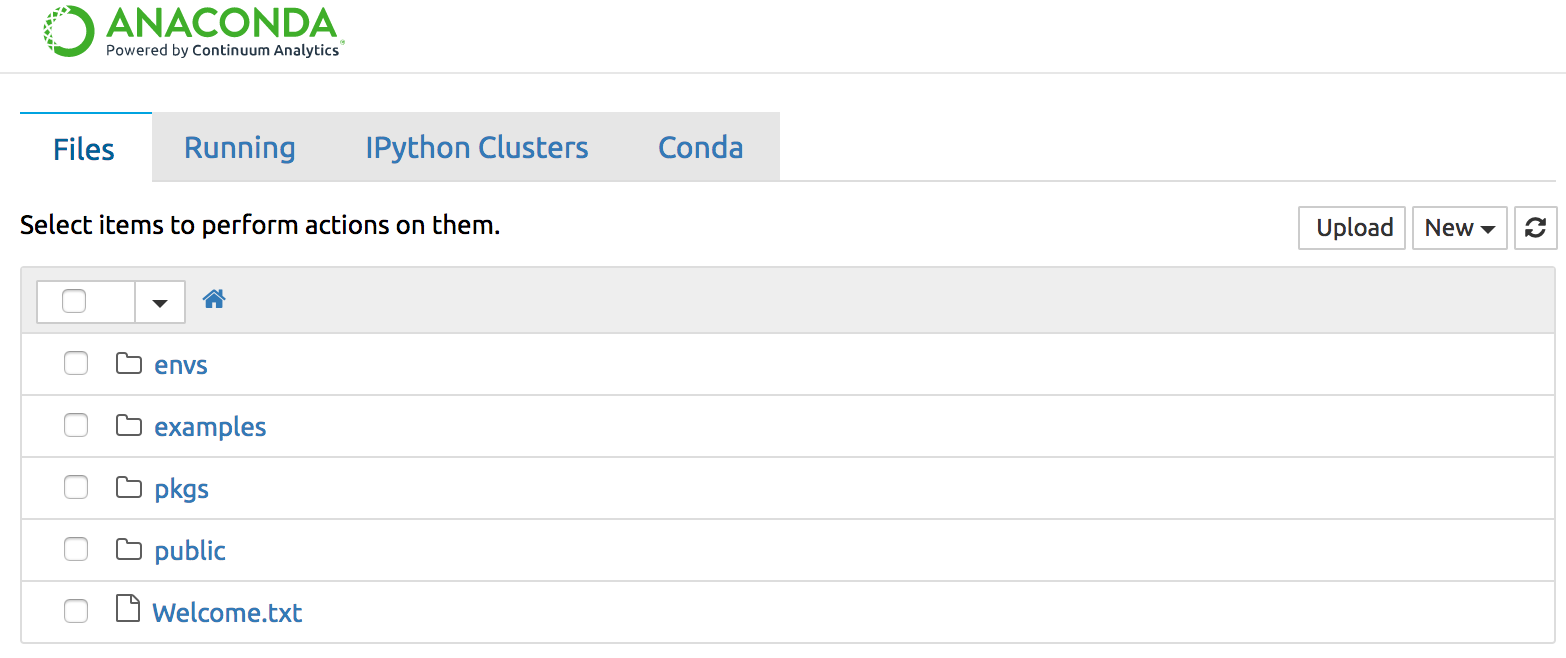 TIP: You can see the same File Manager in the Terminal, Workbench, and Viewer applications.