- Jetpack Compose Desktop
- Build Desktop Apps With Kotlin And Compose Multiplatform For Desktop
- 1 Introduction
- 2 Getting started
- 3 Learning by practice: implementing a simple calculator
- Entry point
- DisplayPanel
- Keyboard
- Think. Do. Learn.
- How to create a desktop app using Kotlin and Compose Desktop
- Compose Multiplatform
- Declarative framework for sharing UIs across multiple platforms. Based on Kotlin and Jetpack Compose.
- Supported platforms
- Accelerated UI development
- Android UI skills for other platforms
- An excellent ecosystem
- Easy integration with every platform
- Component-level reuse
- Try Compose Multiplatform
Jetpack Compose Desktop
Несколько дней назад компания JetBrains в своём блоге рассказала о выходе нового инструмента для создания дескопных приложений Jetpack Compose Desktop. Компания с русскими корнями не особо жалует русскоязычную аудиторию и не спешит рассказать нам о новинке, поэтому возьму на себя роль популяризатора.
Разработчики под Android уже могли слышать про Compose, которая доступна в предварительной версии Android Studio 4.2. Я не любитель устанавливать бета-версии, поэтому не мог пощупать новую технологию своими руками. Но когда услышал новость про Compose Desktop, то не удержался и поставил себе IntelliJ IDEA Early Access Program.
Для начала я установил версию IDEA 2020.3, где уже есть все необходимые настройки и шаблоны.
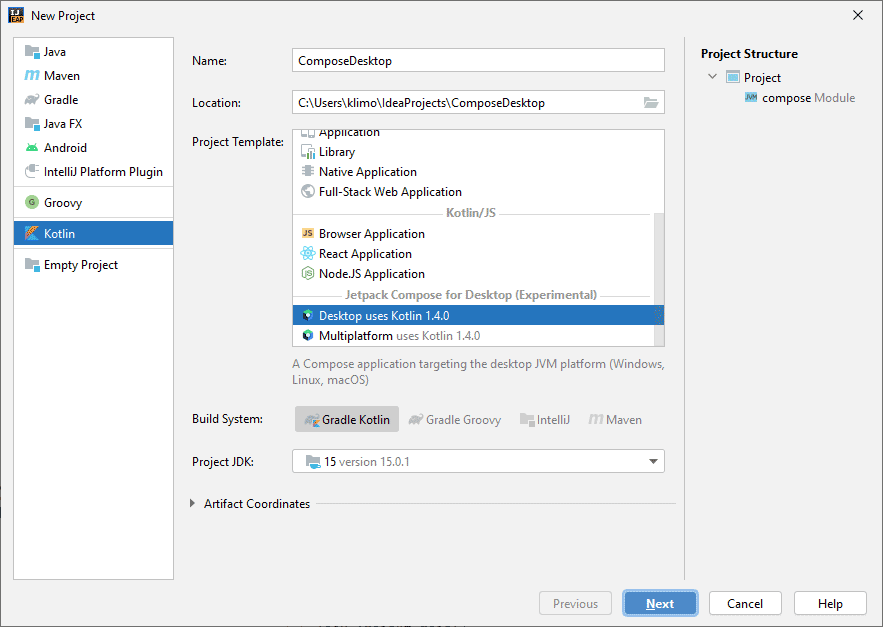
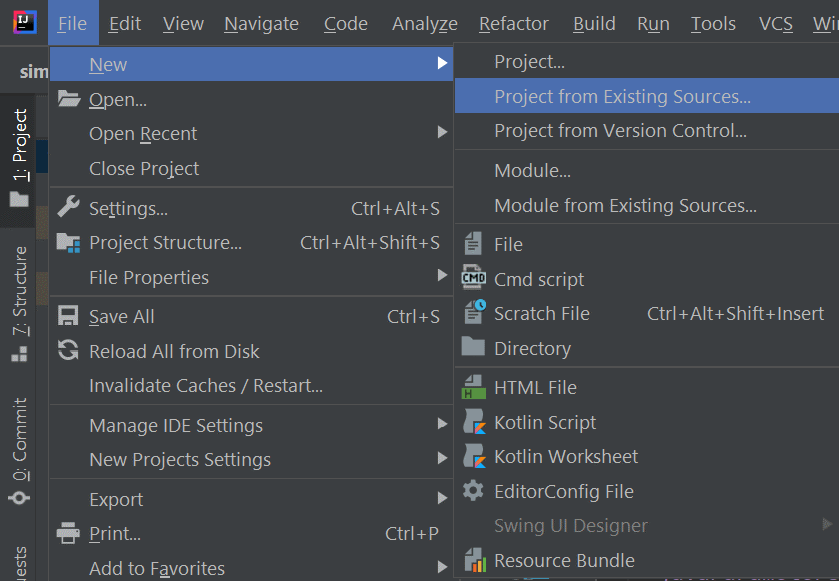
Создаём новый проект и выбираем шаблон Desktop uses Kotlin 1.4.0. Минимальная версия Java SDK должна быть не ниже 11. Проверял на Windows 10, других платформ у меня нет.
Среда разработки сгенерирует первый проект и основной файл main.kt будет иметь следующий вид.
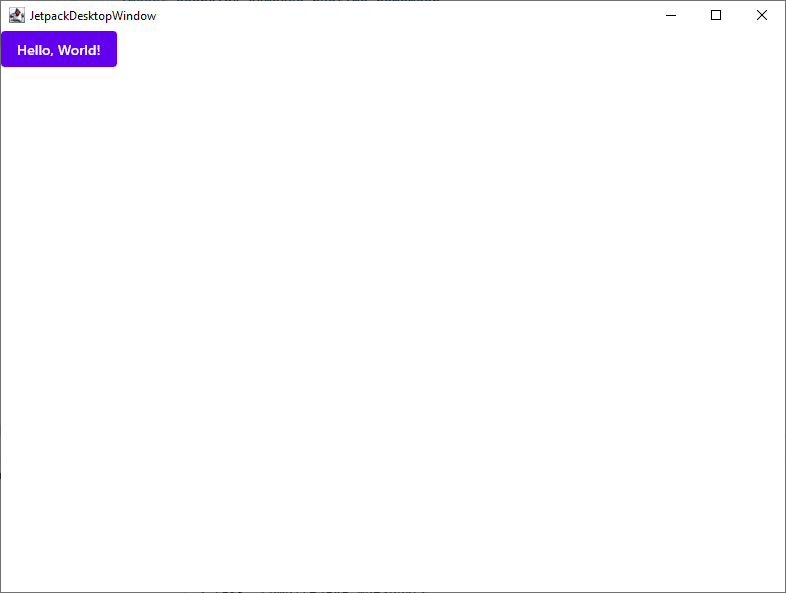
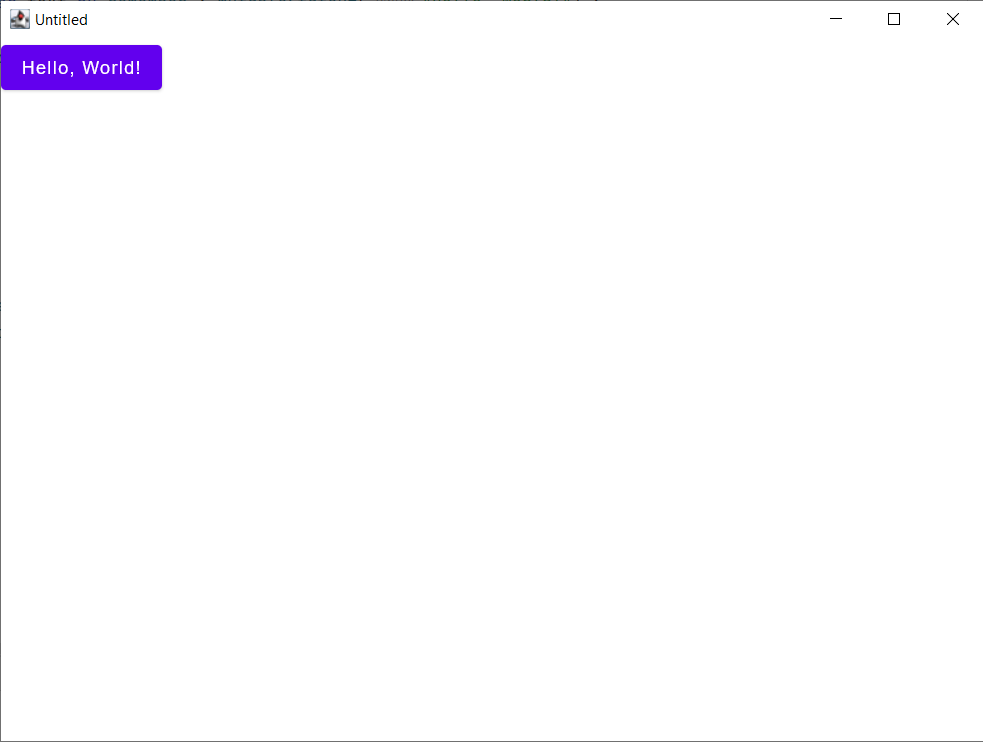
import androidx.compose.desktop.Window import androidx.compose.material.Text import androidx.compose.material.Button import androidx.compose.material.MaterialTheme import androidx.compose.runtime.getValue import androidx.compose.runtime.mutableStateOf import androidx.compose.runtime.remember import androidx.compose.runtime.setValue fun main() = Window < var text by remember < mutableStateOf("Hello, World!") >MaterialTheme < Button(onClick = < text = "Hello, Desktop!" >) < Text(text) >> >Запущенное приложение выглядит следующим образом.
Довольно непривычно видеть имена пакетов androidx для десктоп-приложений.
Усложним приложение: изменим заголовок окна по умолчанию, установим размеры окна, добавим вторую кнопку.
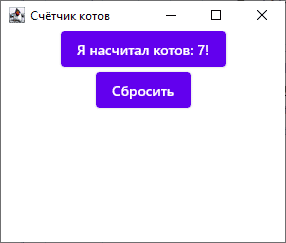
import androidx.compose.desktop.Window import androidx.compose.foundation.layout.Arrangement import androidx.compose.foundation.layout.Column import androidx.compose.foundation.layout.fillMaxSize import androidx.compose.material.Text import androidx.compose.material.Button import androidx.compose.material.MaterialTheme import androidx.compose.runtime.getValue import androidx.compose.runtime.mutableStateOf import androidx.compose.runtime.remember import androidx.compose.runtime.setValue import androidx.compose.ui.Alignment import androidx.compose.ui.Modifier import androidx.compose.ui.unit.IntSize import androidx.compose.ui.unit.dp fun main() = Window(title = "Счётчик котов", size = IntSize(300, 250)) < var count by remember < mutableStateOf(0) >MaterialTheme < Column(Modifier.fillMaxSize(), Arrangement.spacedBy(5.dp)) < Button(modifier = Modifier.align(Alignment.CenterHorizontally), onClick = < count++ >) < Text(if (count == 0) "Hello Kitty" else "Я насчитал котов: $count!") >Button(modifier = Modifier.align(Alignment.CenterHorizontally), onClick = < count = 0 >) < Text("Сбросить") >> > >Теперь мы можем считать усатых-полосатых.
Пока сложно сказать, приживётся ли подобный способ создания приложений для Android и десктопа. Многие разработчики уже вовсю восторгаются и пишут хвалебные посты в интернете. Но сама возможность использовать знакомую среду разработки и свои навыки не только для Android, но и для Windows (Mac, Linux) мне нравится. Я буду смотреть за развитием проекта, который пока находится в альфа-версии.
Build Desktop Apps With Kotlin And Compose Multiplatform For Desktop
How to design cross platform desktop GUI applications using Kotlin and the Compose Multiplatform library by JetBrains.
1 Introduction
Compose Multiplatform is a UI framework made by Jetbrains to simplify and accelerate desktop application development using Kotlin with a reactive and functional API. It targets the JVM and thus can be used to build cross platform GUI apps. It also supports other platforms such as web.
It’s based on the Jetpack Compose declarative UI Toolkit made by Google for Android. Using Kotlin to design user interfaces promotes less bugs, better tooling support and more concise and robust code. This is achieved using a declarative UI model based on composable functions, which take in parameters to describe the UI logic without returning anything and must be free of side-effects. More details about composables are presented in the Compose mental model documentation.
Although this tutorial’s main subject is Compose Multiplatform for Desktop, but the concepts and most code snippets are also applicable to Android’s Jetpack Compose.
2 Getting started
JDK 11 or later is required. The ‘JAVA_HOME’ environment variable should be set with the JDK path location. IntelliJ IDEA Community Edition or Ultimate Edition 20.2 or later are the preferred IDEs. Follow this tutorial if you need to install JDK 11 and IntelliJ IDEA.
- Download the Compose for Desktop project starter from the following link
- Extract and move the folder to your workspace
- Open IntelliJ IDEA and open the project from your workspace
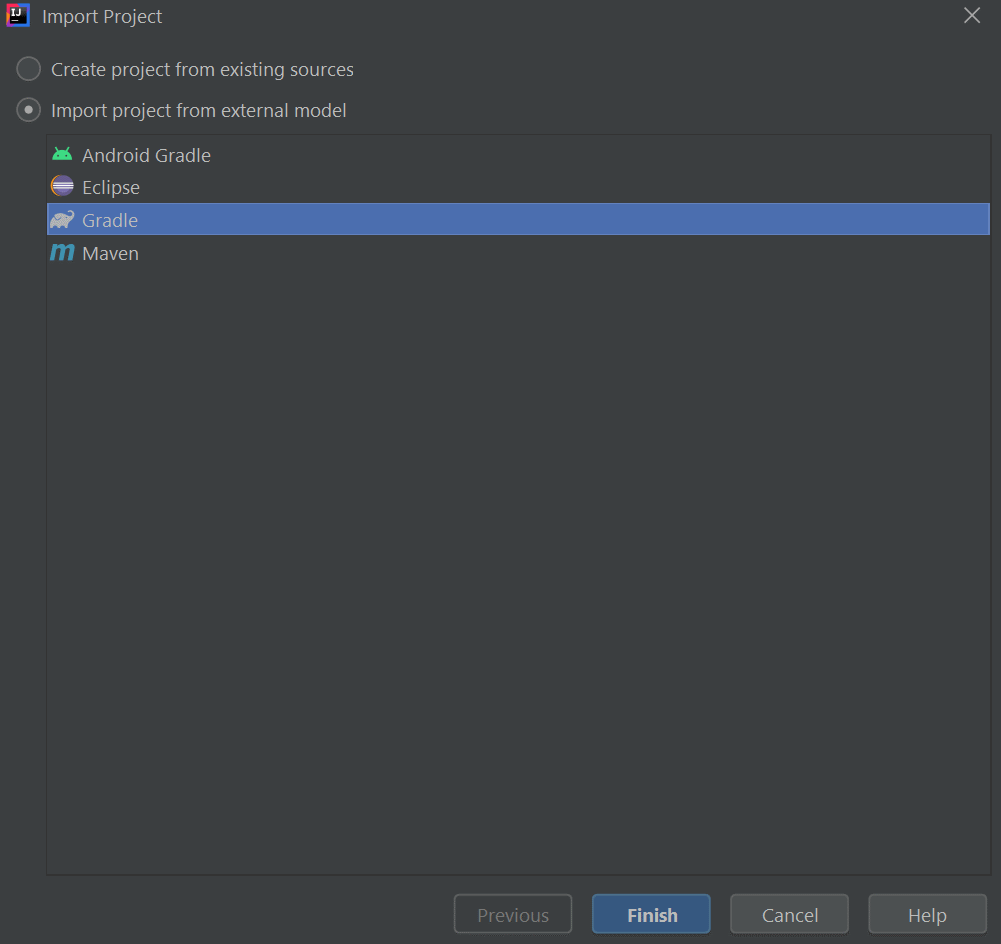
- Choose Gradle Kotlin as a build system
- Open src/main/kotlin/main.kt , override the content with the following:
import androidx.compose.material.Text import androidx.compose.ui.window.Window import androidx.compose.ui.window.application fun main() = application < Window(onCloseRequest = ::exitApplication) < Text("Hello, World!") >> 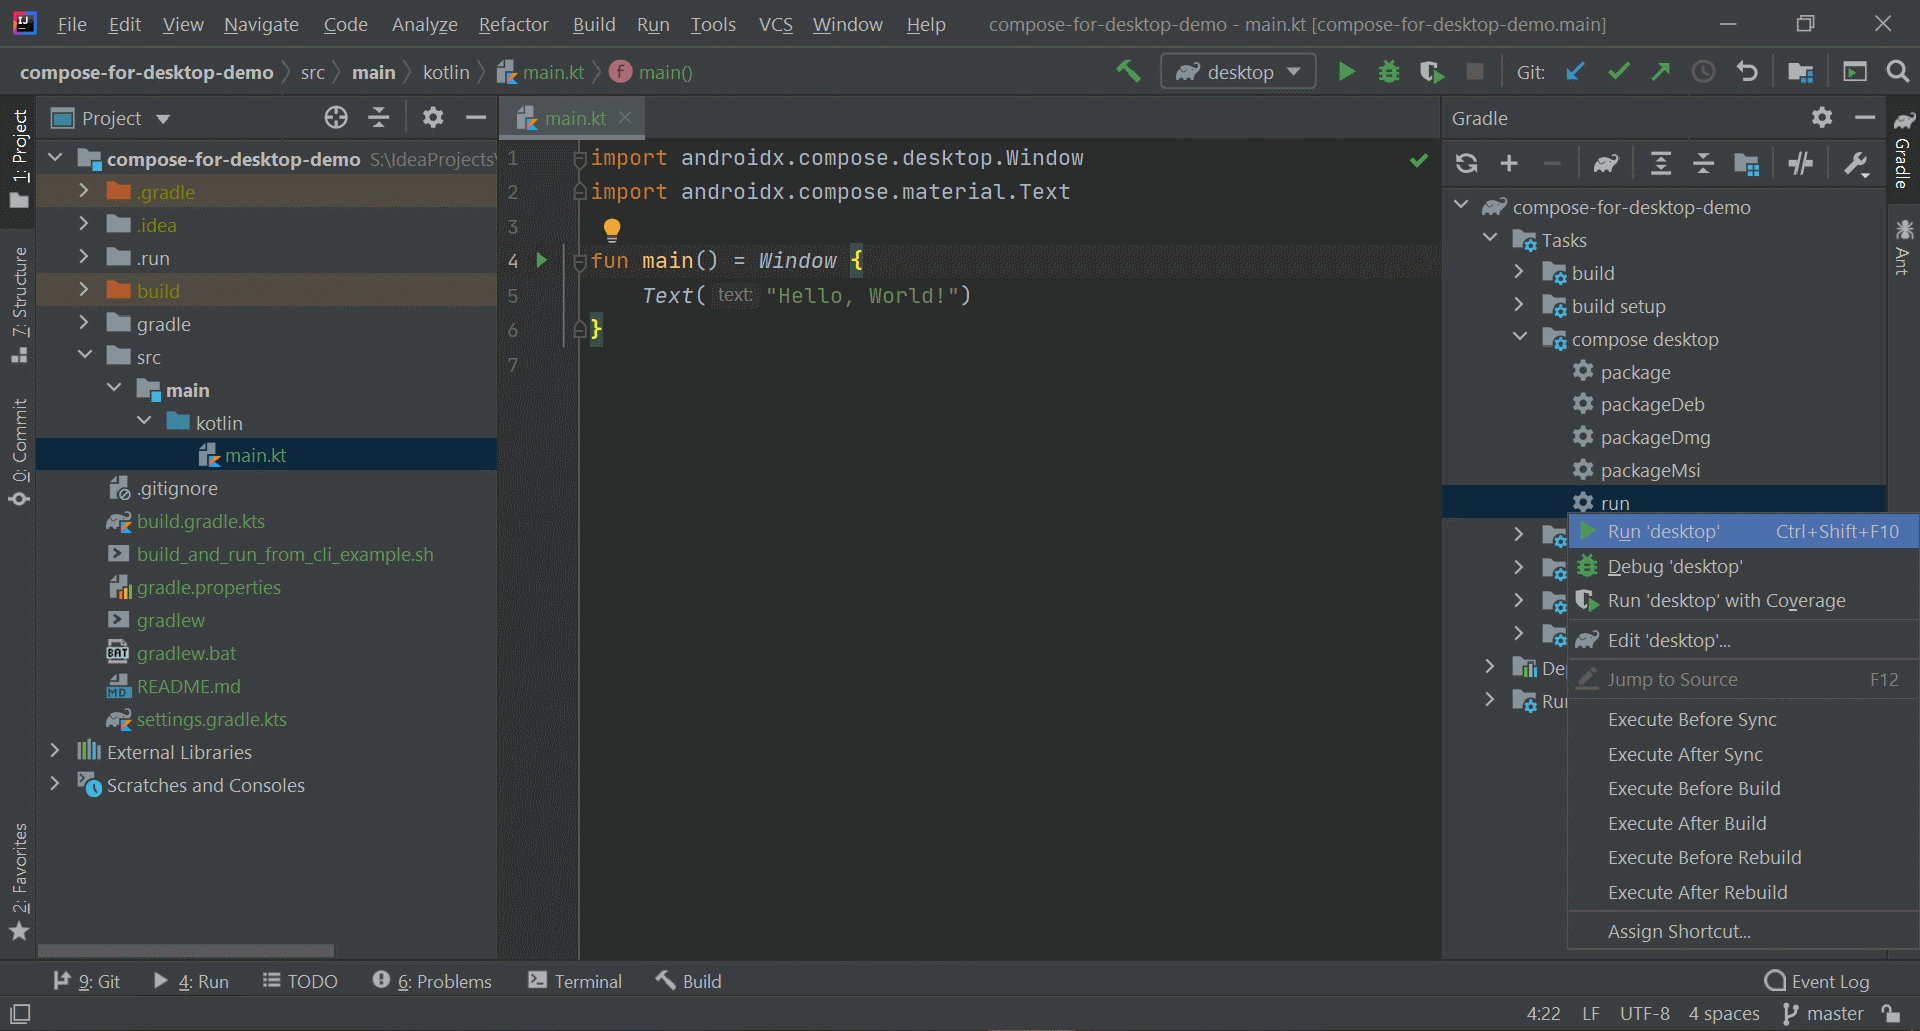
3 Learning by practice: implementing a simple calculator
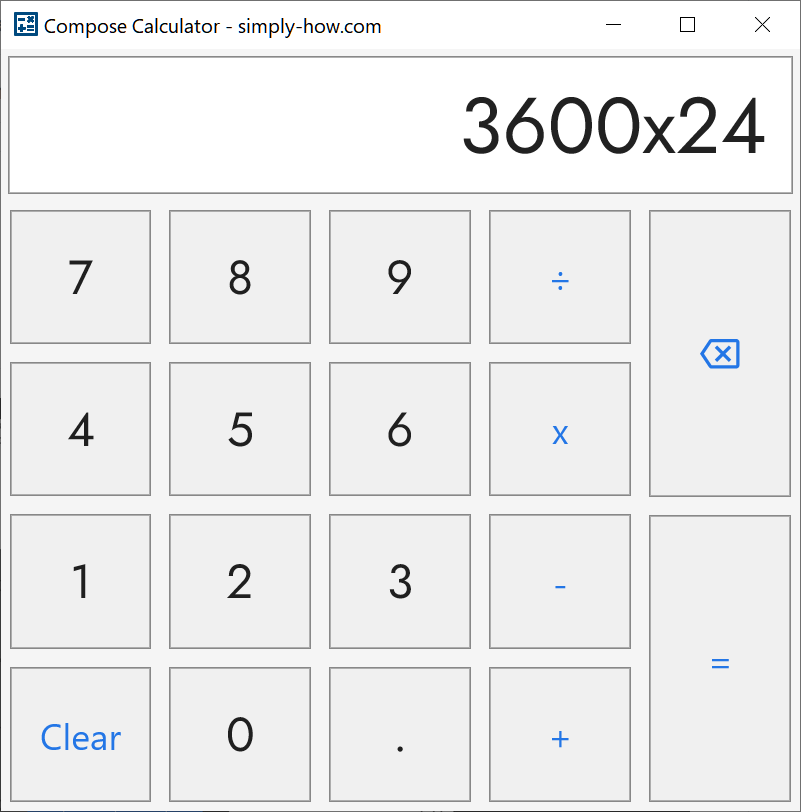
To dig deeper into Compose for Desktop concepts and learn it by practice, we will implement in this section a calculator UI. The resulting UI will look like this:
Entry point
const val DEFAULT_WIDTH = 500 const val DEFAULT_HEIGHT = 500 fun main() = Window( title = "Compose Calculator - simply-how.com", size = IntSize(DEFAULT_WIDTH, DEFAULT_HEIGHT), icon = Assets.WindowIcon ) < MaterialTheme(colors = lightThemeColors) < val mainOutput = remember < mutableStateOf(TextFieldValue("0")) >Column(Modifier.fillMaxHeight()) < DisplayPanel( Modifier.weight(1f), mainOutput ) Keyboard( Modifier.weight(4f), mainOutput ) >> >- The app’s window has a customized title, size (dimensions) and icon. More window customization are described here.
- An application-wide theme is applied that follow Material Design principles. Learn more about theming here.
- remember is used to create an internal state in the composable. Learn more about state management here.
- Column is used to place items vertically on the screen. Learn about the available layouts here.
- Modifier is used to customize the composable’s appearance and behavior. For example, Modifier.weight is used to size the Column’s children by dividing the available space proportionally. More about Modifiers here.
DisplayPanel
DisplayPanel is the top component of the calculator.
@Composable fun DisplayPanel( modifier: Modifier, mainOutput: MutableState ) < Column( modifier = modifier .fillMaxWidth() .background(MaterialTheme.colors.surface) .padding(CALCULATOR_PADDING) .background(Color.White) .border(color = Color.Gray, width = 1.dp) .padding(start = 16.dp, end = 16.dp), verticalArrangement = Arrangement.Center, horizontalAlignment = Alignment.End ) < Text( text = mainOutput.value.text, style = TextStyle( fontSize = 48.sp, fontFamily = jostFontFamily ), overflow = TextOverflow.Ellipsis, softWrap = false, maxLines = 1, ) >>- We can find here a more complex usage of Modifiers.
- The calculator’s output is displayed using the Text composable with custom styling and behavior.
- TextFieldValue holds the output text’s editing state. It was initialized in the app’s entry point, and is modified by the keyboard keys.
Keyboard
This is the second component of the calculator placed below DisplayPanel .
@Composable fun Keyboard( modifier: Modifier, mainOutput: MutableState ) < Surface(modifier) < KeyboardKeys(mainOutput) >> @Composable fun KeyboardKeys(mainOutput: MutableState) < Row(modifier = Modifier.fillMaxSize()) < KeyboardLayout.forEach < keyColumn ->Column(modifier = Modifier.weight(1f)) < keyColumn.forEach < key ->KeyboardKey(Modifier.weight(1f), key, mainOutput) > > > > >- the Surface composable will implicitly use the surface color defined in the app’s Material theme.
- Row is used to to place items horizontally on the screen.
@Composable fun KeyboardKey(modifier: Modifier, key: Key?, mainOutput: MutableState) < if (key == null) < return EmptyKeyView(modifier) >KeyView(modifier = modifier.padding(1.dp), onClick = key.onClick?.let < < it(mainOutput) >> ?: < val textValue = mainOutput.value.text.let < if (it == "0") key.value else it + key.value >mainOutput.value = TextFieldValue(text = textValue) >) < if (key.icon == null) < val textStyle = if (key.type == KeyType.COMMAND) < TextStyle( color = MaterialTheme.colors.primary, fontSize = 22.sp ) >else < TextStyle( fontFamily = jostFontFamily, fontSize = 29.sp ) >Text( text = key.value, style = textStyle ) > else < Icon( asset = key.icon, tint = MaterialTheme.colors.primary ) >> > val KEY_BORDER_WIDTH = 1.dp val KEY_BORDER_COLOR = Color.Gray val KEY_ACTIVE_BACKGROUND = Color.White @Composable fun KeyView( modifier: Modifier = Modifier, onClick: () -> Unit, children: @Composable ColumnScope.() -> Unit ) < val active = remember < mutableStateOf(false) >Column( horizontalAlignment = Alignment.CenterHorizontally, verticalArrangement = Arrangement.Center, modifier = modifier.fillMaxWidth() .padding(CALCULATOR_PADDING) .clickable(onClick = onClick) .background(color = if (active.value) KEY_ACTIVE_BACKGROUND else MaterialTheme.colors.background) .border(width = KEY_BORDER_WIDTH, color = KEY_BORDER_COLOR) .pointerMoveFilter( onEnter = < active.value = true false >, onExit = < active.value = false false >), children = children ) > @Composable fun EmptyKeyView(modifier: Modifier) = Box( modifier = modifier.fillMaxWidth() .background(MaterialTheme.colors.background) .border(width = KEY_BORDER_WIDTH, color = KEY_BORDER_COLOR) ) - Modifier.clickable is used to make the keys receive click interactions from the user.
- Modifier.pointerMoveFilter is used here to change the keys background color when hovering over them. Learn more about mouse events here.
The app’s full source code is available on GitHub.
Think. Do. Learn.
How to create a desktop app using Kotlin and Compose Desktop
Let’s quickly and simply create a desktop app using Kotlin and Compose for Desktop.
- In IntelliJ IDEA, install the Compose Multiplatform plugin (Settings > Plugins, then search for and install ‘Compose Multiplatform IDE Support’ by JetBrains). Restart IJ to load the plugin.
- In IntelliJ IDEA, click ‘New Project’, select ‘Kotlin’ on the left, then select ‘Compose Desktop Application’, then click ‘Next’
- Leave the defaults alone, then click ‘Finish’
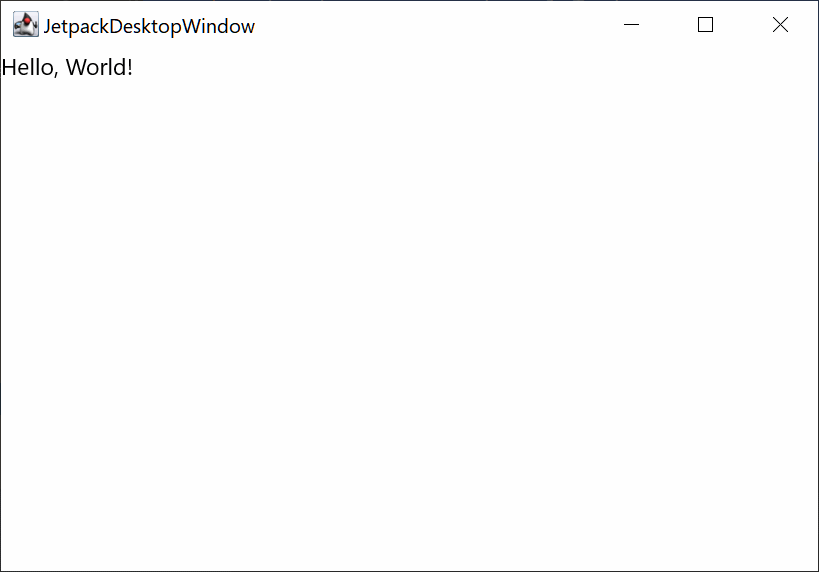
- After the project loads, run ‘Main.kt’ to ensure that you have everything working. It should look similar to the following picture:
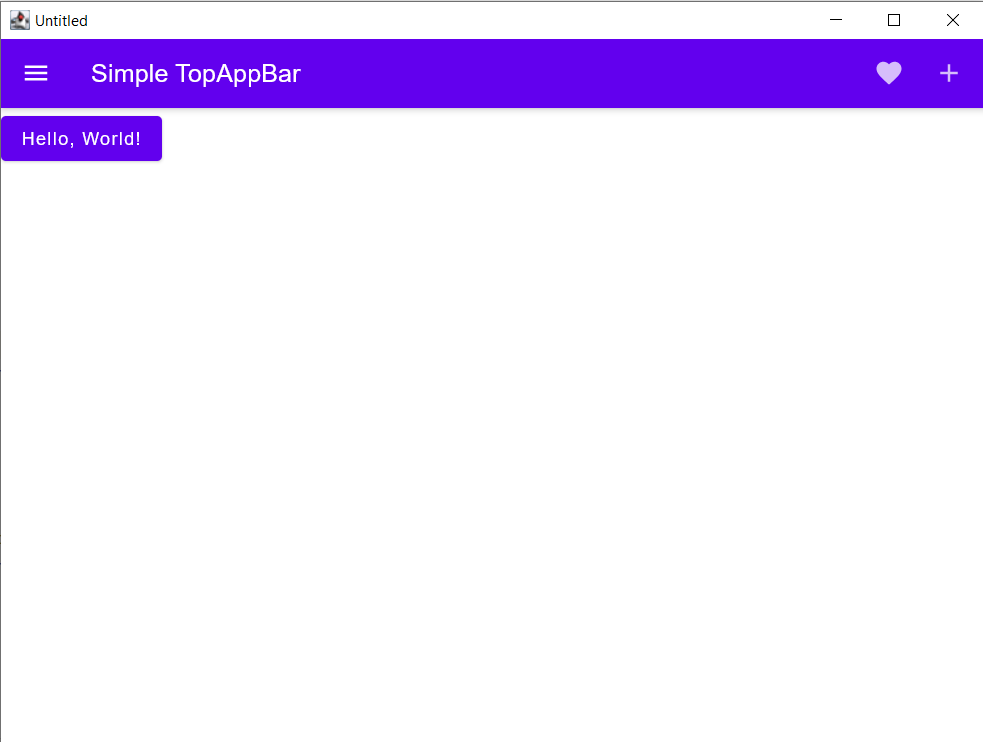
- Let’s add an app bar. Replace the code in Main.kt with the following:
import androidx.compose.material.MaterialTheme import androidx.compose.desktop.ui.tooling.preview.Preview import androidx.compose.material.Button import androidx.compose.material.Icon import androidx.compose.material.IconButton import androidx.compose.material.Scaffold import androidx.compose.material.Text import androidx.compose.material.TopAppBar import androidx.compose.material.icons.Icons import androidx.compose.material.icons.filled.Add import androidx.compose.material.icons.filled.Favorite import androidx.compose.material.icons.filled.Menu import androidx.compose.runtime.Composable import androidx.compose.runtime.getValue import androidx.compose.runtime.mutableStateOf import androidx.compose.runtime.remember import androidx.compose.runtime.setValue import androidx.compose.ui.window.Window import androidx.compose.ui.window.application @Composable @Preview fun App() < var text by remember < mutableStateOf("Hello, World!") >MaterialTheme < Scaffold( topBar = < MyTopAppBar() >) < Button(onClick = < text = "Hello, Desktop!" >) < Text(text) >> > > fun main() = application < Window(onCloseRequest = ::exitApplication) < App() >> @Composable fun MyTopAppBar() < TopAppBar( title = < Text("Simple TopAppBar") >, navigationIcon = < IconButton(onClick = < /* doSomething() */ >) < Icon(Icons.Filled.Menu, contentDescription = null) >>, actions = < // RowScope here, so these icons will be placed horizontally IconButton(onClick = < /* doSomething() */ >) < Icon(Icons.Filled.Favorite, contentDescription = "Localized description") >IconButton(onClick = < /* doSomething() */ >) < Icon(Icons.Filled.Add, contentDescription = "Localized description") >> ) > To learn more about the available GUIs and views, see https://developer.android.com/jetpack/compose/layouts
Now, let’s create the executable file and run the app on the desktop!
- In the terminal, at the root of the project, run ./gradlew createDistributable
- Confirm that your runnable app is in ‘build/compose/binaries/main/app/’
- If you are on Windows, then run the EXE (or MSI) file. The other supported targets/platforms are macOS (.dmg, .pkg) and Linux (.deb, .rpm)
Congrats for making your first Kotlin desktop app! Feel free to reach out for any questions, comments, or support. 🙂
Compose
Multiplatform
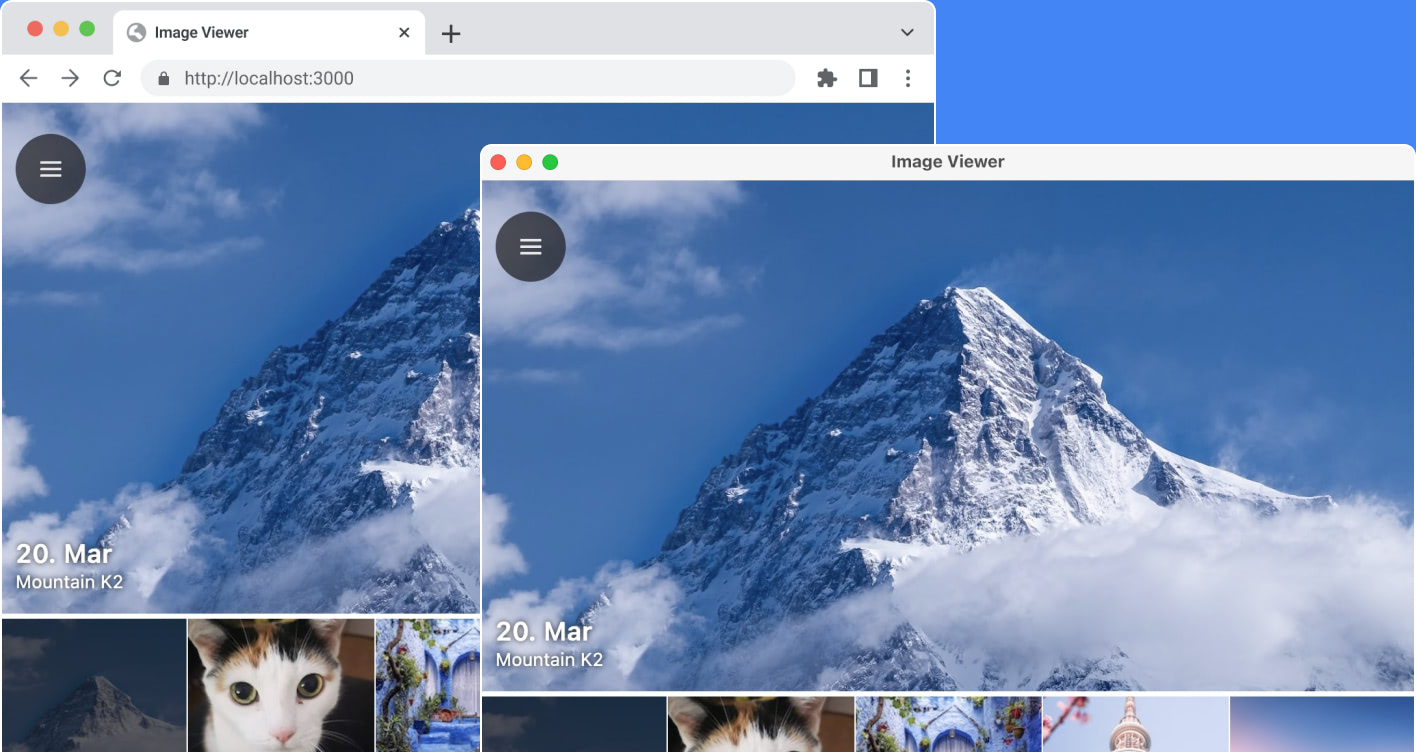
Develop stunning shared UIs for Android, iOS, desktop, and web.
Declarative framework for sharing UIs across multiple platforms. Based on Kotlin and Jetpack Compose.
Developed by JetBrains and open-source contributors.
Supported platforms
Accelerated UI development
Build your user interface once, and use it on all platforms – Android, iOS, web, and desktop. Save yourself the effort of keeping different UIs in sync, and get your app into the hands of your users more quickly.
Android UI skills for other platforms
Use the same familiar APIs from Jetpack Compose to build user interfaces for all platforms.
An excellent ecosystem
Use a wide variety of production-ready Kotlin libraries and frameworks that make it easy to be productive from the get-go and get support from a helpful and welcoming developer community!
Easy integration with every platform
Building on top of Kotlin Multiplatform means not having to compromise on using platform-specific features and APIs. Easily access the full capabilities of every platform, just like native applications.
Component-level reuse
Build your UIs with customizable widgets that you can use on all of your target platforms. Use premade themes to get started quickly, or create your own visual style down to the very pixel.
Button(
onClick =
logger.info("Pressed!")
>
)
Text("Hello $platform")
>
@Serializable
data class Friend(val name: String)
@Composable
fun FriendCard(name: String)
var myFriend by remember
mutableStateOf(null)
>
LaunchedEffect(name)
val friend = ktorClient
.get("$host/$name.json")
.body()
myFriend = friend
>.
After moving our desktop application to 100% Kotlin, we noticed improved productivity of our team.
Using a single language means that every developer can make a feature from start to finish without switching contexts. It is faster, less error prone, and improves knowledge sharing among developers. The entire application also uses the same representation for data in memory, skipping the need for extra (de)serialization steps.
Toolbox team lead, JetBrains
Try Compose Multiplatform
Develop stunning shared UIs for Android, iOS, desktop, and web.
