Create Windows Executable (.exe) for Java Application
Launch4j is a cross-platform tool for wrapping Java applications distributed as jars in lightweight Windows native executable files. In this post, we will learn making such an executable file for a demo java application.
Step1 ) Create a java application
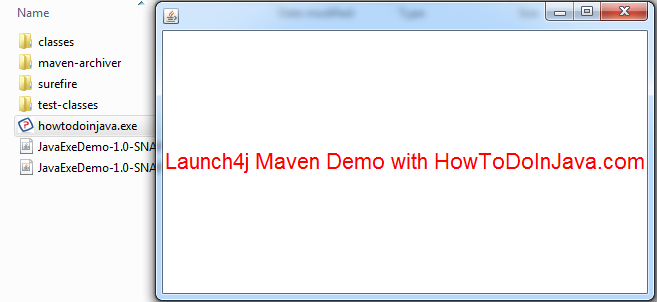
I am creating a very basic java class which simply displays a frame and some text on it. It also has the main() method which will start the application.
package com.howtodoinjava; import java.awt.Color; import java.awt.Font; import java.awt.Frame; import java.awt.Label; import java.awt.event.WindowAdapter; import java.awt.event.WindowEvent; import javax.swing.JDialog; public class ApplicationMain extends JDialog < private static final long serialVersionUID = 1L; public ApplicationMain() < //Create a frame Frame f = new Frame(); f.setSize(500, 300); //Prepare font Font font = new Font( "SansSerif", Font.PLAIN, 22 ); //Write something Label label = new Label("Launch4j Maven Demo with HowToDoInJava.com"); label.setForeground(Color.RED); label.setFont(font); f.add(label); //Make visible f.setVisible(true); f.addWindowListener(new WindowAdapter() < public void windowClosing(WindowEvent e) < System.exit(0); >>); > public static void main(final String[] args) < new ApplicationMain(); >>
Step 2) Create maven file with launch4j configured in it
I have created a pom file for packaging the application as .exe file. If you feel something unclear, drop a comment.
Кофе-брейк #148. Как превратить любую Java-программу в автономный EXE-файл
Источник: Mccue.dev Сегодня вы узнаете, как создать из Java-программы исполняемый EXE-файл для запуска в операционной системе Windows. Двойной щелчок для запуска — один из самых простых способов открыть программу. Если у человека, которому вы хотите показать свое приложение, уже установлена правильная версия Java, для запуска он может дважды щелкнуть файл jar. Если же у него не установлена Java, то есть способы создать исполняемый установщик, такой как jpackage. После этого для запуска кода нужно лишь нажать на этот установщик. Также можно использовать Native Image, чтобы превратить код в исполняемый файл, который не требует какой-либо дополнительной установки. В этой статье мы сосредоточимся на довольно простом подходе, который работает для любого приложения, независимо от того, какие зависимости вы включаете или какие функции JVM используете. Код, о котором сегодня пойдет речь, можно найти в репозитории GitHub, а исполняемые файлы с программой выложены здесь.
Используемый стек
Java 9+
Maven
NodeJS
Шаг 1. Скомпилируйте и упакуйте свой код в jar
Эта базовая программа создаст простое окно с текстом, который вы можете менять, нажимая на одну из кнопок в интерфейсе.
package example; import org.apache.commons.text.WordUtils; import javax.swing.*; import java.awt.*; public class Main < public static void main(String[] args) < var label = new JLabel("Hello, World!"); label.setFont(new Font("Serif", Font.PLAIN, 72)); var uppercaseButton = new JButton("Uppercase"); uppercaseButton.addActionListener(e ->label.setText(WordUtils.capitalize(label.getText())) ); var lowercaseButton = new JButton("lowercase"); lowercaseButton.addActionListener(e -> label.setText(WordUtils.uncapitalize(label.getText())) ); var panel = new JPanel(); panel.setLayout(new BoxLayout(panel, BoxLayout.Y_AXIS)); panel.add(label); panel.add(uppercaseButton); panel.add(lowercaseButton); var frame = new JFrame("Basic Program"); frame.add(panel); frame.pack(); frame.setVisible(true); frame.setDefaultCloseOperation(WindowConstants.EXIT_ON_CLOSE); > >
Сейчас наша цель состоит в том, чтобы упаковать код вместе с его зависимостями в jar. JAR-файлы — это обычные ZIP-архивы с небольшой дополнительной структурой. Для проекта Maven конфигурация будет выглядеть следующим образом.
Здесь плагин “shade” будет обрабатывать включение кода из всех ваших зависимостей в jar. В данном случае единственной внешней зависимостью является org.apache.commons/commons-text.
Шаг 2. Создайте среду выполнения Java (Java Runtime Environment, JRE)
Чтобы запустить уже созданный нами jar-файл, нужно связать его со средой выполнения Java. Для этого мы будем использовать jlink. Поскольку в экосистеме Java не используются модули, то вы, скорее всего, не слышали о них и не использовали jlink. Короче говоря, jlink может создавать “настраиваемые исполняемые образы”. Например, вы делаете веб-сервер. Вам не нужны AWT или Swing, поэтому включать их в код будет лишним. С помощью jlink вы можете создать JRE, которая вообще не включает модуль java.desktop. Эта система работает лучше всего, если ваше приложение и все его зависимости включают скомпилированные файлы module-info.java, которые дают jlink точную информацию, какие модули вы хотите включить. Вы также можете вручную определить список необходимых модулей, используя jdeps. И даже без модульного проекта мы можем эффективно клонировать нашу инсталляцию Java в каталог с помощью jlink.
Включение каждого модуля по отдельности дает уверенность в том, что такие библиотеки как org.apache.commons/commons-text будут работать именно так, как задумано. Нужно лишь выяснить, какие модули нам требуются.
Шаг 3. Объедините Jar и JRE в исполняемый файл
Заархивируйте каталог, содержащий JRE и jar вашего приложения.
Прикрепите сценарий-заглушку (stub script) к верхней части этого zip-файла, который извлечет данные во временный каталог и запустит код.
Это создаст исполняемый файл с именем “application”. Если вы создаете его для Windows, то нужно указать “application.exe”. Когда исполняемый файл запускается, <> будет заменен на временный каталог, в котором был развернут zip-файл. Учтите, что при создании исполняемых файлов используются также и такие механизмы, как подпись кода и автоматические обновления. Однако эти вещи требуют более глубокого изучения, которое трудно вместить в одну публикацию.
We use cookies to collect and analyze information on site performance and usage, to provide social media features and to enhance and customize content and advertisements.
Be sure to read this Javaworld article. It describes the various pitfalls related to the Runtime.exec() method.
Using Runtime.exec()
package com.rgagnon.howto; import java.io.*; public class Exec < public static void main(String args[]) < try < String line; Process p = Runtime.getRuntime().exec("cmd /c dir"); BufferedReader bri = new BufferedReader (new InputStreamReader(p.getInputStream())); BufferedReader bre = new BufferedReader (new InputStreamReader(p.getErrorStream())); while ((line = bri.readLine()) != null) < System.out.println(line); >bri.close(); while ((line = bre.readLine()) != null) < System.out.println(line); >bre.close(); p.waitFor(); System.out.println("Done."); > catch (Exception err) < err.printStackTrace(); >> >
The next example, launch CMD.EXE, grab stdin/stdout and push to stdin command to be interpreted by the shell.
String line; OutputStream stdin = null; InputStream stderr = null; InputStream stdout = null; // launch EXE and grab stdin/stdout and stderr Process process = Runtime.getRuntime ().exec ("/folder/exec.exe"); stdin = process.getOutputStream (); stderr = process.getErrorStream (); stdout = process.getInputStream (); // "write" the parms into stdin line = "param1" + "\n"; stdin.write(line.getBytes() ); stdin.flush(); line = "param2" + "\n"; stdin.write(line.getBytes() ); stdin.flush(); line = "param3" + "\n"; stdin.write(line.getBytes() ); stdin.flush(); stdin.close(); // clean up if any output in stdout BufferedReader brCleanUp = new BufferedReader (new InputStreamReader (stdout)); while ((line = brCleanUp.readLine ()) != null) < //System.out.println ("[Stdout] " + line); >brCleanUp.close(); // clean up if any output in stderr brCleanUp = new BufferedReader (new InputStreamReader (stderr)); while ((line = brCleanUp.readLine ()) != null) < //System.out.println ("[Stderr] " + line); >brCleanUp.close();
Launch a Windows CMD (or BAT) file and retrieve the errorlevel or exitcode
// win xp import java.io.*; public class CmdExec < public static void main(String argv[]) < try < String line; Process p = Runtime.getRuntime().exec("test.cmd"); p.waitFor(); System.out.println(p.exitValue()); >catch (Exception err) < err.printStackTrace(); >> >
Since 1.5, the ProcessBuilder class provides more controls overs the process to be started. It’s possible to set a starting directory.
import java.io.*; import java.util.*; public class CmdProcessBuilder < public static void main(String args[]) throws InterruptedException,IOException < Listcommand = new ArrayList(); command.add(System.getenv("windir") +"\\system32\\"+"tree.com"); command.add("/A"); ProcessBuilder builder = new ProcessBuilder(command); Map environ = builder.environment(); builder.directory(new File(System.getenv("temp"))); System.out.println("Directory : " + System.getenv("temp") ); final Process process = builder.start(); InputStream is = process.getInputStream(); InputStreamReader isr = new InputStreamReader(is); BufferedReader br = new BufferedReader(isr); String line; while ((line = br.readLine()) != null) < System.out.println(line); >System.out.println("Program terminated!"); > >
Windows rundll32 utility
Windows File association Any program using the Windows file association mechanism can be started with the rundll32 utility.
// "file" is the filename of the data file // ex. myresume.doc // to start Word if the doc extension is associated with it. Runtime.getRuntime().exec ("rundll32 SHELL32.DLL,ShellExec_RunDLL " + file.getAbsolutePath());
See also this HowTo about the new Desktop API, the recommended solution (but you need JDK1.6). See also this one to open the default browser.
The following example start a Dial-up connection on the Win plateform :
[Dialup.java] public class Dialup < public static void main(String[] args) throws Exception < Process p = Runtime.getRuntime() .exec("rundll32.exe rnaui.dll,RnaDial MyConnection"); p.waitFor(); System.out.println("Done."); >>
You still need to press ENTER to CONNECT, there is an option in the Connection properties to connect automatically.
On NT and W2K, rnaui.dll is not available. Use rasdial.exe instead.
rasdial "connection name" rasdial "connection name" /d to drop rasdial /? for more options
PDF (Windows only)
PDF (Mac only)
Path to executable with spaces in them
You can include a path for the program to be executed. On the Win plateform, you need to put the path in quotes if the path contains spaces.
If you need to pass arguments, it’s safer to a String array especially if they contain spaces.
String[] cmd = < "myProgram.exe", "-o=This is an option" >; Runtime.getRuntime().exec(cmd);
If using the start command and the path of the file to be started contains a space then you must specified a title to the start command.
// Win9x Runtime.getRuntime().exec("start myscript.vbs"); // WinNT Runtime.getRuntime().exec("cmd /c start myscript.vbs"); or // with a visible console Runtime.getRuntime().exec("cscript myscript.vbs"); // with no visible console Runtime.getRuntime().exec("wscript myscript.vbs");
It’s important to pass a dummy title to the Windows start command where there is a possibility that the filename contains a space. It’s a feature.
Start a Windows application under another account
You use the RUNAS command from the command line to start an application under another account (not available with XP Home edition). There are many switches that can enhance the behaviour of RUNAS. Typing «runas /?» from the command prompt gets you all the options.
/SaveCred option allows you to save a password for that account and then reuse it later. For example, The command runas /savecred /user:administrator regedit.exe prompts for the password, and then Regedit runs. Next time you use the same command, there is no password prompt.
One potential problem is that when /SaveCred saves the credentials it saves it for whenever RUNAS invokes that user account. This can be a huge security risk so be careful using it!
RUNAS capability can be disabled by editing the Registry or by disabling the RUNAS or Secondary Logon Services. The appropriate registry key is HKLM\SOFTWARE\Microsoft\Windows\CurrentVersion\policies\Explorer , create a new DWORD value named HideRunAsVerb and assign it a value of 1 to disable Run as.
RUNAS doesn’t work when used from a Windows service.
Windows : execute something in Program Files
We want to execute the textpad editor located in C:\Program Files\TextPad 4 but without hard coding the path since it can be different for a localized version of Windows.
We simply extract to environnment variable called %programfiles% and build the complete path from there.
public class Exec < static String WIN_PROGRAMFILES = System.getenv("programfiles"); static String FILE_SEPARATOR = System.getProperty("file.separator"); public static void main(String[] args) throws Exception < String[] commands = ; Runtime.getRuntime().exec(commands); > >