- Building and Running a Java SE Application by Using Maven
- Time to Complete
- Background
- What Do You Need?
- Setting Up the Maven Environment
- Creating a Java SE Project from a Maven Template
- Creating and Modifying Java Source Files
- Creating a Manifest with Maven
- Testing, Building, and Running the Application Using Maven
- Testing the Application
- Building the Application
- Packaging and Running the Application
- Want to Learn More?
- Credits
Building and Running a Java SE Application by Using Maven
In this tutorial, you create and build a Java Platform, Standard Edition (Java SE) application using Maven. You install, configure, build, and create an executable Java Archive (JAR) file with Maven.
Time to Complete
Background
Maven is a build management tool that is central to project build tasks such as compilation, packaging, and artifact management. Maven uses a strict XML-based rule set to promote consistency while maintaining flexibility. Because most Java-centric continuous integration systems integrate well with Maven, it’s a good choice for an underlying build system.
- A project model that is reusable, maintainable, and easier to comprehend
- Plug-ins or tools that interact with the declarative model
- Local Repository: The location created on your machine when you run your first instance of a Maven command in your machine
- Central Repository: The Maven community-owned repository that contains commonly used libraries
- Remote Repository: A developer-owned custom repository that contains project-related libraries and JARs
What Do You Need?
- Download and install the latest Java SE Development Kit. For this tutorial, the available version is Java SE 8.
- Download the Apache Maven. For this tutorial, the available version is 3.2.2.
Setting Up the Maven Environment
In this section, you extract the downloaded archive and install the latest Maven version to a directory of your choice. You verify the Java installation, set the Maven environment, and verify the Maven installation.
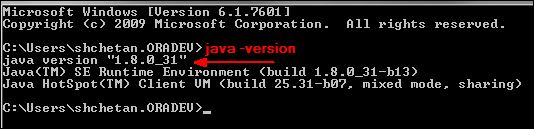
- Verify the Java installation:
java -version The output displays the Java version that you installed. - Extract the downloaded Maven x.x.x archive to a local directory. The archive names are:
- Windows OS: apache-maven-3.2.2-bin.zip
- Linux OS: apache-maven-3.2.2-bin.tar.gz
- Mac OS: apache-maven-3.2.2-bin.tar.gz
Note: This OBE shows you how to install and create a Java SE application using Maven in a Windows operating system.
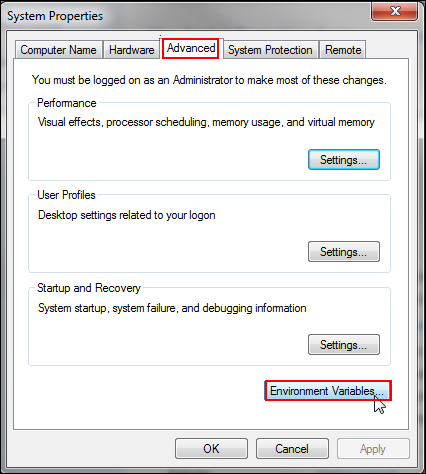 The Environment Variables dialog box is displayed.
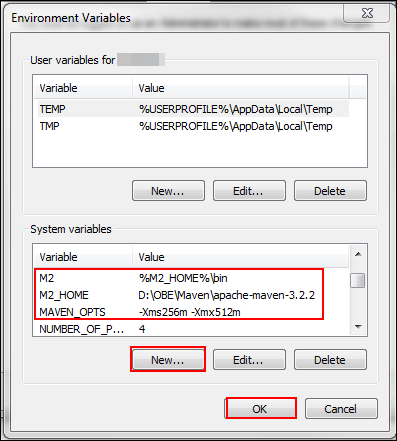
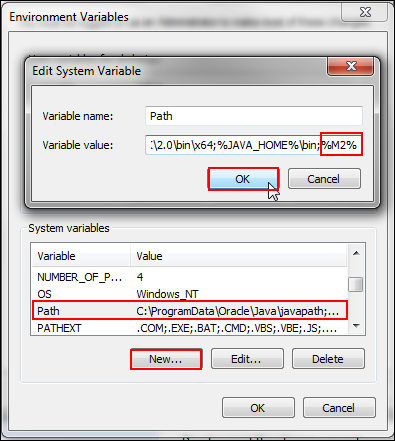
- Variable name: Path
- Variable value: %M2% (Enter the value after bin in the system path)
 The output displays the installed Maven version, the Java version, the Java home, the Default locale, and the OS name.
Creating a Java SE Project from a Maven Template
- Open the command prompt, navigate to the directory where you installed Maven, and create Maven_app, a Maven-based Java application folder: mvn archetype:generate -DgroupId=com.example.bank
-DartifactId=OracleBanking
-DarchetypeArtifactId=maven-archetype-quickstart
-DinteractiveMode=false An archetype is an original pattern/model for creating similar projects. In Maven, an archetype is a template of a project that is combined with user input to produce a working Maven project. The following table describes what the template does:
| Archetype ArtifactIds | Description |
|---|---|
| mvn archetype:generate | Creates a project |
| -DgroupId=com.example.bank | Creates the com.example.bank dependency package structure |
| maven-archetype-quickstart | Creates a Java project |
| -DinteractiveMode=false | Sets interactive mode to false |
The Java project named OracleBanking is created. The following table presents the project details:
| Project Structure | Description |
|---|---|
| OracleBanking | Contains src folder and pom.xml |
| src/main/java | Contains Java code files under the package structure ( com.example/bank ) |
| src/test | Contains test code files under the package structure ( com.example/bank ) |
| pom.xml | Contains information about the project and details of various configurations used by Maven to build the project |
AppTest.java
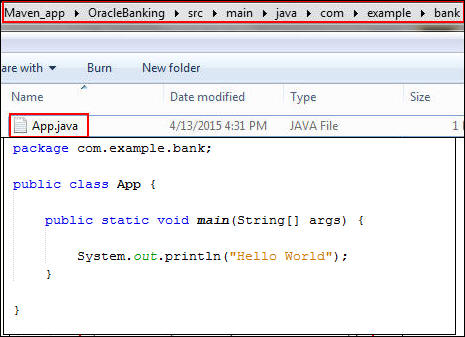
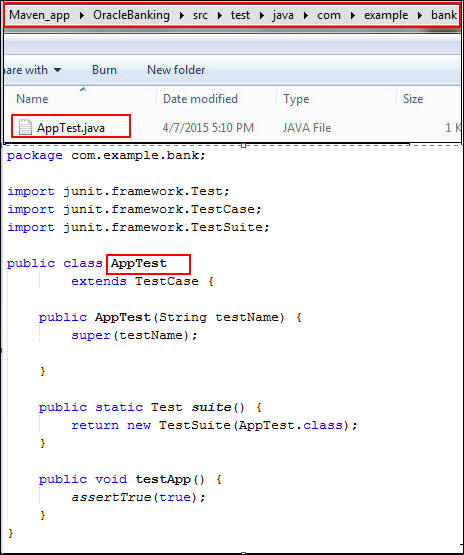 By default, Maven adds the App.java source file and the AppTest.java test file to the default directory structure.
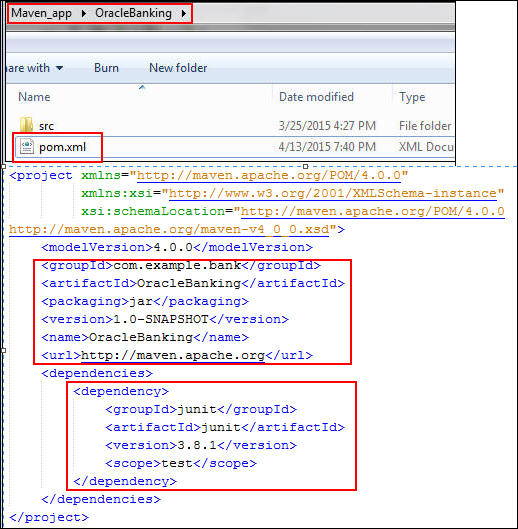 Each project has a single pom.xml file, and each pom.xml file has a project element and three mandatory fields: groupId, artifactId, and version. Notice that Maven has already added JUnit as the test framework. The following table describes what each node does:
| Node | Description |
|---|---|
| project | Top-level element in all Maven pom.xml files |
| modelVersion | Object model version that this POM is using |
| groupId | Project groupId (for example, com.example.bank ) |
| artifactId | Project ID (for example, OracleBanking ) |
| packaging | Project files converted into a JAR file |
| version | Project version used in the artifact’s repository to separate each version (for example, 1.0-SNAPSHOT ) |
| name | Project display name |
| url | Location of the project site |
Creating and Modifying Java Source Files
In this section, you calculate simple interest by creating the SimpleInterest.java source file and modifying the App.java source file.
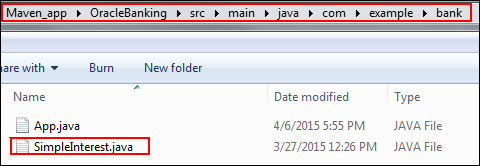
- Navigate to the directory where you created your Maven project, and then open the specified location: \**\Maven_app\OracleBanking\src\main\java\com\example\bank
- Create a Java source file named SimpleInterest.java.
- Edit the SimpleInterest.java file with the following code:
package com.example.bank; public class SimpleInterest < public static double calculateSimpleInterest(double amount, double years, double rate_of_interest) < double simple_interest; simple_interest = amount * years * rate_of_interest; return simple_interest; >> double result = SimpleInterest.calculateSimpleInterest(10000, 5, 7); System.out.println("The simple interest is:" + result); public static double calculateSimpleInterest(double amount, double years, double rate_of_interest) 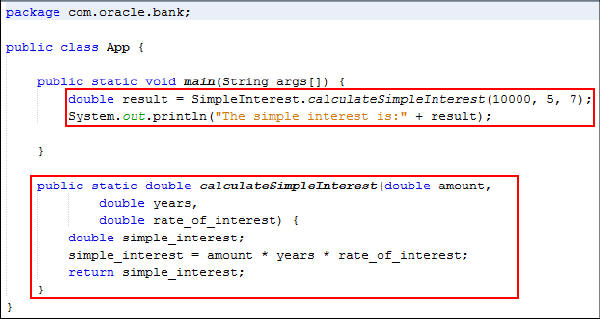
Creating a Manifest with Maven
In this section, you learn how to use maven-jar-plugin to create a manifest file and package it by adding it to the JAR file.
- Defines the entry point of the project and creates an executable JAR file.
- Adds the class path of the project dependencies.
org.apache.maven.plugins maven-jar-plugin 2.4 com.example.bank.App 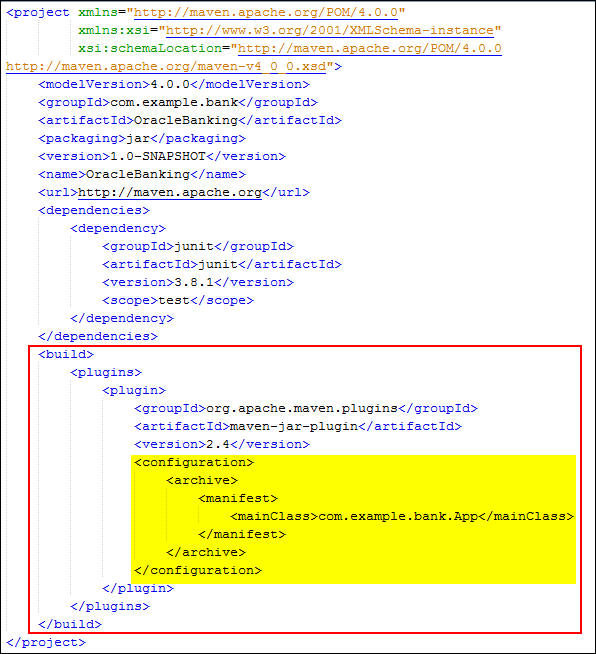
You defined maven-jar-plugin in pom.xml, and configured it within the configuration tag.
You successfully updated your pom.xml file.
Testing, Building, and Running the Application Using Maven
Testing the Application
In this section, you learn how to test your application with AppTest.java using the Maven command-line interface (CLI).
- Import the package into AppTest.java: import junit.framework.Assert;
- Edit the AppTest method:
double result=App.calculateSimpleInterest(10000,5,7); Assert.assertEquals("Test failed. ",35000.0,result);  You modified the simple interest value, and then verified the value by using assert statements in the JUnit test case.
 The test case failed and the assert failed message is displayed.
 Assert.assertEquals("Test failed. ", 350000.0, result); 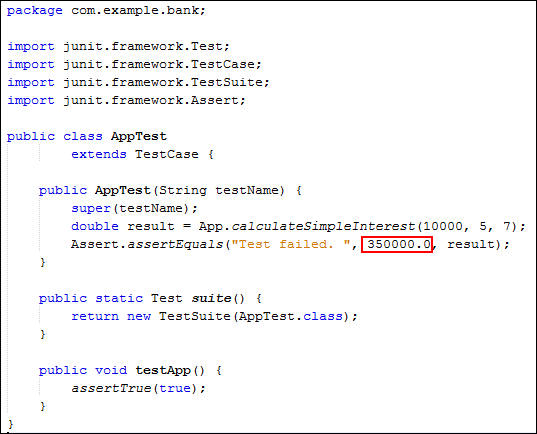 You modified the simple interest value, and then verified the value by using assert statements in the JUnit test case.
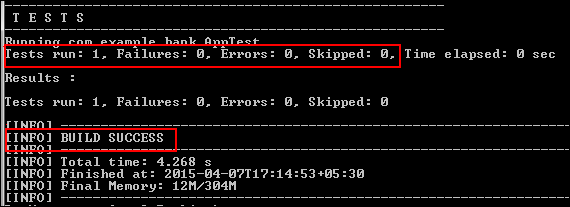 The test case executed successfully, and a build success message is displayed.
Building the Application
In this section, you learn how to clean and build your application using the Maven CLI.
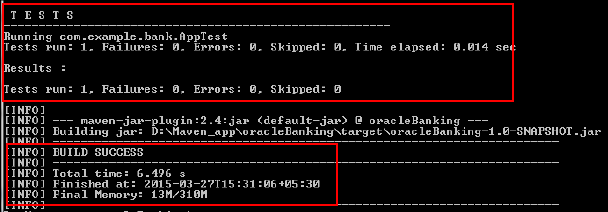
- Clean and build your Maven project, and review the output: mvn clean package
 You successfully built the OracleBanking Java SE application using Maven.
 - Navigate to the directory where you created OracleBanking and notice that a target folder was created.
- Open the target folder, and review the folder structure.
Folder name Description classes Contains .class files of Java source files test-classes Contains .class files of Java test files maven-archiver Contains the pom.properties file surefire-reports Contains the report of the application when mvn command is executed. java Empty Java file OracleBanking-1.0-SNAPSHOT.jar Contains all the project related details in a single zip file. This is the executable JAR file used to run the application
 You successfully built the OracleBanking Java SE application using Maven.
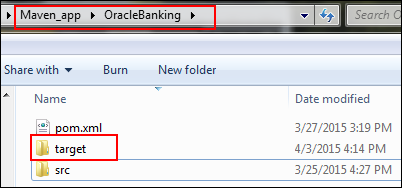
Packaging and Running the Application
In this section, you learn how to package and run the Java SE project using the Maven CLI.
- Navigate to the directory where you installed Maven, and open the settings.xml file. The tag specifies the local repository location on your machine. By default, the local repository is created in the %USER_HOME% directory. You can specify another location by updating it in the settings.xml file. If you need to set proxy details for the application, then update it in the settings.xml file.
- Clean and package the files, plug-ins, and libraries before running the application: mvn clean package
- Use the Maven Local repository to run your Java SE Maven application: mvn exec:java -Dexec.mainClass=»com.example.bank.App» -s «*****location of settings.xml file.********»
- Review the output. You successfully executed the Java SE application named OracleBanking using Maven. The simple interest is calculated and displayed in the Maven CLI.
- Execute the JAR file with following commands: cd target
java -jar OracleBanking-1.0-SNAPSHOT.jar - Review the output. You successfully executed the OracleBanking Java SE application by using Maven. The simple interest is calculated and displayed in the Maven CLI.
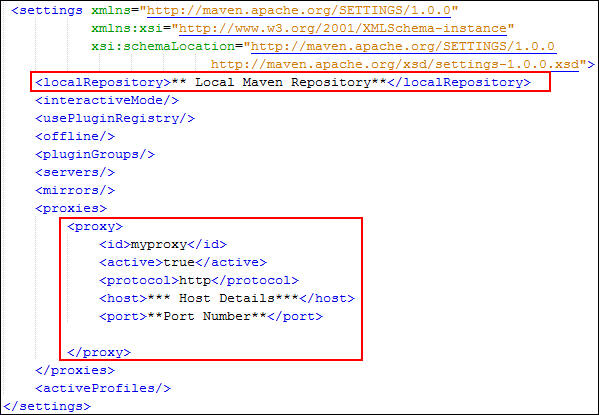 The tag specifies the local repository location on your machine. By default, the local repository is created in the %USER_HOME% directory. You can specify another location by updating it in the settings.xml file. If you need to set proxy details for the application, then update it in the settings.xml file.
 You successfully executed the Java SE application named OracleBanking using Maven. The simple interest is calculated and displayed in the Maven CLI.
 You successfully executed the OracleBanking Java SE application by using Maven. The simple interest is calculated and displayed in the Maven CLI.
Want to Learn More?
- Maven Quick Guide
- Maven Getting Started Guide
- Installing and Configuring Maven for Build Automation and Dependency Managementin Oracle Fusion Middleware Developing Applications Using Continuous Integration
Credits
To navigate this Oracle by Example tutorial, note the following:
Topic List: Click a topic to navigate to that section. Expand All Topics: Click the button to show or hide the details for the sections. By default, all topics are collapsed. Hide All Images: Click the button to show or hide the screenshots. By default, all images are displayed. Print: Click the button to print the content. The content that is currently displayed or hidden is printed.
To navigate to a particular section in this tutorial, select the topic from the list.