«Hello World!» for Microsoft Windows
It’s time to write your first application! The following instructions are for users of Windows Vista, Windows 7, and Windows 8. Instructions for other platforms are in «Hello World!» for Solaris OS, Linux, and Mac OS X and «Hello World!» for the NetBeans IDE.
A Checklist
To write your first program, you’ll need:
- The Java SE Development Kit 8 (JDK 8) You can download the Windows version now. (Make sure you download the JDK, not the JRE.) Consult the installation instructions.
- A text editor In this example, we’ll use Notepad, a simple editor included with the Windows platforms. You can easily adapt these instructions if you use a different text editor.
These two items are all you’ll need to write your first application.
Creating Your First Application
Your first application, HelloWorldApp , will simply display the greeting «Hello world!». To create this program, you will:
- Create a source file A source file contains code, written in the Java programming language, that you and other programmers can understand. You can use any text editor to create and edit source files.
- Compile the source file into a .class file The Java programming language compiler ( javac ) takes your source file and translates its text into instructions that the Java virtual machine can understand. The instructions contained within this file are known as bytecodes.
- Run the program The Java application launcher tool ( java ) uses the Java virtual machine to run your application.
Create a Source File
To create a source file, you have two options:
- You can save the file HelloWorldApp.java on your computer and avoid a lot of typing. Then, you can go straight to Compile the Source File into a .class File.
- Or, you can use the following (longer) instructions.
First, start your editor. You can launch the Notepad editor from the Start menu by selecting Programs > Accessories > Notepad. In a new document, type in the following code:
/** * The HelloWorldApp class implements an application that * simply prints "Hello World!" to standard output. */ class HelloWorldApp < public static void main(String[] args) < System.out.println("Hello World!"); // Display the string. >> Be Careful When You Type
Note: Type all code, commands, and file names exactly as shown. Both the compiler ( javac ) and launcher ( java ) are case-sensitive, so you must capitalize consistently.
HelloWorldApp is not the same as helloworldapp .
Save the code in a file with the name HelloWorldApp.java . To do this in Notepad, first choose the File > Save As . menu item. Then, in the Save As dialog box:
- Using the Save in combo box, specify the folder (directory) where you’ll save your file. In this example, the directory is myapplication on the C drive.
- In the File name text field, type «HelloWorldApp.java» , without the quotation marks.
- From the Save as type combo box, choose Text Documents (*.txt).
- In the Encoding combo box, leave the encoding as ANSI.
When you’re finished, the dialog box should look like this .
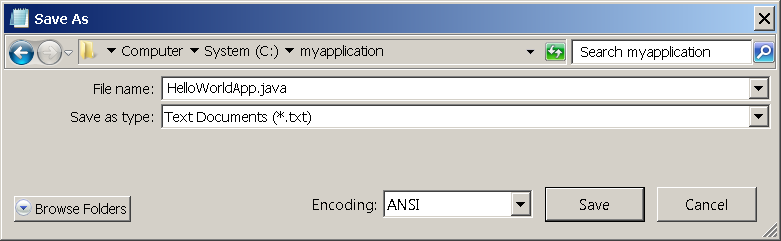
The Save As dialog just before you click Save.
Now click Save, and exit Notepad.
Compile the Source File into a .class File
Bring up a shell, or «command,» window. You can do this from the Start menu by choosing Run. and then entering cmd . The shell window should look similar to the following figure .
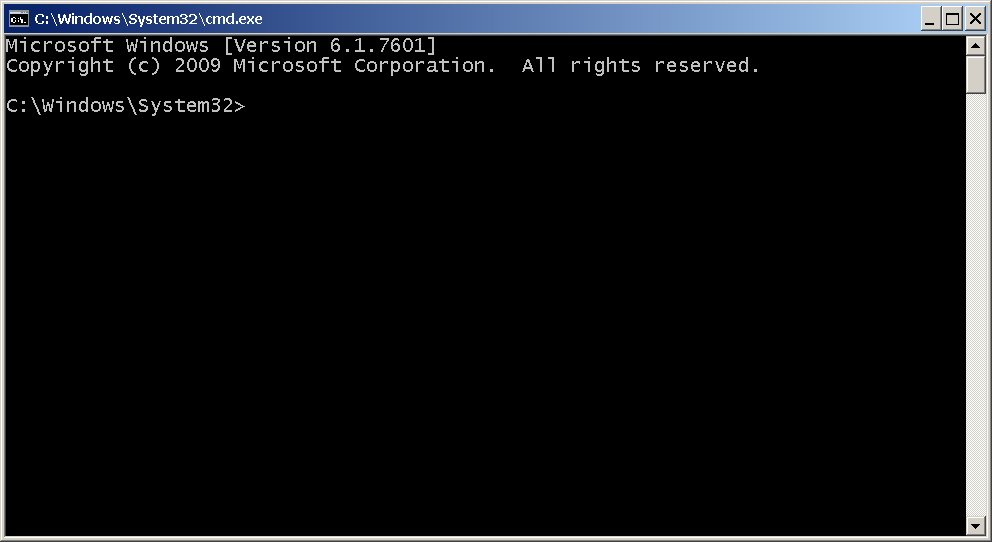
The prompt shows your current directory. When you bring up the prompt, your current directory is usually your home directory for Windows XP (as shown in the preceding figure.
To compile your source file, change your current directory to the directory where your file is located. For example, if your source directory is myapplication on the C drive, type the following command at the prompt and press Enter:
Now the prompt should change to C:\myapplication> .
To change to a directory on a different drive, you must type an extra command: the name of the drive. For example, to change to the myapplication directory on the D drive, you must enter D: , as follows:
C:\>D: D:\>cd myapplication D:\myapplication>
If you enter dir at the prompt, you should see your source file, as follows:
C:\>cd myapplication C:\myapplication>dir Volume in drive C is System Volume Serial Number is F2E8-C8CC Directory of C:\myapplication 2014-04-24 01:34 PM . 2014-04-24 01:34 PM .. 2014-04-24 01:34 PM 267 HelloWorldApp.java 1 File(s) 267 bytes 2 Dir(s) 93,297,991,680 bytes free C:\myapplication>
Now you are ready to compile. At the prompt, type the following command and press Enter.
The compiler has generated a bytecode file, HelloWorldApp.class . At the prompt, type dir to see the new file that was generated as follows:
C:\myapplication>javac HelloWorldApp.java C:\myapplication>dir Volume in drive C is System Volume Serial Number is F2E8-C8CC Directory of C:\myapplication 2014-04-24 02:07 PM . 2014-04-24 02:07 PM .. 2014-04-24 02:07 PM 432 HelloWorldApp.class 2014-04-24 01:34 PM 267 HelloWorldApp.java 2 File(s) 699 bytes 2 Dir(s) 93,298,032,640 bytes free C:\myapplication>
Now that you have a .class file, you can run your program.
If you encounter problems with the instructions in this step, consult the Common Problems (and Their Solutions).
Run the Program
In the same directory, enter the following command at the prompt:
You should see the following on your screen:
C:\myapplication>java -cp . HelloWorldApp Hello World! C:\myapplication>
Congratulations! Your program works!
If you encounter problems with the instructions in this step, consult the Common Problems (and Their Solutions).
Previous page: «Hello World!» for the NetBeans IDE
Next page: «Hello World!» for Solaris OS, Linux, and Mac OS X
Java language source file
The information on this page is for Archive Purposes Only
This page is not being actively maintained. Links within the documentation may not work and the information itself may no longer be valid. The last revision to this document was made on April 20, 1999
11 — Code Examples
11.1 Java Source File Example
The following example shows how to format a Java source file containing a single public class. Interfaces are formatted similarly. For more information, see «Class and Interface Declarations» on page 4 and «Documentation Comments» on page 9
/* * @(#)Blah.java 1.82 99/03/18 * * Copyright (c) 1994-1999 Sun Microsystems, Inc. * 901 San Antonio Road, Palo Alto, California, 94303, U.S.A. * All rights reserved. * * This software is the confidential and proprietary information of Sun * Microsystems, Inc. ("Confidential Information"). You shall not * disclose such Confidential Information and shall use it only in * accordance with the terms of the license agreement you entered into * with Sun. */ package java.blah; import java.blah.blahdy.BlahBlah; /** * Class description goes here. * * @version 1.82 18 Mar 1999 * @author Firstname Lastname */ public class Blah extends SomeClass < /* A class implementation comment can go here. */ /** classVar1 documentation comment */ public static int classVar1; /** * classVar2 documentation comment that happens to be * more than one line long */ private static Object classVar2; /** instanceVar1 documentation comment */ public Object instanceVar1; /** instanceVar2 documentation comment */ protected int instanceVar2; /** instanceVar3 documentation comment */ private Object[] instanceVar3; /** * . constructor Blah documentation comment. */ public Blah() < // . implementation goes here. >/** * . method doSomething documentation comment. */ public void doSomething() < // . implementation goes here. >/** * . method doSomethingElse documentation comment. * @param someParam description */ public void doSomethingElse(Object someParam) < // . implementation goes here. >> Managing Source and Class Files
Many implementations of the Java platform rely on hierarchical file systems to manage source and class files, although The Java Language Specification does not require this. The strategy is as follows.
Put the source code for a class, interface, enumeration, or annotation type in a text file whose name is the simple name of the type and whose extension is .java . For example:
//in the Rectangle.java file package graphics; public class Rectangle
Then, put the source file in a directory whose name reflects the name of the package to which the type belongs:
The qualified name of the package member and the path name to the file are parallel, assuming the Microsoft Windows file name separator backslash (for UNIX, use the forward slash).
- class name – graphics.Rectangle
- pathname to file – graphics\Rectangle.java
As you should recall, by convention a company uses its reversed Internet domain name for its package names. The Example company, whose Internet domain name is example.com , would precede all its package names with com.example . Each component of the package name corresponds to a subdirectory. So, if the Example company had a com.example.graphics package that contained a Rectangle.java source file, it would be contained in a series of subdirectories like this:
. \com\example\graphics\Rectangle.java
When you compile a source file, the compiler creates a different output file for each type defined in it. The base name of the output file is the name of the type, and its extension is .class . For example, if the source file is like this
//in the Rectangle.java file package com.example.graphics; public class Rectangle < . . . >class Helper
then the compiled files will be located at:
\com\example\graphics\Rectangle.class \com\example\graphics\Helper.class
Like the .java source files, the compiled .class files should be in a series of directories that reflect the package name. However, the path to the .class files does not have to be the same as the path to the .java source files. You can arrange your source and class directories separately, as:
\sources\com\example\graphics\Rectangle.java \classes\com\example\graphics\Rectangle.class
By doing this, you can give the classes directory to other programmers without revealing your sources. You also need to manage source and class files in this manner so that the compiler and the Java Virtual Machine (JVM) can find all the types your program uses.
The full path to the classes directory, \classes , is called the class path, and is set with the CLASSPATH system variable. Both the compiler and the JVM construct the path to your .class files by adding the package name to the class path. For example, if
is your class path, and the package name is
then the compiler and JVM look for .class files in
\classes\com\example\graphics.
A class path may include several paths, separated by a semicolon (Windows) or colon (UNIX). By default, the compiler and the JVM search the current directory and the JAR file containing the Java platform classes so that these directories are automatically in your class path.
Setting the CLASSPATH System Variable
To display the current CLASSPATH variable, use these commands in Windows and UNIX (Bourne shell):
In Windows: C:\> set CLASSPATH In UNIX: % echo $CLASSPATH
To delete the current contents of the CLASSPATH variable, use these commands:
In Windows: C:\> set CLASSPATH= In UNIX: % unset CLASSPATH; export CLASSPATH
To set the CLASSPATH variable, use these commands (for example):
In Windows: C:\> set CLASSPATH=C:\users\george\java\classes In UNIX: % CLASSPATH=/home/george/java/classes; export CLASSPATH