Embedded Jetty

Server Tutorials

Tomcat Setup

Jetty Setup
Embedded Jetty
Hello World: Embedded Jetty (Command Line)
Hello World: Embedded Jetty (Maven)
Anatomy of a Web App
Hello World: Static Website
Hello World: Command Line
Hello World: Maven
Client / Server Communication
Servlets
Social Feed Website Part 1: Servlets
JSP

Social Feed Website Part 2: JSP
JSP Unix Time
JSP Date
JSP Coin Flipper
JSP Zoo
JSP Header
Servlet JSP Date
Servlet JSP Date (Hidden JSP)

Eclipse EE

Post Requests
Social Feed Website Part 3: Post Requests
Name Input
Name List
Name List — JSP
Name List — Fetch

Libraries
Sanitizing User Input
Unsanitized User Input
Escaping User Input
Sessions
Social Feed Website Part 4: Sessions
Secure Password Storage

Hosting on AWS
Thread Safety

Social Feed Website Part 5: Thread Safety

Hosting on Google App Engine
Databases

Uploading Files

Creating a REST API

Struts

p5.js Tutorials

JavaScript Tutorials
![]()
Processing Tutorials

Java Tutorials
Server Tutorials
![]()
Google Cloud

Android Tutorials

LibGDX Tutorials

How-To Guides

Gallery
Blog

Teaching


Tutorials
Server Tutorials
Embedded Jetty
Embedded Jetty
This tutorial walks through the process of using Jetty to run a server on your computer. Running a local Jetty server is handy for testing things out without needing to update (or pay for) a live server.
Jetty is a popular Java server, especially because of its ability to run embedded in any Java application. That’s what this tutorial is about, but you can also follow the Jetty tutorial to use Jetty as its own server container.
Download Jetty
Jetty is bundled as a jetty-home directory inside a .zip file, which you can download from here.
Download that file, and then unzip the directory anywhere. I put mine on my desktop. You can always move it later.
Embedded Jetty
There are a couple of ways to use Jetty to create a server. You can either run a full server that you then add code to, or you can write code that runs an embedded Jetty server.
To learn about running a full Jetty server, check out this tutorial.
The rest of this tutorial walks you through running an embedded Jetty server.
ServerMain.java
Instead of running a server and then adding code to it, you can run a Jetty server directly from a normal Java class.
Here’s an example Java class that runs an embedded Jetty server:
package io.happycoding; import java.net.URL; import org.eclipse.jetty.server.Server; import org.eclipse.jetty.webapp.WebAppContext; /** * Starts up a server that serves static files from the top-level directory. */ public class ServerMain public static void main(String[] args) throws Exception // Create a server that listens on port 8080. Server server = new Server(8080); WebAppContext webAppContext = new WebAppContext(); server.setHandler(webAppContext); // Load static content from the top level directory. URL webAppDir = ServerMain.class.getClassLoader().getResource("."); webAppContext.setResourceBase(webAppDir.toURI().toString()); // Start the server! 🚀 server.start(); System.out.println("Server started!"); // Keep the main thread alive while the server is running. server.join(); > > This code creates a server that listens on port 8080 and loads static files (like index.html ) from the top level directory, and then it starts that server.
This code assumes you have a directory structure like this:
- HelloWorld/
- index.html
- io/happycoding/ (this is a directory representing a package)
- ServerMain.java
Notably, the static files (like index.html ) are in the top-level directory, and the packages and classes are in that same top-level directory. You can also have a more complicated directory structure, but you’d have to change the corresponding lines in the ServerMain class.
Command Line
Eventually you’ll probably want to use an IDE like Eclipse or Intellij to compile and run your code, but I recommend using the command line the first few times so you really understand what’s going on behind the scenes.
Example Project
You can view and download an example project that uses the command line to deploy an embedded Jetty server here:
This section of the tutorial walks through this example project.
Compiling
To compile this code, open a command line to the HelloWorld directory and then run this command:
javac -cp /jetty-home/lib/* io/happycoding/ServerMain.javaDon’t forget to change the classpath to your local copy of Jetty! For example, the command I would run is this:
javac -cp C:/Users/kevin/Desktop/jetty-home-11.0.5/lib/* io/happycoding/ServerMain.javaRunning
And then to run the ServerMain class, run this command:
java -cp /jetty-home/lib/*;jetty-home/lib/annotations/*;jetty-home/lib/apache-jsp/*;jetty-home/lib/jaspi/*;/jetty-home/lib/logging/*;.; io.happycoding.ServerMainFor example, the command I would run is this:
java -cp C:\Users\kevin\Desktop\jetty-home-11.0.5\lib\*;C:\Users\kevin\Desktop\jetty-home-11.0.5\lib\annotations\*;C:\Users\kevin\Desktop\jetty-home-11.0.5\lib\apache-jsp\*;C:\Users\kevin\Desktop\jetty-home-11.0.5\lib\jaspi\*;C:\Users\kevin\Desktop\jetty-home-11.0.5\lib\logging\*;.; io.happycoding.ServerMainThe classpath to run the server is a bit more complicated than the classpath to compile the server, because running the server requires a few other libraries that aren’t used directly by the ServerMain class.
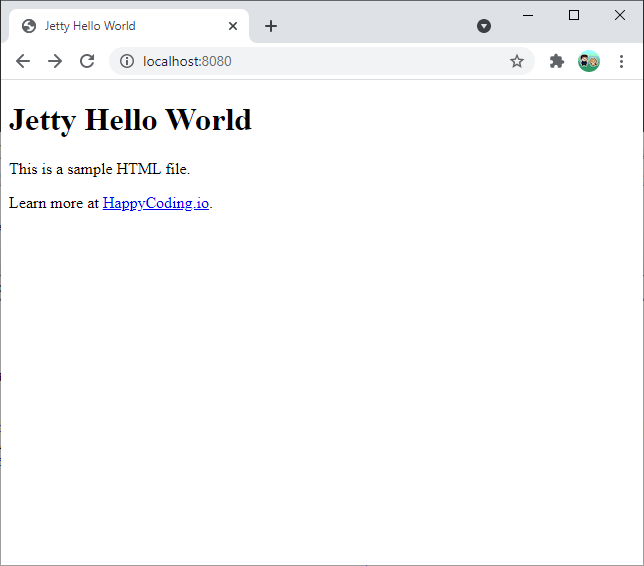
You should see Server started! in your command line. That means you can navigate to localhost:8080 to see the index.html file:

Try changing your index.html file, restarting the server, and refreshing the page to see your changes!
Servlets
You’ll learn more about servlets in the servlets tutorial, but for now, let’s look at how the ServerMain.java file can also load server code.
Let’s say you have this servlet class in the io.happycoding package:
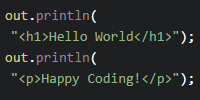
package io.happycoding; import java.io.IOException; import jakarta.servlet.annotation.WebServlet; import jakarta.servlet.http.HttpServlet; import jakarta.servlet.http.HttpServletRequest; import jakarta.servlet.http.HttpServletResponse; @WebServlet("/hello") public class HelloWorldServlet extends HttpServlet @Override public void doGet(HttpServletRequest request, HttpServletResponse response) throws IOException response.setContentType("text/html;"); response.getWriter().println("Hello world!
"); > >This servlet uses the @WebServlet annotation to map to the /hello URL and writes a hard-coded
Hello world!
message to the response.
For the embedded Jetty server to see this class, you need to add this line of code to your ServerMain.java file:
// Look for annotations in classes and packages in the top level directory. webAppContext.setAttribute( "org.eclipse.jetty.server.webapp.ContainerIncludeJarPattern", ".*/");Then, to compile both the ServerMain.java file and the HelloWorldServlet.java file, cd into the HelloWorld directory and run this command:
javac -cp /jetty-home/lib/* io.happycoding.*.javaFor example, here’s the command I would run:
javac -cp C:/Users/kevin/Desktop/jetty-home-11.0.5/lib/* io.happycoding.*.javaThen, run the ServerMain class:
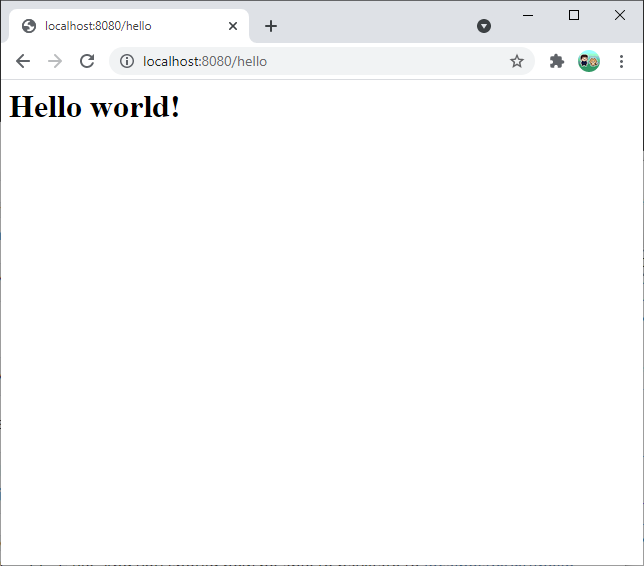
java -cp /jetty-home/lib/*;jetty-home/lib/annotations/*;jetty-home/lib/apache-jsp/*;jetty-home/lib/jaspi/*;/jetty-home/lib/logging/*;.; io.happycoding.ServerMainYou should see Server started! in your command line, and you should still be able to navigate to localhost:8080 to see your index.html file. And you should now be able to navigate to localhost:8080/hello to see the content generated from the servlet!
Maven
So far, this tutorial has used the command line to compile and run the code. You can keep using that approach if you want, but it can get pretty annoying to handle the classpath yourself, especially as you start using other libraries.
Maven is a tool that manages the classpath for you, and makes it easier to compile and build (and eventually deploy) your server. To use Maven, first download and install it from here.
Example Project
You can view and download an example project that uses Maven to deploy an embedded Jetty server here:
The rest of this tutorial walks through this example project.
Maven Directory Structure
- Web App Name
- pom.xml
- src/
- main/
- java/
- Java packages and classes go here
- Static files like index.html , script.js , and styles.css go here
For example, you might have a HelloWorld webapp directory that looks like this:
- HelloWorld
- pom.xml
- src/
- main/
- java/
- /io/happycoding/
- ServerMain.java
- HelloWorldServlet.java
- index.html
pom.xml
Maven uses a pom.xml file to configure a project, including information about the classpath and how to compile and build the project. Here’s an example pom.xml file:
xmlns="http://maven.apache.org/POM/4.0.0" xmlns:xsi="http://www.w3.org/2001/XMLSchema-instance" xsi:schemaLocation="http://maven.apache.org/POM/4.0.0 http://maven.apache.org/xsd/maven-4.0.0.xsd"> 4.0.0 io.happycoding jetty-hello-world 1 11 11 UTF-8 11.0.5 io.happycoding.ServerMain jakarta.servlet jakarta.servlet-api 5.0.0 provided org.eclipse.jetty jetty-server $ org.eclipse.jetty jetty-annotations $ org.apache.maven.plugins maven-resources-plugin 2.7 copy-web-resources compilecopy-resources $/classes/META-INF/resources./src/main/webapp org.apache.maven.plugins maven-shade-plugin 3.2.4 packageshade false implementation="org.apache.maven.plugins.shade.resource.ManifestResourceTransformer"> $ServerMain.java
Next, because Maven’s directory structure is a bit different, you’ll need to change a few things in your ServerMain.java file:
package io.happycoding; import java.net.URL; import org.eclipse.jetty.server.Server; import org.eclipse.jetty.webapp.WebAppContext; /** * Starts up a server that serves static files and annotated servlets. */ public class ServerMain public static void main(String[] args) throws Exception // Create a server that listens on port 8080. Server server = new Server(8080); WebAppContext webAppContext = new WebAppContext(); server.setHandler(webAppContext); // Load static content from the resources directory. URL webAppDir = ServerMain.class.getClassLoader().getResource("META-INF/resources"); webAppContext.setResourceBase(webAppDir.toURI().toString()); // Look for annotations in the classes directory (dev server) and in the // jar file (live server). webAppContext.setAttribute( "org.eclipse.jetty.server.webapp.ContainerIncludeJarPattern", ".*/target/classes/|.*\\.jar"); // Start the server! 🚀 server.start(); System.out.println("Server started!"); // Keep the main thread alive while the server is running. server.join(); > >Specifically, notice that the static content and the annotations are loaded from specific locations.
To see why those locations make sense, cd into the HelloWorld directory and run this command:
This tells Maven to compile and build your code based on the pom.xml file, and then Maven copies the compiled code into a target directory. Try exploring the HellowWorld/target directory to see the directory structure that Maven outputs, which is why the static files and annotations are loaded from those locations.
Running a Server
Finally, to run a local server, execute this command:
This command tells Maven to run the code as a Java application, by running the main() method in the ServerMain class.
Now you can visit localhost:8080 to see your web app!
Note that you can run multiple Maven commands in one step. For example, this command clears out old copies of your code, packages a new version, and runs a server with that new code:
mvn clean package exec:javaYou’ll run this command a lot when developing an embedded Jetty server using Maven!
Homework
Add a few HTML pages to your HelloWorld web app, and then run your server again to see them in the browser.
- /io/happycoding/
- java/
- main/
- java/
- main/