- Java hello the world
- Lesson: A Closer Look at the «Hello World!» Application
- Source Code Comments
- The HelloWorldApp Class Definition
- The main Method
- Lesson: The «Hello World!» Application
- Первая программа – Hello, World!
- Что вам понадобится
- Исходный код
- Компилирование
- Выполнение программы
- Резюме
- Java Hello World Program
- Java Hello World Program
- 1. Compile and Run Java Hello World Program
- 2. Java Program important points
Java hello the world
- Introduction to Java
- The complete History of Java Programming Language
- C++ vs Java vs Python
- How to Download and Install Java for 64 bit machine?
- Setting up the environment in Java
- How to Download and Install Eclipse on Windows?
- JDK in Java
- How JVM Works – JVM Architecture?
- Differences between JDK, JRE and JVM
- Just In Time Compiler
- Difference between JIT and JVM in Java
- Difference between Byte Code and Machine Code
- How is Java platform independent?
- Decision Making in Java (if, if-else, switch, break, continue, jump)
- Java if statement with Examples
- Java if-else
- Java if-else-if ladder with Examples
- Loops in Java
- For Loop in Java
- Java while loop with Examples
- Java do-while loop with Examples
- For-each loop in Java
- Continue Statement in Java
- Break statement in Java
- Usage of Break keyword in Java
- return keyword in Java
- Object Oriented Programming (OOPs) Concept in Java
- Why Java is not a purely Object-Oriented Language?
- Classes and Objects in Java
- Naming Conventions in Java
- Java Methods
- Access Modifiers in Java
- Java Constructors
- Four Main Object Oriented Programming Concepts of Java
- Inheritance in Java
- Abstraction in Java
- Encapsulation in Java
- Polymorphism in Java
- Interfaces in Java
- ‘this’ reference in Java
Lesson: A Closer Look at the «Hello World!» Application
Now that you’ve seen the «Hello World!» application (and perhaps even compiled and run it), you might be wondering how it works. Here again is its code:
The «Hello World!» application consists of three primary components: source code comments, the HelloWorldApp class definition, and the main method. The following explanation will provide you with a basic understanding of the code, but the deeper implications will only become apparent after you’ve finished reading the rest of the tutorial.
Source Code Comments
/** * The HelloWorldApp class implements an application that * simply prints "Hello World!" to standard output. */ class HelloWorldApp < public static void main(String[] args) < System.out.println("Hello World!"); // Display the string. > > Comments are ignored by the compiler but are useful to other programmers. The Java programming language supports three kinds of comments:
/* text */ The compiler ignores everything from /* to */ . /** documentation */ This indicates a documentation comment (doc comment, for short). The compiler ignores this kind of comment, just like it ignores comments that use /* and */ . The javadoc tool uses doc comments when preparing automatically generated documentation. For more information on javadoc , see the Javadoc™ tool documentation . // text The compiler ignores everything from // to the end of the line.
The HelloWorldApp Class Definition
/** * The HelloWorldApp class implements an application that * simply displays "Hello World!" to the standard output. */ class HelloWorldApp public static void main(String[] args) < System.out.println("Hello World!"); // Display the string. >> As shown above, the most basic form of a class definition is:
The keyword class begins the class definition for a class named name , and the code for each class appears between the opening and closing curly braces marked in bold above. Chapter 2 provides an overview of classes in general, and Chapter 4 discusses classes in detail. For now it is enough to know that every application begins with a class definition.
The main Method
/** * The HelloWorldApp class implements an application that * simply displays "Hello World!" to the standard output. */ class HelloWorldApp < public static void main(String[] args) System.out.println("Hello World!"); //Display the string. > > In the Java programming language, every application must contain a main method whose signature is:
public static void main(String[] args)
The modifiers public and static can be written in either order ( public static or static public ), but the convention is to use public static as shown above. You can name the argument anything you want, but most programmers choose «args» or «argv».
The main method is similar to the main function in C and C++; it’s the entry point for your application and will subsequently invoke all the other methods required by your program.
The main method accepts a single argument: an array of elements of type String .
public static void main(String[] args)
This array is the mechanism through which the runtime system passes information to your application. For example:
Each string in the array is called a command-line argument. Command-line arguments let users affect the operation of the application without recompiling it. For example, a sorting program might allow the user to specify that the data be sorted in descending order with this command-line argument:
The «Hello World!» application ignores its command-line arguments, but you should be aware of the fact that such arguments do exist.
System.out.println("Hello World!"); uses the System class from the core library to print the «Hello World!» message to standard output. Portions of this library (also known as the «Application Programming Interface», or «API») will be discussed throughout the remainder of the tutorial.
Lesson: The «Hello World!» Application
The sections listed below provide detailed instructions for compiling and running a simple «Hello World!» application. The first section provides information on getting started with the NetBeans IDE, an integrated development environment that greatly simplifies the software development process. The NetBeans IDE runs on all of the platforms listed below. The remaining sections provide platform-specific instructions for getting started without an integrated development environment. If you run into problems, be sure to consult the common problems section; it provides solutions for many issues encountered by new users.
«Hello World!» for the NetBeans IDE These instructions are for users of the NetBeans IDE. The NetBeans IDE runs on the Java platform, which means that you can use it with any operating system for which there is a JDK 7 available. These operating systems include Microsoft Windows, Solaris OS, Linux, and Mac OS X. We recommend using the NetBeans IDE instead of the command line whenever possible.
«Hello World!» for Microsoft Windows These command-line instructions are for users of Windows XP Professional, Windows XP Home, Windows Server 2003, Windows 2000 Professional, and Windows Vista.
«Hello World!» for Solaris OS, Linux, and Mac OS X These command-line instructions are for users of Solaris OS, Linux, and Mac OS X. Common Problems (and Their Solutions) Consult this page if you have problems compiling or running your application.
Первая программа – Hello, World!
В этом уроке вы напишите свою первую программу на Java! Для этого вам потребуется компилятор Java из набора JDK (набор инструментов разработки). Если вы ещё не установили JDK, вы можете это сделать, прочитав наш предыдущий урок.
Что вам понадобится
Для первой программы на Java потребуется следующее:
Исходный код
Исходный код программы – это код на каком-либо языке программирования. В нашем случае это язык программирования Java. Программисты пишут исходный код, который понятен им и компилятору. Затем компилятор преобразует исходный код программы в байт код, который понятен виртуальной машине Java (Java Virtual Machine, JVM). JVM это среда выполнения программ, скомпилированных в виде байт кода.
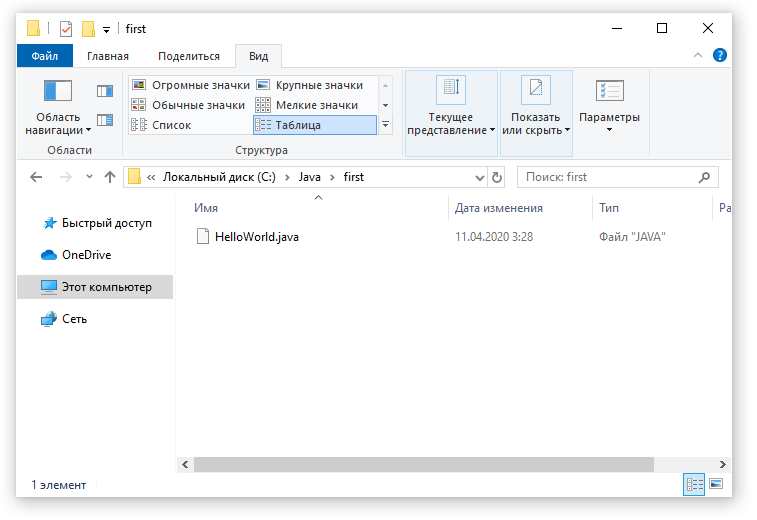
Рекомендую создать отдельную директорию для ваших исходников. Далее в тексте будет использоваться директория C:\Java\first
Исходный код Java программ содержится в файлах с расширением .java. В этих файлах хранятся классы Java. Давайте напишем свой первый класс:
Здесь мы объявили класс HelloWorld, указали в нём точку входа (метод main) и скомандовали вывести в консоль строку «Hello, World!».
Сохраните этот исходник в файле с названием HelloWorld.java. Будьте внимательны: название файла должно совпадать с названием класса, а расширение должно быть .java.
Теперь откройте консоль (нажмите комбинацию Win+R и укажите cmd):
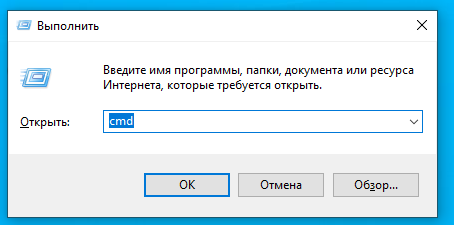
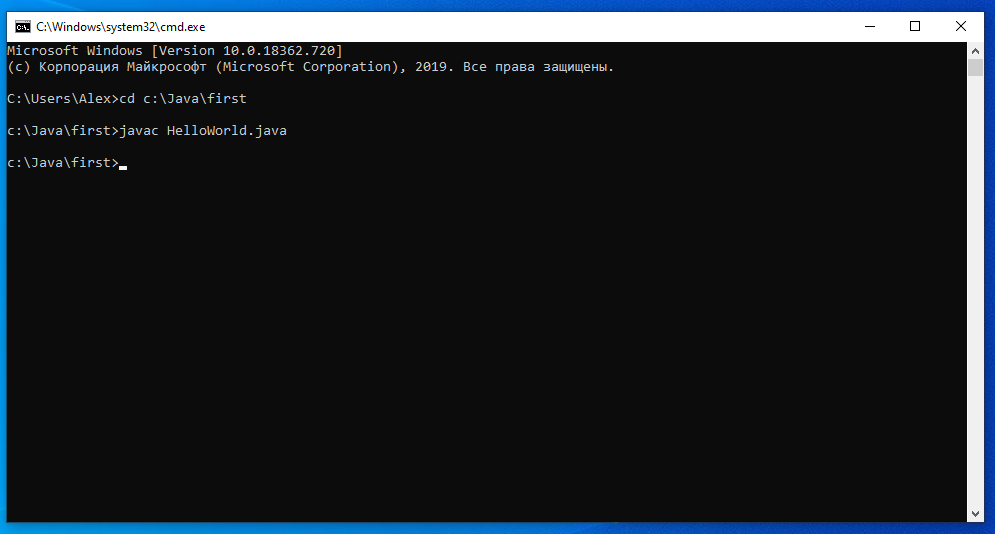
В открывшейся консоли перейдите в каталог с исходниками:
Теперь нам требуется скомпилировать исходный код в байт код.
Компилирование
Давайте укажем компилятору Java, что нам требуется скомпилировать исходный код в файле HelloWorld.java:
Компилятор javac должен молча отработать и скомпилировать наш исходный код.
Успешным результатом компилирования будет создание нового файла HelloWorld.class в папке с исходником:

Выполнение программы
Давайте же наконец запустим нашу первую программу!
Выполните в консоли следующую команду:
Здесь мы запускаем на выполнение наш класс HelloWorld. Обратите внимание, что при запуске программы на выполнение не требуется указывать расширения файлов, так как указывается именно название класса (не файла).
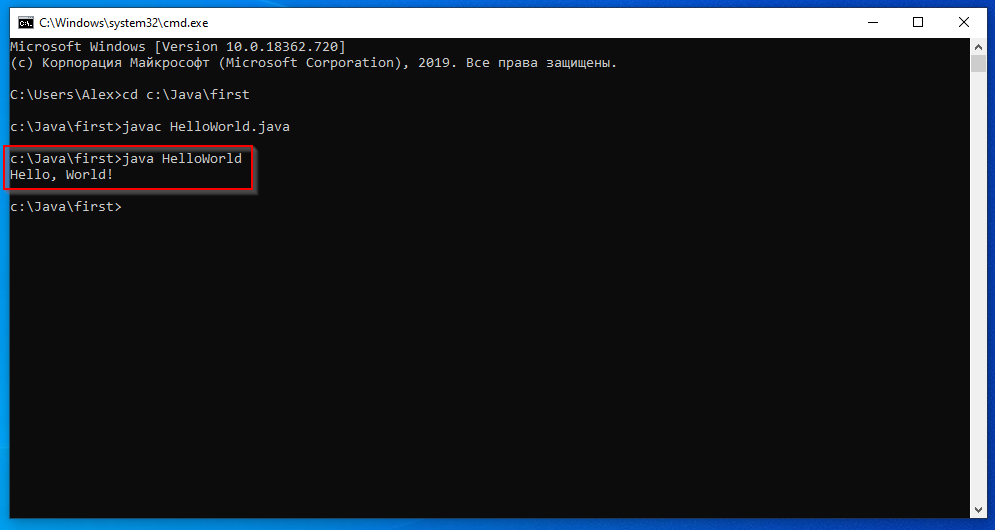
Если вы увидели надпись «Hello, World!», поздравляю, значит, у вас всё получилось и программа корректно выполнилась!
Резюме
В этом уроке вы научились компилировать первую программу с помощью компилятора javac и запускать её на выполнение с помощью виртуальной машины java. В следующих уроках вы узнаете, из чего состоят классы Java.
Java Hello World Program

While we believe that this content benefits our community, we have not yet thoroughly reviewed it. If you have any suggestions for improvements, please let us know by clicking the “report an issue“ button at the bottom of the tutorial.
Whenever we start to learn a programming language, the first program is always to print the Hello World. In the last article, we learned how to install Java on Windows 10. Now we are ready to write and run our first Hello World Java program.
Java Hello World Program
To keep things simple and working for a new user, here is the sample hello world program that you can use.
public class JavaHelloWorldProgram < public static void main(String args[])< System.out.println("Hello World"); >> 1. Compile and Run Java Hello World Program
Open Command Prompt and go to the directory where the hello world program file is saved. Then execute the below commands in order.
$javac JavaHelloWorldProgram.java $java JavaHelloWorldProgram Hello World 
If you are using Java 11 or higher, then you can simply execute java JavaHelloWorldProgram.java and it will compile and execute the program for you. No need to explicitly compile and then run the java program.
2. Java Program important points
- A Java source file can have multiple classes but only one public class is allowed.
- The java source file name should be same as the public class name. That’s why the file name of our program is JavaHelloWorldProgram.java
- When we compile the code, it generates byte code and save it as Class_Name.class extension. If you look at the directory where we compiled the java file, you will notice a new file created JavaHelloWorldProgram.class
- When we execute the class file, we don’t need to provide complete file name. We need to use only the public class name.
- When we run the program using java command, it loads the class into JVM and looks for the main method in the class and runs it. The main function syntax should be same as specified in the program, else it won’t run and throw exception as Exception in thread «main» java.lang.NoSuchMethodError: main .
I have recently created a short video for Java Hello World Program using Notepad and then Eclipse. Watch it for a better understanding. https://www.youtube.com/watch?v=ZREpFyjTDho That’s all for this post and you can start playing with your first class. In the next post, I will get into further details of classes, JDK, JVM, and other features provided by the Java programming language. Update: Read this post to know about JDK vs JRE vs JVM in java.
Thanks for learning with the DigitalOcean Community. Check out our offerings for compute, storage, networking, and managed databases.