In this tutorial, we will see how to generate source code jar for maven based project.
If you have simple java project, then you need to convert it maven project.
Sometimes, you need to pack source code with your project jar. This is extremely useful when people use your library and can attach source code for debugging.
You can simply use maven-source-plugin to achieve the same.
Once you put this in your pom.xml, you should be able to see source jar along with your project jar.
Deploy the jar
You need to run mvn install to generate the source jar along with project jar. I am using eclipse to run this mvn command.
You can also go to project location in terminal and execute mvn install to generate the source code jar.
How do I generate and deploy a source jar file for my project?
Ajax (1)
Ant (16)
Apache Web Server (8)
Bioinformatics (10)
Cascading Style Sheets (47)
Classes and Objects (14)
Database (13)
Design Patterns (22)
Eclipse (39)
Files (62)
General Java (69)
JSPs (9)
Java Basics (11)
Linux (23)
Logging (5)
Maven (88)
Search (12)
Servlets (20)
Struts (1)
Text (19)
Tomcat (8)
Version Control (8)
Windows (2)
XML (1)
Description: This maven tutorial describes how to generate a source code jar file for a project using the maven-source-plugin plugin.
Tutorial created using: Windows Vista || JDK 1.6.0_04 || Eclipse Web Tools Platform 2.0.1 (Eclipse 3.3.1)
The maven-source-plugin can be used to generate a source code jarW file for a project. Deploying this source jar to a remote repository can be useful for other developers so that they can ‘attach source’ and debug into the project source code. MavenSW does a great job of automating this process.
Here is a plugin entry from a pom.xml file that includes the «maven-source-plugin». It specifies the «jar» goal, which is the goal that generates the source jar file. By default this goal attaches to the package phase of the mavenSW default lifecycle.
I’ll perform a «mvn clean package» on «aproject» to generate the normal jar file and the source jar file.
The console output of «mvn clean package» is shown here:
Console output for ‘mvn clean package’ on ‘aproject’ project
[INFO] Scanning for projects. WAGON_VERSION: 1.0-beta-2 [INFO] ------------------------------------------------------------------------ [INFO] Building aproject [INFO] task-segment: [clean, package] [INFO] ------------------------------------------------------------------------ [INFO] [clean:clean] [INFO] Deleting directory C:\dev\workspace\aproject\target [INFO] [resources:resources] [INFO] Using default encoding to copy filtered resources. [INFO] [compiler:compile] [INFO] Compiling 1 source file to C:\dev\workspace\aproject\target\classes [INFO] [resources:testResources] [INFO] Using default encoding to copy filtered resources. [INFO] [compiler:testCompile] [INFO] Compiling 1 source file to C:\dev\workspace\aproject\target\test-classes [INFO] [surefire:test] [INFO] Surefire report directory: C:\dev\workspace\aproject\target\surefire-reports ------------------------------------------------------- T E S T S ------------------------------------------------------- Running com.maventest.AppTest Tests run: 1, Failures: 0, Errors: 0, Skipped: 0, Time elapsed: 0.045 sec Results : Tests run: 1, Failures: 0, Errors: 0, Skipped: 0 [INFO] [jar:jar] [INFO] Building jar: C:\dev\workspace\aproject\target\aproject-1.1.jar [INFO] Preparing source:jar [WARNING] Removing: jar from forked lifecycle, to prevent recursive invocation. [INFO] No goals needed for project - skipping [INFO] [source:jar ] [INFO] Building jar: C:\dev\workspace\aproject\target\aproject-1.1-sources.jar [INFO] ------------------------------------------------------------------------ [INFO] BUILD SUCCESSFUL [INFO] ------------------------------------------------------------------------ [INFO] Total time: 4 seconds [INFO] Finished at: Tue Feb 19 19:15:36 PST 2008 [INFO] Final Memory: 11M/22M [INFO] ------------------------------------------------------------------------
After the maven command has completed, we can see the normal jar artifact (aproject-1.1.jar) and the source jar file (aproject-1.1-sources.jar) have been generated for the project.
This guide demonstrates how to create a Java library with Gradle using gradle init . You can follow the guide step-by-step to create a new project from scratch or download the complete sample project using the links above.
What you’ll build
You’ll generate a Java library that follows Gradle’s conventions.
What you’ll need
A text editor or IDE — for example IntelliJ IDEA
A Java Development Kit (JDK), version 8 or higher — for example AdoptOpenJDK
The latest Gradle distribution
Create a project folder
Gradle comes with a built-in task, called init , that initializes a new Gradle project in an empty folder. The init task uses the (also built-in) wrapper task to create a Gradle wrapper script, gradlew .
The first step is to create a folder for the new project and change directory into it.
Run the init task
From inside the new project directory, run the init task using the following command in a terminal: gradle init . When prompted, select the 3: library project type and 3: Java as implementation language. Next you can choose the DSL for writing buildscripts — 1 : Groovy or 2: Kotlin . For the other questions, press enter to use the default values.
The output will look like this:
$ gradle init Select type of project to generate: 1: basic 2: application 3: library 4: Gradle plugin Enter selection (default: basic) [1..4] 3 Select implementation language: 1: C++ 2: Groovy 3: Java 4: Kotlin 5: Scala 6: Swift Enter selection (default: Java) [1..6] 3 Select build script DSL: 1: Groovy 2: Kotlin Enter selection (default: Groovy) [1..2] 1 Select test framework: 1: JUnit 4 2: TestNG 3: Spock 4: JUnit Jupiter Enter selection (default: JUnit 4) [1..4] Project name (default: demo): Source package (default: demo): BUILD SUCCESSFUL 2 actionable tasks: 2 executed
The init task generates the new project with the following structure:
Important: Notice the usage of the Maven Compiler Plugin, in order to explicitly define the JDK version that must be used for our project’s compilation phase.
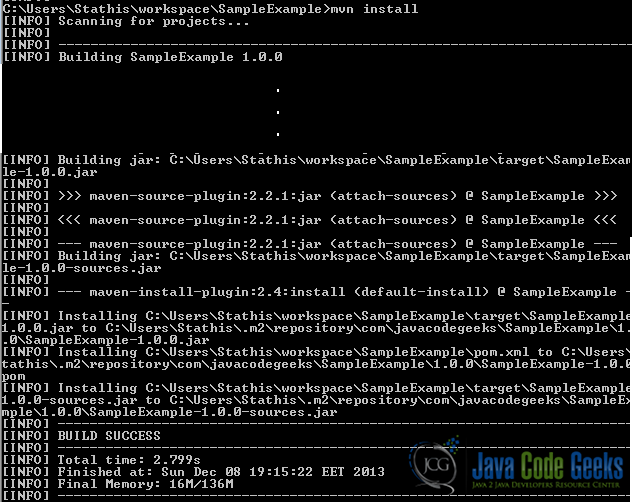
2. Deploy the Project
Using the terminal (Linux or Mac) or the command prompt (Windows), we navigate to the folder where our project is located. Then, we issue the following command:
This command packages and installs our project into Maven’s Local Repository. A sample output of the command’s execution is shown below:
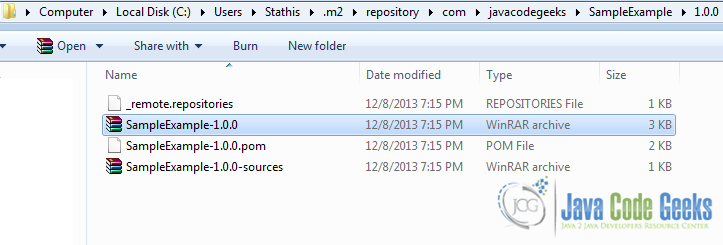
3. Verify the execution
-.jar
—sources.jar
The first .jar file contains the class and executables of our project, while the second .jar file contains the source files of our Java project. A sample output is show below:
This was a tutorial on how to generate and package the source code of a Maven based project into a .jar file.