Adding Classes to the JAR File’s Classpath
You may need to reference classes in other JAR files from within a JAR file.
For example, in a typical situation an applet is bundled in a JAR file whose manifest references a different JAR file (or several different JAR files) that serves as utilities for the purposes of that applet.
You specify classes to include in the Class-Path header field in the manifest file of an applet or application. The Class-Path header takes the following form:
Class-Path: jar1-name jar2-name directory-name/jar3-name
By using the Class-Path header in the manifest, you can avoid having to specify a long -classpath flag when invoking Java to run your application.
Note: The Class-Path header points to classes or JAR files on the local network, not JAR files within the JAR file or classes accessible over Internet protocols. To load classes in JAR files within a JAR file into the class path, you must write custom code to load those classes. For example, if MyJar.jar contains another JAR file called MyUtils.jar, you cannot use the Class-Path header in MyJar.jar's manifest to load classes in MyUtils.jar into the class path.
An Example
We want to load classes in MyUtils.jar into the class path for use in MyJar.jar. These two JAR files are in the same directory.
We first create a text file named Manifest.txt with the following contents:
Warning: The text file must end with a new line or carriage return. The last line will not be parsed properly if it does not end with a new line or carriage return.
We then create a JAR file named MyJar.jar by entering the following command:
jar cfm MyJar.jar Manifest.txt MyPackage/*.class
This creates the JAR file with a manifest with the following contents:
Manifest-Version: 1.0 Class-Path: MyUtils.jar Created-By: 1.7.0_06 (Oracle Corporation)
The classes in MyUtils.jar are now loaded into the class path when you run MyJar.jar.
How to Add JAR file to Classpath in Java?
JAR is an abbreviation of JAVA Archive. It is used for aggregating multiple files into a single one, and it is present in a ZIP format. It can also be used as an archiving tool but the main intention to use this file for development is that the Java applets and their components(.class files) can be easily downloaded to a client browser in just one single HTTP request, rather than establishing a new connection for just one thing. This will improve the speed with which applets can be loaded onto a web page and starts their work. It also supports compression, which reduces the file size and the download time will be improved.
Methods: JAR file can be added in a classpath in two different ways
Method 1 – Using Eclipse IDE
Step 1: Right-Click on your project name
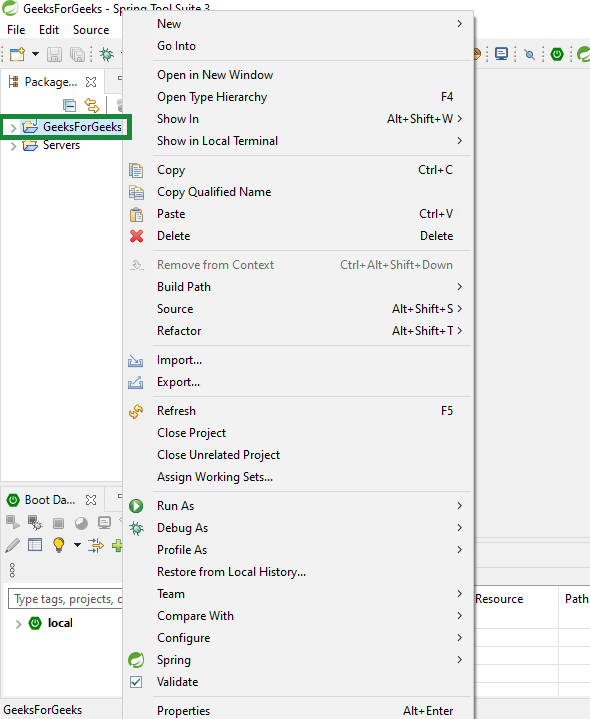
Step 2: Click on Build Path
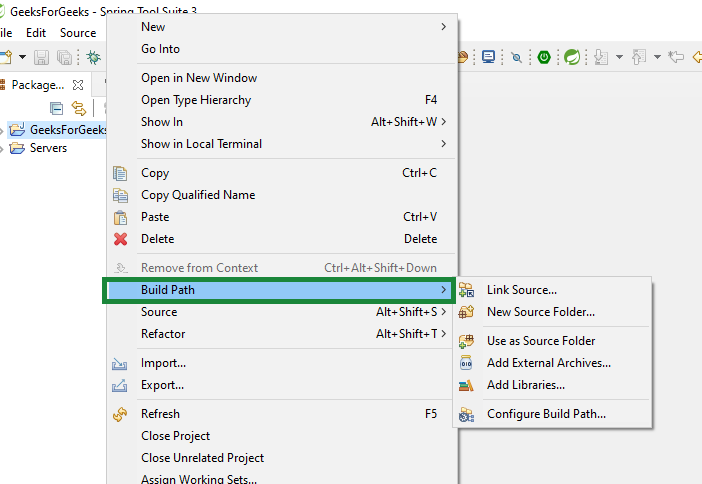
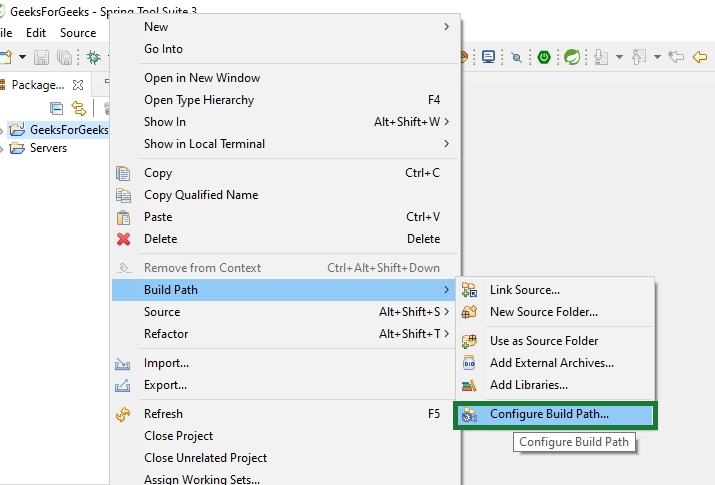
Step 3: Click on configure build path
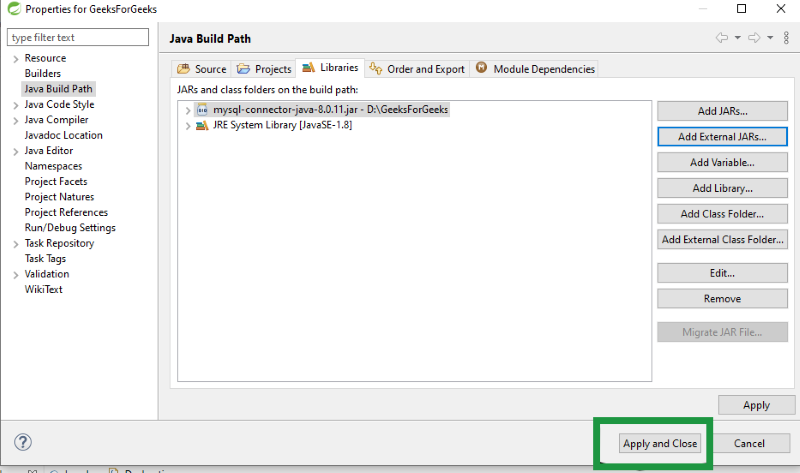
Step 4: Click on libraries and click on “Add External JARs”
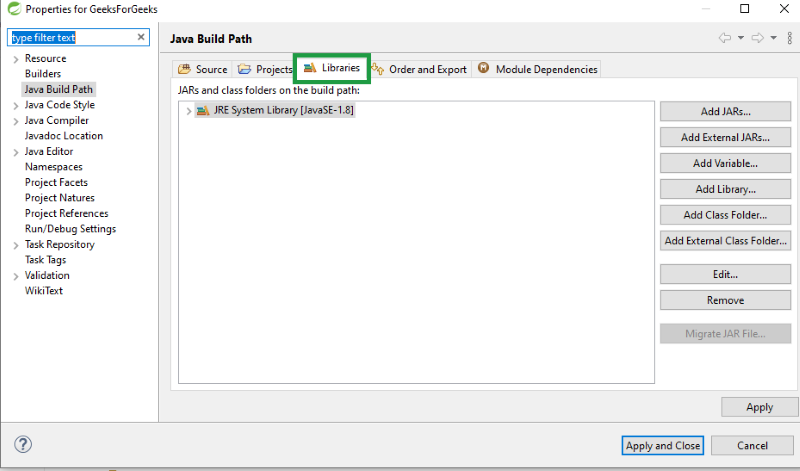
Step 5: Select the jar file from the folder where you have saved your jar file
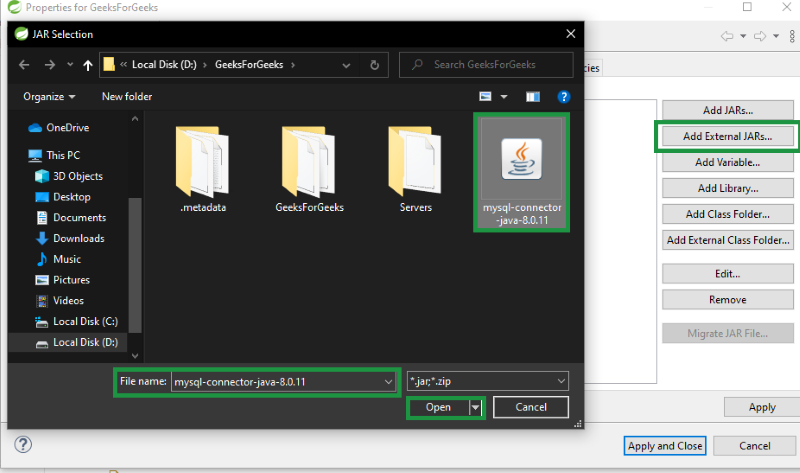
Step 6: Click on Apply and Ok.
Method 2 – Using the command line
Command 1: By including JAR name in CLASSPATH environment variable
CLASSPATH environment variable is not case-sensitive. It can be either Classpath or classpath which is similar to PATH environment variable which we can use to locate Java binaries like javaw and java command.
Command 2: By including name of JAR file in -a classpath command-line option
This option is viable when we are passing –classpath option while running our java program like java –classpath $(CLASSPATH) Main. In this case, CLASSPATH shell variable contains the list of Jar file which is required by the application. One of the best advantages of using classpath command-line option is that it allows us to use every application to have its own set of JAR classpath. In other cases, it’s not available to all Java program which runs on the same host.
Command 3: By including the jar name in the Class-Path option in the manifest
When we are running an executable JAR file we always notice that the Class-Path attribute in the file inside the META-INF folder. Therefore, we can say that Class-Path is given the highest priority and it overrides the CLASSPATH environment variable as well as –classpath command-line option. Henceforth, we can deduce that its a good place to include all JAR files required by Java Application.
Command 4: By using Java 6 wildcard option to include multiple JAR
From Java 1.6+ onwards we can use a wildcard for including all jars in a directory to set classpath or else to provide Java program using classpath command-line option. We can illustrate the Java command example to add multiple JAR into classpath using Java 6 wildcard method as follows,
java.exe -classpath D:\lib\*Main
In this method, we include all JAR files inside ‘D:\lib’ directory into the classpath. We must ensure that syntax is correct. Some more important points about using Java 6 wildcard to include multiple JAR in classpath are as follows:
Whenever JAR and classfile are present in the same directory then we need to include both of them separately
Java -classpath /classes: /lib/*
In Java 6 wildcard which includes all JAR, it will not search for JARs in a subdirectory.
Wildcard is included in all JAR is not honored in the case when we are running Java program with JAR file and having Class-Path attribute in the manifest file. JAR wildcard is honored when we use –cp or –classpath option
Command 5: Adding JAR in ext directory example be it ‘C:\Program Files\Java\jdk1.6.0\jre\lib\ext’
By using the above method we can add multiple JAR in our classpath. JAR from ext directory can be loaded by extension Classloader. It has been given higher priority than application class loader which loads JAR from either CLASSPATH environment variable or else directories specified in –classpath or –cp