- Java AWT tutorial for beginners
- AWT hierarchy
- Components and containers
- Java AWT Example
- AWT Example 1: creating Frame by extending Frame class
- AWT Example 2: creating Frame by creating instance of Frame class
- Top Related Articles:
- About the Author
- Introduction to Abstract Window Toolkit (AWT) in Java
- On Windows XP
- On Ubuntu 18.04
- Structure
- Some basic functions/attributes:
- obj.setBounds(int x-coordinate,int y-coordinate,int width ,int height)
- obj.setSize(int width,int height)
- obj.setVisible(boolean arg);
- obj.add(Object component);
- Example: A registration Form
- Our final output would be something similar to this:
- Conclusion
- FAHAD ISRAR
Java AWT tutorial for beginners
AWT stands for Abstract Window Toolkit. It is a platform dependent API for creating Graphical User Interface (GUI) for java programs.
Why AWT is platform dependent? Java AWT calls native platform (Operating systems) subroutine for creating components such as textbox, checkbox, button etc. For example an AWT GUI having a button would have a different look and feel across platforms like windows, Mac OS & Unix, this is because these platforms have different look and feel for their native buttons and AWT directly calls their native subroutine that creates the button. In simple, an application build on AWT would look like a windows application when it runs on Windows, but the same application would look like a Mac application when runs on Mac OS.
AWT is rarely used now days because of its platform dependent and heavy-weight nature. AWT components are considered heavy weight because they are being generated by underlying operating system (OS). For example if you are instantiating a text box in AWT that means you are actually asking OS to create a text box for you.
Swing is a preferred API for window based applications because of its platform independent and light-weight nature. Swing is built upon AWT API however it provides a look and feel unrelated to the underlying platform. It has more powerful and flexible components than AWT. In addition to familiar components such as buttons, check boxes and labels, Swing provides several advanced components such as tabbed panel, scroll panes, trees, tables, and lists. We will discuss Swing in detail in a separate tutorial.
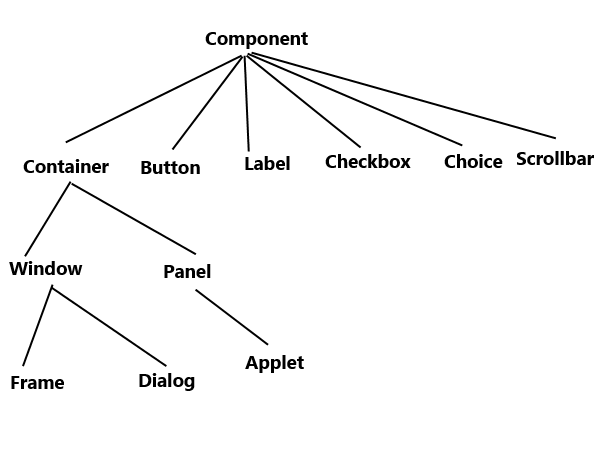
AWT hierarchy
Components and containers
All the elements like buttons, text fields, scrollbars etc are known as components. In AWT we have classes for each component as shown in the above diagram. To have everything placed on a screen to a particular position, we have to add them to a container. A container is like a screen wherein we are placing components like buttons, text fields, checkbox etc. In short a container contains and controls the layout of components. A container itself is a component (shown in the above hierarchy diagram) thus we can add a container inside container.
Types of containers:
As explained above, a container is a place wherein we add components like text field, button, checkbox etc. There are four types of containers available in AWT: Window, Frame, Dialog and Panel. As shown in the hierarchy diagram above, Frame and Dialog are subclasses of Window class.
Window: An instance of the Window class has no border and no title
Dialog: Dialog class has border and title. An instance of the Dialog class cannot exist without an associated instance of the Frame class.
Panel: Panel does not contain title bar, menu bar or border. It is a generic container for holding components. An instance of the Panel class provides a container to which to add components.
Frame: A frame has title, border and menu bars. It can contain several components like buttons, text fields, scrollbars etc. This is most widely used container while developing an application in AWT.
Java AWT Example
We can create a GUI using Frame in two ways:
1) By extending Frame class
2) By creating the instance of Frame class
Lets have a look at the example of each one.
AWT Example 1: creating Frame by extending Frame class
import java.awt.*; /* We have extended the Frame class here, * thus our class "SimpleExample" would behave * like a Frame */ public class SimpleExample extends Frame < SimpleExample()< Button b=new Button("Button!!"); // setting button position on screen b.setBounds(50,50,50,50); //adding button into frame add(b); //Setting Frame width and height setSize(500,300); //Setting the title of Frame setTitle("This is my First AWT example"); //Setting the layout for the Frame setLayout(new FlowLayout()); /* By default frame is not visible so * we are setting the visibility to true * to make it visible. */ setVisible(true); >public static void main(String args[]) < // Creating the instance of Frame SimpleExample fr=new SimpleExample(); >> 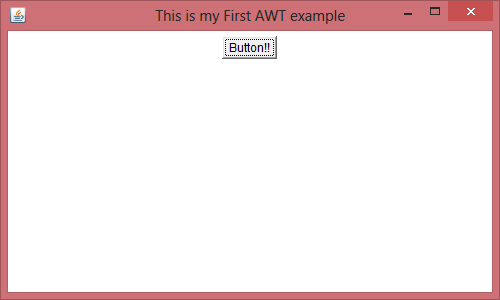
Output:
AWT Example 2: creating Frame by creating instance of Frame class
import java.awt.*; public class Example2 < Example2() < //Creating Frame Frame fr=new Frame(); //Creating a label Label lb = new Label("UserId: "); //adding label to the frame fr.add(lb); //Creating Text Field TextField t = new TextField(); //adding text field to the frame fr.add(t); //setting frame size fr.setSize(500, 300); //Setting the layout for the Frame fr.setLayout(new FlowLayout()); fr.setVisible(true); >public static void main(String args[]) < Example2 ex = new Example2(); >> 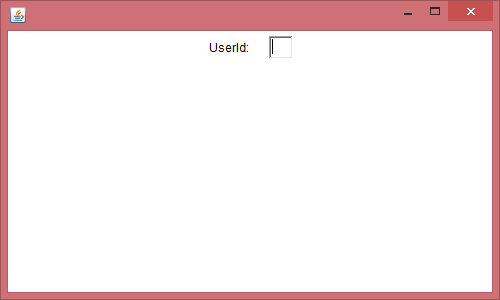
Output:
Top Related Articles:
About the Author
I have 15 years of experience in the IT industry, working with renowned multinational corporations. Additionally, I have dedicated over a decade to teaching, allowing me to refine my skills in delivering information in a simple and easily understandable manner.
Introduction to Abstract Window Toolkit (AWT) in Java

Abstract Window Toolkit(AWT) is an to create GUI using JAVA for Window based applications.It is said to be platform dependent as it implements itself over the underlying Operating System.Thus,it uses the native components like the windows,panels,dialog and whatever you see on the GUI of your Operating System.It calls the platforms subroutines to implement the functionalities.Depending on the Operating System(platform)the UI will be different from OS to OS.For Example you can see below that the same program rendered different UI on different platforms .
We have covered the basics by building a form UI using Abstract Window Toolkit (AWT) in Java.
On Windows XP
On Ubuntu 18.04
If you’d see above images the look and feel of both of them is entirely like the native application and depends on the platform it is being run.
Structure
Lets get into the structure of the AWT.

If you’d see the images shown previously (Windows XP and Ubuntu) on observing closely you will notice that there exists a conatainer(which has the close,maximize and minimize button on top-right) that is composed of several elements like buttons,text-box etc.These elements are called components.Container can be defined as a special type of component that is superset of all the other constituting components.As shown in the figure above Button,Label,Checkbox,Choice,Scrollbar are also the components.We won’t go much into theoretical concepts instead we will focus on understanding the functionality and practical implementation of AWT.
Lets get ourselves familiar with some special containers that we would be using in future
- Window: It implements a top level window container for GUI implmentation and has no borders or menubar.
- Panel: It is used for holding other components and does not have any title bar, menu bar or border.
- Frame: It is sub-window component which contains other elemental components like title bar,textfield,button,label etc.
Some basic functions/attributes:
Before moving on to develop a frame we should learn about some basic functions/methods and attributes that we would utilize to develop our GUI.
Let obj be an identifier for a component object.
obj.setBounds(int x-coordinate,int y-coordinate,int width ,int height)
Usage: Used to set components position on screen and its dimensions
//Creating a button component Button bt=new Button("Click Me"); // setting button position and dimension on screen bt.setBounds(50,50,50,50); obj.setSize(int width,int height)
Usage: Used to set frame dimensions.
Example:
//Creating a new frame Frame fr=new Frame("My Frame"); //Setting frame dimensions fr.setSize(400, 400); obj.setVisible(boolean arg);
Usage: used to set the component visible(arg=true) i.e render the component on screen or to hide the component(arg=false).
import java.awt.*; public class example extends Frame < //Constructor that accepts title for frame example(String frame_title)< //Instantiating a frame using frame class Frame fr=new Frame(frame_title); //Setting frame Dimensions fr.setSize(500, 300); //Making frame visible fr.setVisible(true); >public static void main(String args[]) < //creating a frame and passing a title example fr = new example("Example Frame"); //String frame_tile="Example Frame" >> 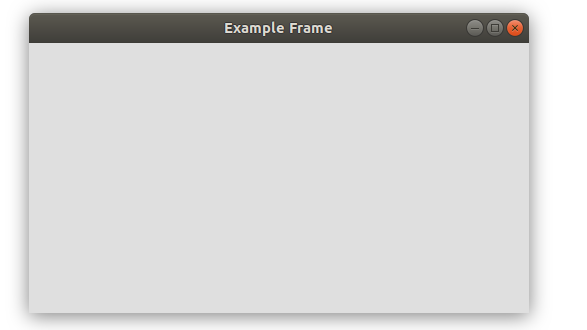
Output on Ubuntu 18.04
obj.add(Object component);
Usage: used to add a component to another component.The component being added becomes a sub-component and the one to which it is being added becomes the parent container for this component.
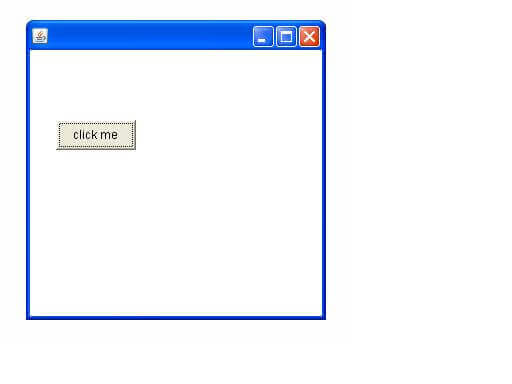
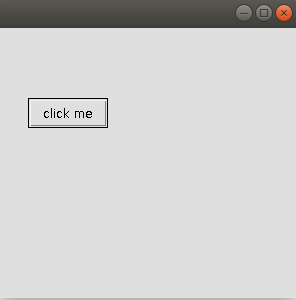
import java.awt.*; public class example extends Frame < //Constructor that takes Frame Title as arguement example(String frame_title)< //Instantiating a frame Frame fr=new Frame(frame_title); //Setting Frame width and height fr.setSize(500,300); //Instantiating a Button Button bt=new Button("Click Me"); // setting button position on screen bt.setBounds(100,50,100,50); //adding button into frame fr.add(bt); //Setting no Layouts fr.setLayout(null); //Making the Frame Visible fr.setVisible(true); >public static void main(String args[]) < // Creating the instance of Frame example frame = new example("A Frame with Button"); >> 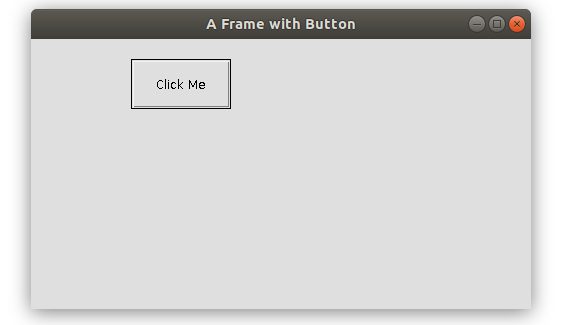
Output on Ubnutu 18.04
To understand more we’ll see an example!!
Example: A registration Form
Suppose we want to create a registration form and handle the input as well.
Our final output would be something similar to this:
Also here we would require an Event Listener that would keep track of our input and submit actions.We will use ActionListener for that.
So let’s dive into the code. The explanations wherever neccessary have been added into the code itself using comments.
//Registration Form using AWT /*To Compile: javac awt.java To run: java Main */ import java.awt.*; import java.awt.event.*; public class registration_form implements ActionListener < TextField t = new TextField(); TextField t1 = new TextField(); Choice c = new Choice(); Label submit = new Label("Registration Successful"); Frame f = new Frame(); MenuBar mb = new MenuBar(); Menu m = new Menu("Menu"); Label l = new Label("Name"); Label l1 = new Label("Pasword: "); Label l2 = new Label("Occupation"); Button s = new Button("Submit"); Button clr = new Button("Clear"); //Constructor that will create the form registration_form()< //Frame Layout f.setSize(600,600); f.setVisible(true); f.setLayout(null); f.setTitle("Registration Form"); //End of Layout //Menu m.add("File"); m.add("Edit"); mb.add(m); f.setMenuBar(mb); //End of Menu //First Row : Name and TextField for name l.setBounds(50,100, 100,30); f.add(l); t.setBounds(170,100, 100,30); f.add(t); //End of row 1 //row 2 l1.setBounds(50,170, 100,30); //We'll display * for every char entered in password field t1.setEchoChar('*'); t1.setBounds(170,170, 100,30); f.add(l1); f.add(t1); //End of row 2 //Choice Row 3 l2.setBounds(50,220, 100,30); c.add("Student"); c.add("Employee"); c.add("Business"); c.setBounds(170,220, 100,30); f.add(l2); f.add(c); //End of Choice row s.setBounds(50,280, 100,30); // We will add functionality to the button s.addActionListener(this); clr.setBounds(170,280,100,30); clr.addActionListener(this); f.add(s); f.add(clr); submit.setBounds(50,330, 300,30); f.add(submit); submit.setVisible(false); >//Handles events public void actionPerformed(ActionEvent e) < //If Submit Button Pressed if (e.getSource() == s)< submit.setVisible(true); submit.setText("Name ="+t.getText() +" Occupation ="+c.getSelectedItem()); >//If Clear Button Pressed else < //Incase of exception t.setText(" "); t.setText(""); t1.setText(" "); t1.setText(""); //Selects the first option of choice on clearing screen c.select(0); / submit.setVisible(false); >> > class Main < public static void main(String Z[])< registration_form reg = new registration_form(); >> - Source File name: registration_form.java
- Compile using javac registration_form.java
- Generated files(on compilation): registration_form.class and Main.class
- Run using java Main
Conclusion
As AWT implements its GUI using the underlying Operating system,it’s components become quite heavy.For example if you are creating a Button in AWT then you are actually asking OS to create a Button for you.Swing is another API that is popularly used because it is platform independent and light weight as well.The UI is independent of the Operating System.Not only is it lightweight but also it is more flexible and powerful.It offers advance features and components as well like lists,tables,combo box,slider etc.Thus,Swing has replaced AWT at most of the applications and uses.Nevertheless,AWT still finds its place where the look and feel of a native appliacation is concerned.
With this article at OpenGenus, you must have a good idea of using Abstract Window Toolkit (AWT) in Java by building a basic form. Enjoy.

FAHAD ISRAR
Intern at OpenGenus | Google Summer of Code 2020 & 2021