- How to Put Image Inline With Text
- Method 1: How to Put an Image inline With Text in HTML?
- Method 2: How to Put an Image Inline With Text Using CSS Properties?
- Conclusion
- HTML Images
- Example
- Example
- Example
- HTML Images Syntax
- Syntax
- The src Attribute
- Example
- The alt Attribute
- Example
- Example
- Image Size — Width and Height
- Example
- Example
- Width and Height, or Style?
- Example
- Images in Another Folder
- Example
- Images on Another Server/Website
- Example
- Animated Images
- Example
- Image as a Link
- Example
- Image Floating
- Example
- Common Image Formats
- Chapter Summary
- HTML Exercises
- HTML Image Tags
- HTML Lesson 4: How to Insert an Image in HTML
- Follow Along
- A Funny Dog
- Self Closing Elements
- About the Author
- 20 thoughts on “ HTML Lesson 4: How to Insert an Image in HTML ”
How to Put Image Inline With Text
![]()
While publishing research papers, inline images with the text data are used for a better understanding of the user. Inline images are utilized for conveying value and information. It also supports a broad range of data formats, including “GIFs”, “JPG”, “PNG”, and “SVG”. Furthermore, users can also utilize this format for making the webpage. To do so, HTML/CSS provides different properties to add the image inline with the text.
This write-up will explain:
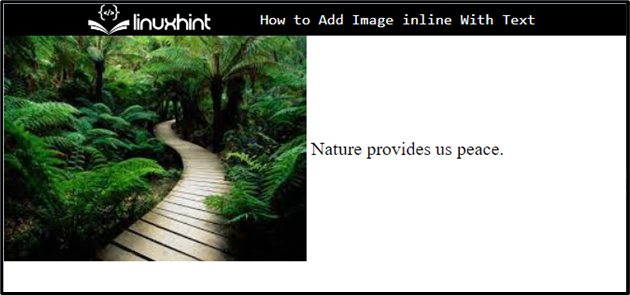
Method 1: How to Put an Image inline With Text in HTML?
To put an image inline with text in HTML, utilize inline styling in HTML. To do so, follow the given instructions.
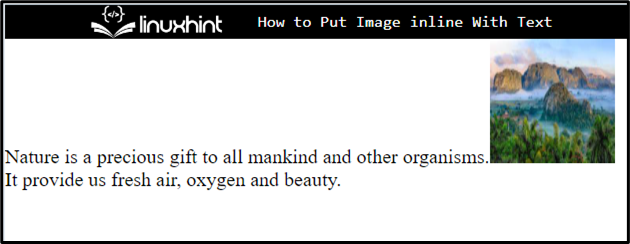
Step 1: Add an Image
Initially, add an image with the help of the “ ” tag. Then, apply inline styling by utilizing the “style” attribute. The description of the attribute is mentioned below:
-
- The HTML “style” tag contains several CSS properties and value pairs that can be utilized directly. To do so, the value of this attribute is set as “vertical-align: middle”.
- The “vertical-align” property is applied to control the element’s vertical alignment.
- “src” is used for inserting a media file inside the element.
Step 2: Make a “div” Container
Next, use the “ ” element to make a div container in the HTML page. Then, insert the “style” attribute with the following values:
-
- “vertical-align: middle” is set for inline styling and setting the container alignment.
- “display: inline” tells the element to fit itself on the same line.
- After that, embed the text in between the “div” tag:
It can be noticed that the image has been added inline with the text on the HTML page:

Method 2: How to Put an Image Inline With Text Using CSS Properties?
To put an image inline with the text, the CSS “vertical-align” property with the value “middle” and “display” as “inline” can be applied.
Step 1: Create Main div Container
First, create a div container using the “ ” tag and add an id attribute with a specific name.
Step 2: Create a Nested div Container
Next, create a next container between the first “div” container and insert a “class” attribute with a particular name. Then, embed text in between the “div” tag.
Step 3: Add an Image
After that, add an image by utilizing the “ ” tag. Then, add the below-listed attributes in the image tag:
-
- “src” is used to add the media file. To do so, we have set the file name as this attribute value.
- “width” and “height” determines the size of the added image element:
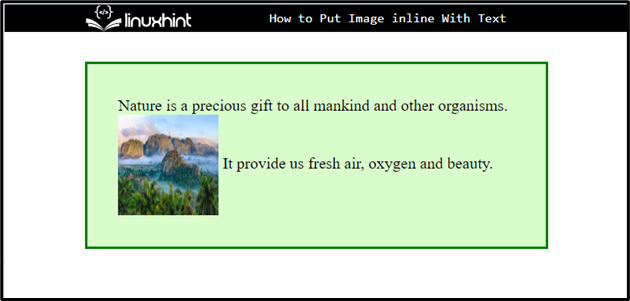
Step 4: Style “div” Container
Access the div element with the help of the value of the id as “#main”:
#main <
margin: 30px 80px;
background-color: rgb ( 217 , 252 , 203 ) ;
border: 3px solid green;
padding: 30px;
}Then, apply the CSS properties mentioned in the above code snippet:
-
- “margin” defines a space outside of the defined boundary.
- “background-color” property allocated the color at the backside of the defined element.
- “border” determines a boundary around the element.
- “padding” is used for adding the space inside of the defined border.
Step 5: Make Image Inline With Text
Access the nested div container with the class name “.main-content” and apply the listed CSS properties:
-
- “height” and “width” properties are utilized for setting the element’s size.
- “vertical-align” is used for setting the vertical alignment as “middle”.
- “display” controls how an element is handled as a block or inline component, as well as the arrangement of its children.
That’s all about putting an image inline with the text.
Conclusion
To put the image inline with the text, first, add an image and text in the div container. Then, the user can utilize the inline styling in HTML and apply CSS properties. To do so, apply the “vertical-align” CSS property with the value “middle” and “display” set as “inline” to put the image in line with the text. This post explained the method to put the image inline with the text.
HTML Images
Images can improve the design and the appearance of a web page.
Example
Example
Example
HTML Images Syntax
The HTML
tag is used to embed an image in a web page.
Images are not technically inserted into a web page; images are linked to web pages. The
tag creates a holding space for the referenced image.
The
tag is empty, it contains attributes only, and does not have a closing tag.
The
tag has two required attributes:
Syntax
The src Attribute
The required src attribute specifies the path (URL) to the image.
Note: When a web page loads, it is the browser, at that moment, that gets the image from a web server and inserts it into the page. Therefore, make sure that the image actually stays in the same spot in relation to the web page, otherwise your visitors will get a broken link icon. The broken link icon and the alt text are shown if the browser cannot find the image.
Example
The alt Attribute
The required alt attribute provides an alternate text for an image, if the user for some reason cannot view it (because of slow connection, an error in the src attribute, or if the user uses a screen reader).
The value of the alt attribute should describe the image:
Example
If a browser cannot find an image, it will display the value of the alt attribute:
Example
Tip: A screen reader is a software program that reads the HTML code, and allows the user to «listen» to the content. Screen readers are useful for people who are visually impaired or learning disabled.
Image Size — Width and Height
You can use the style attribute to specify the width and height of an image.
Example
Alternatively, you can use the width and height attributes:
Example

The width and height attributes always define the width and height of the image in pixels.
Note: Always specify the width and height of an image. If width and height are not specified, the web page might flicker while the image loads.
Width and Height, or Style?
The width , height , and style attributes are all valid in HTML.
However, we suggest using the style attribute. It prevents styles sheets from changing the size of images:
Example
Images in Another Folder
If you have your images in a sub-folder, you must include the folder name in the src attribute:
Example
Images on Another Server/Website
Some web sites point to an image on another server.
To point to an image on another server, you must specify an absolute (full) URL in the src attribute:
Example
Notes on external images: External images might be under copyright. If you do not get permission to use it, you may be in violation of copyright laws. In addition, you cannot control external images; they can suddenly be removed or changed.
Animated Images
HTML allows animated GIFs:
Example
Image as a Link
To use an image as a link, put the
tag inside the tag:
Example
Image Floating
Use the CSS float property to let the image float to the right or to the left of a text:
Example
The image will float to the right of the text.
The image will float to the left of the text.
Tip: To learn more about CSS Float, read our CSS Float Tutorial.
Common Image Formats
Here are the most common image file types, which are supported in all browsers (Chrome, Edge, Firefox, Safari, Opera):
Abbreviation File Format File Extension APNG Animated Portable Network Graphics .apng GIF Graphics Interchange Format .gif ICO Microsoft Icon .ico, .cur JPEG Joint Photographic Expert Group image .jpg, .jpeg, .jfif, .pjpeg, .pjp PNG Portable Network Graphics .png SVG Scalable Vector Graphics .svg Chapter Summary
- Use the HTML
element to define an image
- Use the HTML src attribute to define the URL of the image
- Use the HTML alt attribute to define an alternate text for an image, if it cannot be displayed
- Use the HTML width and height attributes or the CSS width and height properties to define the size of the image
- Use the CSS float property to let the image float to the left or to the right
Note: Loading large images takes time, and can slow down your web page. Use images carefully.
HTML Exercises
HTML Image Tags
Tag Description Defines an image Defines an image map Defines a clickable area inside an image map Defines a container for multiple image resources For a complete list of all available HTML tags, visit our HTML Tag Reference.
HTML Lesson 4: How to Insert an Image in HTML
As you recall from Lesson 1 (What is HTML?), adding a paragraph in HTML is as simple as wrapping text in and tags. Adding an image, however, is a little more complicated.
Follow Along
Before we continue, I encourage you to follow along by copying and pasting today’s code into your own HTML document (or the page we created in Lesson 2: How To Create and Save Your First HTML File by Hand). This will allow you to edit the text, and refresh the file in your web browser as we make edits. This will greatly enhance your learning ability.
A Funny Dog
Let’s pretend we have an image of a dog on our computer saved as “funny-dog.jpg” and we want to insert it into a webpage; this is the code we would use:
Let’s analyze this code. First, is the code for creating an image element. Next, the letters “src” are used as an attribute (which you learned about in Lesson 3: Attributes and Values) and stand for “source”. Basically, we need to provide the web browser with a value to the source of the image. Naturally, the value for the source attribute is “funny-dog.jpg”. This example assumes your image file is located in the same directory as your HTML file. If, for example, you had your image file inside a folder named “images” your code would look like this:
Self Closing Elements
As you can see, in both code examples so far there has not been an ending tag, because the image code is a “self closing” element. This is because unlike a paragraph, we won’t have a plethora of content inside our
element, but rather a single image. In fact, HTML5 does not require us to ever “close” our elements, but for organizational reasons I recommend including traditional closing tags for most elements.
There is one additional bit of code we must add before we are finished. We must assign an “alt” attribute and value to our image. The “alt” attribute stands for “alternative” and is used to provide a text-based alternative for viewers incase the image will not load, or if they are visually impaired. Here is what our code will look like:
If you prefer to watch video lessons instead of reading written lessons check out my 8 hour video course and learn pro-level HTML, CSS, and responsive design.
About the Author
Brad Schiff is a front-end developer, designer, and educator who has been building user interfaces for over a decade. He’s done work for Fortune 500 companies, national political campaigns, and international technology leaders. His proudest achievement is helping people learn front-end web development.
20 thoughts on “ HTML Lesson 4: How to Insert an Image in HTML ”
Thanks for your help! I’m still struggling with the editing of a theme, but this helped me with imgs.
Hiya thanks for the tutorial. One question, how can I change the size of the images? I just put one on and it’s massive!
Hello Brad,
You’ve been extremely helpful over the years. In adding images to HTML, it’s been successful ever since – that’s if I’m connected to the Internet.
However, can’t I get to see the image I added to the HTML doc without getting on the net?You dont have to connect to the net to view your HTML doc, just make sure your HTML files and images folder are in the same directory.