- Viewport meta tag
- Background
- Viewport basics
- Screen density
- Viewport width and screen width
- The effect of interactive UI widgets
- Common viewport sizes for mobile and tablet devices
- Specifications
- See also
- Found a content problem with this page?
- HTML vs Body: How to Set Width and Height for Full Page Size
- Does It Matter?
- Why Does This Happen?
- And The Problem May Be Hidden
- Reverse-inheritance?
- So What is the Ideal Height Setting for a Full Responsive Page?
- The Modern Solution is Simplified
- Page Height May Cause a Horizontal Scrollbar
- So What is the Fix?
- How to Set the Page for Full Width
- How to Set Width to Your Preference
- Conclusion
Viewport meta tag
This article describes how to use the «viewport» tag to control the viewport’s size and shape.
Background
The browser’s viewport is the area of the window in which web content can be seen. This is often not the same size as the rendered page, in which case the browser provides scrollbars for the user to scroll around and access all the content.
Some mobile devices and other narrow screens render pages in a virtual window or viewport, which is usually wider than the screen, and then shrink the rendered result down so it can all be seen at once. Users can then pan and zoom to see different areas of the page. For example, if a mobile screen has a width of 640px, pages might be rendered with a virtual viewport of 980px, and then it will be shrunk down to fit into the 640px space.
This is done because not all pages are optimized for mobile and break (or at least look bad) when rendered at a small viewport width. This virtual viewport is a way to make non-mobile-optimized sites in general look better on narrow screen devices.
However, this mechanism is not so good for pages that are optimized for narrow screens using media queries — if the virtual viewport is 980px for example, media queries that kick in at 640px or 480px or less will never be used, limiting the effectiveness of such responsive design techniques. The viewport meta tag mitigates this problem of virtual viewport on narrow screen devices.
Viewport basics
A typical mobile-optimized site contains something like the following:
meta name="viewport" content="width=device-width, initial-scale=1" /> Not all devices are the same width; you should make sure that your pages work well in a large variation of screen sizes and orientations.
The basic properties of the «viewport» tag include:
Controls the size of the viewport. It can be set to a specific number of pixels like width=600 or to the special value device-width , which is 100vw, or 100% of the viewport width. Minimum: 1 . Maximum: 10000 . Negative values: ignored.
Controls the size of the viewport. It can be set to a specific number of pixels like height=400 or to the special value device-height , which is 100vh, or 100% of the viewport height. Minimum: 1 . Maximum: 10000 . Negative values: ignored.
Controls the zoom level when the page is first loaded. Minimum: 0.1 . Maximum: 10 . Default: 1 . Negative values: ignored.
Controls how much zoom out is allowed on the page. Minimum: 0.1 . Maximum: 10 . Default: 0.1 . Negative values: ignored.
Controls how much zoom in is allowed on the page. Any value less than 3 fails accessibility. Minimum: 0.1 . Maximum: 10 . Default: 10 . Negative values: ignored.
Controls whether zoom in and zoom out actions are allowed on the page. Valid values: 0 , 1 , yes , or no . Default: 1 , which is the same as yes . Setting the value to 0 , which is the same as no , is against Web Content Accessibility Guidelines (WCAG).
Specifies the effect that interactive UI widgets, such as a virtual keyboard, have on the page’s viewports. Valid values: resizes-visual , resizes-content , or overlays-content . Default: resizes-visual .
Warning: Usage of user-scalable=no can cause accessibility issues to users with visual impairments such as low vision. WCAG requires a minimum of 2× scaling; however, the best practice is to enable a 5× zoom.
Screen density
Screen resolutions have risen to the size that individual pixels are indistinguishable by the human eye. For example, smartphones often have small screens with resolutions upwards of 1920–1080 pixels (≈400dpi). Because of this, many browsers can display their pages in a smaller physical size by translating multiple hardware pixels for each CSS «pixel». Initially, this caused usability and readability problems on many touch-optimized websites.
On high dpi screens, pages with initial-scale=1 will effectively be zoomed by browsers. Their text will be smooth and crisp, but their bitmap images may not take advantage of the full screen resolution. To get sharper images on these screens, web developers may want to design images – or whole layouts – at a higher scale than their final size and then scale them down using CSS or viewport properties.
The default pixel ratio depends on the display density. On a display with density less than 200dpi, the ratio is 1.0. On displays with density between 200 and 300dpi, the ratio is 1.5. For displays with density over 300dpi, the ratio is the integer floor (density/150dpi). Note that the default ratio is true only when the viewport scale equals 1. Otherwise, the relationship between CSS pixels and device pixels depends on the current zoom level.
Viewport width and screen width
Sites can set their viewport to a specific size. For example, the definition «width=320, initial-scale=1» can be used to fit precisely onto a small phone display in portrait mode. This can cause problems when the browser renders a page at a larger size. To fix this, browsers will expand the viewport width if necessary to fill the screen at the requested scale. This is especially useful on large-screen devices.
For pages that set an initial or maximum scale, this means the width property actually translates into a minimum viewport width. For example, if your layout needs at least 500 pixels of width then you can use the following markup. When the screen is more than 500 pixels wide, the browser will expand the viewport (rather than zoom in) to fit the screen:
meta name="viewport" content="width=500, initial-scale=1" /> Other attributes that are available are minimum-scale , maximum-scale , and user-scalable . These properties affect the initial scale and width, as well as limiting changes in zoom level.
The effect of interactive UI widgets
Interactive UI widgets of the browser can influence the size of the page’s viewports. The most common such UI widget is a virtual keyboard. To control which resize behavior the browser should use, set the interactive-widget property.
The visual viewport gets resized by the interactive widget.
The viewport gets resized by the interactive widget.
Neither the viewport nor the visual viewport gets resized by the interactive widget.
When the viewport gets resized, the initial containing block also gets resized, thereby affecting the computed size of viewport units.
Common viewport sizes for mobile and tablet devices
If you want to know what mobile and tablet devices have which viewport widths, there is a comprehensive list of mobile and tablet viewport sizes here. This gives information such as viewport width on portrait and landscape orientation as well as physical screen size, operating system and the pixel density of the device.
Specifications
See also
Found a content problem with this page?
This page was last modified on Jul 5, 2023 by MDN contributors.
Your blueprint for a better internet.
HTML vs Body: How to Set Width and Height for Full Page Size

Dave Gray

CSS is difficult but also forgiving. And this forgiveness allows us to haphazardly throw styles into our CSS.
Our page still loads. There is no «crash».
When it comes to page width and height, do you know what to set on the HTML element? How about the body element?
Do you just slap the styles into both elements and hope for the best?
If you do, you’re not alone.
The answers to those questions are not intuitive.
I’m 100% guilty of applying styles to both elements in the past without considering exactly which property should be applied to which element. 🤦♂️
It is not uncommon to see CSS properties applied to both the HTML and body elements like this:
Does It Matter?
The above style definition creates a problem:
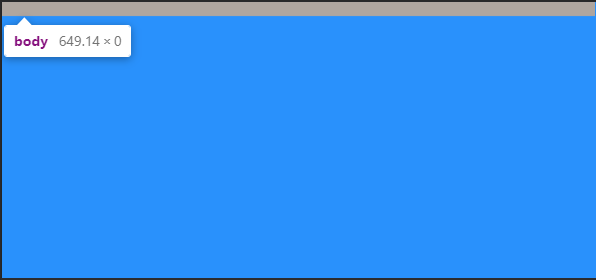
Setting min-height to 100% on both elements does not allow the body element to fill the page like you might expect. If you check the computed style values in dev tools, the body element has a height of zero.
Meanwhile, the HTML element has a height equal to the visible part of the page in the browser.
Look at the following screenshot from Chrome Dev Tools:
Why Does This Happen?
Using a percentage as a size value requires the element to reference a parent to base that percentage on.
The HTML element references the viewport which has a height value equal to the visible viewport height. However, we only set a min-height on the HTML element. NOT a height property value.
Therefore, the body element has no parent height value to reference when deciding what 100% is equal to.
And The Problem May Be Hidden
If you started out with enough content to fill the body of the page, you might not have noticed this issue.
And to make it more difficult to notice, if you set a background-color on both elements or even on just one of them, the viewport is full of that color. This gives the impression the body element is as tall as the viewport.
It’s not. It’s still at zero.
The image above is taken from a page with the following CSS:
Reverse-inheritance?
In a strange twist, the HTML element assumes the background-color of the body element if you don’t set a separate background-color on the html element.
So What is the Ideal Height Setting for a Full Responsive Page?
For years, the answer was the following:
This allows the HTML element to reference the parent viewport and have a height value equal to 100% of the viewport value.
With the HTML element receiving a height value, the min-height value assigned to the body element gives it an initial height that matches the HTML element.
This also allows the body to to grow taller if the content outgrows the visible page.
The only drawback is the HTML element does not grow beyond the height of the visible viewport. However, allowing the body element to outgrow the HTML element has been considered acceptable.
The Modern Solution is Simplified
This example uses vh (viewport height) units to allow the body to set a minimum height value based upon the full height of the viewport.
Like the previously discussed background-color, if we do not set a height value for the HTML element, it will assume the same value for height that is given to the body element.
Therefore, this solution avoids the HTML element overflow present in the previous solution and both elements grow with your content!
The use of vh units did cause some mobile browser issues in the past, but it appears that Chrome and Safari are consistent with viewport units now.
Page Height May Cause a Horizontal Scrollbar
Shouldn’t this say «Page Width»?
In another strange series of events, your page height may activate the horizontal scrollbar in your browser.
When your page content grows taller than the viewport height, the vertical scrollbar on the right is activated. This can cause your page to instantly have a horizontal scrollbar as well.
So What is the Fix?
You may sleep better knowing it starts with a page width setting.
This problem arises when any element — not just the HTML or body element — is set to 100vw (viewport width) units.
The viewport units do not account for the approximate 10 pixels that the vertical scrollbar takes up.
Therefore, when the vertical scrollbar activates you also get a horizontal scrollbar.
How to Set the Page for Full Width
Not setting a width on the HTML and body elements will default to the full size of the screen. If you do set a width value other than auto, consider utilizing a CSS reset first.
Remember, by default the body element has 8px of margin on all sides.
A CSS reset removes this. Otherwise, setting the width to 100% before removing the margins will cause the body element to overflow. Here’s the CSS reset I use:
How to Set Width to Your Preference
While it may not always be necessary to set a width, I usually do.
If you set the width to 100% on the body element you will have a full page width. This is essentially equivalent to not setting a width value and allowing the default.
If you want to use the body element as a smaller container and let the HTML element fill the page, you could set a max-width value on the body.
Conclusion
With no height value provided for the HTML element, setting the height and/or min-height of the body element to 100% results in no height (before you add content).
However, with no width value provided for the HTML element, setting the width of the body element to 100% results in full page width.
This can be counterintuitive and confusing.
For a responsive full page height, set the body element min-height to 100vh.
If you set a page width, choose 100% over 100vw to avoid surprise horizontal scrollbars.
I’ll leave you with a tutorial from my YouTube channel demonstrating the CSS height and width settings for an HTML page that is full screen size and grows with the content it contains:
Do you have a different way of setting the CSS width and height that you prefer?