- Saved searches
- Use saved searches to filter your results more quickly
- azhinu/Web-to-App
- Name already in use
- Sign In Required
- Launching GitHub Desktop
- Launching GitHub Desktop
- Launching Xcode
- Launching Visual Studio Code
- Latest commit
- Git stats
- Files
- README.md
- About
- HTML TO APP
- Google Play Store Ready
- Detect Installs
- Turn your website / html into a mobile App for Android and iOS
- Stage 1 — Set the general details of your App
- Stage 2 — Set the mode and build your App
- Your App is ready.
- How to convert a web page(html,css,js) into android app?
- Method 1: Using WebView
- Method 2: Using Cordova
- Conclusion
Saved searches
Use saved searches to filter your results more quickly
You signed in with another tab or window. Reload to refresh your session. You signed out in another tab or window. Reload to refresh your session. You switched accounts on another tab or window. Reload to refresh your session.
Convert website to android app. An android studio template.
azhinu/Web-to-App
This commit does not belong to any branch on this repository, and may belong to a fork outside of the repository.
Name already in use
A tag already exists with the provided branch name. Many Git commands accept both tag and branch names, so creating this branch may cause unexpected behavior. Are you sure you want to create this branch?
Sign In Required
Please sign in to use Codespaces.
Launching GitHub Desktop
If nothing happens, download GitHub Desktop and try again.
Launching GitHub Desktop
If nothing happens, download GitHub Desktop and try again.
Launching Xcode
If nothing happens, download Xcode and try again.
Launching Visual Studio Code
Your codespace will open once ready.
There was a problem preparing your codespace, please try again.
Latest commit
Git stats
Files
Failed to load latest commit information.
README.md
This is a template project for Android Studio that allows you to create an android webview application in minutes. You can use it to create a simple app for your website or as a starting point for your HTML5 based android app.
Download or clone this repository and import it into Android Studio.
- Open app/src/main/res/values/strings.xml and edit app_name and web_url strings.
- Open the app/scr/main/java/com.example.app/MyWebViewClient.java file and replace example.com on line 16 with your hostname.
String hostname = "example.com";
applicationId "com.example.app"
If you want to create a local HTML5 android app put all your files (including your index.html ) in the assets directory
If you want to change package name, go to app/build.gradle and change it on line 7./
applicationId "com.example.app"
To change application icon, replace files in app/src/main/res/mipmap-* with your icon.
About
Convert website to android app. An android studio template.
HTML TO APP
Convert your HTML / JS / CSS files into a mobile App for Android &iOS.
Google Play Store Ready
Publish your App to the Google Play Store and to any other APK store.
Detect Installs

The App Maker of WebIntoApp.com also allows you to convert your HTML / Javascript / CSS project files into a mobile App for Android and iOS, online.
Any App that made with HTML / JS / CSS that can work on your local device can be used as a stand alone App for Android & iOS. Just upload your project files under a zip file and hit the Make App button, the App Maker will add your files to a WebView App with all the Extra Features.
You can use the Extra Features section of our App Maker in order to set the Icon, the Ownership and the look and the behavior of your App.
The App Maker supports the Firebase SDK by default, you can easily add your JSON / PLIST settings then use the Messaging (Push Notifications) and the Analytics services of Firebase from your App.
You can convert your HTML / JS / CSS project file into a mobile App for Android for Free and test the results, upgrading to a dedicated App can be done at any time in the future.
Follow the next steps in order to convert your HTML / JS / CSS into a mobile App:
The HTML/CSS/JS project files should be under the main directory of a ZIP file, while the index.html file is the entry point of your App.
Set the App details, such as the Icon, the Ownership, the Splash Screen and more, then click on the Next Button.
Make sure all the details of the App are correct, set the mode of your App (Free or Dedicated) then click on the Make App button. The App Maker will build your App online, this process may take up to 1 minute.
Your App is ready! You can download and install it on your local device and publish it to the Google Play Store (Free App) and to the Apple App Store (Dedicated App).
Turn your website / html into a mobile App for Android and iOS
This tutorial will guide you how to convert a website, or html files (with js and css) into a free or a dedicated App for Android and iOS with the App Maker of the WebIntoApp.
The App Maker is a wizard tool that allows everyone, even those that do not have technical knowledgement, to convert an existing website (online URL) and HTML / JS / CSS files (offline App) into a stand-alone Mobile App for Android and iOS.
You can either create a new App, or edit / add / remove features from an existing App with the App Maker.
The App Maker contains two main stages. The first stage allows you to set the App details, such as the App name, the version, the description, the extra features and more, while in the second stage you can set the mode of the App (free or dedicated), then compile and build it according to the details that you have set in stage one.
Stage 1 — Set the general details of your App
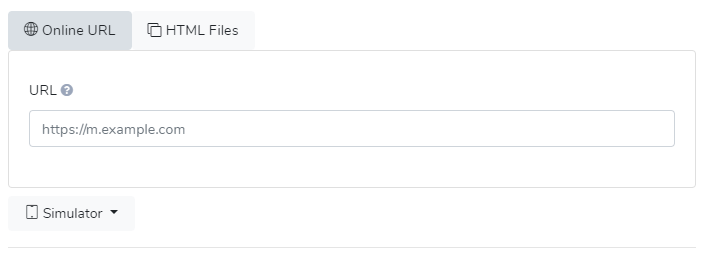
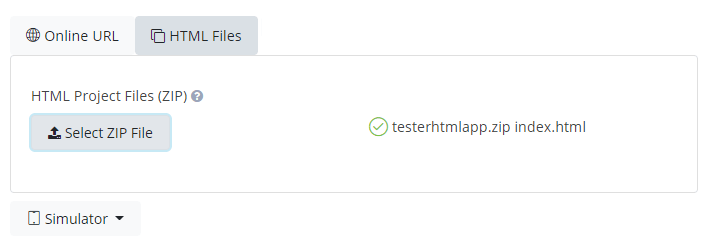
- Set the source of your App
The source of your App can be an online website (URL) or HTML / JS / CSS files under a zip file.
Make sure the HTML/CSS/JS files are under the main directory of the ZIP file, while the index.html file is the entry point of your App.
Please note that HTML App (with JS and CSS) that can be run locally should work fine inside the webview of your App. Server-side technologies and languages, such as PHP (or MYSQL) will not work.
You can use the Simulator in order to review the estimated look of your App in the device. Currently the simulator works with Online URLs only. 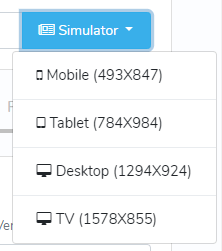
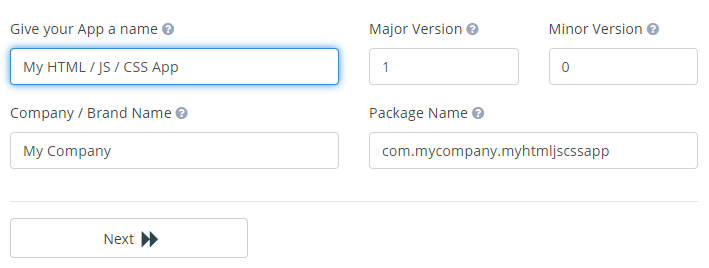
Set the App details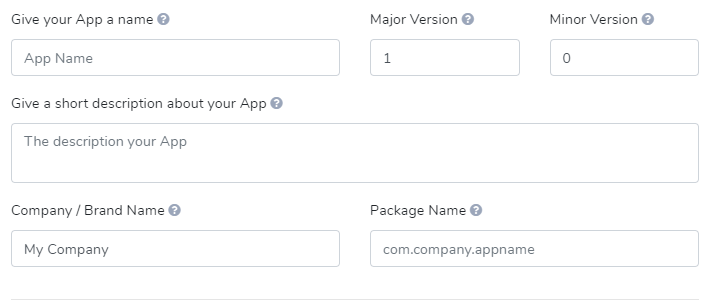
- Give your App a name.
- Set the Major Version and the Minor Version of your App.
- Describe the App.
- Set your company / organization name.
- Set the package name.
The App Maker will create the package name automatically from the App Name field and the Company Name field.
Please Note: If your App uses the Firebase services, please make sure that the package name of the Firebase App and the package name of your App are the same. If you will not set the Firebase Package name as the Package name of your App, the App Maker will change the Package name of your App to the Package name of the Firebase App automatically.
The Extras section of the App Maker allows you to set the advanced features of your App, such as the Icon, Splash Screen, Firebase, AdMob and Advanced Settings.
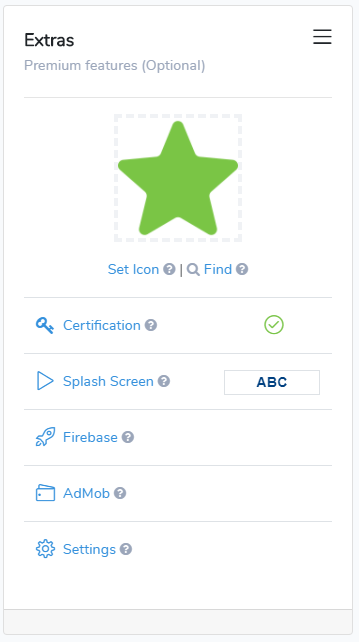
- Set the icon of your App.
Click on the Set Icon link in order to Upload the icon of your App. The system will generate the relevant icons and fit them to the right resolutions according to the Android and iOS requirements.
The system will use the Auto-Fill functionality when you are creating a new App so you do not have to deal with these fields, but if you still want to set other details, you can fill those fields as you wish.
You can set the defaults values of those fields in the Settings->Defaults, so each time you are creating a new App those fields will filled up automatically.
Now that you have set the details of your App, you can click on the Next button in order to move to the next stage.

Stage 2 — Set the mode and build your App
In the second stage you can set the mode (free or dedicated) then compile and build your App according to the details that you have set in stage one.

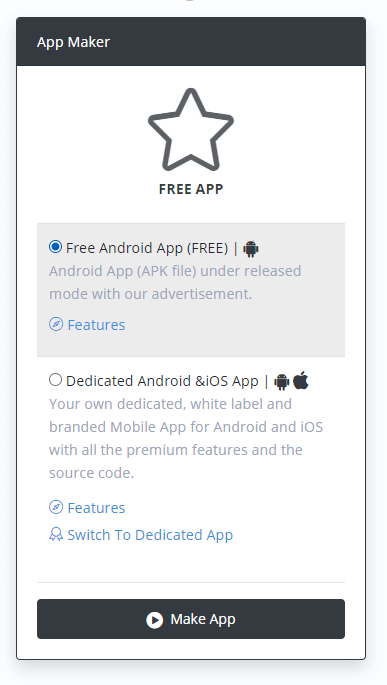
- Set the mode of your App.
You can create a free app or a dedicated App. Here are the main points for each mode:- Free App
Android App (APK file) under released mode with our advertisement for free usage. - Dedicated App
Your own dedicated, white label and branded Mobile App for Android and iOS* with all the premium features and the source code for free or commercial usage.
- Free App
- Compile and create your App.
Click on the Make App button.
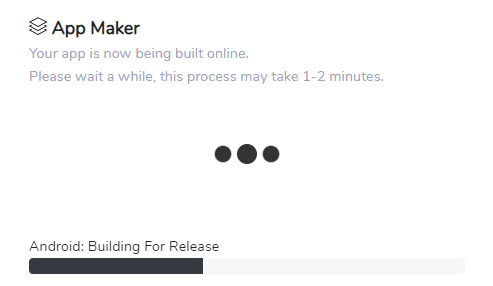
The App Maker will display a window with the building progress of your App. Please wait a while, this process may take up to 1-2 minute.
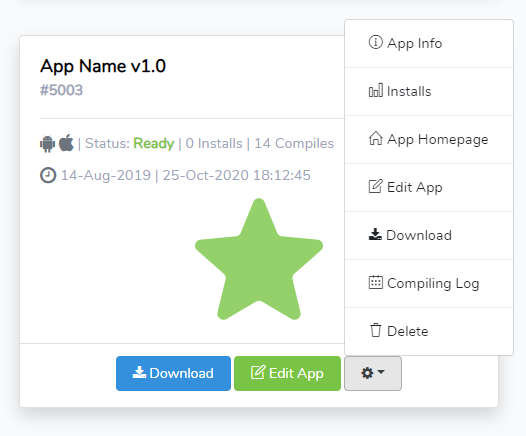
Your App is ready.
You can now download your App, publish it everywhere, and use all the features the WebIntoApp.com provides, such as detecting new installs (detailed with many parameters), push notifications with the Firebase Cloud Messaging service and even earn money with AdMobe.
How to convert a web page(html,css,js) into android app?
There are several ways to convert a web page (HTML, CSS, JavaScript) into an Android app. Here are two common methods:
Method 1: Using WebView
- Step 1 — Create a new project in Android Studio and name it whatever you want.
- Step 2 — In the «activity_main.xml» file, add a WebView element
This element is used to display web pages in your app.
WebView android:id="@+id/webView" android:layout_width="match_parent" android:layout_height="match_parent" />- Step 3 — In the MainActivity.java file, add the following code to load the web page in the WebView.
WebView webView = (WebView) findViewById(R.id.webView); webView.loadUrl("http://www.example.com");- Step 4 — To enable JavaScript and other web page features, add the following code to the MainActivity.java file.
WebSettings webSettings = webView.getSettings(); webSettings.setJavaScriptEnabled(true);- Step 5 — To handle link clicks within the WebView, add the following code to the MainActivity.java file.
webView.setWebViewClient(new WebViewClient());- Step 6 — To handle back button presses and navigation within the WebView, add the following code to the MainActivity.java file.
webView.setOnKeyListener(new View.OnKeyListener() public boolean onKey(View v, int keyCode, KeyEvent event) if (keyCode == KeyEvent.KEYCODE_BACK && event.getAction() == MotionEvent.ACTION_UP && webView.canGoBack()) webView.goBack(); return true; > return false; > >);- Step 7 — Now you can run your app and it will display the web page specified in the loadUrl() method.
Method 2: Using Cordova
- Step 1 — Install Node.js and Apache Cordova on your computer.
- Step 2 — Open the command prompt or terminal and navigate to the location where you want to create your project.
- Step 3 — Run the following command to create a new Cordova project.
cordova platform add android- Step 6 — Copy the HTML, CSS and JavaScript files of your web page to the «www» folder of your project.
- Step 7 — Run the following command to build and run the app on an emulator or connected device.
Both of these methods have their own advantages and disadvantages. The WebView method is simpler and requires less setup, but it may not work well with complex web pages. The Cordova method is more powerful and allows you to access native device features, but it requires more setup and may not be compatible with all web pages.
For more detail about WebView and Cordova, you can refer to the official documentation:
In addition to the above methods, there are also other frameworks and tools that can be used to convert web pages into Android apps, such as React Native, Xamarin and PhoneGap. Each of these frameworks has its own unique features and advantages, so you should research and consider which one best fits your project’s requirements.
Overall, converting a web page into an Android app can be a complex process, but with the right tools and frameworks, it can be done relatively easily. It’s important to understand the fundamentals of how the web and mobile apps work and how the technologies interact with each other. With the right understanding and planning, you can create a great Android app that’s based on a web page.
Conclusion
In conclusion, converting a web page into an Android app can be done using different methods such as WebView and Cordova, each having its own advantages and disadvantages. It’s important to understand the basics of how the web and mobile apps work, as well as the fundamentals of the technologies used in the process. Additionally, you can also use other frameworks and tools like React Native, Xamarin and PhoneGap to convert web pages into android apps. The best approach would be to research and determine which method or framework would be the best fit for your project’s requirements, and then proceed with the development process.