- CSS for Labels, Buttons and Form Interactions
- Part 4: CSS for Labels, Buttons and Form Interactions
- Styling CSS Labels
- Styling Form Controls
- Aligning Labels to the Left of Inputs
- Styling Buttons in CSS
- Centering Form Elements
- Responding to Focus and Hover Events in CSS
- Going Forward
- Пример
- Результат
- Пример
- Результат
- Пример (форма с флажками)
- Результат
- Пример
- Результат
- Атрибуты
- Как добавить стиль к тегу ?
- Распространенные свойства для изменения визуальной насыщенности/выделения/размера текста внутри тега :
- Цвет текста внутри тега :
- Стили форматирования текста для тега :
- Другие свойства для тега :
- How can I change the font size for labels in HTML?
- Related Q&A May You Like
- Most Quizs Popular
- Javascript — Functions
- Asp.Net Core — Exam test 01
- Asp.Net Core — Exam test 02
- C# — Level Beginner
- Popular Tips
- How to pass multiple models to one view in Asp.net Core
- Easy way to install and secure Redis on Linux Ubuntu 20.04
- Caching data by using in-memory cache in Asp.Net Core 3.1
CSS for Labels, Buttons and Form Interactions
Part 4: CSS for Labels, Buttons and Form Interactions
In the last installment of this series on Web Forms, we explored some of the most commonly employed CSS attributes to style form elements. Today’s article continues from where that one left off to cover how to style labels and buttons, as well as how to alter an element’s appearance based on user interactions.
You can review the previous articles in this series by visiting:
Styling CSS Labels
In addition to adding functionality to your forms, labels can greatly increase readability and play a part in laying out form controls. To illustrate, let’s take a form that accepts user info, with the following HTML markup:
Styling Form Controls
That produces this bare-bones form:
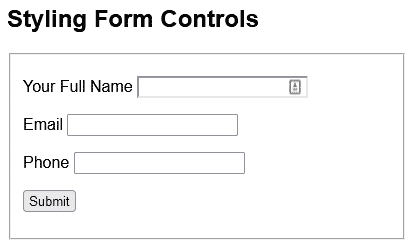
Before we get to the labels, let’s apply a bit of styling to the form and input controls:
That first rule selects everything on the page using the asterisk (*) wildcard character. Hence, it applies the specified font-family to the entire page.
With the above styles in place, you’ll notice that the label positioning becomes haphazard, in that some appear above the input, while others are aligned to the left:
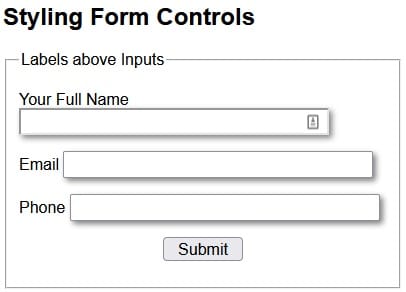
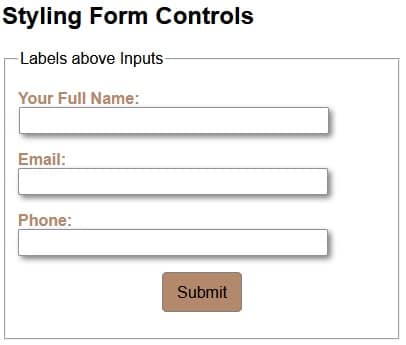
We can position all labels above their associated controls using the following CSS:
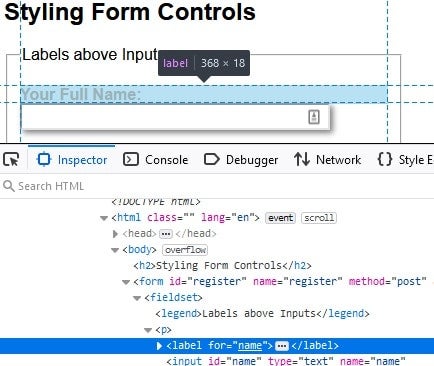
The key attribute is “display: block;”. Assigning a value of “block” to the display property makes the element behave as a block element, such as a . Hence, it starts on a new line, and takes up the entire width of the container. We can verify this behavior by inspecting a label with the browser tools:
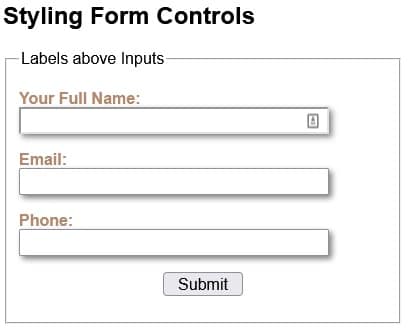
The “label:after” creates a pseudo-element that is the last child of the selected element. It is often used to add cosmetic content to an element with the content property. In our case, we can use it to append a colon (:) after each label.
Here is the form with all CSS applied:
Aligning Labels to the Left of Inputs
Another common layout is to position labels to the left of their associated controls. To do that, we can replace the “display: block;” with two other attributes, i.e. width and float:
The width determines how much horizontal space the label “column” takes. The more width is allocated, the further from the controls the labels will be.
Assigning a value of “left” to float positions labels to the left-most edge of their container.
There are a couple of other considerations when positioning labels to the left of their associated controls:
- Make sure that the form’s width is great enough to accommodate both the labels and fields on one line. Otherwise, they may wrap.
- You may want to assign a value to the margin-top so that there is a bit of vertical space between form elements. Without that, they can look like a stack of slices in a loaf of bread!
We’ll deal with both those issues by adding the following CSS:
Here is the updated form with labels to the left of input fields:

Styling Buttons in CSS
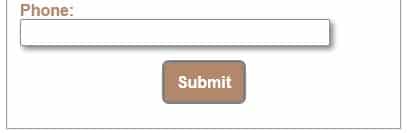
Without additional CSS styling, HTML buttons are rendered as gray rectangular boxes with black text. Not very interesting. The good news is that CSS allows us to change virtually every aspect of a button’s appearance and positioning. Case in point, take a look at the following CSS rule:
Now the button’s appearance matches the color palette of the rest of the form:
Centering Form Elements
One difference between the Submit button and the rest of the form is that it is horizontally centered. There are a number of ways to center an element within its container; one way is to give the element a width (either absolute or relative) and then set the margin-left and margin-right attributes to “auto”. Here is the code that centers the Submit button:
display: block; margin-left: auto; margin-right: auto; width: 80px;
Responding to Focus and Hover Events in CSS
You might be under the impression that you need JavaScript in order to make a form interactive. Not true! Thanks to the CSS :focus and :hover pseudo-classes, you can change an element’s appearance in response to user actions. As you may have guessed, the :focus pseudo-class governs an element’s appearance when it obtains the focus. Likewise, the :hover pseudo-class sets an element’s appearance when the mouse cursor traverses over it.
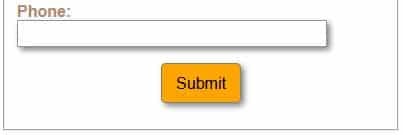
Here is a rule that alters the Submit button’s appearance on focus:
This rule kicks in when the mouse cursor is traverses over the Submit button:
You’ll find the demo for this tutorial on codepen.io.
Going Forward
In the next article, we’ll cover radio buttons, checkboxes, and selects before moving on to JavaScript and its role in making forms more interactive.
HTML тег
Тег
Тег также используется для определения горячих клавиш на клавиатуре и перехода на активный элемент подобно ссылкам.
Связать текстовую метку и форму, к которой она относится, можно двумя способами:
Пример
html> html> head> title> Заголовок документа title> head> body> form> label for="lfname">Имя пользователя: label> input id="lfname" name="fname" type="text" /> form> body> html>Результат

Пример
html> html> head> title>Заголовок документа title> head> body> form> label>Имя input id="User" name="Имя" type="text" /> label> form> body> html>Результат

Пример (форма с флажками)
html> html> head> title>Заголовок документа title> head> body> form> label for="barca">Барселона label> input type="radio" name="team" id="barca" value="Барселона">br /> label for="real">Реал Мадрид label> input type="radio" name="team" id="real" value="Реал Мадрид">br /> form> body> html>Результат

Используйте CSS свойства font для стилизации тега .
Пример
html> html> head> title>Заголовок документа title> style> body < padding: 20px; > label < font-size: 20px; font-weight: 700; color: #1c87c9; > input < width: 50%; height: 28px; padding: 4px 10px; border: 1px solid #666; background: #cce6ff; color: #1c87c9; font-size: 16px; > style> head> body> form> label>Ваше имя: label> input id="User" name="Name" type="text"/> form> body> html>Результат

Атрибуты
| Атрибут | Значение | Описание |
|---|---|---|
| accesskey | accesskey | Определяет горячую клавишу, с помощью которой можно перейти к привязанному к метке (через атрибут for) элементу формы. |
| for | element_id | Устанавливает идентификатор элемента, к которому должна быть привязана метка. |
| form | form_id | Определяет форму (формы) с которой будет связана метка. Этот атрибут позволяет размещать метки в произвольном месте документа, а не только в качестве потомка элемента тега . Элемент был удален из спецификации HTML. |
Как добавить стиль к тегу ?
Распространенные свойства для изменения визуальной насыщенности/выделения/размера текста внутри тега :
- CSS свойство font-style задает стиль шрифта: normal | italic | oblique | initial | inherit
- CSS свойство font-family создает приоритетный список названий семейства шрифтов и/или общее имя шрифтов для выбранных элементов.
- CSS свойство font-size задает размер щрифта.
- CSS свойство font-weight устанавливает насыщенность шрифта.
- CSS свойство text-transform задает регистр текста (заглавные или строчные буквы).
- CSS свойство text-decoration устанавливает оформление текста. Оно является сокращенным свойством для text-decoration-line, text-decoration-color, text-decoration-style.
Цвет текста внутри тега :
Стили форматирования текста для тега :
- CSS свойство text-indent указывает размер отступа первой строки в текстовом блоке.
- CSS свойство text-overflow указывает, как будет отображаться пользователю строчный текст, выходящий за границы блока.
- CSS свойство white-space указывает, как будут отображены пробелы внутри элемента.
- CSS свойство word-break указывает перенос строки.
Другие свойства для тега :
- CSS свойство text-shadow добавляет тень к тексту.
- CSS свойство text-align-last выравнивает последнюю строку текста.
- CSS свойство line-height устанавливает межстрочный интервал.
- CSS свойство letter-spacing устанавливает расстояние между буквами/символами в тексте.
- CSS свойство word-spacing устанавливает расстояние между словами в тексте.
How can I change the font size for labels in HTML?
Hi, I have a form with some checkboxes and labels as below:
Now how can I change the font size of label text to 17px?
Thank you for any suggestions.
Hello, You can use the font-size property of CSS to do. 1. Write CSS inline You can set direct CSS into label tag by style attribute as below:
With this way you also copy f-size17 class for all label tags. 3. Write selector for all label tag
Related Q&A May You Like
- How to get the text of paragraph tag html in Jquery
- How to get many values selected of checkbox using Jquery
- How to center text of
tag html using CSS?
- how to remove bullets from ul Html tag in css?
- How do I change the background opacity in CSS?
- How to add a custom font into Html using CSS?
- What is the difference between class and id selector in CSS?
- [Resolved] An unhandled exception occurred: Cannot find module ‘@angular/compiler-cli’
- HTTP Error 500.30 — ANCM In-Process Start Failure in .Net Core
- TypeError: Object(…) is not a function in react-redux-firebase package
- How to create a group of css multiple classes same style?
- ValueError: The truth value of an array with more than one element is ambiguous. Use a.any() or a.all() in Python
- TypeError: ‘list’ object is not callable in Python 3.8.2
- Error: The json property name for collides with another property in .Net 6
- ReferenceError: Component is not defined in ReactJs
* Type maximum 2000 characters.
* All comments have to wait approved before display.
* Please polite comment and respect questions and answers of others.
Most Quizs Popular
Javascript — Functions
Asp.Net Core — Exam test 01
Asp.Net Core — Exam test 02
C# — Level Beginner
Popular Tips

How to pass multiple models to one view in Asp.net Core
In MVC we can not pass multiple models to a single view Asp.Net Core. But in the reality, we have many case need to do this. In this article, we will discuss some ways to help resolve this problem.

Easy way to install and secure Redis on Linux Ubuntu 20.04
In this article, I’ll guide you on how to install and secure Redis Server on Ubuntu Linux 18.04 or 20.04. It is very simple to install with some steps to finish and test it.
Caching data by using in-memory cache in Asp.Net Core 3.1
In this article I will guide you how to cache data in Asp.net Core using in-memory cache. As you know, cache helps access and return data faster than many times if compared with getting data from the database. In Asp.net framework we have IIS cache (Http cache) but in Asp.net core microsoft replace it with In-memory cache technique.