- How to Auto-Resize the Image to fit an HTML Container
- Create HTML
- Add CSS
- Example of auto-resizing an image with the width and height properties:
- Here’s our result:
- Example of resizing an image using the object-fit property set to “cover”:
- Example of auto-resizing an image with the max-width and max-height properties:
- Example of resizing an image using the background-size property set to “contain” & «cover»:
- Related Resources
- How to Resize Images in HTML
- Resizing with CSS
- Resizing Considerations
- Resize an Image Dynamically
- Resize ALL Images
- Background Images
- The picture Element and Responsive Design
- Related
How to Auto-Resize the Image to fit an HTML Container
It is not complicated to make the image stretch to fit the container. CSS makes it possible to resize the image so as to fit an HTML container. To auto-resize an image or a video, you can use various CSS properties, which are described in this tutorial. It’s very easy if you follow the steps described below.
Let’s see an example and try to discuss each part of the code.
Create HTML
body> div class="box"> img src="https://pp.userapi.com/c622225/v622225117/10f33/47AAEI48pJU.jpg?ava=1" alt="Example image"/> div> body>Add CSS
- Set the height and width of the .
- You can add border to your by using the border property with values of border-width, border-style and border-color properties.
- Set the height and width to «100%» for the image.
.box < width: 30%; height: 200px; border: 5px dashed #f7a239; > img < width: 100%; /* takes the 100 % width of its container (.box div)*/ height: 100%; /* takes the 100 % height of its container (.box div)*/ >Let’s combine the code parts and see how it works! Here is the result of our code.
Example of auto-resizing an image with the width and height properties:
html> html> head> title>Title of the document title> style> body < background: crimson; > .box < width: 40%; height: 200px; border: 5px solid gold; > img < width: 100%; height: 100%; > style> head> body> div class="box"> img src="/uploads/media/default/0001/05/f32e5dec539f7c03f44990789d49d67c20c3e040.jpg" alt="Example image" /> div> body> html>Here’s our result:

The image takes 40% width and 200px height of its container (red background).
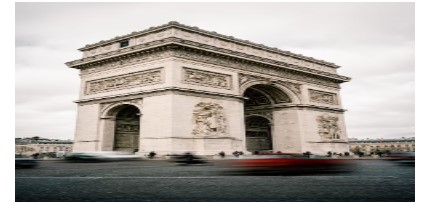
In the example below, we use the «cover» value of the object-fit property. When using the «cover» value, the aspect ratio of the content is sized while filling the element’s content box. It will be clipped to fit the content box.
You can use other values like contain, scale-down, etc. for object-fit and make sure to check them as well. Still, we’ll mostly use the cover value as we like our image to cover its container as much as it doesn’t hurt the aspect ratio.
Example of resizing an image using the object-fit property set to “cover”:
html> html> head> style> .container < width: 60%; height: 300px; border: 5px solid gold; > img < width: 100%; height: 100%; object-fit: cover; > style> head> body> div class="container"> img src="https://images.unsplash.com/photo-1581974267369-3f2fe3b4545c?ixlib=rb-1.2.1&ixid=eyJhcHBfaWQiOjEyMDd9&auto=format&fit=crop&w=500&q=60" alt="Image" /> div> body> html>This image will help you understand it better! See how the image fits its aspect ratio based on the screen size changes!
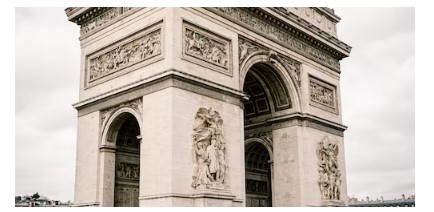
See another example where the image size is set manually, and the object-fit property is set as well. In this case, when the browser is resized, the image will preserve its aspect ratio and won’t be resized according to the container.
Example of resizing an image using the object-fit property:
html> html> head> style> body < text-align: center; > img < width: 400px; height: 200px; object-fit: cover; > style> head> body> img src="https://images.unsplash.com/photo-1581974267369-3f2fe3b4545c?ixlib=rb-1.2.1&ixid=eyJhcHBfaWQiOjEyMDd9&auto=format&fit=crop&w=500&q=60" alt="Image" /> body> html>Let’s see this example without object-fit property first! Ugly, huh? You’re right!
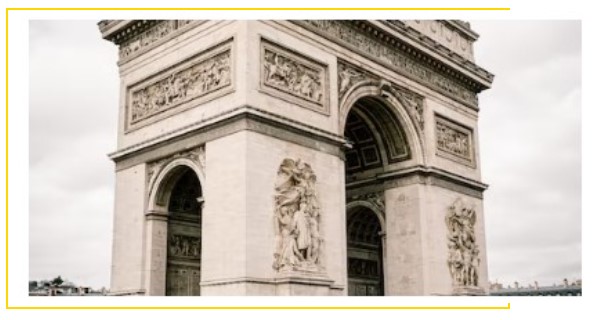
In the next example, we use the max-width and the rules can be applied to max-height as well. The max-height property sets the maximum height of an element, and the max-width property sets the maximum width of an element. To resize an image proportionally, set either the height or width to «100%», but not both. If you set both to «100%», the image will be stretched.
Example of auto-resizing an image with the max-width and max-height properties:
html> html> head> title>Title of the document title> style> img < width: 600px; /* image initial width */ > div < border: 2px dotted #000000; > .container < width: 500px; /* container initial width */ border: 2px solid gold; > style> head> body> div class="container"> img src="/uploads/media/default/0001/05/8dc771228e65a66d63299043ad824e26fb9b879f.jpg" alt="Circle portrait" /> div> body> html>Here’s the problem! Our image is out of its container because its width (600px) is bigger than its container width (500px)!
To solve our problem, we’ll use the max-width: 100% property, which not allows the image to take any width bigger than its container (here, not more than 500px).
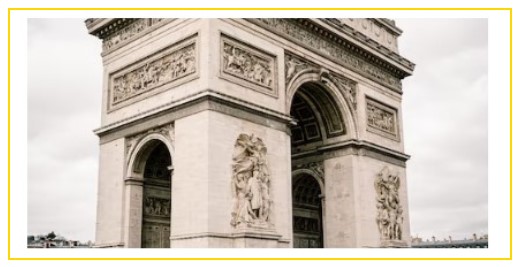
Now, it will scale down when the width is less than 500px. The same rule is applicable for max-height property.
html> html> head> title>Title of the document title> style> img < width: 600px; max-width: 100%; /* add this line */ > .container < height: 100%; width: 500px; border: 2px solid gold; > style> head> body> div class="container"> img src="https://www.w3docs.com//uploads/media/default/0001/05/8dc771228e65a66d63299043ad824e26fb9b879f.jpg" alt="image example" /> div> body> html>To use an image as a CSS background, use the background-size property. This property offers two special values: contain and cover. Let’s see examples of these values.
Example of resizing an image using the background-size property set to “contain” & «cover»:
html> html> head> title>Title of the document title> style> .box < width: 300px; height: 250px; border: 5px solid gold; background-image: url("https://images.unsplash.com/photo-1582093236149-516a8be696fe?ixlib=rb-1.2.1&ixid=eyJhcHBfaWQiOjEyMDd9&auto=format&fit=crop&w=500&q=60"); background-size: contain; /* try other properties here like cover, contain, etc */ background-repeat: no-repeat; background-position: 50% 50%; > style> head> body> div class="box"> div> body> html>Here’s what contain will give us!
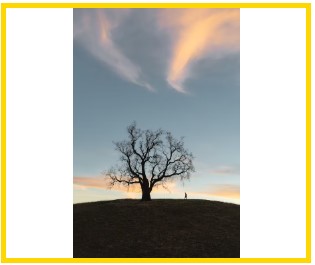

Much better! I hope you’ve enjoyed it all!

Related Resources
How to Resize Images in HTML
To resize an image in HTML, use the width and height attributes of the img tag. You can also use various CSS properties to resize images.
Here’s an image at its original size:

You should be seeing this image at its original size, unless your device is narrow and has resized it.
Below is the same image after it’s been resized using HTML (using the width and height attributes of the img tag):
You can play with the dimensions and click Run to see how it affects the end result.
Resizing with CSS
It’s usually better to use CSS to resize images in HTML. You can do this with the height and width properties.
In my stylesheet, I create a class called cats and I then reference that in the img tag. By doing this, only images with class=»cats» will set to this size. You can use whatever class name you like. Just be sure that the img tag references the correct class.
Also, in this example I used px to indicate the image size in pixels. You can use any other valid length , percentage , or various other values as required.
Resizing Considerations
Resizing images with HTML/CSS should only be done if necessary. It is usually better to use an image that is the correct size in the first place than to resize it with HTML. This is because resizing it with HTML doesn’t reduce the file size — the full file still has to be downloaded before it can be resized.
Therefore, if possible, resize the image to the correct dimensions first using in an image editor (such as GIMP) before uploading it to your website/blog.
Resize an Image Dynamically
You can use the CSS max-width property to resize the image dynamically.
The following example displays quite a large image in a small viewport. To see it in different sized viewports click Editor and Preview. You can also resize your window to see the image shrink and expand.
By ommitting any width/height declarations and only using max-width: 100%; , the image will be displayed at 100% of the size of its container, but no larger. If the image is larger than its container, the image will shrink to fit. However, if the image is smaller than its container, it will be displayed at its true size (i.e. it won’t increase in size to fit the container).
This technique can be handy when designing responsively for the image/web page to be displayed across multiple sized devices.
Read on for a more advanced method for responsively resizing images (using the picture element).
Resize ALL Images
The previous CSS examples put the styles into a class, so that we can apply it selectively to certain images. You can also apply styles to all images if you like.
In fact, you can combine it, so that all images are styled a certain way, and then also be specific about certain images.
Here’s an example of what that could look like:
This sets all img elements to a maximum width of 100%.
However, it also sets a class for thumbnails (called thumbnail ) which explicitly sets their width and height. Therefore, images with that class will be sized using those explicit dimensions instead.
You might notice that I’ve prefixed the class name with img. in the stylesheet. What I mean is, I’ve used img.thumbnail in the CSS. By doing this, I’m specifying that only img elements that use the thumbnail class will have those styles applied. This prevents you from inadvertently applying the class to the wrong element in the event that another element uses a class of the same name.
For example, if a video element had class=»thumbnail» , the above class won’t be applied to it. You would need to use something like video.thumbnail in your stylesheet for video thumbnails.
However, this is entirely optional. Feel free to change img.thumbnail to just .thumbnail if you want the class applied to all elements that use that class.
Background Images
You can also resize background images using CSS. In particular, you can use the background-size property to resize background images.
In this example, I use the contain keyword to specify the size of the background image. You can also supply any length or percentage value, the cover keyword, or auto (which specifies that the image size is automatically determined using the intrinsic width and/or height of the image).
Further to this, all CSS properties are able to use the initial , inherit , and unset values.
When working with background images, you also have the option of using the background property as a shorthand to specify the background image URL, its size, the background color, etc, all in one go. I encourage you to look at that page, because there are several other things you can do with regards to resizing/cropping/repeating background images, etc.
The picture Element and Responsive Design
One of the more recent additions to HTML is the picture element.
This element allows you to load a different image, depending on the user’s screen pixel density, viewport size, image format, and other factors.
Click the two orientation buttons at the top right of the editor to toggle the two images. Those two buttons change the orientation of the editor/preview pane, and therefore the width of the viewport.
Alternatively, try clicking the Preview button, then resizing your browser window to see the same effect.
Doing this should switch the image from a close-up of the kitten’s face, to a larger version that includes the kitten’s whole body.
I don’t know what device/size screen you’ll be viewing this on, so you may need to resize your screen or reorient your device to see the effect. Alternatively you can adjust the code to use a more suitable width for your device (i.e. change 600px to a different value).
The picture element contains multiple source elements to determine possible source images for the img element, depending on factors such as screen pixel density, viewport size, image format, etc.
When using this element, you’re not actually resizing the image as such. What you’re doing is selecting the appropriately sized image for a given situation.
The good thing about this method is that it allows you to do things like, display a cropped version of the image for smaller viewports, while displaying an uncropped version for larger ones.