- How to use height and width attributes in HTML?
- Example
- HTML Attributes
- HTML Attributes
- The href Attribute
- Example
- The src Attribute
- Example
- The width and height Attributes
- Example
- The alt Attribute
- Example
- Example
- The style Attribute
- Example
- The lang Attribute
- The title Attribute
- Example
- We Suggest: Always Use Lowercase Attributes
- We Suggest: Always Quote Attribute Values
- Good:
- Bad:
- Example
- Single or Double Quotes?
- Chapter Summary
- HTML Exercises
- HTML Attribute Reference
- Ширина (width) и высота (height) в HTML
- Максимальная и минимальная ширина (max-width и min-width)
- Максимальная и минимальная высота (max-height и min-height)
How to use height and width attributes in HTML?
The height and width attribute in HTML is used to specify the height and width of the element. The values are set in px i.e. pixels.
The height and width attribute is used in the following HTML elements:
| S. No | Elements | Attribute | Attribute |
| 1 | element | height | width |
| 2 | element | height | width |
| 3 | element | height | width |
| 4 | | height | width |
| 5 | element | height | width |
| 6 | element | height | width |
| 7 | element | height | width |
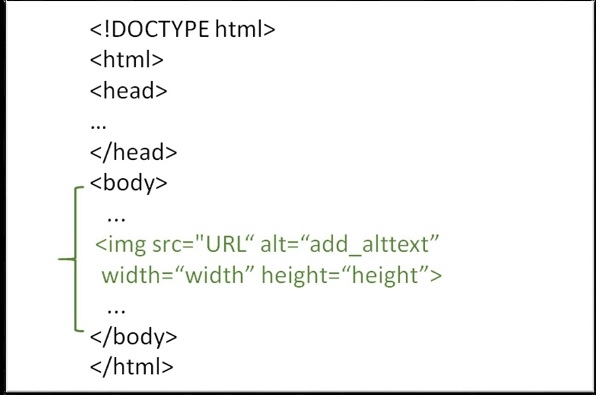
To add an image in an HTML page, tag is used. With that, we need to use the attributes height and width to set the height and width of the image in pixels.
Example
You can try to run the following code to learn how to use height and width attributes in HTML.
HTML Attributes
HTML attributes provide additional information about HTML elements.
HTML Attributes
- All HTML elements can have attributes
- Attributes provide additional information about elements
- Attributes are always specified in the start tag
- Attributes usually come in name/value pairs like: name=»value»
The href Attribute
Example
You will learn more about links in our HTML Links chapter.
The src Attribute
The tag is used to embed an image in an HTML page. The src attribute specifies the path to the image to be displayed:
Example

There are two ways to specify the URL in the src attribute:
1. Absolute URL — Links to an external image that is hosted on another website. Example: src=»https://www.w3schools.com/images/img_girl.jpg» .
Notes: External images might be under copyright. If you do not get permission to use it, you may be in violation of copyright laws. In addition, you cannot control external images; it can suddenly be removed or changed.
2. Relative URL — Links to an image that is hosted within the website. Here, the URL does not include the domain name. If the URL begins without a slash, it will be relative to the current page. Example: src=»https://www.w3schools.com/htmL/img_girl.jpg». If the URL begins with a slash, it will be relative to the domain. Example: src=»https://www.w3schools.com/images/img_girl.jpg».
Tip: It is almost always best to use relative URLs. They will not break if you change domain.
The width and height Attributes
The tag should also contain the width and height attributes, which specify the width and height of the image (in pixels):
Example
The alt Attribute
The required alt attribute for the tag specifies an alternate text for an image, if the image for some reason cannot be displayed. This can be due to a slow connection, or an error in the src attribute, or if the user uses a screen reader.
Example
Example
See what happens if we try to display an image that does not exist:

You will learn more about images in our HTML Images chapter.
The style Attribute
The style attribute is used to add styles to an element, such as color, font, size, and more.
Example
You will learn more about styles in our HTML Styles chapter.
The lang Attribute
You should always include the lang attribute inside the tag, to declare the language of the Web page. This is meant to assist search engines and browsers.
The following example specifies English as the language:
Country codes can also be added to the language code in the lang attribute. So, the first two characters define the language of the HTML page, and the last two characters define the country.
The following example specifies English as the language and United States as the country:
You can see all the language codes in our HTML Language Code Reference.
The title Attribute
The title attribute defines some extra information about an element.
The value of the title attribute will be displayed as a tooltip when you mouse over the element:
Example
We Suggest: Always Use Lowercase Attributes
The HTML standard does not require lowercase attribute names.
The title attribute (and all other attributes) can be written with uppercase or lowercase like title or TITLE.
However, W3C recommends lowercase attributes in HTML, and demands lowercase attributes for stricter document types like XHTML.
At W3Schools we always use lowercase attribute names.
We Suggest: Always Quote Attribute Values
The HTML standard does not require quotes around attribute values.
However, W3C recommends quotes in HTML, and demands quotes for stricter document types like XHTML.
Good:
Bad:
Sometimes you have to use quotes. This example will not display the title attribute correctly, because it contains a space:
Example
At W3Schools we always use quotes around attribute values.
Single or Double Quotes?
Double quotes around attribute values are the most common in HTML, but single quotes can also be used.
In some situations, when the attribute value itself contains double quotes, it is necessary to use single quotes:
Chapter Summary
- All HTML elements can have attributes
- The href attribute of specifies the URL of the page the link goes to
- The src attribute of
specifies the path to the image to be displayed
- The width and height attributes of
provide size information for images
- The alt attribute of
provides an alternate text for an image
- The style attribute is used to add styles to an element, such as color, font, size, and more
- The lang attribute of the tag declares the language of the Web page
- The title attribute defines some extra information about an element
HTML Exercises
HTML Attribute Reference
A complete list of all attributes for each HTML element, is listed in our: HTML Attribute Reference.
Ширина (width) и высота (height) в HTML
В этой статье рассмотрим, как можно задавать ширину и какими свойствами стоит делать это. Для первого примера возьмём блочный элемент div. По умолчанию он имеет высоту равную нулю (если ничего не содержит) и занимает 100% ширины родительского элемента. Попробуем задать ему ширину в 200 пикселей и высоту в 150. Для этого используем CSS свойства width (ширина) и height (высота):
Можно задавать ширину не только в пикселях, но и в процентах от ширины родительского элемента. Попробуем сделать это:
К сожалению, задать высоту для блочного элемента в процентах не получится. Если написать «height:50%;», то в разных браузерах будет диаметрально противоположный результат, поэтому лучше считать такую запись ошибкой.
Только у одного элемента можно задать свойство height в процентах, а точнее у псевдоэлементов :before и ::after. Читайте о них в статье Псевдоэлементы (:before, ::after)
Максимальная и минимальная ширина (max-width и min-width)
Жёсткое ограничение ширины — это не лучший способ строить сайт. Потому что в таком случае появятся проблемы с адаптацией под мобильные и планшеты: ширина экрана может быть меньше ширины блока. Тогда часть сайта будет выходить пределы вёрстки сайта и появится горизонтальная прокрутка, чего у версии сайта на мобильном быть не должно. Поэтому вместо жёсткого задания ширины используется ограничение сверху через CSS свойство max-width. Мы знаем, что блочный элемент div пытается занять всю ширину родительского элемента, как будто по умолчанию у него есть свойство width и оно имеет значение 100%.
Но теперь, если вы возьмёте окно своего браузера и сузите до 400 пикселей и меньше, то увидите как контейнер div уменьшает свои размеры, чтобы не выпрыгивать за пределы вёрстки. Если же изменить «max-width:400px;» на «width:400px», то блок будет выходить за пределы родительского элемента:
По смыслу свойство min-width является диаметрально противоположным к max-width. Оно ограничивает минимальную ширину элемента, но не ограничивает максимальную.
Максимальная и минимальная высота (max-height и min-height)
Для блока div можно задать максимальную высоту. Это делается в том случае, если контента в блоке будет слишком много и есть вероятность, что он испортит вёрстку сайта. Ведь у контейнера div высота изменяется автоматически в зависимости от того, сколько занимает места его дочерние элементы.
Рассмотрим наглядный пример необходимости использования max-height. Допустим, что нам надо сделать чат, где пользователи сайта смогут обмениваться текстовыми сообщениями. Для этого нужно создать контейнер, который будет расти по мере появления в нём новых сообщений. Но как только div достигает определённой высоты, то перестаёт расти и появится полоса прокрутки. Используем следующий CSS код:
Тише, мыши, кот на крыше, а котята ещё выше. Кот пошёл за молоком, а котята кувырком. Кот пришёл без молока, а котята ха-ха-ха. Весь текст не вместится в div. Поэтому из-за свойства «overflow-y: scroll;» появится полоса прокрутки:
Тише, мыши, кот на крыше, а котята ещё выше. Кот пошёл за молоком, а котята кувырком. Кот пришёл без молока, а котята ха-ха-ха.
Благодаря атрибуту contenteditable=»true» у тега div в примере, Вы можете изменить текст внутри контейнера. Попробуйте удалить и добавить несколько строк. Размер контейнера будет подстраиваться под количества текста в нём до тех пор, пока не станет быть равен 100px. Затем появится полоса прокрутки.
По смыслу свойство min-height является диаметрально противоположным к max-height. Оно ограничивает минимальную высоту элемента, но не ограничивает максимальную.