- CSS Buttons
- Example
- Button Sizes
- Example
- Example
- Rounded Buttons
- Example
- Colored Button Borders
- Example
- Hoverable Buttons
- Example
- Shadow Buttons
- Example
- Disabled Buttons
- Example
- Button Width
- Example
- Button Groups
- Example
- Bordered Button Group
- Example
- Vertical Button Group
- Example
- Button on Image
- Animated Buttons
- Example
- Example
- Example
- Example
- CSS Button Size
- Example 01:
- Example 02: Using Inline CSS to Alter the Size of a Button in an HTML File
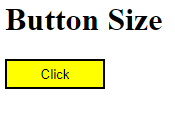
- Example 03: Increasing the Size of a Button When It Hovers With Our Cursor in an HTML File
- Example 04: Using the Font Size to Enhance the Size of a Button Using CSS
- Conclusion
- About the author
- Aqsa Yasin
- Пример
- Результат
- Использование CSS стилей
- Пример
- Результат
- Атрибуты
- Как добавить стиль к тегу ?
- Распространенные свойства для изменения визуальной насыщенности/выделения/размера текста внутри тега :
- Цвет текста внутри тега :
- Стили форматирования текста для тега :
- Другие свойства для тега :
CSS Buttons
Use the background-color property to change the background color of a button:
Example
Button Sizes
Use the font-size property to change the font size of a button:
Example
Use the padding property to change the padding of a button:
10px 24px 12px 28px 14px 40px 32px 16px 16px
Example
.button1
.button2
.button3
.button4
.button5
Rounded Buttons
Use the border-radius property to add rounded corners to a button:
Example
Colored Button Borders
Use the border property to add a colored border to a button:
Example
Hoverable Buttons
Use the :hover selector to change the style of a button when you move the mouse over it.
Tip: Use the transition-duration property to determine the speed of the «hover» effect:
Example
.button <
transition-duration: 0.4s;
>
.button:hover background-color: #4CAF50; /* Green */
color: white;
>
.
Shadow Buttons
Use the box-shadow property to add shadows to a button:
Example
.button1 <
box-shadow: 0 8px 16px 0 rgba(0,0,0,0.2), 0 6px 20px 0 rgba(0,0,0,0.19);
>
.button2:hover box-shadow: 0 12px 16px 0 rgba(0,0,0,0.24), 0 17px 50px 0 rgba(0,0,0,0.19);
>
Disabled Buttons
Use the opacity property to add transparency to a button (creates a «disabled» look).
Tip: You can also add the cursor property with a value of «not-allowed», which will display a «no parking sign» when you mouse over the button:
Example
Button Width
By default, the size of the button is determined by its text content (as wide as its content). Use the width property to change the width of a button:
Example
Button Groups
Remove margins and add float:left to each button to create a button group:
Example
Bordered Button Group
Use the border property to create a bordered button group:
Example
Vertical Button Group
Use display:block instead of float:left to group the buttons below each other, instead of side by side:
Example
Button on Image

Button
Animated Buttons
Example
Example
Add a «pressed» effect on click:
Example
Example
Add a «ripple» effect on click:
CSS Button Size
![]()
This article will go over the concept of the button size in the CSS style approach. As we know, the default button is small in size and is not visible. So, we will use the CSS in two separate ways to increase the button size and alter it on an effect like the hover effect. All these examples will be performed in the Notepad++ environment.
Example 01:
In this example, we will use the width and height property for the button element to increase its size. We will use the CSS Style Tag approach in this example to add several properties. First, we will look at the default size of the button element present in an HTML file.
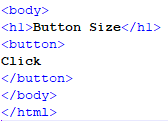
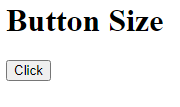
As we can see in the given script, we have not altered the size of the button. In the following output, we can see that the button size is very small and is not feasible for a web page.
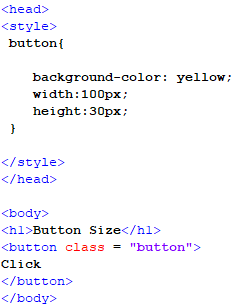
So, now we add the styling to the button. First, we open the head tag for the file. In this tag, the style tag for CSS is called. In this tag, we add all the properties for the button element. We write all the properties for the button element inside the button class parenthesis. First, we set the background color to “yellow”. Then, we set the width in pixel format to “100px”. Finally, we set the height in pixel format to “30px”. We close the style and head tags after all of the formatting are complete. Then, we go to the body tag. We write the page’s headline using the h1 tag in the body tag and then open the button tag. The class from the style tag is called in the button tag. Following that, we close the button tag with the text that displays on the button in between, as well as the body tag.
As explained earlier, we added the code in the previous script. Now, we open this new script on our browser after saving it in the correct format.
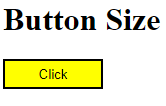
In the given output, we can see that the button has all the formatting including the size that we specified in the style class in the file header.
Example 02: Using Inline CSS to Alter the Size of a Button in an HTML File
In this example, we will use the inline CSS to change the size of an HTML file’s default button element. All the style properties will be assigned inside the button tag. This is an unconventional method to add CSS to any element and will only be associated with the current element.

As we can see in the previous snippet, we directly moved to the body of the file as all the content would be in the body tag. First, we open the h1 tag to write a heading for the page and then close it. Then, we open the button tag. In this tag, we call the style attribute by its keyword. After this, we write all the properties for the button element in the inverted commas and separate them by using the semicolon character. First, we assign the background color, “yellow”. Then, we assign the width in the pixel format. In the end, we assign the height, also in the pixel format. After this, we close the button tag with the text in between, which will appear on the button. And close the body tag along with it. Now, we save this file in the “.html” format and open it on our browser to get the following result:
As we can see in the output of our script, the heading and button from the body tag are visible. The button has all of the values defined in the tag, including the height and width.
Example 03: Increasing the Size of a Button When It Hovers With Our Cursor in an HTML File
In this example, we will use the width and height properties of the button element to make it bigger, only when the pointer is over it. In this example, we will use the CSS style tags to add numerous attributes and effects to the button element.
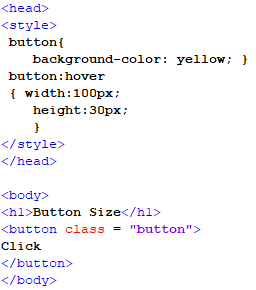
In this example, we customize the button using the CSS style tags. First, we open the file’s head tag. And then, we call the CSS style tag from there. We add all of the button element’s attributes in this tag. Inside the button class parenthesis, we enter all of the properties for the button element; in this example, we set the background color to “yellow.” Then, we open a button class that inherits a method called “hover”. In this function, we do the following: we set the width in pixel format to “100px” and set the height in pixel format to “30px”. After we finish formatting, we close the style and head tags. Then, we go to the body tag. We use the h1 tag to create the page’s title in the body tag, then open the button tag. The button tag uses the class from the style tag and have the text that appears on the button in between. Following that, we close the button tag and the body tag.

As we can see in the previous output, the size and the background color have changed as we hovered on the button with our cursor. This is because the hover function has all these properties defined in the style tag of the header’s file.
Example 04: Using the Font Size to Enhance the Size of a Button Using CSS
In this example, we will opt to a different method to change the size of a button. The font size property will be used to increase the size of a button using the style tag CSS.
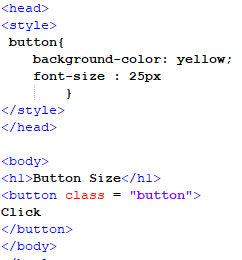
First, we open the style tag in the file header and create a styling class for the button. In this class, we assign a background color to the button. After that, we assign the font size as well. In this case, it is set to “25px”. Then, we close the class and the style and head tags, respectively. Then the body tag has a heading and a button tag which have the style tag class inherited in it. After this, we close the tags and save the file to open it on our browser.
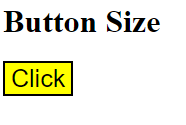
In the output screen, we can see that the button has an increased size from the default button that the HTML provides due to the change in the font size property.
Conclusion
In this article, we discussed the size of the button element present in the Hypertext Markup Language. The default button has a very small size which makes it difficult to navigate on a web page. So, we used the different approaches in CSS like the style tag and inline CSS approach. The most common property used to alter the size are the width and height property of a button. We discussed this concept and implemented this on the Notepad++. We also implemented the font size approach to increase the size of a button.
About the author
Aqsa Yasin
I am a self-motivated information technology professional with a passion for writing. I am a technical writer and love to write for all Linux flavors and Windows.
HTML тег
Содержимое тега пишется между открывающим тегами.
Пример
html> html> head> title>Заголовок документа title> head> body> h1>Вот наша кнопка.. h1> button type="button">Нажать button> body> html>Результат

Использование CSS стилей
К тегу можно применять CSS стили для изменения внешнего вида кнопки, ее размера, цвета, шрифта текста и т.д.
Пример
html> html> head> title>Заголовок документа title> head> body> Обычная кнопка button type="button">Добавить в корзину button> hr /> Кнопка с красным текстом button type="button" style="color: red;">b>Книга HTML b> button> hr /> Кнопка с увеличенным размером шрифта button type="button" style="font: bold 14px Arial;">Загрузить книгу button>br /> body> html>Результат

Атрибуты
У тега
| Атрибут | Значение | Описание |
|---|---|---|
| autofocus | autofocus | Указывает браузеру, что кнопка должна получить фокус после загрузки страницы. |
| disabled | disabled | Деактивирует кнопку. (Используется в случае, когда кнопка должна стать активной после выполнения какого-либо действия.) |
| form | form_id | Указывает форму, к которой относится кнопка. Если кнопка относится к нескольким формам, то их идентификаторы (form_id) должны быть разделены пробелами. |
| formaction | URL | Задаёт адрес, куда будут пересылаться данные формы при нажатии на кнопку. (Используется только для кнопок с атрибутом type=»submit»). |
| formenctype | application/x-www-form- urlencoded multipart/form-data text/plain | Определяет способ кодирования данных формы перед отправкой на сервер. (Используется только для кнопок с атрибутом type=»submit»). все символы кодируются перед отправкой (значение по умолчанию). символы не кодируются пробелы заменяются знаком «+», но символы не кодируются. |
| formmethod | Указывает метод HTTP запроса, который будет использован при отправке данных формы. (Используется только для кнопок с атрибутом type=»submit») | |
| get | Передает данные формы в адресной строке («имя=значение»), которые добавляются к URL страницы после вопросительного знака и разделяются между собой амперсандом (&). (http://example.ru/doc/?name=Ivan&password=vanya) | |
| post | Браузер устанавливает связь с сервером и посылает данные для обработки. | |
| formnovalidate | formnovalidate | Отменяет проверку данных формы на корректность. (Используется только для кнопок с атрибутом type=»submit»). |
| formtarget | Указывает, где показывать ответ после отправки формы. (Используется только для кнопок с атрибутом type=»submit»). | |
| blank | открывает ответ в новом окне. | |
| self | открывает ответ в текущем окне. | |
| parent | открывает ответ в родительском фрейме. | |
| top | открывает ответ во всю ширину окна. | |
| name | name | Определяет имя кнопки. |
| type | Определяет тип кнопки. | |
| button | обычная кнопка | |
| reset | кнопка, которая очищает форму от введенных данных | |
| submit | кнопка для отправки данных формы | |
| value | text | Устанавливает значение кнопки. |
Как добавить стиль к тегу ?
Распространенные свойства для изменения визуальной насыщенности/выделения/размера текста внутри тега :
- CSS свойство font-style задает стиль шрифта: normal | italic | oblique | initial | inherit
- CSS свойство font-family создает приоритетный список названий семейства шрифтов и/или общее имя шрифтов для выбранных элементов.
- CSS свойство font-size задает размер щрифта.
- CSS свойство font-weight устанавливает насыщенность шрифта.
- CSS свойство text-transform задает регистр текста (заглавные или строчные буквы).
- CSS свойство text-decoration устанавливает оформление текста. Оно является сокращенным свойством для text-decoration-line, text-decoration-color, text-decoration-style.
Цвет текста внутри тега :
Стили форматирования текста для тега :
- CSS свойство text-indent указывает размер отступа первой строки в текстовом блоке.
- CSS свойство text-overflow указывает, как будет отображаться пользователю строчный текст, выходящий за границы блока.
- CSS свойство white-space указывает, как будут отображены пробелы внутри элемента.
- CSS свойство word-break указывает перенос строки.
Другие свойства для тега :
- CSS свойство text-shadow добавляет тень к тексту.
- CSS свойство text-align-last выравнивает последнюю строку текста.
- CSS свойство line-height устанавливает межстрочный интервал.
- CSS свойство letter-spacing устанавливает расстояние между буквами/символами в тексте.
- CSS свойство word-spacing устанавливает расстояние между словами в тексте.