- How to set a default image when an image fails to load
- HTML Tag
- Browser Support
- Attributes
- Image properties and styling in CSS
- How to add images to HTML content?
- 1. Width property
- 2. Height property
- 3. The border Property
- 4. The object-fit property
- 5. The border-radius property
- 6. The opacity property
- Question 1
- Which of these properties will add a rounded border to an image?
How to set a default image when an image fails to load

Image loading in websites fail for many reasons. It could be that the src of the image contains a broken link. Or, the internet connection may be poor, and not enough to fetch the image from an external source. Or, the image’s server (which may be external) may be down.
When images don’t load, the alt text is displayed in the container with a tiny icon signifying a broken image, like so:
This view can affect UX especially when the text begins to exceed the image container.
We can display default iamges (instead of alt texts) when an image is not fetched correctly for whatever reason. And in this article, we’ll see how.
According to [MDN](How to set a default image when an image fails to load),
The error event is fired on an Element object when a resource failed to load, or can’t be used. For example, if a script has an execution error or an image can’t be found or is invalid.
When an image fails to load due to connection, broken link, or whatever reason, the onerror event is fired. And this is where we set the default image.
The idea here is, we declare a callback function such that when the error event is fired, that function with the event object as the argument will be invoked. In that callback function, we can change the src of the image to a default link that we’re sure is not broken, and also maybe exists on the same server.
Now, let’s look at the code side of things.
In Plain HTML and JS:
img id="image" src="https://broken-link-goes-here" />// js file const img = document.getElementById("image") img.addEventListener("error", function(event) event.target.src = "https://default-image-link-goes-here" event.onerror = null >)function Component() return ( div> img src="https://broken-link-goes-here" alt="A house with two children standing in front of it" onError=event => event.target.src = "https://default-image-link-goes-here" event.onerror = null >> /> div> ) >The same idea goes for other frameworks. In the callback, you reassign a different image link (which will be used as the default) to the src attribute.
One extra thing I did was add event.onerror = null . The relevance of that line is, if for any reasons the newly assigned image link is broken or the image not fetched, the onerror event will be triggered again. And if the image doesn’t load again, another trigger. And there you have an infinite loooooooop 🥵.
Assignining null to the event prevents that. If the new image link doesn’t work, the error event does not call a callback function and then the alt text will be displayed.
And that’s how to set a default image when an image fails to load.
Articles written with ❤ by
Dillion Megida
HTML ![]() Tag
Tag

The tag is used to embed an image in an HTML page.
Images are not technically inserted into a web page; images are linked to web pages. The tag creates a holding space for the referenced image.
The tag has two required attributes:
- src — Specifies the path to the image
- alt — Specifies an alternate text for the image, if the image for some reason cannot be displayed
Note: Also, always specify the width and height of an image. If width and height are not specified, the page might flicker while the image loads.
Tip: To link an image to another document, simply nest the tag inside an tag (see example below).
Browser Support
Attributes
| Attribute | Value | Description |
|---|---|---|
| alt | text | Specifies an alternate text for an image |
| crossorigin | anonymous use-credentials | Allow images from third-party sites that allow cross-origin access to be used with canvas |
| height | pixels | Specifies the height of an image |
| ismap | ismap | Specifies an image as a server-side image map |
| loading | eager lazy | Specifies whether a browser should load an image immediately or to defer loading of images until some conditions are met |
| longdesc | URL | Specifies a URL to a detailed description of an image |
| referrerpolicy | no-referrer no-referrer-when-downgrade origin origin-when-cross-origin unsafe-url | Specifies which referrer information to use when fetching an image |
| sizes | sizes | Specifies image sizes for different page layouts |
| src | URL | Specifies the path to the image |
| srcset | URL-list | Specifies a list of image files to use in different situations |
| usemap | #mapname | Specifies an image as a client-side image map |
| width | pixels | Specifies the width of an image |
Image properties and styling in CSS

Why are images important in design? Not only in website design but also in other aspects of our lives. If you visit two websites, one with images and one without, what would be your first reaction? You would be more inclined to be attracted to the one that has images. That’s because our brains can easily consume images as compared to text.
In this article, we have explored some properties that can be used to style images. These properties will come in handy as we design our websites.
Table of content:
- How to add images to HTML content?
- Width property
- Height property
- The border Property
- The object-fit property
- The border-radius property
- The opacity property
We will explore the topic now.
How to add images to HTML content?
We use the img tag in HTML to add an image to our HTML content. We then have to specify two attributes for the image tag. The src and alt attributes.
The src attribute is the required attribute. It specifies where our image is in our project path.
The alt attribute acts as a placeholder if the image can’t be displayed or found. It gives us a description of the image.
HTML 

Here, the image is located in the images folder.
The image properties we’ll cover include:
- Setting the width.
- Setting the height.
- Adding borders to images.
- The object-fit property.
- Using the border-radius property to add a rounding effect to images.
- Opacity.
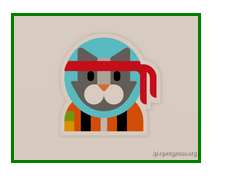
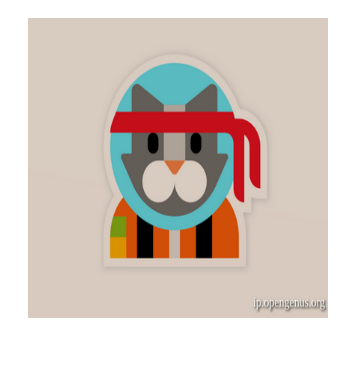
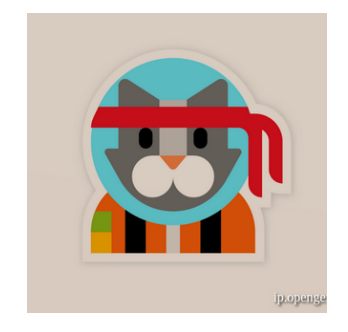
We shall be using the image below to see how we can apply these properties.

The height and width properties can be specified using two units of measurements:
1. Width property
The width of an image is set by using the width property.
Example using px
Example using percentage
2. Height property
The height of an image can be set by using the height property.
Example using px
Example using percentage
We can use pixels or percentages to set the width and the height of images. If you need your image to be responsive, it is advisable to go for percentages as your image will resize depending on the device.
3. The border Property
To add a border to an image, we use the border property.
The border property is shorthand for three properties:
- Border-width: this specifies the width of the border.
- Border-style: specifies what style the border will be. There are several values that can be applied. We’ll explore them soon.
- Border-color: specifies the color of the border.
When specifying the border, the order is:
border: border-width border-style border-color
Example using the border shorthand
Result
Example without the border shorthand
The values of the border-color property can be set using:
- Color names: i.e red
- Hexadecimal: i.e #ff0000
- RGB values: rgb(255,0,0)
- HSL values: i.e hsl(0, 100%, 50%)
The border-width property can be specified using units such as px, percentage(%), rem, and em.
The border-style property has several values. These include:
- Solid: draws a solid line around the image.
- Dashed: draws square dashes around the image
- Dotted: draws a dotted line around the image.
- Double: draws two lines around the image
- None: this is the default value where no border is drawn.
- Hidden: the border is invisible.
HTML CSS .solid-border: < border-style: solid; >.dashed-border: < border-style: dashed; >.dotted-border: < border-style: dotted; >.double-border: < border-style: double; >.none-border: < border-style: none; >.hidden-border:
4. The object-fit property
Let’s say an image is in a container for example a div element, the object-fit property defines how an image will resize within the div.
The object-fit property has several values:
- Cover: this preserves the aspect ratio of the image while filling the container. If the aspect ratio of the container is smaller than the aspect ratio of the image, the image is cropped to fit the container.
- Contain: the image preserves its aspect ratio but gets resized to fill the container.
- Fill: this is the default value. Here the image gets resized to fill the container. It does not preserve the aspect ratio of the image. The image gets stretched to fit the container.
- Scale-down: the image will choose either none or contain to obtain the smallest possible size of the image.
- None: the image does not get resized.
CSS .container < display: flex; align-items: center; justify-content: center; width: 300px; height: 300px; background-color: grey; >img < width: 300px; height: 300px; object-fit: none; >img < object-fit: cover; >img < object-fit: contain; >img < object-fit: fill; >img
- Fill(Default)
- Cover
- Contain
- Scale-down
- None


5. The border-radius property
This property enables us to create rounded images by rounding the borders around the image.
Example
Result
The units used for border-radius include pixels(px) and percentage(%).
To make a rounded image, we set the border-radius value to 50% and specify same values for width and height.
Result
6. The opacity property
To create transparent images, we can use the opacity property. It can take a range of values between 0.0 and 1.0. The default value is 1. To make the image more transparent, use a value lower than 1. The lesser the value the more transparent your image will be.
Result
To have a more in-depth understanding of these properties let’s look at some questions:
Question 1
Which of these properties will add a rounded border to an image?
The border-radius property is used to reduce the sharpness of the image corners thus making it round.