- CSS border Property
- Browser Support
- CSS Syntax
- Property Values
- Related Pages
- COLOR PICKER
- Report Error
- Thank You For Helping Us!
- border
- Синтаксис
- Значения
- Объектная модель
- Браузеры
- CSS Borders
- CSS Border Style
- Example
- border
- Try it
- Constituent properties
- Syntax
- Values
- Description
- Borders vs. outlines
- Formal definition
- Formal syntax
- Examples
- Setting a pink outset border
- HTML
- CSS
- Result
- Specifications
- Browser compatibility
- See also
- Found a content problem with this page?
- MDN
- Support
- Our communities
- Developers
- Все о свойстве border
- Основы
- Border-Radius
- Несколько границ
- Изменение углов
- CSS фигуры
- Создание Speech Bubble
- Итог
CSS border Property
If border-color is omitted, the color applied will be the color of the text.
| Default value: | medium none color |
|---|---|
| Inherited: | no |
| Animatable: | yes, see individual properties. Read about animatable Try it |
| Version: | CSS1 |
| JavaScript syntax: | object.style.border=»3px solid blue» Try it |
Browser Support
The numbers in the table specify the first browser version that fully supports the property.
CSS Syntax
Property Values
| Value | Description | Demo |
|---|---|---|
| border-width | Specifies the width of the border. Default value is «medium» | Demo ❯ |
| border-style | Specifies the style of the border. Default value is «none» | Demo ❯ |
| border-color | Specifies the color of the border. Default value is the color of the text | Demo ❯ |
| initial | Sets this property to its default value. Read about initial | |
| inherit | Inherits this property from its parent element. Read about inherit |
Related Pages

COLOR PICKER


Report Error
If you want to report an error, or if you want to make a suggestion, do not hesitate to send us an e-mail:
Thank You For Helping Us!
Your message has been sent to W3Schools.
Top Tutorials
Top References
Top Examples
Get Certified
W3Schools is optimized for learning and training. Examples might be simplified to improve reading and learning. Tutorials, references, and examples are constantly reviewed to avoid errors, but we cannot warrant full correctness of all content. While using W3Schools, you agree to have read and accepted our terms of use, cookie and privacy policy.
border
Универсальное свойство border позволяет одновременно установить толщину, стиль и цвет границы вокруг элемента. Значения могут идти в любом порядке, разделяясь пробелом, браузер сам определит, какое из них соответствует нужному свойству. Для установки границы только на определенных сторонах элемента, воспользуйтесь свойствами border-top , border-bottom , border-left , border-right .
Синтаксис
Значения
Значение border-width определяет толщину границы. Для управления ее видом предоставляется несколько значений border-style . Их названия и результат действия представлен на рис. 1.
![]()
border-color устанавливает цвет границы, значение может быть в любом допустимом для CSS формате.
inherit наследует значение родителя.
HTML5 CSS2.1 IE Cr Op Sa Fx
В данном примере вокруг слоя добавляется двойная граница. Результат показан на рис. 2.
Рис. 2. Применение свойства border
Объектная модель
[window.]document.getElementById(» elementID «).style.borderБраузеры
Браузер Internet Explorer до шестой версии включительно при толщине границы 1px отображает dotted как dashed . При толщине 2px и выше значение dotted работает корректно. Эта ошибка исправлена в IE7, но только для всех границ толщиной 1px. Если одна из границ блока имеет толщину 2px и выше, то в IE7 значение dotted превращается в dashed .
Internet Explorer до версии 7.0 включительно не поддерживает значение inherit .
Стиль границы в разных браузерах может несколько различаться при использовании значений groove , ridge , inset или outset .
CSS Borders
The CSS border properties allow you to specify the style, width, and color of an element’s border.
I have borders on all sides.
I have a red bottom border.
I have a blue left border.
CSS Border Style
The border-style property specifies what kind of border to display.
The following values are allowed:
- dotted — Defines a dotted border
- dashed — Defines a dashed border
- solid — Defines a solid border
- double — Defines a double border
- groove — Defines a 3D grooved border. The effect depends on the border-color value
- ridge — Defines a 3D ridged border. The effect depends on the border-color value
- inset — Defines a 3D inset border. The effect depends on the border-color value
- outset — Defines a 3D outset border. The effect depends on the border-color value
- none — Defines no border
- hidden — Defines a hidden border
The border-style property can have from one to four values (for the top border, right border, bottom border, and the left border).
Example
Demonstration of the different border styles:
A groove border. The effect depends on the border-color value.
A ridge border. The effect depends on the border-color value.
An inset border. The effect depends on the border-color value.
An outset border. The effect depends on the border-color value.
Note: None of the OTHER CSS border properties (which you will learn more about in the next chapters) will have ANY effect unless the border-style property is set!
border
The border shorthand CSS property sets an element’s border. It sets the values of border-width , border-style , and border-color .
Try it
Constituent properties
This property is a shorthand for the following CSS properties:
Syntax
/* style */ border: solid; /* width | style */ border: 2px dotted; /* style | color */ border: outset #f33; /* width | style | color */ border: medium dashed green; /* Global values */ border: inherit; border: initial; border: revert; border: revert-layer; border: unset;
The border property may be specified using one, two, or three of the values listed below. The order of the values does not matter.
Note: The border will be invisible if its style is not defined. This is because the style defaults to none .
Values
Sets the thickness of the border. Defaults to medium if absent. See border-width .
Sets the style of the border. Defaults to none if absent. See border-style .
Sets the color of the border. Defaults to currentcolor if absent. See border-color .
Description
As with all shorthand properties, any omitted sub-values will be set to their initial value. Importantly, border cannot be used to specify a custom value for border-image , but instead sets it to its initial value, i.e., none .
The border shorthand is especially useful when you want all four borders to be the same. To make them different from each other, however, you can use the longhand border-width , border-style , and border-color properties, which accept different values for each side. Alternatively, you can target one border at a time with the physical (e.g., border-top ) and logical (e.g., border-block-start ) border properties.
Borders vs. outlines
Borders and outlines are very similar. However, outlines differ from borders in the following ways:
- Outlines never take up space, as they are drawn outside of an element’s content.
- According to the spec, outlines don’t have to be rectangular, although they usually are.
Formal definition
- border-width : as each of the properties of the shorthand:
- border-top-width : medium
- border-right-width : medium
- border-bottom-width : medium
- border-left-width : medium
- border-top-style : none
- border-right-style : none
- border-bottom-style : none
- border-left-style : none
- border-top-color : currentcolor
- border-right-color : currentcolor
- border-bottom-color : currentcolor
- border-left-color : currentcolor
- border-width : as each of the properties of the shorthand:
- border-bottom-width : the absolute length or 0 if border-bottom-style is none or hidden
- border-left-width : the absolute length or 0 if border-left-style is none or hidden
- border-right-width : the absolute length or 0 if border-right-style is none or hidden
- border-top-width : the absolute length or 0 if border-top-style is none or hidden
- border-bottom-style : as specified
- border-left-style : as specified
- border-right-style : as specified
- border-top-style : as specified
- border-bottom-color : computed color
- border-left-color : computed color
- border-right-color : computed color
- border-top-color : computed color
- border-color : as each of the properties of the shorthand:
- border-bottom-color : a color
- border-left-color : a color
- border-right-color : a color
- border-top-color : a color
- border-bottom-width : a length
- border-left-width : a length
- border-right-width : a length
- border-top-width : a length
Formal syntax
border =
||
||=
|
thin |
medium |
thick=
none |
hidden |
dotted |
dashed |
solid |
double |
groove |
ridge |
inset |
outsetExamples
Setting a pink outset border
HTML
div>I have a border, an outline, and a box shadow! Amazing, isn't it?div>
CSS
div border: 0.5rem outset pink; outline: 0.5rem solid khaki; box-shadow: 0 0 0 2rem skyblue; border-radius: 12px; font: bold 1rem sans-serif; margin: 2rem; padding: 1rem; outline-offset: 0.5rem; >Result
Specifications
Browser compatibility
BCD tables only load in the browser
See also
Found a content problem with this page?
This page was last modified on Jul 18, 2023 by MDN contributors.
Your blueprint for a better internet.
MDN
Support
Our communities
Developers
Visit Mozilla Corporation’s not-for-profit parent, the Mozilla Foundation.
Portions of this content are ©1998– 2023 by individual mozilla.org contributors. Content available under a Creative Commons license.Все о свойстве border

Все знакомы с css параметром border, но есть ли вещи, которые мы не знаем о нем?
Основы
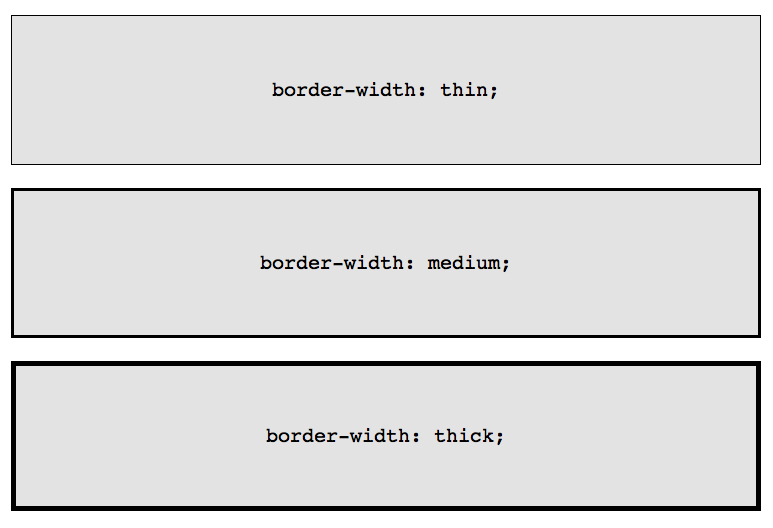
border-width: thick; border-style: solid; border-color: black;Например у параметра border-width есть три параметра: thin, medium, thick:
Если необходимо менять цвет границы при наведении на объект:
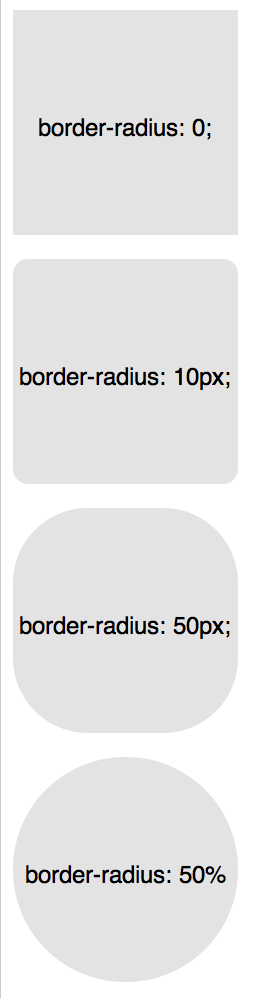
Border-Radius
border-radius — это новый параметр CSS3 для отображения закругленных углов, который корректно работает во всех современных браузерах, за исключением Internet Explorer 8 (и более старых версий).
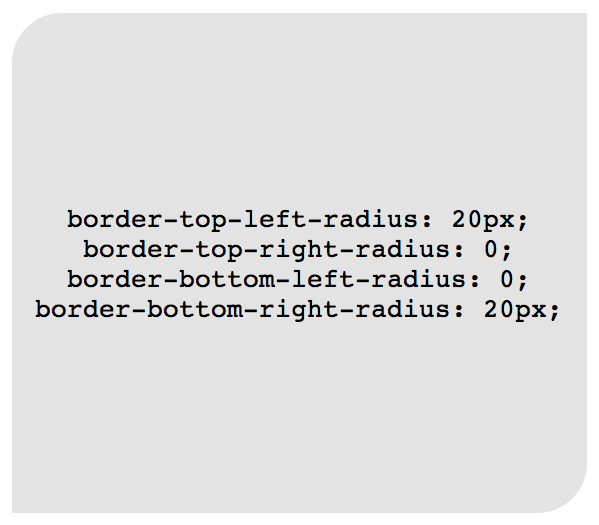
Для каждого угла можно назначить свое закругление:
border-top-left-radius: 20px; border-top-right-radius: 0; border-bottom-right-radius: 30px; border-bottom-left-radius: 0;В приведенном примере необязательно назначать «0» border-top-right-radius и border-bottom-left-radius, если они не наследуют значения, которые должны быть изменены.
Всю конструкцию можно сжать в одну строку:/* top left, top right, bottom right, bottom left */ border-radius: 20px 0 30px 0;Здесь описаны самые простые и популярные примеры применения параметра border. Перейдем к более сложным.
Несколько границ
Border-Style
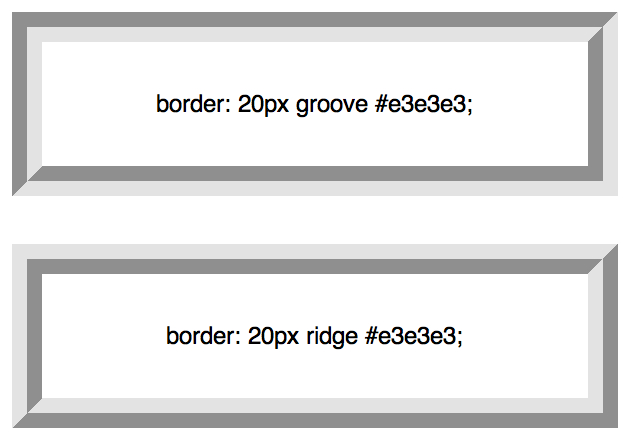
solid, dashed, and dotted — самые популярные значения параметра border-style, но давайте рассмотрим другие, например, groove and ridge.
border: 20px groove #e3e3e3;border-color: #e3e3e3; border-width: 20px; border-style: groove; Outline
Этот способ отлично работает, но ограничен созданием двойной рамки. Если вам необходимо отобразить несколько границ элемента, то необходимо использовать другую технику.
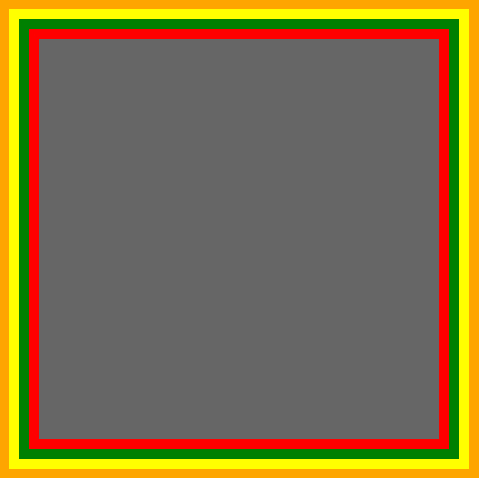
Псевдоэлементы
.box < width: 200px; height: 200px; background: #e3e3e3; position: relative; border: 10px solid green; >/* Create two boxes with the same width of the container */ .box:after, .box:before < content: ''; position: absolute; top: 0; left: 0; bottom: 0; right: 0; >.box:after < border: 5px solid red; outline: 5px solid yellow; >.box:before
Возможно это не самое элегантное решение, однако оно работает
Box-Shadow
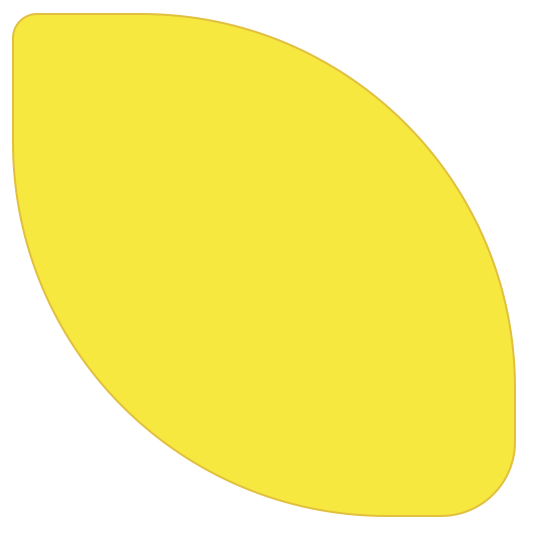
Изменение углов
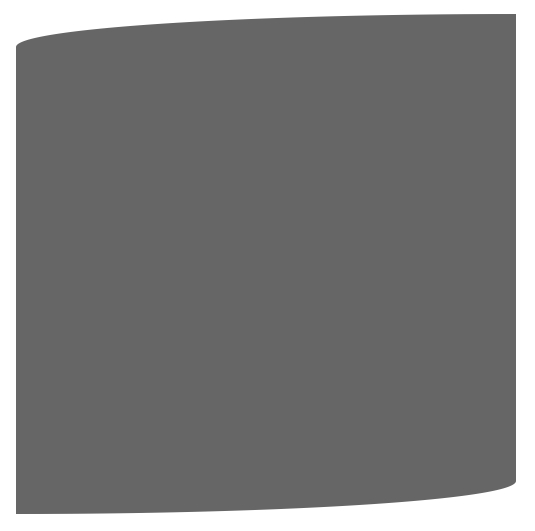
border-radius: 50px / 100px; /* horizontal radius, vertical radius */border-top-left-radius: 50px 100px; border-top-right-radius: 50px 100px; border-bottom-right-radius: 50px 100px; border-bottom-left-radius: 50px 100px;Эта техничка бывает полезна, если необходимо имитировать искривление, а не закругление. Например, так можно получить эффект скрученной бумаги:
CSS фигуры
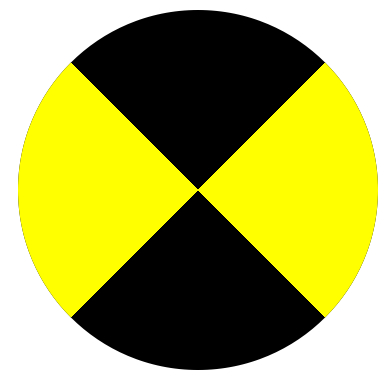
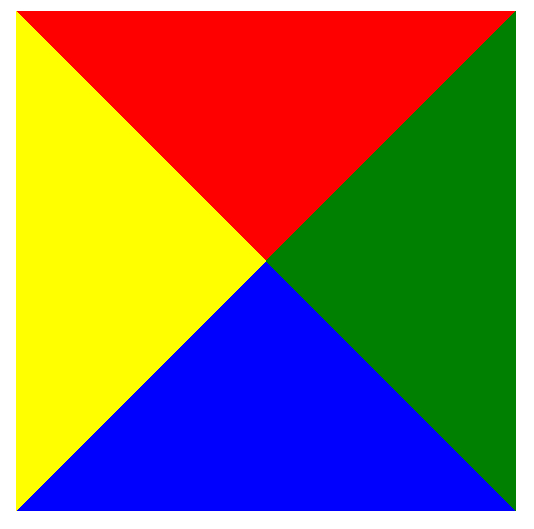
Наиболее частым примером использования CSS фигур является отображение стрелок. Чтобы понять, как это работает, необходимо разобраться с использованием отдельного border-color для каждой стороны и установкой значения «0» для width и height:
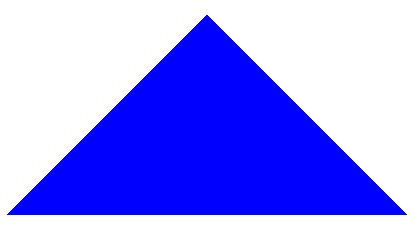
А теперь оставляем только синий треугольник:
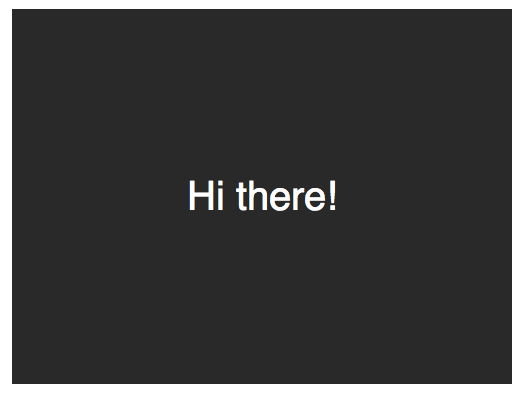
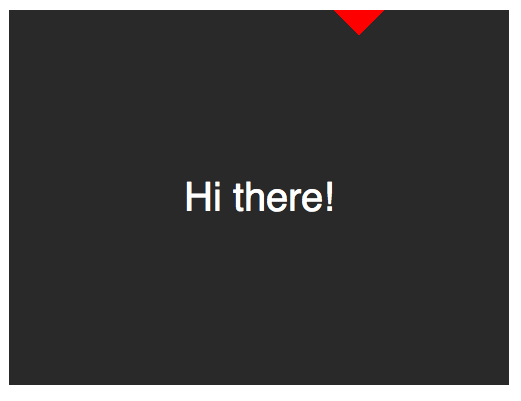
Создание Speech Bubble
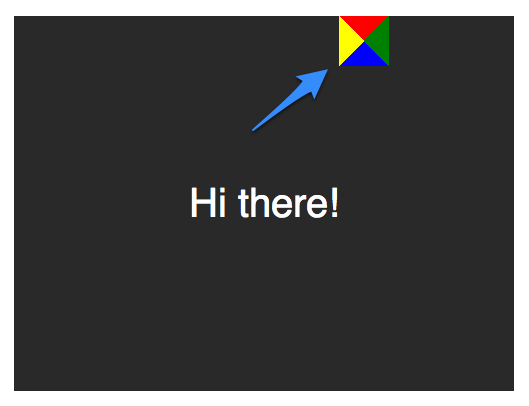
Теперь нужно расположить стрелку-треугольник в нужном месте. Вот наш цветной квадратик:
Оставляем только четверть квадратика:
Теперь перемещаем ниже и закрашиваем:
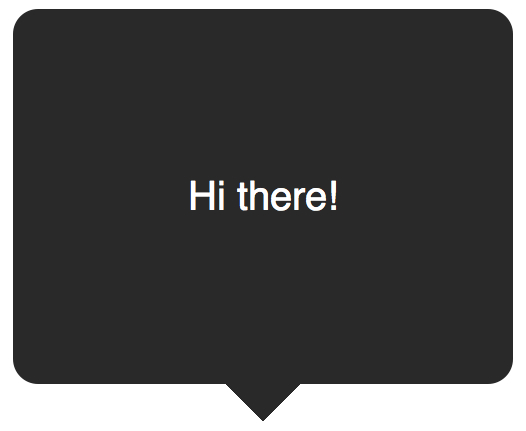
.speech-bubble < /* … other styles */ border-radius: 10px; >.speech-bubble:after < content: ''; position: absolute; width: 0; height: 0; border: 15px solid; border-top-color: #292929; top: 100%; left: 50%; margin-left: -15px; /* adjust for border width */ >Примеры применения:
/* Speech Bubbles Usage: Apply a class of .speech-bubble and .speech-bubble-DIRECTION
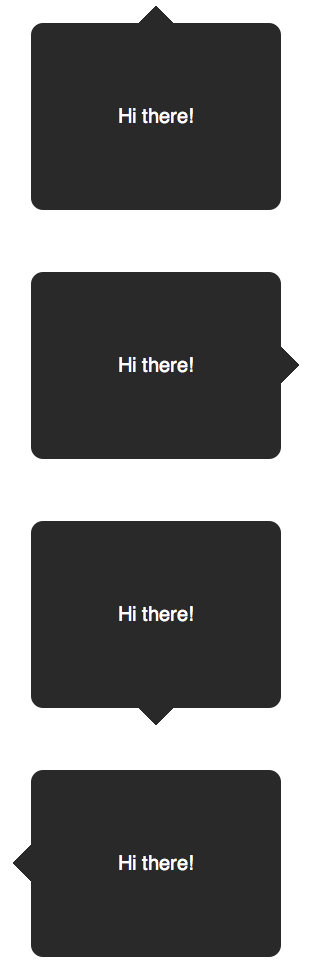
Hi there*/ .speech-bubble < position: relative; background-color: #292929; width: 200px; height: 150px; line-height: 150px; /* vertically center */ color: white; text-align: center; border-radius: 10px; font-family: sans-serif; >.speech-bubble:after < content: ''; position: absolute; width: 0; height: 0; border: 15px solid; >/* Position the Arrow */ .speech-bubble-top:after < border-bottom-color: #292929; left: 50%; bottom: 100%; margin-left: -15px; >.speech-bubble-right:after < border-left-color: #292929; left: 100%; top: 50%; margin-top: -15px; >.speech-bubble-bottom:after < border-top-color: #292929; top: 100%; left: 50%; margin-left: -15px; >.speech-bubble-left:after Вертикальное центрирование текста
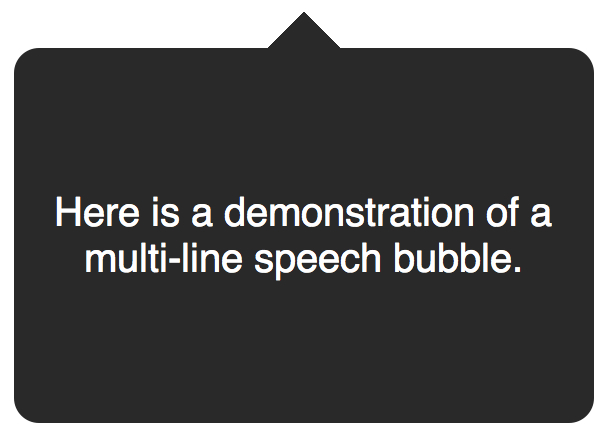
минус использования line-height при вертикальном центрировании в ограничении текста одной строкой. Для решения этой проблемы, можно применить display: table к нашему Speech Bubble и display: table-cell к тексту:
.speech-bubble < /* other styles */ display: table; >.speech-bubble p
Еще один пример нестандартного использования границ:
Итог
Использование параметра border не ограничивается одним лишь «1px solid black», с помощью границ можно создавать различные фигуры, причем достаточно один раз написать CSS-класс и применять его к множеству элементов на странице.