- Buttons
- Examples
- Button tags
- Outline buttons
- Sizes
- Active state
- Disabled state
- Button plugin
- Toggle states
- Checkbox and radio buttons
- Methods
- How TO — Toggle Class
- Toggle Class
- Example
- Example
- Example
- COLOR PICKER
- Report Error
- Thank You For Helping Us!
- The Toggle Button on CSS
- Why you need it?
- Creation. HTML
- Creation. CSS
- Smooth Transition
- Conclusion
Buttons
Use Bootstrap’s custom button styles for actions in forms, dialogs, and more with support for multiple sizes, states, and more.
Examples
Bootstrap includes several predefined button styles, each serving its own semantic purpose, with a few extras thrown in for more control.
type="button" class="btn btn-primary">Primary type="button" class="btn btn-secondary">Secondary type="button" class="btn btn-success">Success type="button" class="btn btn-danger">Danger type="button" class="btn btn-warning">Warning type="button" class="btn btn-info">Info type="button" class="btn btn-light">Light type="button" class="btn btn-dark">Dark type="button" class="btn btn-link">Link Conveying meaning to assistive technologies
Using color to add meaning only provides a visual indication, which will not be conveyed to users of assistive technologies – such as screen readers. Ensure that information denoted by the color is either obvious from the content itself (e.g. the visible text), or is included through alternative means, such as additional text hidden with the .sr-only class.
Button tags
The .btn classes are designed to be used with the element. However, you can also use these classes on or elements (though some browsers may apply a slightly different rendering).
class="btn btn-primary" href="#" role="button">Link class="btn btn-primary" type="submit">Button class="btn btn-primary" type="button" value="Input"> class="btn btn-primary" type="submit" value="Submit"> class="btn btn-primary" type="reset" value="Reset">Outline buttons
In need of a button, but not the hefty background colors they bring? Replace the default modifier classes with the .btn-outline-* ones to remove all background images and colors on any button.
type="button" class="btn btn-outline-primary">Primary type="button" class="btn btn-outline-secondary">Secondary type="button" class="btn btn-outline-success">Success type="button" class="btn btn-outline-danger">Danger type="button" class="btn btn-outline-warning">Warning type="button" class="btn btn-outline-info">Info type="button" class="btn btn-outline-light">Light type="button" class="btn btn-outline-dark">Dark Sizes
Fancy larger or smaller buttons? Add .btn-lg or .btn-sm for additional sizes.
type="button" class="btn btn-primary btn-lg">Large button type="button" class="btn btn-secondary btn-lg">Large button type="button" class="btn btn-primary btn-sm">Small button type="button" class="btn btn-secondary btn-sm">Small button Create block level buttons—those that span the full width of a parent—by adding .btn-block .
type="button" class="btn btn-primary btn-lg btn-block">Block level button type="button" class="btn btn-secondary btn-lg btn-block">Block level button Active state
Buttons will appear pressed (with a darker background, darker border, and inset shadow) when active. There’s no need to add a class to s as they use a pseudo-class. However, you can still force the same active appearance with .active (and include the aria-pressed=»true» attribute) should you need to replicate the state programmatically.
href="#" class="btn btn-primary btn-lg active" role="button" aria-pressed="true">Primary link href="#" class="btn btn-secondary btn-lg active" role="button" aria-pressed="true">Link Disabled state
Make buttons look inactive by adding the disabled boolean attribute to any element.
type="button" class="btn btn-lg btn-primary" disabled>Primary button type="button" class="btn btn-secondary btn-lg" disabled>Button href="#" class="btn btn-primary btn-lg disabled" role="button" aria-disabled="true">Primary link href="#" class="btn btn-secondary btn-lg disabled" role="button" aria-disabled="true">Link Link functionality caveat
Button plugin
Do more with buttons. Control button states or create groups of buttons for more components like toolbars.
Toggle states
Add data-toggle=»button» to toggle a button’s active state. If you’re pre-toggling a button, you must manually add the .active class and aria-pressed=»true» to the .
type="button" class="btn btn-primary" data-toggle="button" aria-pressed="false" autocomplete="off"> Single toggle Checkbox and radio buttons
Bootstrap’s .button styles can be applied to other elements, such as s, to provide checkbox or radio style button toggling. Add data-toggle=»buttons» to a .btn-group containing those modified buttons to enable their toggling behavior via JavaScript and add .btn-group-toggle to style the s within your buttons. Note that you can create single input-powered buttons or groups of them.
The checked state for these buttons is only updated via click event on the button. If you use another method to update the input—e.g., with or by manually applying the input’s checked property—you’ll need to toggle .active on the manually.
Note that pre-checked buttons require you to manually add the .active class to the input’s .
class="btn-group-toggle" data-toggle="buttons"> class="btn btn-secondary active"> type="checkbox" checked autocomplete="off"> Checked class="btn-group btn-group-toggle" data-toggle="buttons"> class="btn btn-secondary active"> type="radio" name="options" id="option1" autocomplete="off" checked> Active class="btn btn-secondary"> type="radio" name="options" id="option2" autocomplete="off"> Radio class="btn btn-secondary"> type="radio" name="options" id="option3" autocomplete="off"> Radio Methods
| Method | Description |
|---|---|
| $().button(‘toggle’) | Toggles push state. Gives the button the appearance that it has been activated. |
| $().button(‘dispose’) | Destroys an element’s button. |
How TO — Toggle Class
Toggle between adding and removing a class name from an element with JavaScript.
Toggle Class
Step 1) Add HTML:
Toggle between adding a class name to the div element with (in this example we use a button to toggle the class name).
Example
Step 2) Add CSS:
Add a class name to toggle:
Example
Step 3) Add JavaScript:
Get the element with and toggle between the «mystyle» class:
Example
function myFunction() <
var element = document.getElementById(«myDIV»);
element.classList.toggle(«mystyle»);
>
Tip: Also see How To Add A Class.
Tip: Also see How To Remove A Class.
Tip: Learn more about the classList property in our JavaScript Reference.

COLOR PICKER


Report Error
If you want to report an error, or if you want to make a suggestion, do not hesitate to send us an e-mail:
Thank You For Helping Us!
Your message has been sent to W3Schools.
Top Tutorials
Top References
Top Examples
Get Certified
W3Schools is optimized for learning and training. Examples might be simplified to improve reading and learning. Tutorials, references, and examples are constantly reviewed to avoid errors, but we cannot warrant full correctness of all content. While using W3Schools, you agree to have read and accepted our terms of use, cookie and privacy policy.
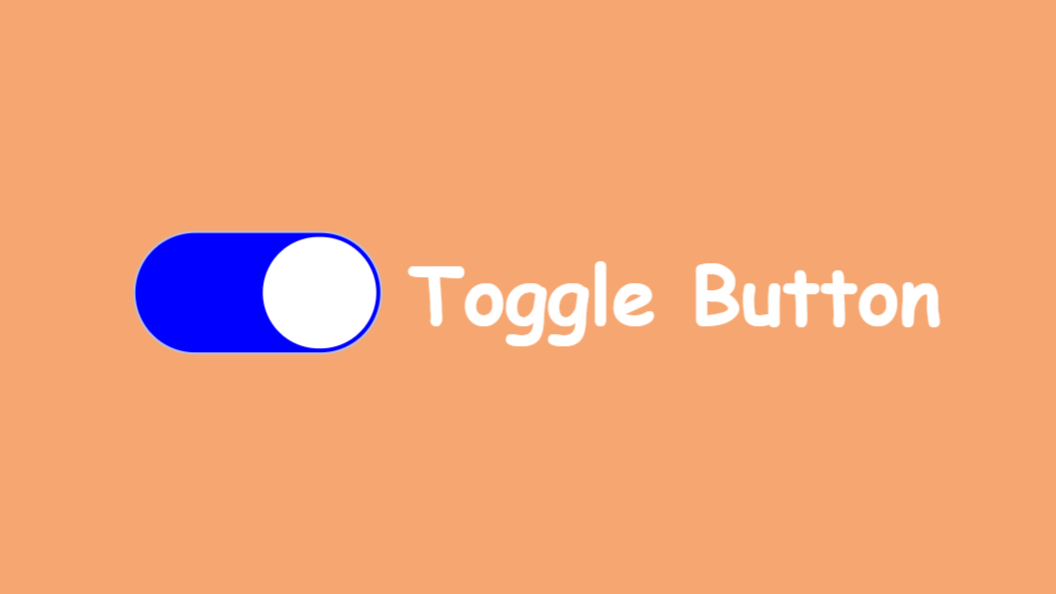
The Toggle Button on CSS
Have you ever seen an attractive Toggle Button on various web-pages or apps? Today we will create it with you together!
Why you need it?
Toggle buttons are widely used in modern apps and web-pages. It makes users click on it with its attractiveness and smooth transition.
Creation. HTML
At first, we need to add the skeleton for our button using HTML. It is just an input with type=”checked” and a label for this input.
In order to bind label with the input, we use for=”toggle-button” where toggle-button is an id of our input.
Creation. CSS
Now we start to customize our toggle button.
Primarily, we need to remove the standard view of the input in the browser. We can do this by adding the appearance: none property to the class .toogle-button.
But here is one problem… The property appearance doesn’t work in Edge and IE.
Despite it, this property works correctly in all modern browsers.
-webkit-: browsers Chrome, Safari, Opera;
-moz-: browser Mozilla Firefox;
Okay, let’s continue. And what will we see after adding appearance: none? Our checkbox will just disappear. And now we can add own styles which we want. Let’s add some styles to .toogle-button for beauty.
After applying these styles our toggle button will look as follows.

Note: I don’t show you applied styles for the label and body’s background-color because our theme is the Toggle Button
Now it is time to add circle inside our button. We can do it by adding a pseudo-element ::after.
Now it looks like the real Toggle Button on the web-page.

But furthermore, we need to add the effect of the circle’s moving after the user’s click. We can achieve this by using the transform: translate(x) property.
If you look at the previous code of the .toogle-button you will see transform: translateX(0). “0” here is an initial position of the circle in which it will return after unchecking.
In order to move the circle to the right side, we need to use pseudo-class :checked for the class .toggle-button.
.toggle-button:checked::after < transform: translateX(calc(100% + 3px)); background-color: #fff; >.toggle-button:checked
In this code we can see translateX(calc(100% + 3px)) where calc(100% + 3px) calculates the position of the circle after user’s click. It is simpler to understand with the formula:
calc(A + B)
Where:
A — the entire inner width of the .toggle-button;
B — property left of the .toggle-button::after (remember, we wrote left: 3px in .toggle-button::after)
If you don’t understand the formula you can look at the explanation with a picture:

Moreover, we change background-color of the circle and the .toggle-button class.
Okay, I’ m sure that all things are clear. Now our toggle button looks so:
Smooth Transition
And at least we will add the smooth movement of our circle. We can just add simple transitions for .toggle-button and .toggle-button::after.
But we need a more attractive effect. Let’s use cubic-bezier. You need just add the code below it to .toggle-button and .toggle-button::after.
transition: all 0.3s cubic-bezier(0.2, 0.85, 0.32, 1.2);And after it, we will see a great animation.
The circle seems to bounce off the walls of the white frame. It’s cool, isn’t it?
Conclusion
Yeah, we did it! Today we created an awesome and cool tool that you can use in your app or web-page.
The full code you can find here: Toggle Button.
If this article was useful to you and gave you new knowledge about CSS I would be great to see likes or comments below with feedback.
I’ll also be glad to read some proposals for my articles.