- HTML Tag
- Tips and Notes
- Browser Support
- Global Attributes
- Event Attributes
- More Examples
- Example
- Related Pages
- Default CSS Settings
- COLOR PICKER
- Report Error
- Thank You For Helping Us!
- How to make footer html
- Примеры использования
- Глобальные атрибуты
- Ограничения
- Нюансы
- Чем заменить тег
- How to Create a Footer using HTML and CSS
- 2. Html Code For adding Links In Footer
- 3. Start Our Footer Styling With Css Code
- 4. Completing the Final Design Of Footer
- 5. Create a Responsive Footer With Media Queries Code
- How To Add a Footer To Your Webpage With HTML
- Tutorial Series: How To Build a Website with HTML
- How to make footer html
- Learn Latest Tutorials
- Preparation
- Trending Technologies
- B.Tech / MCA
- Javatpoint Services
- Training For College Campus
HTML Tag
The tag defines a footer for a document or section.
A element typically contains:
- authorship information
- copyright information
- contact information
- sitemap
- back to top links
- related documents
You can have several elements in one document.
Tips and Notes
Tip: Contact information inside a element should go inside an tag.
Browser Support
The numbers in the table specify the first browser version that fully supports the element.
| Element | |||||
|---|---|---|---|---|---|
| 5.0 | 9.0 | 4.0 | 5.0 | 11.1 |
Global Attributes
Event Attributes
More Examples
Example
Related Pages
Default CSS Settings
Most browsers will display the element with the following default values:

COLOR PICKER


Report Error
If you want to report an error, or if you want to make a suggestion, do not hesitate to send us an e-mail:
Thank You For Helping Us!
Your message has been sent to W3Schools.
Top Tutorials
Top References
Top Examples
Get Certified
W3Schools is optimized for learning and training. Examples might be simplified to improve reading and learning. Tutorials, references, and examples are constantly reviewed to avoid errors, but we cannot warrant full correctness of all content. While using W3Schools, you agree to have read and accepted our terms of use, cookie and privacy policy.
How to make footer html
Тег используется для создания подвала сайта. В этом подвале обычно содержатся копирайт, контактная информация, ссылки на социальные сети, меню и другая вспомогательная информация.
Атрибуты тега :
- id — уникальный идентификатор элемента.
- class — определяет имя класса, которое позволяет связать тег со стилевым оформлением.
Примеры использования
Подвал с меню и контактной информацией:
Подвал со ссылками на социальные сети:
Для чего использовать тег
- Разместить копирайт и авторские права.
- Отобразить контактную информацию.
- Разместить дополнительное меню навигации.
- Добавить ссылки на социальные сети.
- Показать ссылки на политику конфиденциальности и пользовательское соглашение.
- Разместить логотип и ссылку на главную страницу.
- Отобразить информацию о партнёрах и спонсорах.
Глобальные атрибуты
Ограничения
Нюансы
Чем заменить тег
- Если нужно создать колонтитул для элемента, можете использовать тег или .
- Если нужно указать контактную информацию автора или ссылки на связанные документы, можете использовать тег .
👉🏻 Другие теги для структурирования контента

«Доктайп» — журнал о фронтенде. Читайте, слушайте и учитесь с нами.
How to Create a Footer using HTML and CSS
Hello, guys welcome to the Codewithrandom blog, today we’ll learn about How to Create a footer with Html code and styling with Css for Beginners.
In today’s tutorial, we will be using font-awesome for icons, HTML 5, and some basic Css Code for stying Footer.
Given below are the links to the resources that we will be using:
Link of Font-Awesome CDN
Link of Google Font
[email protected];300;400;500;600;700&display=swap" rel="stylesheet" />
1. Setup our Footer Structure Using HTML Code
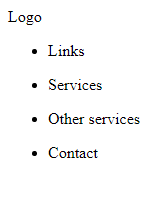
In the First Step, we will code firstly the structure of our footer with a basic footer structure using div, ul, li, and footer tag after we code the links of our footer.
Do you want to learn HTML to JavaScript? 🔥
If yes, then here is our Master Frontend: Zero to Hero eBook! 📚 In this eBook, you’ll learn complete HTML, CSS, Bootstrap, and JavaScript from beginner to advance level. 💪 It includes 450 Projects with source code.
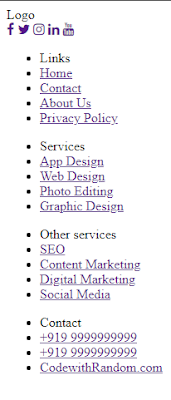
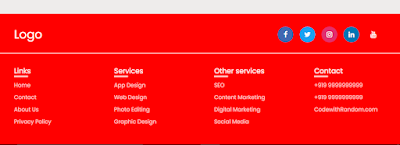
2. Html Code For adding Links In Footer
After completing the structure we should code some links name Links, Services, Other Services, or Contact then we complete our Html part that’s it next we do some stylings.
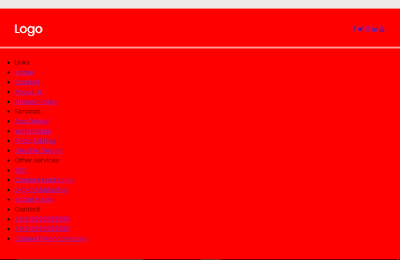
3. Start Our Footer Styling With Css Code
@import url(‘https://fonts.googleapis.com/css2?family=Poppins:[email protected];300;400;500;600;700&display=swap’); * < margin: 0; padding: 0; box-sizing: border-box; font-family: "Poppins" , sans-serif; >body < min-height: 100vh; width: 100%; background: #EEECEB; >footer < position: fixed; background: #ff0000; width: 100%; bottom: 0; left: 0; >footer::before < content: ''; position: absolute; left: 0; top: 100px; height: 1px; width: 100%; background: #fff; >footer .content < max-width: 1250px; margin: auto; padding: 30px 40px 40px 40px; >footer .content .top < display: flex; align-items: center; justify-content: space-between; margin-bottom: 50px; >.content .top .logo-details < color: #fff; font-size: 30px; >.content .top .logo-details:hover
After code links, we do some basic styling like HTML resetting, fonts, background color, top or bottom dividing, logo styling, and a little bit of margin, padding, or alignment.
4. Completing the Final Design Of Footer
.content .top .media-icons < display: flex; >.content .top .media-icons a < height: 40px; width: 40px; margin: 0 8px; border-radius: 50%; text-align: center; line-height: 40px; color: #fff; font-size: 17px; text-decoration: none; transition: all 0.4s ease; >.top .media-icons a:nth-child(1) < background: #4267B2; >.top .media-icons a:nth-child(1):hover < color: #4267B2; background: #fff; >.top .media-icons a:nth-child(2) < background: #1DA1F2; >.top .media-icons a:nth-child(2):hover < color: #1DA1F2; background: #fff; >.top .media-icons a:nth-child(3) < background: #E1306C; >.top .media-icons a:nth-child(3):hover < color: #E1306C; background: #fff; >.top .media-icons a:nth-child(4) < background: #0077B5; >.top .media-icons a:nth-child(4):hover < color: #0077B5; background: #fff; >.top .media-icons a:nth-child(5) < background: #FF0000; >.top .media-icons a:nth-child(5):hover < color: #FF0000; background: #fff; >footer .content .link-boxes < width: 100%; display: flex; justify-content: space-between; >footer .content .link-boxes .box < width: calc(100% / 5 - 10px); >.content .link-boxes .box .link_name < color: #fff; font-size: 18px; font-weight: 400; margin-bottom: 10px; position: relative; >.link-boxes .box .link_name::before < content: ''; position: absolute; left: 0; bottom: -2px; height: 2px; width: 35px; background: #fff; >.content .link-boxes .box li < margin: 6px 0; list-style: none; >.content .link-boxes .box li a < color: #fff; font-size: 14px; font-weight: 400; text-decoration: none; opacity: 0.8; transition: all 0.4s ease >.content .link-boxes .box li a:hover < opacity: 2; text-decoration: none; >.content .link-boxes .input-box < margin-right: 55px; >.link-boxes .input-box input < height: 40px; width: calc(100% + 55px); outline: none; border: 2px solid #AFAFB6; background: #140B5C; border-radius: 4px; padding: 0 15px; font-size: 15px; color: #fff; margin-top: 5px; >.link-boxes .input-box input::placeholder < color: #AFAFB6; font-size: 16px; >.link-boxes .input-box input[type=»button»] < background: #fff; color: #140B5C; border: none; font-size: 18px; font-weight: 500; margin: 4px 0; opacity: 0.8; cursor: pointer; transition: all 0.4s ease; >.input-box input[type=»button»]:hover < opacity: 1; >footer .bottom-details < width: 100%; background: #2c303a; >footer .bottom-details .bottom_text < max-width: 1250px; margin: auto; padding: 20px 40px; display: flex; justify-content: space-between; >.bottom-details .bottom_text span, .bottom-details .bottom_text a < font-size: 14px; font-weight: 300; color: #fff; opacity: 0.8; text-decoration: none; >.bottom-details .bottom_text a:hover < opacity: 1; text-decoration: underline; >.bottom-details .bottom_text a
After completing our basics stylings we do our all links, social icons, bottom styling, hover effect, margin, padding, flex, etc after completing this part we start to write media queries.
5. Create a Responsive Footer With Media Queries Code
@media (max-width: 900px) < footer .content .link-boxes< flex-wrap: wrap; >footer .content .link-boxes .input-box < width: 40%; margin-top: 10px; >> @media (max-width: 700px) < footer< position: relative; >.content .top .logo-details < font-size: 26px; >.content .top .media-icons a < height: 35px; width: 35px; font-size: 14px; line-height: 35px; >footer .content .link-boxes .box < width: calc(100% / 3 - 10px); >footer .content .link-boxes .input-box < width: 60%; >.bottom-details .bottom_text span, .bottom-details .bottom_text a < font-size: 12px; >> @media (max-width: 520px) < footer::before< top: 145px; >footer .content .top < flex-direction: column; >.content .top .media-icons < margin-top: 16px; >footer .content .link-boxes .box < width: calc(100% / 2 - 10px); >footer .content .link-boxes .input-box < width: 100%; >>
Finally, we code a little bit of media queries for creating it responsive so that for today we get this.
How To Add a Footer To Your Webpage With HTML
A website footer is the final block of content at the bottom of a webpage. Footers can contain any type of HTML content, including text, images, and links. In this final tutorial of the series, we’ll create the following basic footer for our webpage using a element:

To get started, paste the following code snippet after your closing


