- Файл requirements.txt в Python и как его создать
- Преимущества использования файла зависимостей
- Как создать файл зависимостей
- Добавление модулей в файл
- Установка модулей из файла
- Как поддерживать requirements.txt в актуальном состоянии
- Как еще можно создать файл зависимостей?
- Советы по использованию файла требований
- Заключение
- How to create and apply a requirements.txt file in Python
- What are requirements.txt files good for?
- requirements.txt files with pip
- requirements.txt files with conda
- Create your own requirements.txt files
- conda specific alternative to requirements.txt files
- Related posts:
- Wasserstein distance by entropy regularization (Sinkhorn algorithm)
- Wasserstein distance and optimal transport
- Visualizing Occam’s Razor through machine learning
- Zen and natural sciences
- The Zen of Python
- The Zen of programming
- Hokke ten Hokke
- Mamba vs. Conda: Unleashing lightning-fast Python package installations
Файл requirements.txt в Python и как его создать
requirements.txt — это простой текстовый файл, который содержит перечень всех модулей и пакетов, необходимых для корректной работы вашей программы. Создавая файл Python requirements.txt , вы избавляете себя от необходимости искать и устанавливать все необходимые модули вручную.
Из статьи вы узнаете о том, как создать файл requirements.txt , о его преимуществах и особенностях использования.
Преимущества использования файла зависимостей
- Возможность отслеживать актуальный список всех модулей и пакетов Python, используемых в вашем проекте.
- Облегчение процесса установки недостающих компонентов.
- Удобство совместной работы. Если на ПК другого пользователя отсутствуют нужные модули, они будут быстро загружены из файла requirements.txt , обеспечив беспроблемный запуск программы.
- Если вы захотите удалить, добавить или обновить модуль, изменения будет достаточно внести только в файл requirements.txt .
- При загрузке requirements.txt , GitHub проверяет зависимости на наличие конфликтов, и в некоторых случаях устраняет уязвимости.
Как создать файл зависимостей
Для этого вам достаточно перейти в корневой каталог проекта, где хранятся ваши .py -файлы, и создать текстовый документ requirements.txt . Важно убедиться, чтобы название было именно таким.
Также этот файл может быть сгенерирован автоматически с помощью следующей команды:
pip freeze > requirements.txt
Она возвращает список всех установленных модулей с указанием версий и помещает их в текстовый файл. Обратите внимание, что pip freeze подразумевает использование виртуальной среды для текущего проекта. В противном случае, список зависимостей может включать в себя и те пакеты, которые установлены в другие виртуальные среды.
Дополнительный вариант использования этой команды, который возвращает только локальные установленные пакеты:
Добавление модулей в файл
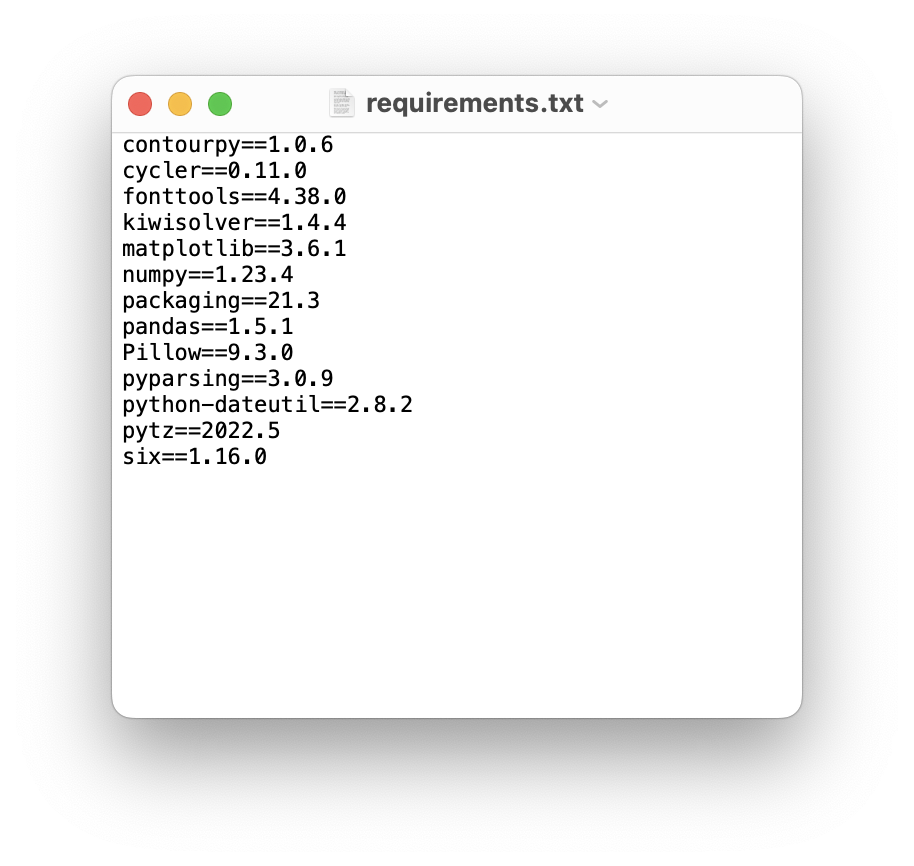
После создания файла его необходимо заполнить названиями модулей и их версиями. Самый простой способ — сделать это вручную. Вот пример содержимого requirements.txt :
matplotlib==3.2.1 numpy==1.18.5 pandas==1.0.4 tensorflow==2.3.1
Перечислив все зависимости, сохраняем файл и закрываем его.
Второй способ — команда pip freeze > requirements.txt , которая работает, даже если файл уже существует. Его пустое содержимое будет заполнено списком пакетов так же, как и при генерации нового файла.
Установка модулей из файла
Для того чтобы установить пакеты из requirements.txt , необходимо открыть командную строку, перейти в каталог проекта и ввести следующую команду:
pip install -r requirements.txt
Если вы хотите обновить компоненты вместо их повторной установки, используйте команду pip install -U -r requirements.txt .
Как поддерживать requirements.txt в актуальном состоянии
Если вы уже создали файл с зависимостями ранее, но по какой-то причине не обновляли его содержимое, волноваться не стоит. Выполните следующие шаги:
- Выведите список устаревших модулей с помощью pip list —outdated .
- Обновите выведенные пакеты вручную с помощью pip install -U PackageName или автоматически, используя pip install -U -r requirements.txt .
- Убедитесь, что ваша программа работает корректно.
- Используйте pip freeze > requirements.txt , чтобы актуализировать содержимое файла с необходимыми внешними зависимостями.
Таким образом вы сможете без проблем обновить информацию об используемых установленных пакетах, даже если в течение определенного времени не занимались управлением зависимостями.
Помните, что постоянное обновление файла requirements.txt помогает избежать многих проблем, связанных с устаревшими или отсутствующими модулями или пакетами. Как следствие, вы обеспечите корректную работу всех ваших сборок на любых ПК.
Как еще можно создать файл зависимостей?
Можно воспользоваться библиотекой pipreqs , которая сделает все за нас. Её запуск в командной строке сгенерирует файл с зависимостями:
$ pipreqs /home/project/location Successfully saved requirements file in /home/project/location/requirements.txt
При этом никто не запрещает вновь обратиться к pip freeze или заполнению документа вручную.
Советы по использованию файла требований
- Всегда используйте pip freeze , чтобы поддерживать список внешних зависимостей в актуальном состоянии.
- Храните в requirements.txt только необходимые модули и пакеты. В противном случае файл может получиться слишком большим и нечитаемым, а неиспользуемые компоненты будут лишь впустую тратить ресурсы.
- Сохраняйте файл с зависимостями в репозитории проекта, чтобы им могли пользоваться другие люди.
- Используйте pip install -r requirements.txt , чтобы автоматически установить все модули, необходимые для работы программы.
- Поддерживайте список зависимостей в актуальном состоянии, чтобы обеспечить полную работоспособность проекта на различных машинах.
Заключение
Мы рассказали вам о том, что представляет собой файл requirements.txt в Python и как его создать. Более того, в материале были разобраны преимущества его использования и практические рекомендации.
Ведение файла requirements.txt является неотъемлемой частью управления зависимостями проекта, которая в конечном итоге избавляет от ряда возможных проблем как программистов, так и конечных пользователей.
How to create and apply a requirements.txt file in Python
When you install Python packages or scripts from GitHub or other source, you might be confronted with a file called “requirements.txt”. Learn in the post, how to use such files for installing Python packages and setting up virtual environments. Also learn, how to create a “requirements.txt” file yourself and for which cases this might be useful.
What are requirements.txt files good for?
“requirements.txt” file serve as a configuration file to create Python set-ups with certain dependencies (i.e., additionally required Python packages) in precisely defined versions. This ensures, that a custom Python pipeline or package someone has developed will always run in the same way, i.e., can be reproduced by any other user on any other machine. Without such configuration file, we would have to install all required co-packages for that pipeline on our own and ony by one – and if we have no extra knowledge on the necessary versions of these co-packages, we probably get into trouble to get the package run at all.
I again highly recommend to work with virtual environments and create one with conda or pip for each custom package or pipeline we’d like install on our machine:
conda create -n my_test_venv -y python=3.9 conda activate my_test_venv python -m venv my_test_venv source my_test_venv/bin/activate By the way, the name “requirements.txt” is only a common convention, they can have any name.
requirements.txt files with pip
Installing packages specified in a “requirements.txt” file with pip is pretty easy. Simply type:
pip install -r requirements.txt requirements.txt files with conda
If you’re working in a virtual environment created with conda, you have to install pip first (if it’s not already there),
and then you can install the “requirements.txt” again via
pip install -r requirements.txt With conda, we have the additional option to combine the command for generating a new virtual environment with the installation of the packages specified in a requirements.txt file:
conda create --name my_test_venv --file requirements.txt Create your own requirements.txt files
To create our own “requirements.txt” file to, e.g., port and reproduce our project on another machine or another test environment, or to publish a project on GitHub, we have to apply only one line of command by making use of the pip freeze ꜛ command:
pip freeze > requirements.txt Alternatively, we can use the pipreqs ꜛ function. Install pipreqs first,
Both solutions work in conda generated virtual environments as well. However, conda holds another solution to create a “requirements.txt” via its list command:
conda list --explicit > requirements.txt conda specific alternative to requirements.txt files
In case you want to have an exact copy of a virtual environment generated with conda on your local machine (e.g., to perform some tests or try out alternative packages dependencies), you can also clone the entire environment via:
conda create --clone my_test_venv --name my_test_venv_clone However, since virtual environments are rather large, from hundreds of megabytes up to some gigabytes, I would not recommend to share them, e.g., with colleagues or provide them to the public. In such cases, generating a “requirements.txt” file is still the better choice.
updated: November 13, 2022
Related posts:
Wasserstein distance by entropy regularization (Sinkhorn algorithm)
July 23, 2023 9 minute read
In the field of machine learning, especially in the context of generative models, optimal transport and the Wasserstein distance have become popular tools fo.
Wasserstein distance and optimal transport
July 23, 2023 26 minute read
The Wasserstein metric, also known as the Earth Mover’s Distance (EMD), provides a robust and insightful approach for comparing probability distributions and.
Visualizing Occam’s Razor through machine learning
July 20, 2023 4 minute read
Here, we illustrate the concept of Occam’s Razor, a principle advocating for simplicity, by examining its manifestation in the domain of machine learning usi.
Zen and natural sciences
July 20, 2023 5 minute read
In this post, I broaden the scope and explore the intersections of Zen and natural sciences more generally.
The Zen of Python
July 20, 2023 14 minute read
The connection between Zen and programming is not a subjective one at all. For instance, Python has built it directly into its core programming, known as The.
The Zen of programming
July 20, 2023 5 minute read
Some thoughts about the connections between Zen and programming.
Hokke ten Hokke
July 19, 2023 5 minute read
Hokke ten Hokke is a chapter from the book Shōbōgenzō by Dōgen Zenji, the founder of Soto-Zen in Japan (13th century). Motivated by the text, I tried to crea.
Mamba vs. Conda: Unleashing lightning-fast Python package installations
July 7, 2023 4 minute read
If you’ve ever experienced the frustration of waiting for ages while installing Python packages with conda, there’s a game-changer I wish I’d heard about ear.


