- Get Image Size in OpenCV Python
- OpenCV Python – Get Image Size
- Example
- Conclusion
- Get image size (width, height) with Python, OpenCV, Pillow (PIL)
- OpenCV: Get image size (width, height) with ndarray.shape
- For color images
- For grayscale (monochrome) images
- Pillow (PIL): Get image size (width, height) with size , width , height
- OpenCV Resize image using cv2.resize()
- OpenCV Python – Resize image
- Syntax of cv2.resize()
- 1. Downscale – Resize and Preserve Aspect Ratio
- 2. Upscale – Resize and Preserve Aspect Ratio
- 3. Resize only width and do not preserve Aspect Ratio
- 4. Resize only height and do not preserve Aspect Ratio
- 5. Resize to specific width and height
- Conclusion
Get Image Size in OpenCV Python
In this OpenCV Tutorial, we will learn how to get image size in OpenCV Python using NumPy Array shape property, with an example.
OpenCV Python – Get Image Size
In Image Processing applications, it is often necessary to know the size of an image that is loaded or transformed through various stages.
When working with OpenCV Python, images are stored in numpy ndarray. To get the image shape or size, use ndarray.shape to get the dimensions of the image. Then, you can use index on the dimensions variable to get width, height and number of channels for each pixel.
In the following code snippet, we have read an image to img ndarray. And then we used ndarray.shape to get the dimensions of the image.
img = cv2.imread('/path/to/image.png') dimensions = img.shape Example
In this example, we have read an image and used ndarray.shape to get the dimension.

We can access height, width and number of channels from img.shape: Height is at index 0, Width is at index 1; and number of channels at index 2.
Python Program
import cv2 # read image img = cv2.imread('/home/img/python.png', cv2.IMREAD_UNCHANGED) # get dimensions of image dimensions = img.shape # height, width, number of channels in image height = img.shape[0] width = img.shape[1] channels = img.shape[2] print('Image Dimension : ',dimensions) print('Image Height : ',height) print('Image Width : ',width) print('Number of Channels : ',channels) Image Dimension : (149, 200, 4) Image Height : 149 Image Width : 200 Number of Channels : 4
img.shape returns (Height, Width, Number of Channels)
- Height represents the number of pixel rows in the image or the number of pixels in each column of the image array.
- Width represents the number of pixel columns in the image or the number of pixels in each row of the image array.
- Number of Channels represents the number of components used to represent each pixel.
In the above example, Number of Channels = 4 represent Alpha, Red, Green and Blue channels.
Conclusion
Concluding this OpenCV Python Tutorial, we have learnt how to get the image shape using OpenCV ndarray.shape.
Get image size (width, height) with Python, OpenCV, Pillow (PIL)
This article explains how to get the image size (width and height) in Python with OpenCV and Pillow (PIL).
You can obtain the image size as a tuple using the shape attribute of ndarray in OpenCV and the size attribute of PIL.Image in Pillow (PIL). It’s important to note that the order of width and height is different in OpenCV and Pillow (PIL).
Refer to the following articles for image resizing and getting the size of a file in bytes:
OpenCV: Get image size (width, height) with ndarray.shape
OpenCV treats an image as a NumPy array ndarray . The image size (width, height) can be obtained using the shape attribute, which returns a tuple of dimensions.
In addition to OpenCV, you can also obtain the image size using the shape attribute when using other libraries, such as Pillow, to read an image file and convert it into an ndarray .
Note that OpenCV loads color image files in BGR order, not RGB.
For color images
For color images, the ndarray is a 3D array with dimensions (height, width, 3) .
import cv2 im = cv2.imread('data/src/lena.jpg') print(type(im)) # print(im.shape) print(type(im.shape)) # (225, 400, 3) # To assign each value to a variable, unpack the tuple as follows:
h, w, c = im.shape print('width: ', w) print('height: ', h) print('channel:', c) # width: 400 # height: 225 # channel: 3 When unpacking a tuple, it is a common convention to assign unused values to _ . In the following example, the number of colors (or channels) is not used:
h, w, _ = im.shape print('width: ', w) print('height:', h) # width: 400 # height: 225 Of course, you can also directly access them by index.
print('width: ', im.shape[1]) print('height:', im.shape[0]) # width: 400 # height: 225 If you want to get tuples in the order of (width, height) , you can use slicing, as demonstrated in the following example:
When passing the size as an argument to functions such as cv2.resize() , ensure it follows the (width, height) format.
See the following article for details of slicing:
For grayscale (monochrome) images
For grayscale images, the ndarray is a 2D array with dimensions (height, width) .
import cv2 im_gray = cv2.imread('data/src/lena.jpg', cv2.IMREAD_GRAYSCALE) print(im_gray.shape) print(type(im_gray.shape)) # (225, 400) # The procedure for grayscale images is essentially the same as for color images:
h, w = im_gray.shape print('width: ', w) print('height:', h) # width: 400 # height: 225 print('width: ', im_gray.shape[1]) print('height:', im_gray.shape[0]) # width: 400 # height: 225 To assign width and height to variables, the following approach works for both color and grayscale images.
h, w = im.shape[0], im.shape[1] print('width: ', w) print('height:', h) # width: 400 # height: 225 If you want to get a (width, height) tuple, you can use slicing. The latter approach ( [1::-1] ) works for both color and grayscale images.
print(im_gray.shape[::-1]) print(im_gray.shape[1::-1]) # (400, 225) # (400, 225) Pillow (PIL): Get image size (width, height) with size , width , height
A PIL.Image object, obtained by reading an image using Pillow (PIL), has the size , width , and height attributes.
The size attribute returns a (width, height) tuple.
from PIL import Image im = Image.open('data/src/lena.jpg') print(im.size) print(type(im.size)) # (400, 225) # w, h = im.size print('width: ', w) print('height:', h) # width: 400 # height: 225 You can also get the width and height using the width and height attributes:
print('width: ', im.width) print('height:', im.height) # width: 400 # height: 225 The process is the same for grayscale (monochrome) images:
im_gray = Image.open('data/src/lena.jpg').convert('L') print(im.size) print('width: ', im.width) print('height:', im.height) # (400, 225) # width: 400 # height: 225 OpenCV Resize image using cv2.resize()
In this OpenCV tutorial, we learn the syntax of cv2.resize() and how to use this function to resize a given image. We can use cv2.resize() function to upscale, downscale, or resize to a desired size (considering or not considering the aspect ratio).
OpenCV Python – Resize image
Resizing an image means changing the dimensions of it, be it width alone, height alone or changing both of them. Also, the aspect ratio of the original image could be preserved in the resized image. To resize an image, OpenCV provides cv2.resize() function.
Syntax of cv2.resize()
The syntax of resize function in OpenCV is
cv2.resize(src, dsize[, dst[, fx[, fy[, interpolation]]]])
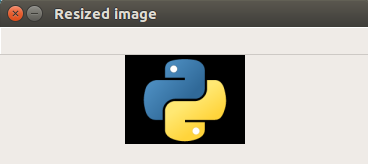
1. Downscale – Resize and Preserve Aspect Ratio
resize-image.py
import cv2 img = cv2.imread('/home/img/python.png', cv2.IMREAD_UNCHANGED) print('Original Dimensions : ',img.shape) scale_percent = 60 # percent of original size width = int(img.shape[1] * scale_percent / 100) height = int(img.shape[0] * scale_percent / 100) dim = (width, height) # resize image resized = cv2.resize(img, dim, interpolation = cv2.INTER_AREA) print('Resized Dimensions : ',resized.shape) cv2.imshow("Resized image", resized) cv2.waitKey(0) cv2.destroyAllWindows() Original Dimensions : (149, 200, 4) Resized Dimensions : (89, 120, 4)
The original image with dimensions [149 x 200 x 4] has been resized to [89, 120, 4] using resize() function.
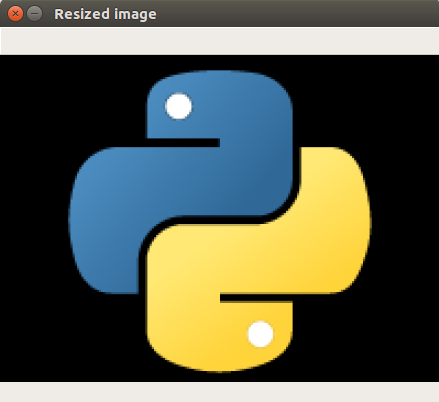
2. Upscale – Resize and Preserve Aspect Ratio
In the following example, scale_percent value holds the percentage by which image has to be scaled. Providing a value >100 upscales the image provided.
resize-image.py
import cv2 img = cv2.imread('/home/img/python.png', cv2.IMREAD_UNCHANGED) print('Original Dimensions : ',img.shape) scale_percent = 220 # percent of original size width = int(img.shape[1] * scale_percent / 100) height = int(img.shape[0] * scale_percent / 100) dim = (width, height) # resize image resized = cv2.resize(img, dim, interpolation = cv2.INTER_AREA) print('Resized Dimensions : ',resized.shape) cv2.imshow("Resized image", resized) cv2.waitKey(0) cv2.destroyAllWindows() Original Dimensions : (149, 200, 4) Resized Dimensions : (327, 440, 4)
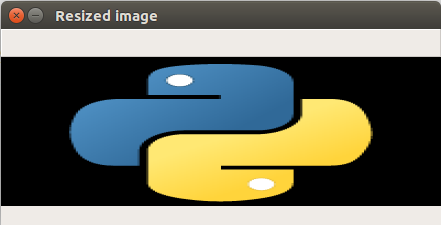
3. Resize only width and do not preserve Aspect Ratio
In this example, we provided a specific value in pixels for width and left the height unchanged.
resize-image.py
import cv2 img = cv2.imread('/home/img/python.png', cv2.IMREAD_UNCHANGED) print('Original Dimensions : ',img.shape) width = 440 height = img.shape[0] # keep original height dim = (width, height) # resize image resized = cv2.resize(img, dim, interpolation = cv2.INTER_AREA) print('Resized Dimensions : ',resized.shape) cv2.imshow("Resized image", resized) cv2.waitKey(0) cv2.destroyAllWindows() Original Dimensions : (149, 200, 4) Resized Dimensions : (149, 440, 4)
As we have increased only the width, the output image looks stretched horizontally.
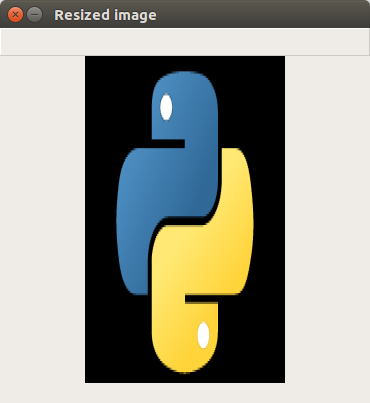
4. Resize only height and do not preserve Aspect Ratio
In the following example, scale_percent value holds the percentage by which height has to be scaled. Or you may also provide a specific value in pixels.
resize-image.py
import cv2 img = cv2.imread('/home/img/python.png', cv2.IMREAD_UNCHANGED) print('Original Dimensions : ',img.shape) width = img.shape[1] # keep original width height = 440 dim = (width, height) # resize image resized = cv2.resize(img, dim, interpolation = cv2.INTER_AREA) print('Resized Dimensions : ',resized.shape) cv2.imshow("Resized image", resized) cv2.waitKey(0) cv2.destroyAllWindows() Original Dimensions : (149, 200, 4) Resized Dimensions : (440, 200, 4)
As we have increased only the height, the output image looks stretched vertically.
5. Resize to specific width and height
In the following example, we shall provide specific value in pixels for both width and height.
resize-image.py
import cv2 img = cv2.imread('/home/img/python.png', cv2.IMREAD_UNCHANGED) print('Original Dimensions : ',img.shape) width = 350 height = 450 dim = (width, height) # resize image resized = cv2.resize(img, dim, interpolation = cv2.INTER_AREA) print('Resized Dimensions : ',resized.shape) cv2.imshow("Resized image", resized) cv2.waitKey(0) cv2.destroyAllWindows() Original Dimensions : (149, 200, 4) Resized Dimensions : (450, 350, 4)
Conclusion
Concluding this OpenCV Python Tutorial, we have learned how to resize an image in Python using OpenCV resize() function.