Forms
HTML form elements work a bit differently from other DOM elements in React, because form elements naturally keep some internal state. For example, this form in plain HTML accepts a single name:
form> label> Name: input type="text" name="name" /> label> input type="submit" value="Submit" /> form>This form has the default HTML form behavior of browsing to a new page when the user submits the form. If you want this behavior in React, it just works. But in most cases, it’s convenient to have a JavaScript function that handles the submission of the form and has access to the data that the user entered into the form. The standard way to achieve this is with a technique called “controlled components”.
In HTML, form elements such as , , and typically maintain their own state and update it based on user input. In React, mutable state is typically kept in the state property of components, and only updated with setState() .
We can combine the two by making the React state be the “single source of truth”. Then the React component that renders a form also controls what happens in that form on subsequent user input. An input form element whose value is controlled by React in this way is called a “controlled component”.
For example, if we want to make the previous example log the name when it is submitted, we can write the form as a controlled component:
class NameForm extends React.Component constructor(props) super(props); this.state = value: ''>; this.handleChange = this.handleChange.bind(this); this.handleSubmit = this.handleSubmit.bind(this); > handleChange(event) this.setState(value: event.target.value>); > handleSubmit(event) alert('A name was submitted: ' + this.state.value); event.preventDefault(); > render() return ( form onSubmit=this.handleSubmit>> label> Name: input type="text" value=this.state.value> onChange=this.handleChange> /> label> input type="submit" value="Submit" /> form> ); > >Since the value attribute is set on our form element, the displayed value will always be this.state.value , making the React state the source of truth. Since handleChange runs on every keystroke to update the React state, the displayed value will update as the user types.
With a controlled component, the input’s value is always driven by the React state. While this means you have to type a bit more code, you can now pass the value to other UI elements too, or reset it from other event handlers.
In HTML, a element defines its text by its children:
textarea> Hello there, this is some text in a text area textarea>In React, a uses a value attribute instead. This way, a form using a can be written very similarly to a form that uses a single-line input:
class EssayForm extends React.Component constructor(props) super(props); this.state = value: 'Please write an essay about your favorite DOM element.' >; this.handleChange = this.handleChange.bind(this); this.handleSubmit = this.handleSubmit.bind(this); > handleChange(event) this.setState(value: event.target.value>); > handleSubmit(event) alert('An essay was submitted: ' + this.state.value); event.preventDefault(); > render() return ( form onSubmit=this.handleSubmit>> label> Essay: textarea value=this.state.value> onChange=this.handleChange> /> label> input type="submit" value="Submit" /> form> ); > >Notice that this.state.value is initialized in the constructor, so that the text area starts off with some text in it.
In HTML, creates a drop-down list. For example, this HTML creates a drop-down list of flavors:
select> option value="grapefruit">Grapefruitoption> option value="lime">Limeoption> option selected value="coconut">Coconutoption> option value="mango">Mangooption> select>Note that the Coconut option is initially selected, because of the selected attribute. React, instead of using this selected attribute, uses a value attribute on the root select tag. This is more convenient in a controlled component because you only need to update it in one place. For example:
class FlavorForm extends React.Component constructor(props) super(props); this.state = value: 'coconut'>; this.handleChange = this.handleChange.bind(this); this.handleSubmit = this.handleSubmit.bind(this); > handleChange(event) this.setState(value: event.target.value>); > handleSubmit(event) alert('Your favorite flavor is: ' + this.state.value); event.preventDefault(); > render() return ( form onSubmit=this.handleSubmit>> label> Pick your favorite flavor: select value=this.state.value> onChange=this.handleChange>> option value="grapefruit">Grapefruitoption> option value="lime">Limeoption> option value="coconut">Coconutoption> option value="mango">Mangooption> select> label> input type="submit" value="Submit" /> form> ); > >Overall, this makes it so that , , and all work very similarly — they all accept a value attribute that you can use to implement a controlled component.
Note
You can pass an array into the value attribute, allowing you to select multiple options in a select tag:
select multiple=true> value=['B', 'C']>>In HTML, an lets the user choose one or more files from their device storage to be uploaded to a server or manipulated by JavaScript via the File API.
Because its value is read-only, it is an uncontrolled component in React. It is discussed together with other uncontrolled components later in the documentation.
When you need to handle multiple controlled input elements, you can add a name attribute to each element and let the handler function choose what to do based on the value of event.target.name .
class Reservation extends React.Component constructor(props) super(props); this.state = isGoing: true, numberOfGuests: 2 >; this.handleInputChange = this.handleInputChange.bind(this); > handleInputChange(event) const target = event.target; const value = target.type === 'checkbox' ? target.checked : target.value; const name = target.name; this.setState( [name]: value >); > render() return ( form> label> Is going: input name="isGoing" type="checkbox" checked=this.state.isGoing> onChange=this.handleInputChange> /> label> br /> label> Number of guests: input name="numberOfGuests" type="number" value=this.state.numberOfGuests> onChange=this.handleInputChange> /> label> form> ); > >Note how we used the ES6 computed property name syntax to update the state key corresponding to the given input name:
It is equivalent to this ES5 code:
var partialState = >; partialState[name] = value;this.setState(partialState);Also, since setState() automatically merges a partial state into the current state, we only needed to call it with the changed parts.
Controlled Input Null Value
Specifying the value prop on a controlled component prevents the user from changing the input unless you desire so. If you’ve specified a value but the input is still editable, you may have accidentally set value to undefined or null .
The following code demonstrates this. (The input is locked at first but becomes editable after a short delay.)
ReactDOM.createRoot(mountNode).render(input value="hi" />); setTimeout(function() ReactDOM.createRoot(mountNode).render(input value=null> />); >, 1000);Alternatives to Controlled Components
It can sometimes be tedious to use controlled components, because you need to write an event handler for every way your data can change and pipe all of the input state through a React component. This can become particularly annoying when you are converting a preexisting codebase to React, or integrating a React application with a non-React library. In these situations, you might want to check out uncontrolled components, an alternative technique for implementing input forms.
If you’re looking for a complete solution including validation, keeping track of the visited fields, and handling form submission, Formik is one of the popular choices. However, it is built on the same principles of controlled components and managing state — so don’t neglect to learn them.
Web Form tag & HTML elements
Forms are very common in web pages through out Internet. Web forms are mostly used to capture user entered data and post them back to the server. You can see signup forms, login forms, profile update forms and many more type of forms.
How to select a form component
Designing a form is based on the data format requirement. For example if you want the users to tell about their gender. Here the user will enter one out of the two choices available, so one period button is to be provided for the user to select. Same way one input text box is to be provided for entering name of the joining member. To select a city, user can be given a dropdown listbox showing name of the cities from which user can select.
Based on different data input requirements we can keep different form components or input types.
Here we will understand different types of components used to collect data and their possible use. Before that let us try to understand the basic form structure or syntax.
Form tag
Our form area starts with
. All our input fields are to be located between these two tags. These are two boundaries for the data entry. Here is the basic syntax for the form tag.
Method attribute of the html form
The method parameter takes two values one is GET and other is POST. In GET method values are passed through the address bar or technically speaking they are passed as query string. We should not pass sensitive information this way as through browser history they can be retrieved. Post method submits the data without using the query string.
You can read more on GET & POST methods here.
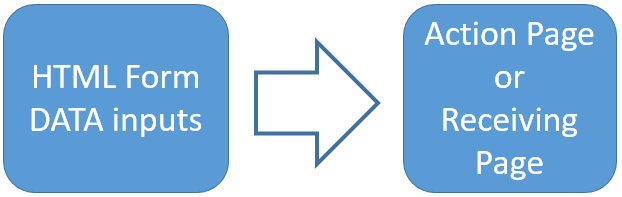
Action attribute
The action attribute takes the name of the file to which the data to be submitted for further processing. It can be a file in the same directory or a file in different directory. We have to give proper path information if they are in different directory. Forms can even submit data to a different web site by using the URL of the site and the particular page by entering the details in action attributes.
For example form can submit data to https://www.mysite.com/my_file.php page for processing the entered data of the visitor.
If the action tag is left blank then the form will submit the data to itself( same file ). In this case we have to keep the form processing script in the same file.
HTML FORM basics with input fields submit button action page and target attributes
We can give a name to the form by declaring it through name tag. Like this name=’f1′ . It is easy to get the value of any entry by using name tag of the form like
var val=form.cat.options[form.cat.options.selectedIndex].value;| Elements | Description |
| Text field | Entering short text like name, email, address etc |
| Hidden Field | Hidden to the user with data to pass along with user entered data |
| Password Field | Input text entered will be masked to prevent others from seeing |
| TextArea | Large text like blog posting, comments, body of email form |
| Radio button | Selecting one of many option |
| Checkbox | Selecting one or more out of several options |
| Drop down list | Selecting option from a drop down list box |
| Optgroup | OPTGROUP for grouping options of a select box |
| Datalist | Selecting from options with auto complete |
| Button | To trigger event or run script by user |
| Image Button | Using images as button |
| Submit Button | Start sending the form elements data for processing |
| Resetting the form | Reset button to reset the form data to default values |
Applications and uses of html form elements
| Application | Uses of form element |
| Set Focus | Keeping the crusher at a text field to receive user data by default |
| Two Submit Button | Submitting same from data to two different action pages |
| Submit to new window | Form data to submit to a new window keeping the parent window as it is |
| Back to previous page | History button to take the user to previous pages |
| File Upload | HTML form tags to upload files from user computer to server or for attachment |
| Select options | Different form component types for user selection of options |

- Exercise on HTML Form
- Create a form for a member to enter following data.
First Name
Second Name
Gender ( Radio button )
Class ( select from a list of one to ten )
Languages they know ( checkbox ) Python, PHP, JavaScript
Details about educational background ( textarea )
The Label and input field must be in one line with matching alignment.
Colour of the font and background of the text should be different.
On Submit the form should send data to a different page. ( Form should be at Signup page signup.html and on submit the data should goto signupck.php page )
Integration of all html input components in to a form and submit user entered data