- Facebook API – Access Tokens
- App Access Token
- User Access Token
- PHP SDK
- JavaScript SDK
- Extended User Access Token
- Page Access Token
- Extended Page Access Token
- Useful Links
- Авторизация на сайте через Facebook
- Ссылка для входа
- Скрипт получения данных пользователя
- Результат:
- «#_=_» в URL
- Использование Facebook PHP SDK, подключение и настройка
- Модель работы в общих чертах
- Регистрация приложения на Facebook
- Установка PHP SDK Facebook.
Facebook API – Access Tokens
There are 3 different Access Tokens, each one with a specific purpose while dealing with the Facebook API. The Facebook docs cover the basics to get you started, it´s all about the Web here, so i will not cover the fourth one in the list: the “Client Token”.
App Access Token
This is the basic token, it´s for getting access to data “as App“. You will not get any user data with this one, but you can read the stream, the events and the albums of a Facebook page. You don´t even need to be admin of that page, but you can NOT get those channels without any Access Token.
The good thing is: In most cases you don´t even need to worry about the App Access Token (or any Token at all), if you are using one of the SDKs. If you include either the PHP SDK or the JavaScript SDK correctly, each call to the Facebook API will automatically include the App Access Token by default.
The docs mention two possibilities to get the App Access Token, one includes a call to the API and the second one is actually very easy to create:
“APP-ID|APP-SECRET” (App-ID, Pipe, App-Secret)
Boom! That´s the App Access Token already. Just be sure not to share it with anyone, the App Secret should never be available to a user.
User Access Token
This is the most common Access Token, you only get it by authorizing the User. This is the one you need when you want to post stuff on the timeline of the User (please don´t create Spam Apps!), or if you want to get User information (Name, Facebook ID, Albums, Movies, …).
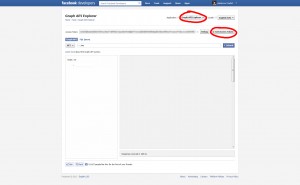
For testing, you can generate a User Access Token in the Graph API Explorer. Just select the App, press “Get Access Token” and the login dialog will show up. After authorizing, the User Access Token will be visible in the text field labeled “Access Token”:
The API Explorer will use the Token in the text field for every test call, next thing i´ll show you is to get a User Access Token with the PHP SDK and the JavaScript SDK.
PHP SDK
How to initialize the PHP SDK is explained in my Facebook PHP SDK 4.0 Tutorial. After that you need to direct the User to the authorization/login URL:
Best practice is not to redirect the User immediately when he opens your App and did not authorize it yet. The User does not know what the App is about, so you better require authorization right when you REALLY need it, or you present an intro page to tell the User why you need his authorization.
After login, the User will get redirected back to your App URL (or another redirect URL you can specify), see the Facebook docs for further information: PHP SDK – getLoginUrlIf the User is authorized successfully, you can get his ID and make calls to the API easily. Don´t worry about the User Access Token, it will get added automatically:
try < $session = $helper->getSessionFromRedirect(); > catch(FacebookRequestException $ex) < // When Facebook returns an error >if ($session) < try < $user_profile = (new FacebookRequest( $session, 'GET', '/me' ))->execute()->getGraphObject(GraphUser::className()); echo "Name: " . $user_profile->getName(); > catch(FacebookRequestException $e) < echo "Exception occured, code: " . $e->getCode(); echo " with message: " . $e->getMessage(); > >
JavaScript SDK
This is the one i prefer in most cases, because you don´t need a redirection. Usability to the max. For initialization, just put the code from the Facebook docs in your HTML file: Facebook API – JavaScript SDK
Right at the comment “Additional initialization code…” you put in your login call (see FB.login in the Facebook docs):
FB.login(function(response) < if (response.authResponse) < FB.api('/me', function(response) < console.log('Hello ' + response.name); >); > else < //login cancelled or not every permission accepted >>, ); //additional permissions Of course you need to think asynchronous while using the JavaScript SDK. Always make sure that the SDK is initialized and the User is authorized before trying to make calls to the API. As i´ve already mentioned, you don´t need to worry about the User Access Token.
Extended User Access Token
By default, a User Access Token is valid for only 2 hours and you can extend it to 60 days. This is quite easy with the PHP SDK:
$longLivedSession = $facebookSession->getLongLivedSession(); echo $longLivedSession->getToken();
Of course this will only work if you got a standard User Access Token already (see section above). Apart from calling the “setExtendedAccessToken” function, there´s nothing else you need to do. You may want to store the Access Token in a database if you need to call the API on behalf of the user while he is not online. Which is the only reason why you would even want to create an Extended Access Token.
Extending the Access Token requires the App Secret, so you should never try to do that client-side. But you can do it without the PHP SDK, by making a server-side call to this URL (with “file_get_contents” or – much better – with “cURL“: https://graph.facebook.com/oauth/access_token?grant_type=fb_exchange_token&client_id=[app-id]&client_secret=[app-secret]&fb_exchange_token=[short-lived-token]
Remember, user tokens are always limited to 60 days max – you can´t just request a new token with a cron job, you can only get a new Token with User interaction.
Page Access Token
The last important Access Token is used to manage Facebook Pages. It´s a bit more complicated to get that Token, these are the required steps:
- get a valid User Access Token with the additional permission “manage_pages”
- make a call to /PAGE-ID?fields=access_token with the Facebook API
- get Page Access Tokens for all your Facebook Pages in an Array
I will only show you how it´s done with the PHP SDK, because there´s not much difference in using the JavaScript SDK for it:
$request = new FacebookRequest($session, 'GET', '/PAGE-ID?fields=access_token'); $response = $request->execute(); $result = $response->getGraphObject()->asArray(); $pageToken = $result['access_token']; $facebookSession = new FacebookSession($pageToken);
From now on, each call to the API will use the Page Access Token. And that is exactly what you need if you want to write something on your Page wall as the Page itself.
Extended Page Access Token
The Page Access Token is valid for only 2 hours, like the default User Access Token. However, you can extended to a Token that is valid forever (and not just 60 days like the Extended User Access Token) by just using the code above for getting a Page Access Token with only one difference: you have to get a valid Extended User Access Token before calling /me/accounts:
$facebookSession->getLongLivedSession(); $request = new FacebookRequest($session, 'GET', '/PAGE-ID?fields=access_token'); .
Quite easy, right? If you just need one Extended Page Access Token without creating some code, use the Graph API Explorer:
- Authorize with your App and copy the generated User Access Token (don´t forget the “manage_pages” permission)
- Put that link with the correct IDs in the Browser: https://graph.facebook.com/oauth/access_token?grant_type=fb_exchange_token&client_id=[app-id]&client_secret=[app-secret]&fb_exchange_token=[short-lived-token]
- Copy the acquired Extended User Token back to the Graph API Explorer
- Make a call to /me/accounts
Result: A list of all your Pages, including an Extended Page Access Token for every Page.
Useful Links
Any questions/suggestions? Feel free to comment and i´ll try to answer 🙂
Авторизация на сайте через Facebook
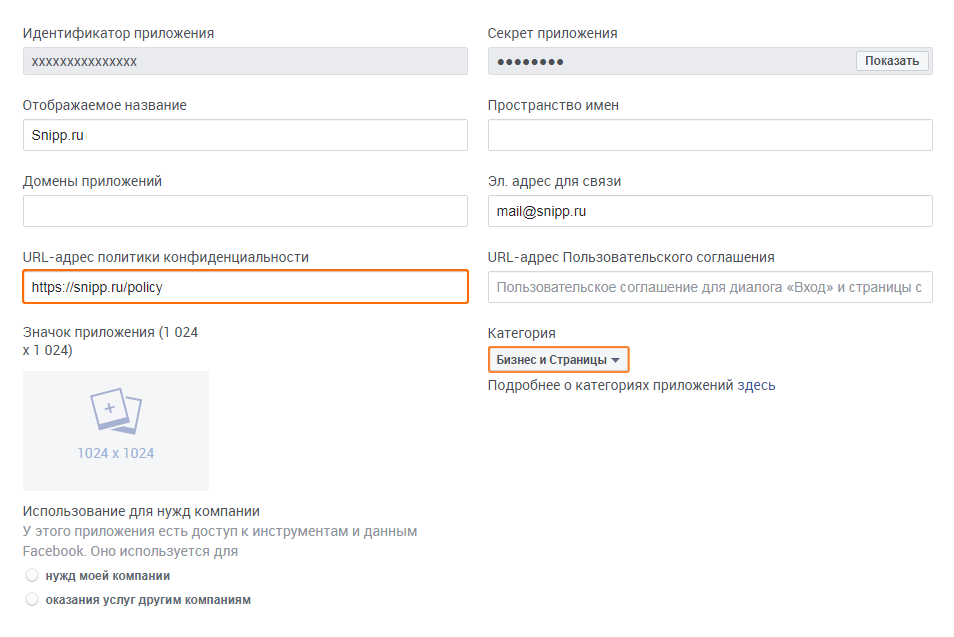
Чтобы включить приложение, нужно перейти в основные настройки и указать URL-адрес политики конфиденциальности и категорию.
Ссылка для входа
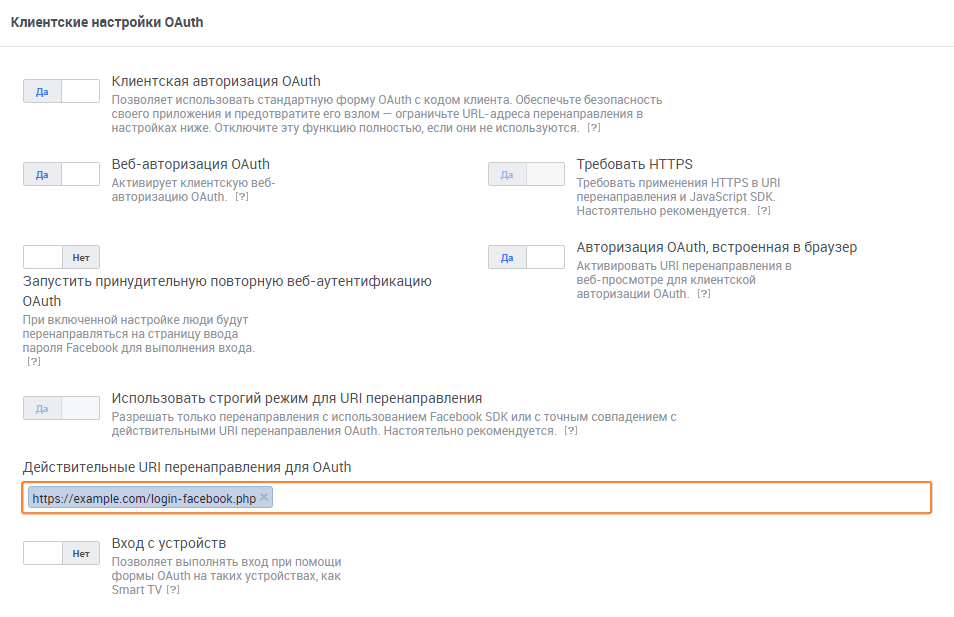
Создадим PHP-скрипт, который будет обрабатывать ответы от Facebook, к примеру https://example.com/login-facebook.php Этот URL нужно добавить в список «Действительных URI перенаправления для OAuth» в настройках входа через Facebook.
После этого можно сформировать ссылку для входа: https://www.facebook.com/dialog/oauth?client_id= Идентификатор_приложения &redirect_uri= https://example.com/login-facebook.php &scope=email&response_type=code В URL можно добавить параметр « state » для передачи своих данных.
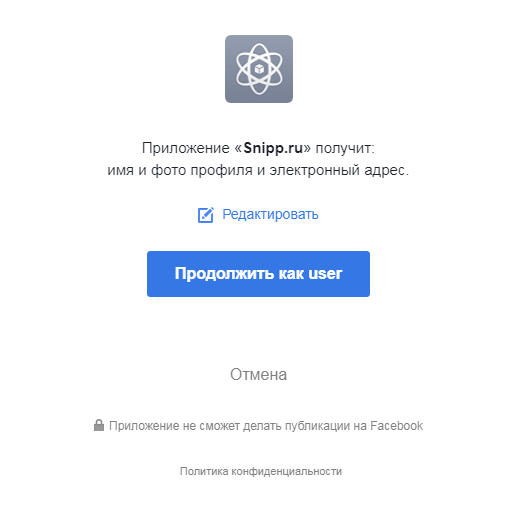
После того, как пользователь подтвердил запрос, он будет перенаправлен на redirect_uri с добавлением кода в GET-параметре.
Скрипт получения данных пользователя
В скрипте, полученный код отправляется запросом получения access_token и по нему метод https://graph.facebook.com/me возвращает id, имя, фамилию, e-mail и фото пользователя (полный список полей на https://developers.facebook.com/docs/graph-api/reference/user).
'Идентификатор приложения', 'client_secret' => 'Секрет приложения', 'redirect_uri' => 'https://example.com/login-facebook.php', 'code' => $_GET['code'] ); // Получение access_token $data = file_get_contents('https://graph.facebook.com/oauth/access_token?' . urldecode(http_build_query($params))); $data = json_decode($data, true); if (!empty($data['access_token'])) < $params = array( 'access_token' =>$data['access_token'], 'fields' => 'id,email,first_name,last_name,picture' ); // Получение данных пользователя $info = file_get_contents('https://graph.facebook.com/me?' . urldecode(http_build_query($params))); $info = json_decode($info, true); var_dump($info); > >Результат:
array( 'id' => '123456789', 'email' => 'mail@example.com', 'first_name' => 'Иван', 'last_name' => 'Иванов', 'picture' => array( 'data' => ( 'height' => 50, 'is_silhouette' => true, 'url' => 'https://platform-lookaside.fbsbx.com/platform/profilepic/?asid=123456', 'width' => 50 > > >«#_=_» в URL
Сделано это специально, поскольку некоторые браузеры, при редиректе переносят хеш из URL-адреса в новый URL. Такой хеш можно удалить:
if (window.location.hash === "#_=_")
Использование Facebook PHP SDK, подключение и настройка
Основная проблема тех, кто начинает работать с Facebook SDK, это наличие предыдущего опыта работы с другими сторонними API и SDK. Просто забудьте все, что знали раньше :). Внутренний мир разработчиков facebook богат и многообразен, потому простых решений вы тут не увидите.
Т.к. очередная версия SDK устаревает в течении 2 лет (точнее гарантированно работает не более 2-х лет с момента релиза), то лучше читать гайд от самого facebook.
Он вот тут — https://developers.facebook.com/docs/php/gettingstarted
Текущая версия — v2.8. Раз вы пришли сюда, то, видимо, стиль документации facebook сидит у вас где то в печенках :).
Модель работы в общих чертах
Чтобы что то получить/передать через API, нужно, чтобы вы представились Facebook. В конечном счете, всё сводится к тому, что вы должны получить «маркер доступа». Это такой временный ключ.
Существуют разные типы маркеров доступа (да, всё не просто):
Они отличаются во своим возможностям. Типичный подход — использование маркера доступа приложения (МДП).
Но чтобы получить МДП, нужно сначала зарегистрировать приложение.
На момент написания статьи актуальная версия PHP SKD 5.4. Скачать можно здесь — https://github.com/facebook/facebook-php-sdk-v4/. Если выйдет свежая версия, ориентируетесь на месте. После этого можно приступать к написанию кода.
Далее все этапы подробнее.
Регистрация приложения на Facebook
Не так сложно как звучит. Фактически, мы создаём учетную запись, через которую будет производится доступ к API.
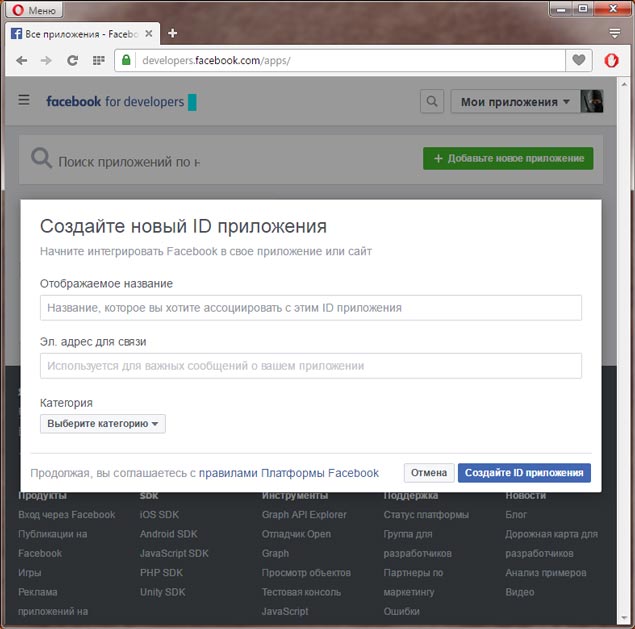
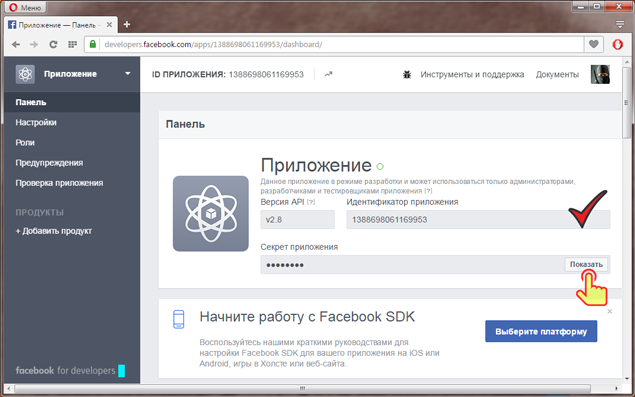
Переходите на https://developers.facebook.com/apps/, жмите по кнопе — «добавить приложение». Заполняйте форму (она выше на скриншоте), и вы попадете в карточку вашего только что созданного приложения.
Здесь нам понадобится значение двух полей: идентификатор приложения (app_id) и ключ-секрет (app secret).
Установка PHP SDK Facebook.
Самая свежая версия работает с PHP v5.4. В архиве куча всякого хлама, нас интересует только библиотеки в папке /src/Facebook/.
Создадим для них, к примеру, папку /fb-sdk в корне вашего сайта. Копируем 🙂
А PHP добавим следующий код:
