- 10 Best CSS button hover effects
- CSS button gradient effects
- CSS button hover effects using box shadow
- Expanding CSS button hover effect
- CSS button on hover fill effects
- 3D rotating button effect on hover with CSS only
- Apple style swipe effect on hover
- CSS Button hover background change
- Hidden door CSS button effect
- Animated Pac-Man CSS button on hover
- A true 3D button animation using three.js
- Related articles
- Анимация кнопок при наведении
- Использование transition
- Использование animation
- Использование сторонних библиотек
- Animate.css
- Hover.css
- Итого
- См. также
- Рецепты
10 Best CSS button hover effects
I bet the last time you created a CSS hover effect for a button on your site, you flipped the colour of the text with the colour of the background and used a transition of somewhere between 0.3 and 0.5 seconds.
Am I right? Do you feel seen?
Or perhaps you google a bit and found a list of cool CSS animations to add to your website and picked a couple of them, right?
Even if not, would you agree that this is the most common way to create CSS hover animations for buttons? I’m not knocking it — I’ve done it many times myself. It works.
But. there are plenty of other ways you can animate your buttons with CSS, which could make your site more fun and help it stand out from the crowd.
So let’s explore some other options!
CSS button gradient effects
At the time I’m writing this, you can’t animate gradients with CSS — at least, not directly. There is, however, a way to trick CSS into doing what we want — we just make the background larger than the button, and move the background on hover. The result is an animated gradient effect on your buttons.
Here are a few examples — you can take one of these and change the gradient colours and angle if you want:
You can also create an animated gradient effect around the border, instead of the background. Or both:
CSS button hover effects using box shadow
Remember when you were a kid, and you drew a rectangle, then you added a little shading around two edges to make it look kinda 3D? Well CSS box-shadow does that:
But, box-shadow gives us a lot of control of how the shadow appears:
- How big should the shadow be?
- How far from the box?
- What colour?
- Multiple shadows, or just one?
- Inside the box, or outside?
- Solid shadow, or blurry?
And, we can animate all of this! Here are some creative ideas on how you can use box-shadow in your button hover effects:
Check out Mozilla’s article on box-shadow to learn more.
Expanding CSS button hover effect
Here’s a unique hover effect that might be useful to you:
It looks like a text link with a little icon next to it, but looks can be deceiving — the whole thing is actually the button. When you hover, the icon expands and spreads over the text. Very nice!
CSS button on hover fill effects
As I said earlier, the most common button hover effect has to be a simple fill — simply flipping the background colour and the text colour, usually with a fade-in of half a second or so. To be fair, there’s a reason this is common — it does the job and does it well. But that doesn’t mean you can’t get creative with it.
There are lots of ways you can do create the fill effect besides a fade. You could have the background spread out from the centre, slide it in from the side, or spin it around and lock it into place, just to name three. Here are a few ways you could mix it up a bit:
If you like beautifying elements like buttons, you will for sure like turning checkboxes into beautiful toggle switch elements. Check out the best examples we’ve found on CSS toggle switches.
3D rotating button effect on hover with CSS only
You might have seen these 3D rotating buttons before. This one is particularly cool because it’s done purely in CSS, and because it has two «cubes» that rotate in different directions (although you could just get rid of the second one if you don’t want it).
Note that you’ll need to change the data-attr and the text within the span to change the text shown.
Apple style swipe effect on hover
These buttons visually mimic the effect on iOS when you swipe a menu item (e.g., a note in your Notes app) to make the buttons appear. Here though, it’s just a visual effect — you don’t have to click on the green bit that slides in, you can click any part of it:
The cool thing about these is you can give the visitor an additional call to action (though personally, I’d have used red instead of green for the cancel button).
CSS Button hover background change
OK, time to think outside the box.
I mean that literally — why not have our CSS button’s hover effect change something other than the actual button itself? Like the background, maybe?
This is one of those cool ideas that’s good to have in your back pocket for future use.
Hidden door CSS button effect
Oh! look, a Twitter icon. I guess I just click this and it takes me to the user’s twitter page. Like the 10 zillions other Twitter buttons I’ve seen in my life.
Oh well, might as well click it:
Woah! Is it a Twitter button, or the entrance to a shuttle bay on the Starship Enterprise?
Although there is some JS in the Pen, that’s just to import the Twitter link, in this case to creator Tim Holman’s Twitter link. The JS doesn’t have any effect on how the button works — and of course you don’t have to use it for Twitter — you can adapt it for anything.
Animated Pac-Man CSS button on hover
Here’s an incredible piece of work by Dario Corsi. Check it out:
There’s so much to appreciate about this:
- It’s pure CSS — not an image or line of JS insight
- Of all the ghosts, Dario chose Blinky, the leader of the ghosts and Pac-Man’s arch enemy
- Blinky’s eyes look in the direction he’s moving!
- The animation stops in-place when you stop hovering, rather than resetting to the beginning
A true 3D button animation using three.js
This one isn’t pure CSS, but I thought I’d include this to show you the type of things that are possible when bringing JS into the picture. This is a «true» 3D hover effect button by Robin Delaporte:
Look at that! If you move your mouse around the button area, the shapes react to your mouse movements.
Now, when I say «true» 3D, obviously it’s not actually 3D since it’s a flat image on your screen! I just mean that there’s a Z-axis involved. These are not simply 2D objects at different depths, moving at different rates (as is the case with parallax ). The angle and position of the object along the Z-axis are calculated in JS. This means you can move or rotate it along the third dimension, and add lighting effects to really bring it to life.
To do this, Robin has used a JS library called three.js — a very popular library for making 3D animations on the web, and it’s actually fairly easy to get started with. Of course, you’ll need some practice to create something like this, but if you really study it, you can make some amazing stuff.
Speaking of easy-to-use JS libraries that help you make great stuff, you might also like fullPage.js. fullPage helps you make gorgeous one-page sites quickly and easily, and it works like a charm alongside WordPress, React, and Vue.
We’ve been talking a lot about using animations to improve the visual appeal of your site in this post, and if you’re into this sort of thing have a look at the effects you can use with fullPage. You can use different effects as you scroll from one full-screen page to the next (the card effect is pretty snazzy for instance), or in sliders. All of this is built-in and works out of the box.
And of course, you can integrate all of the awesome CSS button hover effects we’ve just looked at into your fullPage.js site! In fact, the background image change button could work really well on a full-page site — give fullPage.js a try and see what you can come up with!
Related articles
Анимация кнопок при наведении
В прошлом уроке мы разобрали, как изменить стиль кнопки при наведении на неё курсора мыши. Для этой цели применяется псевдокласс :hover, а чтобы изменения происходили плавно, добавляется свойство transition, которое устанавливает время перехода.
Вот, к примеру, как в течение полсекунды поменять цвет фона кнопки с синего на красный.
Использование transition
Свойство transition достаточно гибкое и позволяет устанавливать: время перехода для каждого свойства отдельно; время задержки перед выполнением перехода; функцию времени, согласно которой происходит изменение.
Так, если понадобится задать разное время перехода для цвета фона и рамки, пишем следующее, разделяя параметры запятой:
transition: background-color 1s, border-color 0.5s;В таком случае цвет фона будет меняться в течение одной секунды, а цвет рамки в течение полсекунды.
Если требуется сделать задержку перед началом изменения, то добавляем в конец ещё время:
transition: background-color 1s 0.5s;Здесь при наведении на кнопку полсекунды ничего не происходит, а затем цвет фона меняется в течение одной секунды.
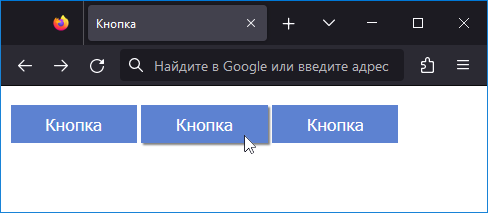
Рассмотрим добавление к кнопке рамки, сделанной через box-shadow. Да, это свойство добавляет тень, но вполне универсально, чтобы применяться, в том числе, и для формирования рамок у кнопок. Здесь используется две тени, одна поверх другой, что, в итоге, даёт зелёную рамку на некотором удалении от кнопки.
box-shadow: 0 0 0 2px #fff, /* Белая тень */ 0 0 0 4px #3f8a7c; /* Зелёная тень */У кнопки при наведении будем менять цвет фона и после небольшой задержки показывать рамку. Для этого в transition запишем следующее:
transition: background-color 0.4s, box-shadow 0.2s 0.3s;Окончательный код показан в примере 1.
Пример 1. Использование transition
Использование animation
Свойство transition имеет своё определённую роль и с его помощью нельзя сделать сложную анимацию элемента. Для этой цели предназначено свойство animation, работающее совместно с правилом @keyframes.
Сперва нашей анимации следует дать уникальное имя, пусть будет flip :
Теперь определяемся с ключевыми кадрами, которые задаются в процентах. Например, для вращения элемента нам понадобится два положения:
Конечное значение 100% в данном случае можно не указывать, поскольку оно совпадает с начальным.
Для вращения элемента используем свойство transform с функцией rotateX().
Теперь эту анимацию можно привязать к кнопке, добавив свойство animation к псевдоклассу :hover .
Саму анимацию можно воспроизвести несколько раз, добавив число повторений в конец набора значений:
animation: flip 1s 3; /* Повторяем три раза */Или сделать анимацию бесконечной с помощью ключевого слова infinite .
animation: flip 1s infinite; /* Бесконечная анимация */В примере 2 при наведении курсора мыши на кнопку она поворачивается один раз вокруг горизонтальной оси.
Пример 2. Использование @keyframes
Использование сторонних библиотек
Существуют готовые сторонние библиотеки CSS, предлагающие наборы различных анимаций. Принцип работы у них схожий — сперва подключается дополнительный CSS-файл, затем в своём стиле указывается желаемое имя анимации или к самому элементу добавляется определённый стилевой класс. Анимировать подобным образом можно не только кнопки, но и другие элементы — ссылки, изображения и т. д.
Ниже рассмотрим пару популярных библиотек.
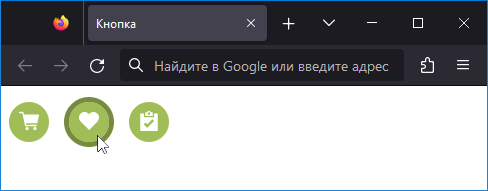
Animate.css
Эту библиотеку можно установить через npm, Yarn или добавить напрямую через CDN:
После чего на сайте выбираем понравившуюся анимацию и вставляем её имя в свойство animation . Обязательно следует добавить и продолжительность самой анимации:
В примере 3 при наведении курсора на заблокированную кнопку она трясётся по горизонтали. Для анимации не всех кнопок, а только с атрибутом disabled , используем комбинацию псевдоклассов :disabled:hover .
Пример 3. Использование библиотеки Animate.css
Hover.css
Эта библиотека содержит набор разных эффектов с анимацией, иконками, тенями, уголками и рамками. Сама библиотека устанавливается через npm, Bower или скачивается напрямую с сайта GitHub. После этого подключается как обычный CSS-файл:
Эффекты для элемента работают путём добавления соответствующего класса к элементу. Все классы Hover.css начинаются с префикса hvr-, после чего идёт имя эффекта. К примеру, для создания пульсирующей кнопки при наведении, указываем класс hvr-pulse :
В примере 4 при наведении курсора мыши на кнопку она поднимается вверх и под кнопкой добавляется тень.
Пример 4. Использование библиотеки Hover.css
Итого
- Для плавного изменения значений стилевых свойств при наведении на кнопку курсора мыши используется свойство transition.
- Сложная анимация делается с помощью ключевых кадров через правило @keyframes.
- Сама анимация применяется к кнопке через псевдокласс :hover и свойство animation.
- Готовые стилевые библиотеки для анимации позволяют упростить создание эффектов для кнопок.
Создайте кнопку, чтобы при наведении на неё курсора мыши у неё плавно появлялась тень, как показано на рис. 1.
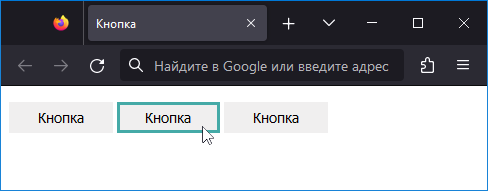
Создайте кнопку, чтобы при наведении на неё курсора мыши вокруг кнопки плавно появлялся контур (рис. 1).
Создайте кнопку, чтобы при наведении на неё курсора мыши внутри кнопки плавно появлялась рамка (рис. 1).
См. также
- :focus на мобильных устройствах
- animation
- box-shadow
- transition
- Анимация
- Анимация в CSS
- Анимация ссылок при наведении
- Всплывающая подсказка
- Добавление тени
- Добавление треугольника
- Оформление кнопок
- Переходы
- Переходы и анимация
- Переходы с помощью :hover
- Работа с типографикой
- Сочетание с псевдоклассами
- Трансформация в CSS