- CSS: как задавать размеры элементов на сайте
- Как задаются размеры
- Размеры в пикселях — жёстко, но точно
- В зависимости от размеров экрана — гибко, но надо перепроверять на разных экранах
- Проценты — очень гибко, но всегда нужен родительский элемент
- Нужно ли в этом разбираться?
- width
- Try it
- Syntax
- Values
- Accessibility concerns
- Formal definition
- Formal syntax
- Examples
- Default width
- Example using pixels and ems
- Example with percentage
- Example using «max-content»
- Example using «min-content»
- Specifications
- Browser compatibility
- See also
- Found a content problem with this page?
- MDN
- Support
- Our communities
- Developers
- CSS Height, Width and Max-width
- CSS Setting height and width
- CSS height and width Values
- CSS height and width Examples
- Example
- Example
- Setting max-width
- Example
- Try it Yourself — Examples
- All CSS Dimension Properties
CSS: как задавать размеры элементов на сайте
Мы тут рассказывали про размеры текста в вёрстке. Но что, если задавать размеры не только текста, но вообще всего? В CSS это делается так же легко, как и в случае с текстом.
Как задаются размеры
У большинства элементов в CSS есть такие параметры для работы с размером:
height, width — высота и ширина;
max-height, max-width — высота и ширина, больше которых элемент не может быть (а меньше — может);
min-height, min-width — минимальная высота и ширина;
margin — размер поля вокруг элемента. Другие элементы не должны влезать в это поле;
padding — отступы внутри элемента, например, если внутри будет написан текст.
Например, нам нужно нарисовать кнопку, внутри которой будет текст. Описание стиля кнопки может быть таким:
.button width:75%;
max-width:600px;
min-width:300px;
padding: 15px 15px 19px 15px;
margin: 20px auto 50px auto;
>
Перевод: кнопка должна занимать от 300 до 600 пикселей в ширину, а в этом диапазоне быть 75% ширины от содержащего ее контейнера; внутри кнопки отступи сверху 15 пикселей, справа 15, снизу 19, слева 15 (по часовой стрелке). Саму кнопку от ближайшего элемента сверху отодвинь на 20 пикселей, слева и справа отодвинь одинаково, чтобы она встала по центру, а снизу отступи еще 50 пикселей до следующего элемента.
Запись в стиле padding: 15px 15px 19px 15px — это короткий способ задать отступы по часовой стрелке. Первое значение — отступ сверху, второе — справа, третье — снизу, четвёртое — слева. Вместо короткой записи можно ещё так:
Но так обычно не пишут, потому что много текста.
Размеры в пикселях — жёстко, но точно
Самый простой способ задать размер элемента — указать его в пикселях. Например, если нам нужна ширина элемента 100 пикселей, то можно написать:
В пикселях можно задавать размеры почти чему угодно, потому что пиксели есть везде:
- HTML-вёрстка предполагает, что содержимое будет отображаться на каком-то экране;
- у каждого экрана, даже у виртуального, есть размер в пикселях по высоте и ширине экрана;
- получается, браузер всегда сможет понять, сколько пикселей какую часть экрана занимают, и от этого он нарисует элемент нужного нам размера.
С пикселями есть только одна проблема: так как размеры и плотность пикселей на разных экранах разные, то может получиться так:
- на экране 5-дюймового телефона с разрешением 1920 на 1080 пикселей баннер шириной 200 пикселей получит размер в 5 сантиметров;
- а на мониторе с диагональю 24 дюйма, но с тем же разрешением 1920 на 1080 те же 200 пикселей будут иметь длину 10 сантиметров.
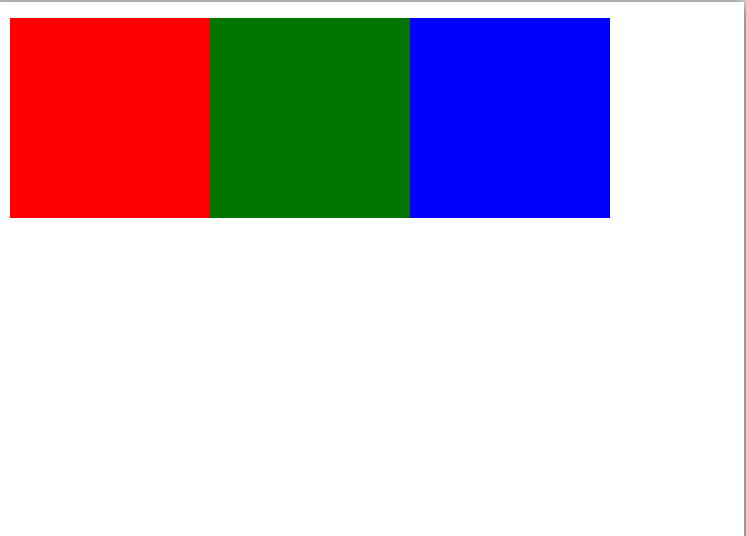
Чтобы было нагляднее, сделаем тестовую страницу с тремя блоками одинаковой высоты, но с шириной 100 пикселей.
div < /* у блоков будет единая высота */ height: 100px; /* и становиться они будут друг за другом в один ряд */ float: left; >/* у блоков будет одинаковая ширина, но разный цвет фона */ .div1 < width: 100px; background: red; >.div2 < width: 100px; background: green; >.div3

Справедливости ради, браузеры понимают эту проблему, поэтому умеют пересчитывать пиксели так, чтобы сайты не ломались. Например, если у вас есть современный экран с разрешением 288 точек на дюйм и тут же рядом старый экран с разрешением 72 точки на дюйм, то браузер поймёт, что надо пересчитать одни пиксели в другие. Если поставить два сайта рядом на этих экранах, они будут не один в один, но похожи.


В зависимости от размеров экрана — гибко, но надо перепроверять на разных экранах
Чтобы не зависеть от размера пикселей, а масштабировать элементы в зависимости от размера экрана, придумали другие единицы измерения:
Получается, программисту уже не надо думать, сколько пикселей надо сделать картинку, чтобы она занимала половину ширины экрана на разных экранах. Вместо этого достаточно указать так:
В этом случае браузер сделает так:
- Посмотрит, что за единица измерения — vw, значит нужна ширина экрана.
- Узнает, какой ширины в пикселях окно, в котором открывается эта страница.
- Поделит её на 100, чтобы узнать размер одного vw в пикселях.
- Умножит это значиние на 50, чтобы понять размер в пикселях нужного нам элемента.
- Установит это значение в пикселях при вёрстке.
- Если в процессе просмотра у браузера поменяется размер экрана — он сам всё пересчитает и отрисует заново.
Используем страницу из предыдущего раздела и немного переделаем её — установим такой размер блоков:
div < /* у блоков будет единая высота */ height: 100px; /* и становиться они будут друг за другом в один ряд */ float: left; >/* задаём ширину относительно ширины экрана */ .div1 < width: 10vw; background: red; >.div2 < width: 20vw; background: green; >.div3

Если нам нужно, чтобы блоки по высоте занимали всю высоту экрана, то для этого достаточно указать в стилях div такой параметр:

Ещё есть vmin и vmax, которые работают так:
- vmin находит минимальное значение из пары (vh, vw);
- а vmax находит максимальное значение из пары (vh, vw).
Это нужно, например, для адаптивной вёрстки, когда вам требуется привязаться к короткой стороне экрана и в зависимости от её размеров построить всю остальную страницу.
Проценты — очень гибко, но всегда нужен родительский элемент
Кажется, что vh и vw — это и есть те самые проценты от ширины экрана и что можно обойтись без обычных процентов. Но на самом деле просто проценты в вёрстке тоже используются, но с одним важным моментом:
👉 Чтобы использовать проценты, нужен родительский элемент, от которого эти проценты будут считаться.
Родительский элемент — тот, внутри которого находятся другие наши элементы. Например, мы хотим сделать на странице блок шириной 500 пикселей:
У этого блока есть точный размер, который браузер может взять или посчитать. Теперь внутри этого блока мы легко можем расположить свои блоки в тех же процентах, что и в предыдущем примере:
div < /* у блоков будет единая высота */ height: 100vh; /* и становиться они будут друг за другом в один ряд */ float: left; >/* задаём ширину в процентах относительно родителя */ .div1 < width: 10%; background: red; >.div2 < width: 20%; background: green; >.div3

Если мы явно не указали размер родительского элемента, то браузер постарается угадать его или посчитать самостоятельно. Но получится это не всегда.
Нужно ли в этом разбираться?
Вообще в современном мире взрослые фронтендеры верстают с помощью css-grid и готовых верстальных фреймворков: в них все размеры стандартизированы и прописаны под капотом, а верстальщики просто говорят «большое», «среднее», «сбоку», «на три четверти», «на всю ширину» и т. д. А уже как это интерпретировать и какие конкретно там размеры — этим занимается фреймворк.
width
The width CSS property sets an element’s width. By default, it sets the width of the content area, but if box-sizing is set to border-box , it sets the width of the border area.
Try it
The specified value of width applies to the content area so long as its value remains within the values defined by min-width and max-width .
- If the value for width is less than the value for min-width , then min-width overrides width .
- If the value for width is greater than the value for max-width , then max-width overrides width .
Syntax
/* values */ width: 300px; width: 25em; /* value */ width: 75%; /* Keyword values */ width: max-content; width: min-content; width: fit-content(20em); width: auto; /* Global values */ width: inherit; width: initial; width: revert; width: revert-layer; width: unset;
Values
Defines the width as a distance value.
Defines the width as a percentage of the containing block’s width.
The browser will calculate and select a width for the specified element.
The intrinsic preferred width.
The intrinsic minimum width.
Uses the fit-content formula with the available space replaced by the specified argument, i.e. min(max-content, max(min-content, )) .
Accessibility concerns
Ensure that elements set with a width aren’t truncated and/or don’t obscure other content when the page is zoomed to increase text size.
Formal definition
| Initial value | auto |
|---|---|
| Applies to | all elements but non-replaced inline elements, table rows, and row groups |
| Inherited | no |
| Percentages | refer to the width of the containing block |
| Computed value | a percentage or auto or the absolute length |
| Animation type | a length, percentage or calc(); |
Formal syntax
width =
auto |
|
min-content |
max-content |
fit-content( )
=
|
Examples
Default width
p class="goldie">The Mozilla community produces a lot of great software.p>
Example using pixels and ems
.px_length width: 200px; background-color: red; color: white; border: 1px solid black; > .em_length width: 20em; background-color: white; color: red; border: 1px solid black; > div class="px_length">Width measured in pxdiv> div class="em_length">Width measured in emdiv>
Example with percentage
.percent width: 20%; background-color: silver; border: 1px solid red; > div class="percent">Width in percentagediv>
Example using «max-content»
p.maxgreen background: lightgreen; width: intrinsic; /* Safari/WebKit uses a non-standard name */ width: -moz-max-content; /* Firefox/Gecko */ width: -webkit-max-content; /* Chrome */ width: max-content; > p class="maxgreen">The Mozilla community produces a lot of great software.p>
Example using «min-content»
p.minblue background: lightblue; width: -moz-min-content; /* Firefox */ width: -webkit-min-content; /* Chrome */ width: min-content; > p class="minblue">The Mozilla community produces a lot of great software.p>
Specifications
Browser compatibility
BCD tables only load in the browser
See also
Found a content problem with this page?
This page was last modified on Jul 18, 2023 by MDN contributors.
Your blueprint for a better internet.
MDN
Support
Our communities
Developers
Visit Mozilla Corporation’s not-for-profit parent, the Mozilla Foundation.
Portions of this content are ©1998– 2023 by individual mozilla.org contributors. Content available under a Creative Commons license.
CSS Height, Width and Max-width
The CSS height and width properties are used to set the height and width of an element.
The CSS max-width property is used to set the maximum width of an element.
CSS Setting height and width
The height and width properties are used to set the height and width of an element.
The height and width properties do not include padding, borders, or margins. It sets the height/width of the area inside the padding, border, and margin of the element.
CSS height and width Values
The height and width properties may have the following values:
- auto — This is default. The browser calculates the height and width
- length — Defines the height/width in px, cm, etc.
- % — Defines the height/width in percent of the containing block
- initial — Sets the height/width to its default value
- inherit — The height/width will be inherited from its parent value
CSS height and width Examples
Example
Set the height and width of a element:
Example
Set the height and width of another element:
Note: Remember that the height and width properties do not include padding, borders, or margins! They set the height/width of the area inside the padding, border, and margin of the element!
Setting max-width
The max-width property is used to set the maximum width of an element.
The max-width can be specified in length values, like px, cm, etc., or in percent (%) of the containing block, or set to none (this is default. Means that there is no maximum width).
The problem with the above occurs when the browser window is smaller than the width of the element (500px). The browser then adds a horizontal scrollbar to the page.
Using max-width instead, in this situation, will improve the browser’s handling of small windows.
Tip: Drag the browser window to smaller than 500px wide, to see the difference between the two divs!
Note: If you for some reason use both the width property and the max-width property on the same element, and the value of the width property is larger than the max-width property; the max-width property will be used (and the width property will be ignored).
Example
This element has a height of 100 pixels and a max-width of 500 pixels:
Try it Yourself — Examples
Set the height and width of elements
This example demonstrates how to set the height and width of different elements.
Set the height and width of an image using percent
This example demonstrates how to set the height and width of an image using a percent value.
Set min-width and max-width of an element
This example demonstrates how to set a minimum width and a maximum width of an element using a pixel value.
Set min-height and max-height of an element
This example demonstrates how to set a minimum height and a maximum height of an element using a pixel value.
All CSS Dimension Properties
| Property | Description |
|---|---|
| height | Sets the height of an element |
| max-height | Sets the maximum height of an element |
| max-width | Sets the maximum width of an element |
| min-height | Sets the minimum height of an element |
| min-width | Sets the minimum width of an element |
| width | Sets the width of an element |