- Use containers for development
- Introduction
- Run a database in a container
- Multi-stage Dockerfile for development
- Use Compose to develop locally
- Connect a Debugger
- Next steps
- Feedback
- Run and debug a Java application with Docker
- Create a new Java project
- Run the Java application on a Docker run target
- Debug the Java application
Use containers for development
Work through the steps to build an image and run it as a containerized application in Run your image as a container.
Introduction
In this module, we’ll walk through setting up a local development environment for the application we built in the previous modules. We’ll use Docker to build our images and Docker Compose to make everything a whole lot easier.
Run a database in a container
First, we’ll take a look at running a database in a container and how we use volumes and networking to persist our data and allow our application to talk with the database. Then we’ll pull everything together into a Compose file which allows us to setup and run a local development environment with one command. Finally, we’ll take a look at connecting a debugger to our application running inside a container.
Instead of downloading MySQL, installing, configuring, and then running the MySQL database as a service, we can use the Docker Official Image for MySQL and run it in a container.
Before we run MySQL in a container, we’ll create a couple of volumes that Docker can manage to store our persistent data and configuration. Let’s use the managed volumes feature that Docker provides instead of using bind mounts. You can read all about Using volumes in our documentation.
Let’s create our volumes now. We’ll create one for the data and one for configuration of MySQL.
$ docker volume create mysql_data $ docker volume create mysql_config Now we’ll create a network that our application and database will use to talk to each other. The network is called a user-defined bridge network and gives us a nice DNS lookup service which we can use when creating our connection string.
$ docker network create mysqlnet Now, let’s run MySQL in a container and attach to the volumes and network we created above. Docker pulls the image from Hub and runs it locally.
$ docker run -it --rm -d -v mysql_data:/var/lib/mysql \ -v mysql_config:/etc/mysql/conf.d \ --network mysqlnet \ --name mysqlserver \ -e MYSQL_USER=petclinic -e MYSQL_PASSWORD=petclinic \ -e MYSQL_ROOT_PASSWORD=root -e MYSQL_DATABASE=petclinic \ -p 3306:3306 mysql:8.0 Okay, now that we have a running MySQL, let’s update our Dockerfile to activate the MySQL Spring profile defined in the application and switch from an in-memory H2 database to the MySQL server we just created.
We only need to add the MySQL profile as an argument to the CMD definition.
CMD ["./mvnw", "spring-boot:run", "-Dspring-boot.run.profiles=mysql"] $ docker build --tag java-docker . Now, let’s run our container. This time, we need to set the MYSQL_URL environment variable so that our application knows what connection string to use to access the database. We’ll do this using the docker run command.
$ docker run --rm -d \ --name springboot-server \ --network mysqlnet \ -e MYSQL_URL=jdbc:mysql://mysqlserver/petclinic \ -p 8080:8080 java-docker Let’s test that our application is connected to the database and is able to list Veterinarians.
$ curl --request GET \ --url http://localhost:8080/vets \ --header 'content-type: application/json' You should receive the following json back from our service.
"vetList":["id":1,"firstName":"James","lastName":"Carter","specialties":[],"nrOfSpecialties":0,"new":false>,"id":2,"firstName":"Helen","lastName":"Leary","specialties":["id":1,"name":"radiology","new":false>],"nrOfSpecialties":1,"new":false>,"id":3,"firstName":"Linda","lastName":"Douglas","specialties":["id":3,"name":"dentistry","new":false>,"id":2,"name":"surgery","new":false>],"nrOfSpecialties":2,"new":false>,"id":4,"firstName":"Rafael","lastName":"Ortega","specialties":["id":2,"name":"surgery","new":false>],"nrOfSpecialties":1,"new":false>,"id":5,"firstName":"Henry","lastName":"Stevens","specialties":["id":1,"name":"radiology","new":false>],"nrOfSpecialties":1,"new":false>,"id":6,"firstName":"Sharon","lastName":"Jenkins","specialties":[],"nrOfSpecialties":0,"new":false>]> Multi-stage Dockerfile for development
Let’s take a look at updating our Dockerfile to produce a final image which is ready for production as well as a dedicated step to produce a development image.
We’ll also set up the Dockerfile to start the application in debug mode in the development container so that we can connect a debugger to the running Java process.
Below is a multi-stage Dockerfile that we will use to build our production image and our development image. Replace the contents of your Dockerfile with the following.
# syntax=docker/dockerfile:1 FROM eclipse-temurin:17-jdk-jammy as base WORKDIR /app COPY .mvn/ .mvn COPY mvnw pom.xml ./ RUN ./mvnw dependency:resolve COPY src ./src FROM base as development CMD ["./mvnw", "spring-boot:run", "-Dspring-boot.run.profiles=mysql", "-Dspring-boot.run.jvmArguments='-agentlib:jdwp=transport=dt_socket,server=y,suspend=n,address=*:8000'"] FROM base as build RUN ./mvnw package FROM eclipse-temurin:17-jre-jammy as production EXPOSE 8080 COPY --from=build /app/target/spring-petclinic-*.jar /spring-petclinic.jar CMD ["java", "-Djava.security.egd=file:/dev/./urandom", "-jar", "/spring-petclinic.jar"] We first add a label to the FROM eclipse-temurin:17-jdk-jammy statement. This allows us to refer to this build stage in other build stages. Next, we added a new build stage labeled development .
We expose port 8000 and declare the debug configuration for the JVM so that we can attach a debugger.
Use Compose to develop locally
We can now create a Compose file to start our development container and the MySQL database using a single command.
Open the petclinic in your IDE or a text editor and create a new file named docker-compose.dev.yml . Copy and paste the following commands into the file.
version: '3.8' services: petclinic: build: context: . target: development ports: - "8000:8000" - "8080:8080" environment: - SERVER_PORT=8080 - MYSQL_URL=jdbc:mysql://mysqlserver/petclinic volumes: - ./:/app depends_on: - mysqlserver mysqlserver: image: mysql:8.0 ports: - "3306:3306" environment: - MYSQL_ROOT_PASSWORD= - MYSQL_ALLOW_EMPTY_PASSWORD=true - MYSQL_USER=petclinic - MYSQL_PASSWORD=petclinic - MYSQL_DATABASE=petclinic volumes: - mysql_data:/var/lib/mysql - mysql_config:/etc/mysql/conf.d volumes: mysql_data: mysql_config: This Compose file is super convenient as we do not have to type all the parameters to pass to the docker run command. We can declaratively do that using a Compose file.
Another really cool feature of using a Compose file is that we have service resolution set up to use the service names. Therefore, we are now able to use mysqlserver in our connection string. The reason we use mysqlserver is because that is what we’ve named our MySQL service as in the Compose file.
Now, to start our application and to confirm that it is running properly.
$ docker-compose -f docker-compose.dev.yml up --build We pass the —build flag so Docker will compile our image and then starts the containers. You should see similar output if it runs successfully:

Now let’s test our API endpoint. Run the following curl commands:
$ curl --request GET \ --url http://localhost:8080/vets \ --header 'content-type: application/json' You should receive the following response:
"vetList":["id":1,"firstName":"James","lastName":"Carter","specialties":[],"nrOfSpecialties":0,"new":false>,"id":2,"firstName":"Helen","lastName":"Leary","specialties":["id":1,"name":"radiology","new":false>],"nrOfSpecialties":1,"new":false>,"id":3,"firstName":"Linda","lastName":"Douglas","specialties":["id":3,"name":"dentistry","new":false>,"id":2,"name":"surgery","new":false>],"nrOfSpecialties":2,"new":false>,"id":4,"firstName":"Rafael","lastName":"Ortega","specialties":["id":2,"name":"surgery","new":false>],"nrOfSpecialties":1,"new":false>,"id":5,"firstName":"Henry","lastName":"Stevens","specialties":["id":1,"name":"radiology","new":false>],"nrOfSpecialties":1,"new":false>,"id":6,"firstName":"Sharon","lastName":"Jenkins","specialties":[],"nrOfSpecialties":0,"new":false>]> Connect a Debugger
We’ll use the debugger that comes with the IntelliJ IDEA. You can use the community version of this IDE. Open your project in IntelliJ IDEA and then go to the Run menu > Edit Configuration. Add a new Remote JVM Debug configuration similar to the following:

Open the following file src/main/java/org/springframework/samples/petclinic/vet/VetController.java and add a breakpoint inside the showResourcesVetList function.
Start your debug session, Run menu and then Debug NameOfYourConfiguration

You should now see the connection in the logs of your Compose application.

We can now call the server endpoint.
$ curl --request GET --url http://localhost:8080/vets You should have seen the code break on the marked line and now you are able to use the debugger just like you would normally. You can also inspect and watch variables, set conditional breakpoints, view stack traces and a do bunch of other stuff.

You can also activate the live reload option provided by SpringBoot Dev Tools. Check out the SpringBoot documentation for information on how to connect to a remote application.
Next steps
In this module, we took a look at creating a general development image that we can use pretty much like our normal command line. We also set up our Compose file to expose the debugging port and configure Spring Boot to live reload our changes.
In the next module, we’ll take a look at how to run unit tests in Docker. See
Feedback
Help us improve this topic by providing your feedback. Let us know what you think by creating an issue in the Docker Docs GitHub repository. Alternatively, create a PR to suggest updates.
Run and debug a Java application with Docker
You can use Docker to run and debug a Java application in a container with a specific runtime environment. This tutorial describes how to create a Docker run target with OpenJDK 17 for a simple Java application.
Before you begin, install and run Docker, enable the Docker plugin, and connect to the Docker daemon in IntelliJ IDEA. For more information, see Getting started with Docker in IntelliJ IDEA.
Create a new Java project
The sample application for this tutorial will consist of a single HelloWorld.java file, which prints Hello, World! to the console and exits.
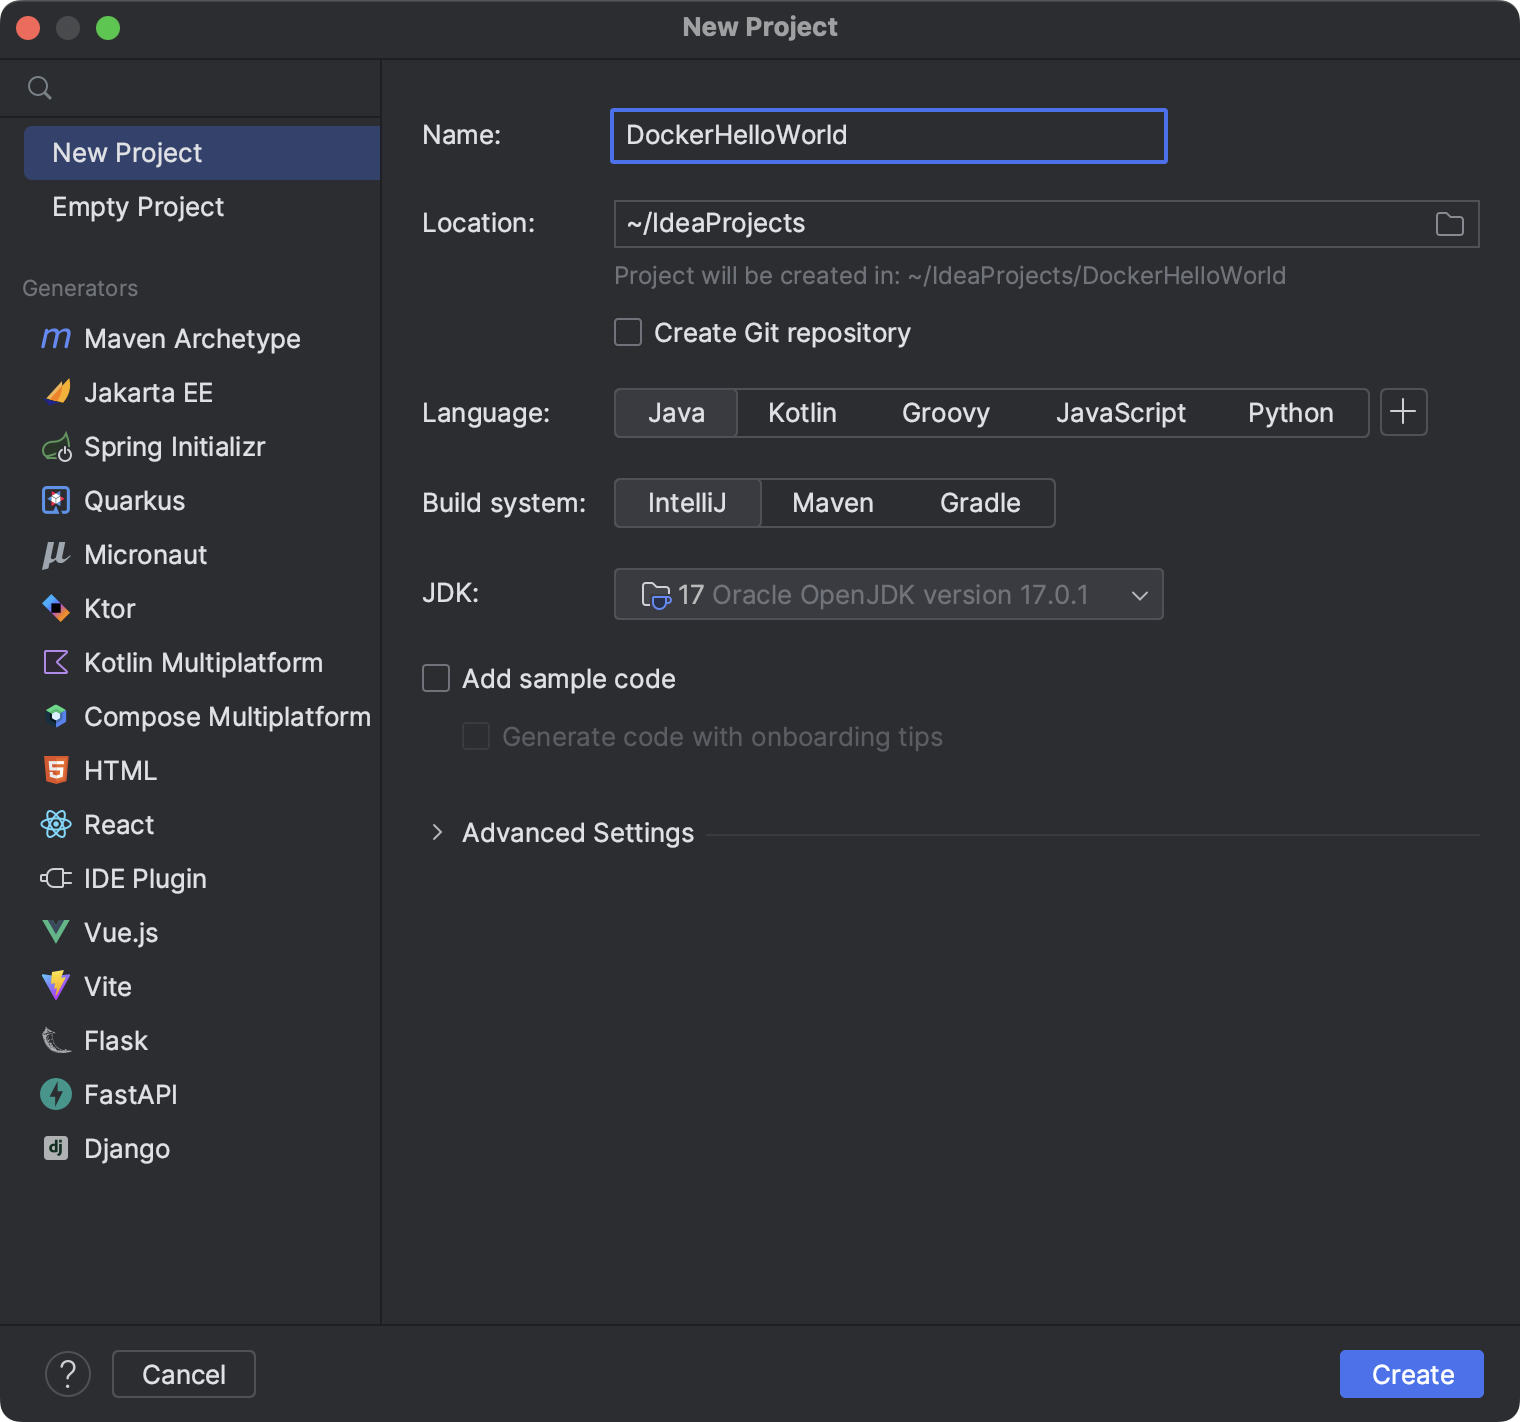
- From the main menu, select File | New | Project .
- In the New Project dialog, select New Project and name the project DockerHelloWorld .
- Create the main Java class file HelloWorld.java in the src directory. To do this, in the Project tool window, right-click the src directory, point to New and click Java Class . In the New Java Class dialog, type HelloWorld and press Enter . Paste the following code into the new file:
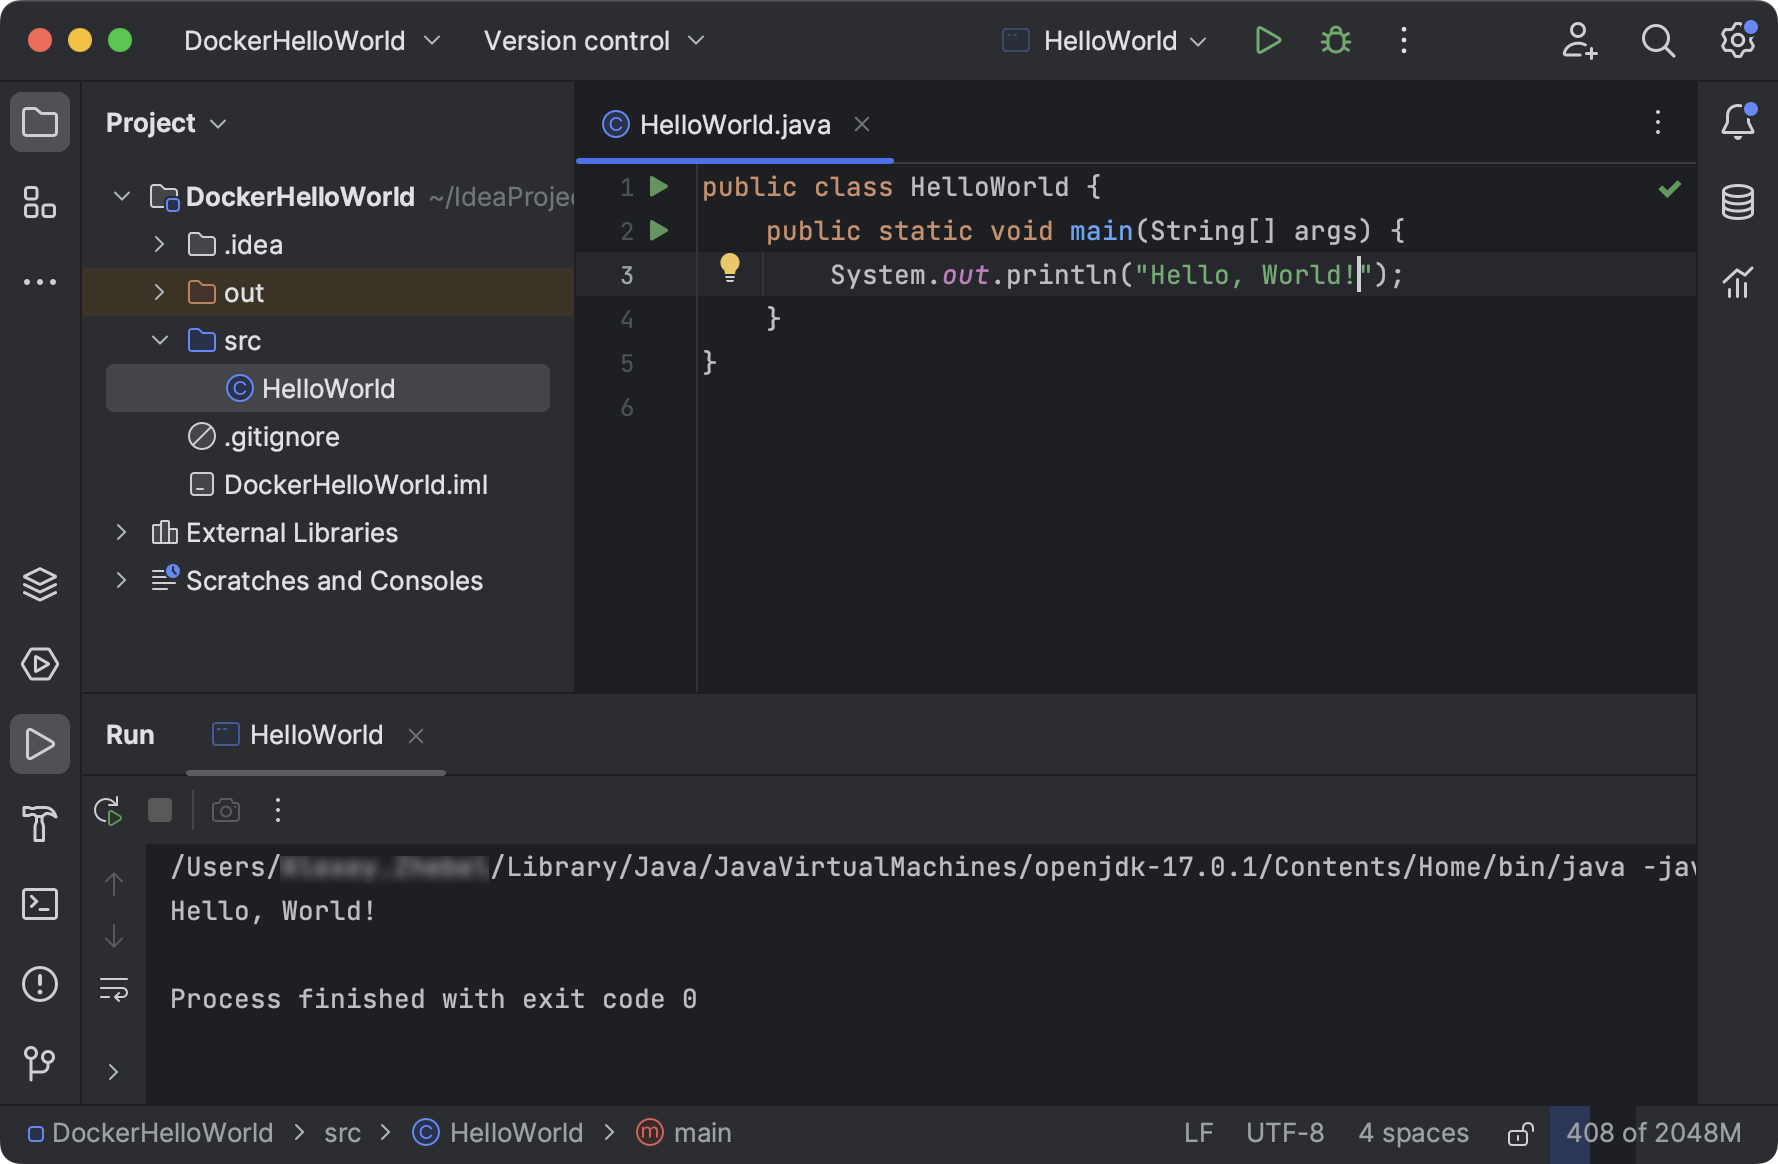
By default, IntelliJ IDEA creates a run configuration that compiles and executes your application locally. You can configure different run targets for it, including remote machines via SSH connections and Docker containers.
Run the Java application on a Docker run target
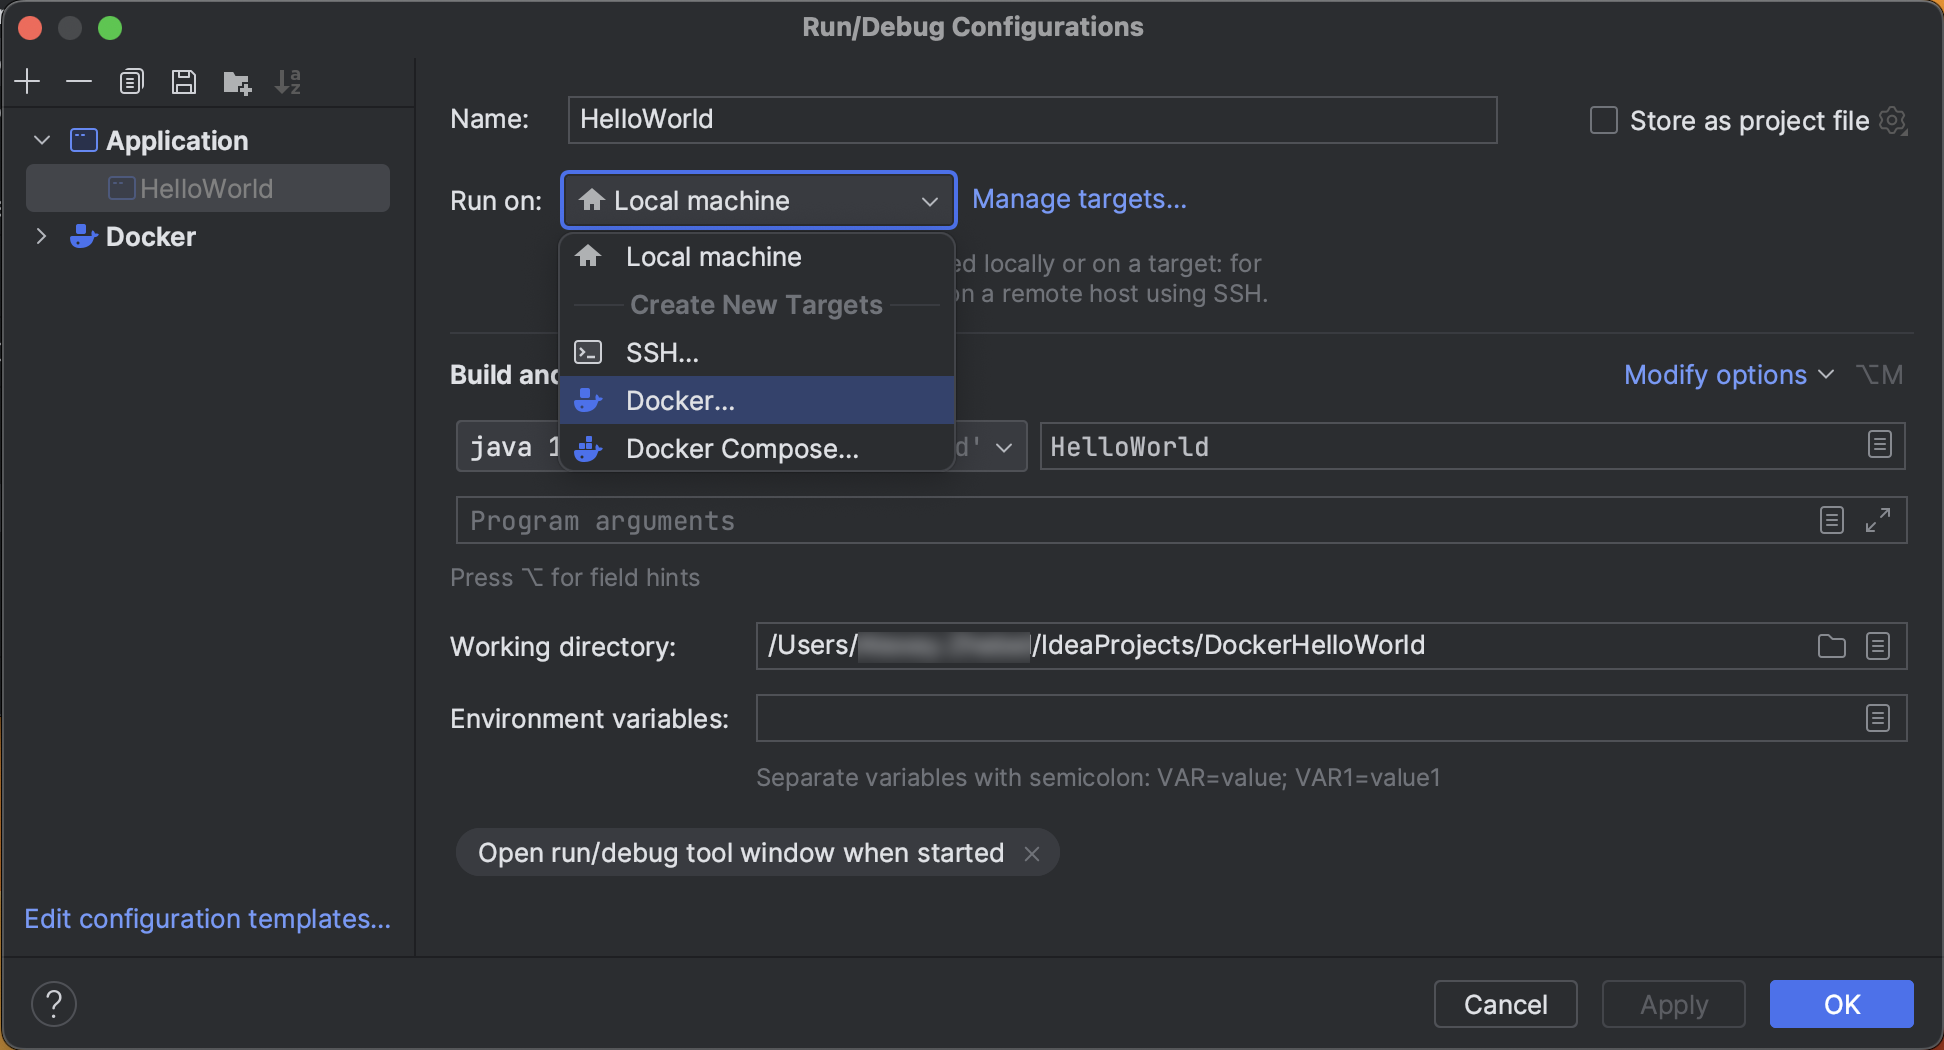
- From the main menu, select Run | Edit Configurations .
- Select the run configuration that compiles and executes your application, expand the Run on list, and select Docker .
- On the first step of the New Target: Docker wizard, select Pull or use existing , and specify openjdk as the name of the image to pull.
- On the second step, Docker will pull the specified image.
- On the third step, click Create to add the new Docker run target.
- Click Apply to save the changes to the run configuration.
- Start the run configuration to compile and execute your application on the latest OpenJDK container. For more information, see Run applications.
Debug the Java application
- Open HelloWorld.java and click line number 3 with System.out.println(«Hello, World!»); to put a breakpoint on this line.
- Select your application’s run configuration but instead of running it, start the debugger with . For more information, see Start the debugger session.
This will compile and execute the application in debug mode, and IntelliJ IDEA will halt execution at the specified breakpoint: just before it prints out to the console.