- How to Select a Default Radio Button in HTML Forms: A Complete Guide
- Creating Radio Buttons in HTML Forms
- Default radio buttons html
- Try it
- Value
- Defining a radio group
- Data representation of a radio group
- Additional attributes
- Using radio inputs
- Selecting a radio button by default
- Providing a bigger hit area for your radio buttons
- Validation
- Styling radio inputs
- Technical summary
- Specifications
- Browser compatibility
How to Select a Default Radio Button in HTML Forms: A Complete Guide
Learn how to select a specific radio button by default when a page is loaded in HTML forms. This comprehensive guide covers creating radio buttons, selecting a default option, getting the value of the selected radio button in JavaScript, styling radio buttons with CSS, and the advantages and disadvantages of using radio buttons in HTML.
- Creating Radio Buttons in HTML Forms
- Selecting a Default Radio Button in HTML Forms
- Create Radio Button Inputs Allowing Users to Select One Option
- Getting the Value of the Selected Radio Button in JavaScript
- Styling Radio Buttons with CSS
- Advantages and Disadvantages of Using Radio Buttons in HTML
- Other code examples for selecting a default radio button in HTML forms
- Conclusion
- How do I make a selected radio button in HTML?
- How can I check if a Radiobutton is selected in HTML?
- How do I select a radio button when a label is clicked?
- How can I tell if a radio option is selected?
If you have ever filled out a form online, you’ve most likely come across radio buttons. Radio buttons are used to present a set of related options, where only one option can be selected at a time. However, what if you want to select a specific radio button by default when the page is loaded? In this blog post, we will discuss how to do just that in HTML forms.
Creating Radio Buttons in HTML Forms
To create radio buttons in HTML, you use the element with the type radio and assign a name to multiple radio buttons to form a radio group. Wrap the radio button grouping(s) in a
Default radio buttons html
Only one radio button in a given group can be selected at the same time. Radio buttons are typically rendered as small circles, which are filled or highlighted when selected.
Try it
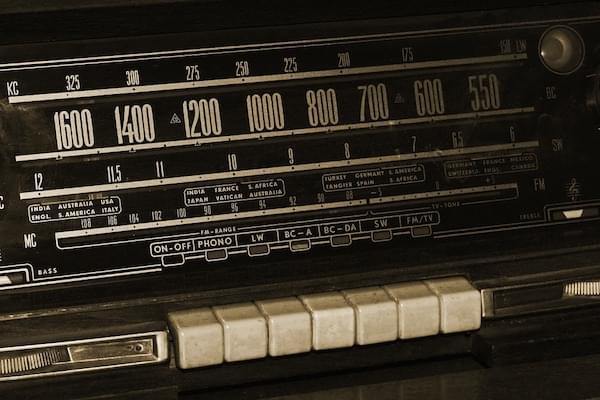
They are called radio buttons because they look and operate in a similar manner to the push buttons on old-fashioned radios, such as the one shown below.
Note: Checkboxes are similar to radio buttons, but with an important distinction: radio buttons are designed for selecting one value out of a set, whereas checkboxes let you turn individual values on and off. Where multiple controls exist, radio buttons allow one to be selected out of them all, whereas checkboxes allow multiple values to be selected.
Value
The value attribute is a string containing the radio button’s value. The value is never shown to the user by their user agent. Instead, it’s used to identify which radio button in a group is selected.
Defining a radio group
A radio group is defined by giving each of radio buttons in the group the same name . Once a radio group is established, selecting any radio button in that group automatically deselects any currently-selected radio button in the same group.
You can have as many radio groups on a page as you like, as long as each has its own unique name .
For example, if your form needs to ask the user for their preferred contact method, you might create three radio buttons, each with the name property set to contact but one with the value email , one with the value phone , and one with the value mail . The user never sees the value or the name (unless you expressly add code to display it).
The resulting HTML looks like this:
form> fieldset> legend>Please select your preferred contact method:legend> div> input type="radio" id="contactChoice1" name="contact" value="email" /> label for="contactChoice1">Emaillabel> input type="radio" id="contactChoice2" name="contact" value="phone" /> label for="contactChoice2">Phonelabel> input type="radio" id="contactChoice3" name="contact" value="mail" /> label for="contactChoice3">Maillabel> div> div> button type="submit">Submitbutton> div> fieldset> form>
Here you see the three radio buttons, each with the name set to contact and each with a unique value that uniquely identifies that individual radio button within the group. They each also have a unique id , which is used by the element’s for attribute to associate the labels with the radio buttons.
You can try out this example here:
Data representation of a radio group
When the above form is submitted with a radio button selected, the form’s data includes an entry in the form contact=value . For example, if the user clicks on the «Phone» radio button then submits the form, the form’s data will include the line contact=phone .
If you omit the value attribute in the HTML, the submitted form data assigns the value on to the group. In this scenario, if the user clicked on the «Phone» option and submitted the form, the resulting form data would be contact=on , which isn’t helpful. So don’t forget to set your value attributes!
Note: If no radio button is selected when the form is submitted, the radio group is not included in the submitted form data at all, since there is no value to report.
It’s fairly uncommon to actually want to allow the form to be submitted without any of the radio buttons in a group selected, so it is usually wise to have one default to the checked state. See Selecting a radio button by default below.
Let’s add a bit of code to our example so we can examine the data generated by this form. The HTML is revised to add a block to output the form data into:
form> fieldset> legend>Please select your preferred contact method:legend> div> input type="radio" id="contactChoice1" name="contact" value="email" /> label for="contactChoice1">Emaillabel> input type="radio" id="contactChoice2" name="contact" value="phone" /> label for="contactChoice2">Phonelabel> input type="radio" id="contactChoice3" name="contact" value="mail" /> label for="contactChoice3">Maillabel> div> div> button type="submit">Submitbutton> div> fieldset> form> pre id="log">pre>
Then we add some JavaScript to set up an event listener on the submit event, which is sent when the user clicks the «Submit» button:
const form = document.querySelector("form"); const log = document.querySelector("#log"); form.addEventListener( "submit", (event) => const data = new FormData(form); let output = ""; for (const entry of data) output = `$output>$entry[0]>=$entry[1]>\r`; > log.innerText = output; event.preventDefault(); >, false, );
Try this example out and see how there’s never more than one result for the contact group.
Additional attributes
In addition to the common attributes shared by all elements, radio inputs support the following attributes.
A Boolean attribute which, if present, indicates that this radio button is the default selected one in the group.
Unlike other browsers, Firefox by default persists the dynamic checked state of an across page loads. Use the autocomplete attribute to control this feature.
Using radio inputs
We already covered the fundamentals of radio buttons above. Let’s now look at the other common radio-button-related features and techniques you may need to know about.
Selecting a radio button by default
To make a radio button selected by default, you include checked attribute, as shown in this revised version of the previous example:
form> fieldset> legend>Please select your preferred contact method:legend> div> input type="radio" id="contactChoice1" name="contact" value="email" checked /> label for="contactChoice1">Emaillabel> input type="radio" id="contactChoice2" name="contact" value="phone" /> label for="contactChoice2">Phonelabel> input type="radio" id="contactChoice3" name="contact" value="mail" /> label for="contactChoice3">Maillabel> div> div> button type="submit">Submitbutton> div> fieldset> form>
In this case, the first radio button is now selected by default.
Note: If you put the checked attribute on more than one radio button, later instances will override earlier ones; that is, the last checked radio button will be the one that is selected. This is because only one radio button in a group can ever be selected at once, and the user agent automatically deselects others each time a new one is marked as checked.
Providing a bigger hit area for your radio buttons
Beyond accessibility, this is another good reason to properly set up elements on your forms.
Validation
Radio buttons don’t participate in constraint validation; they have no real value to be constrained.
Styling radio inputs
The following example shows a slightly more thorough version of the example we’ve seen throughout the article, with some additional styling, and with better semantics established through use of specialized elements. The HTML looks like this:
form> fieldset> legend>Please select your preferred contact method:legend> div> input type="radio" id="contactChoice1" name="contact" value="email" checked /> label for="contactChoice1">Emaillabel> input type="radio" id="contactChoice2" name="contact" value="phone" /> label for="contactChoice2">Phonelabel> input type="radio" id="contactChoice3" name="contact" value="mail" /> label for="contactChoice3">Maillabel> div> div> button type="submit">Submitbutton> div> fieldset> form>
The CSS involved in this example is a bit more significant:
html font-family: sans-serif; > div:first-of-type display: flex; align-items: flex-start; margin-bottom: 5px; > label margin-right: 15px; line-height: 32px; > input appearance: none; border-radius: 50%; width: 16px; height: 16px; border: 2px solid #999; transition: 0.2s all linear; margin-right: 5px; position: relative; top: 4px; > input:checked border: 6px solid black; > button, legend color: white; background-color: black; padding: 5px 10px; border-radius: 0; border: 0; font-size: 14px; > button:hover, button:focus color: #999; > button:active background-color: white; color: black; outline: 1px solid black; > Most notable here is the use of the appearance property (with prefixes needed to support some browsers). By default, radio buttons (and checkboxes) are styled with the operating system’s native styles for those controls. By specifying appearance: none , you can remove the native styling altogether, and create your own styles for them. Here we’ve used a border along with border-radius and a transition to create a nice animating radio selection. Notice also how the :checked pseudo-class is used to specify the styles for the radio button’s appearance when selected.
Note: If you wish to use the appearance property, you should test it very carefully. Although it is supported in most modern browsers, its implementation varies widely. In older browsers, even the keyword none does not have the same effect across different browsers, and some do not support it at all. The differences are smaller in the newest browsers.
Notice that when clicking on a radio button, there’s a nice, smooth fade out/in effect as the two buttons change state. In addition, the style and coloring of the legend and submit button are customized to have strong contrast. This might not be a look you’d want in a real web application, but it definitely shows off the possibilities.
Technical summary
Specifications
Browser compatibility
BCD tables only load in the browser