How to create a custom React hook to fetch an API (using TypeScript)?
Hooks are convenient for modern react development. The react framework comes with standard hooks to manage state, for example, with useState, and here we will write our hook to fetch data from any API. Buț first …
… what is a hook?
A hook is a javascript or typescript function that can include other hooks. Its name starts with « use », and this function can only be called inside a React functional component. You can find the complete Rules of Hooks documentation here.
Let’s start
First, create a new React project using Typescript.
In the terminal, navigate to the desired folder, and with the terminal command :
npx create-react-app apihook —template typescript The project is ready, time to think about the output of our hook to set the goal.
The output
- response status code: to test the response code
- response status text: to get the response status in a more readable way
- data: data provided by the API
- error: description of the error if one occurs
- loading: to know if the process is running
We will write a type to set that!
Coding!
I will create a new folder to store my hook and a new file named useApiHook.ts
And set my type as following :
We will now declare my hook as a function that will take a string containing the url as parameter and return a TApiResponse :
export type TApiResponse = < status: Number; statusText: String; data: any; error: any; loading: Boolean; >; export const useApiGet = (url: string): TApiResponse => <>; We will also use the state to store the information before returning the response. For this purpose, we will use a standard hook named useState, and import this function from the React framework :
import < useState >from 'react'; export type TApiResponse = < status: Number; statusText: String; data: any; error: any; loading: Boolean; >; export const useApiGet = (url: string): TApiResponse => < const [status, setStatus] = useState(0); const [statusText, setStatusText] = useState(''); const [data, setData] = useState(); const [error, setError] = useState(); const [loading, setLoading] = useState(false); >; Please note that we initialize status and textStatus to avoid « undefined ». If not, we would get a TypeScript error telling that it doesn’t match the type we defined (the power of TypeScript !).
Time to get the data!
Here we will use an async function to create a promise and get the data. We will also use try/catch to catch an error if something wrong happens.
We also set isLoading to ‘true’, so the process will be set as running :
import < useState >from 'react'; export type TApiResponse = < status: Number; statusText: String; data: any; error: any; loading: Boolean; >; export const useApiGet = (url: string): TApiResponse => < const [status, setStatus] = useState(0); const [statusText, setStatusText] = useState(''); const [data, setData] = useState(); const [error, setError] = useState(); const [loading, setLoading] = useState(false); const getAPIData = async () => < setLoading(true); try < const apiResponse = await fetch(url); const json = await apiResponse.json(); >catch (error) < >>; >; We are almost done !
Now let’s store the results in the different states, and at the end, set isLoading to false to declare that the process is finished:
import < useState >from 'react'; export type TApiResponse = < status: Number; statusText: String; data: any; error: any; loading: Boolean; >; export const useApiGet = (url: string): TApiResponse => < const [status, setStatus] = useState(0); const [statusText, setStatusText] = useState(''); const [data, setData] = useState(); const [error, setError] = useState(); const [loading, setLoading] = useState(false); const getAPIData = async () => < setLoading(true); try < const apiResponse = await fetch(url); const json = await apiResponse.json(); setStatus(apiResponse.status); setStatusText(apiResponse.statusText); setData(json); >catch (error) < setError(error); >setLoading(false); >; >; To finish our custom hook, we need to trigger the function we have crated. To do so, we use another standard hook : useEffect().
This hook will execute code when the component loads or some variable has changed.
We will only use it when the component is loaded for our purpose.
We need first to import it and use it to call our function :
import < useState, useEffect >from 'react'; export type TApiResponse = < status: Number; statusText: String; data: any; error: any; loading: Boolean; >; export const useApiGet = (url: string): TApiResponse => < const [status, setStatus] = useState(0); const [statusText, setStatusText] = useState(''); const [data, setData] = useState(); const [error, setError] = useState(); const [loading, setLoading] = useState(false); const getAPIData = async () => < setLoading(true); try < const apiResponse = await fetch(url); const json = await apiResponse.json(); setStatus(apiResponse.status); setStatusText(apiResponse.statusText); setData(json); >catch (error) < setError(error); >setLoading(false); >; useEffect(() => < getAPIData(); >, []); return < status, statusText, data, error, loading >; >; Now that our hook is done let’s call it in the main application.
Use the custom hook
In our example, we will call the hook to fetch a movie database API and console.log the result.
We need to create an account on omdbapi.com to get a free API key required to pull the data.
In the file App.tsx, we will :
- import the type and the custom hook
- add the call to the API and store the result in a variable called data
Then to display the result, I will use the property loading from the response to avoid multiple print during the process:
import React from 'react'; import logo from './logo.svg'; import './App.css'; import < useApiGet, TApiResponse >from './hooks/useApiHook'; function App() < // call to the hook const data: TApiResponse = useApiGet( 'http://www.omdbapi.com/?s=Guardians&apikey=xxxxxxxx' ); // print the output if (!data.loading) console.log(data); return (  className="App-logo" alt="logo" />
 Edit src/App.tsx and save to reload.
Learn React ); > export default App; Run the app
Finally let’s run the app by typing in the console :
npm start
Conclusion
Hooks can be super handy and allow the creation of reusable functions. They have to follow some rules to build them and are very flexible.
For our example, we could go further and extend the function to handle parameters, other methods, some checks and controls, but I wanted to keep it simple to explain the principle.
Now I invite you to create custom hooks for your react apps, and feel free to share some usages in the comments.
Article also available on Medium
R e l a t a b l e C o d e
Step by Step guide on building a custom React hook in Typescript
Introduction
According to the results of the annual survey of the State of Javascript, it doesn’t seem like React nor Typescript is going anywhere anytime soon so it’s worth taking some time and learning how they work!
React hooks have revolutionized the way we can build React components as they tend to be considerably more intuitive than Class Components. However, one feature that isn’t taken advantage of nearly as much as it should be, is the ability to create custom hooks!
Custom hooks let us abstract away the logic of react components and re-use them! I suggest only doing this with logic that actually gets reused a ton throughout your web application.
More info about hooks can be found here.
For the sake of this article, the example I’m going to be creating is a useToggle hook! Toggling something in the UI is quite common so we should get a lot of mileage out of this one.
Building the hook
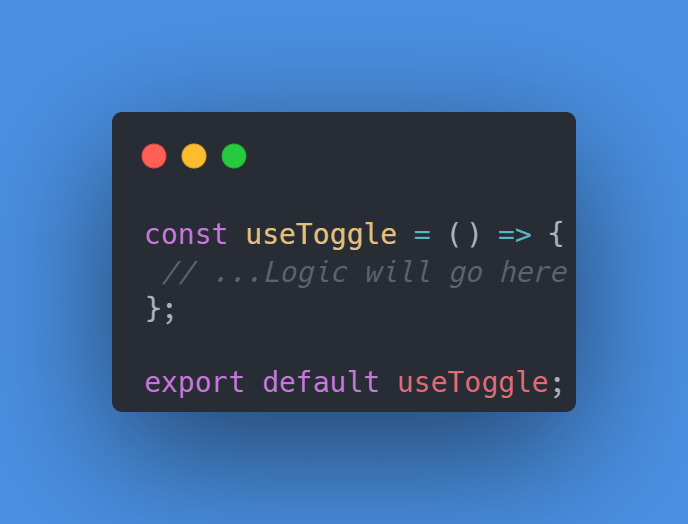
First, let’s create the file useToggle.ts , and let’s build the skeleton for our hook. All hooks must begin with the word use!
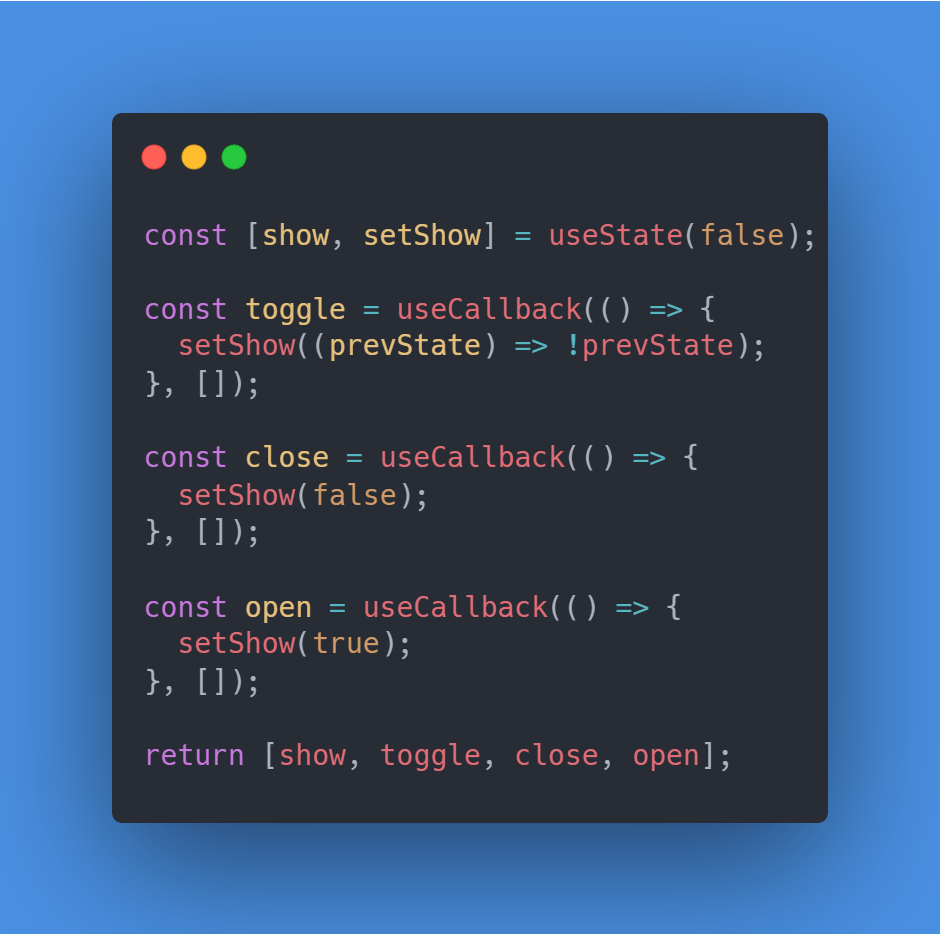
A toggle hook will typically just rely on toggling a boolean state from true to false and vice versa, however, to make it more complete let’s add some additional, optional, functionality to the hook where we can completely set it to false or true.
Let’s create the state and the skeleton of the functions:
You should import the appropriate hooks from React itself, in this case, useState and useCallback.
JavaScriptimport < useState, useCallback >from 'react';
The useState hook has access to the previous state, this is generally safer to use so we’ll just toggle it with this functionality. The other two functions, close and open, will set the state to either true or false directly. The state of the toggle and the three functions will get returned in an array.
Typescript
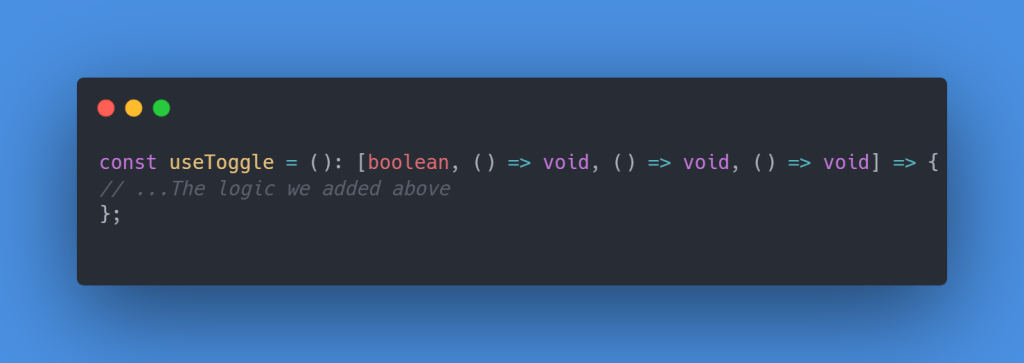
Last but not least, let’s give our hook some type-safety by letting the function know what we are expecting to return.
We return an array with the internal state of the hook, and the 3 functions to alter the state!
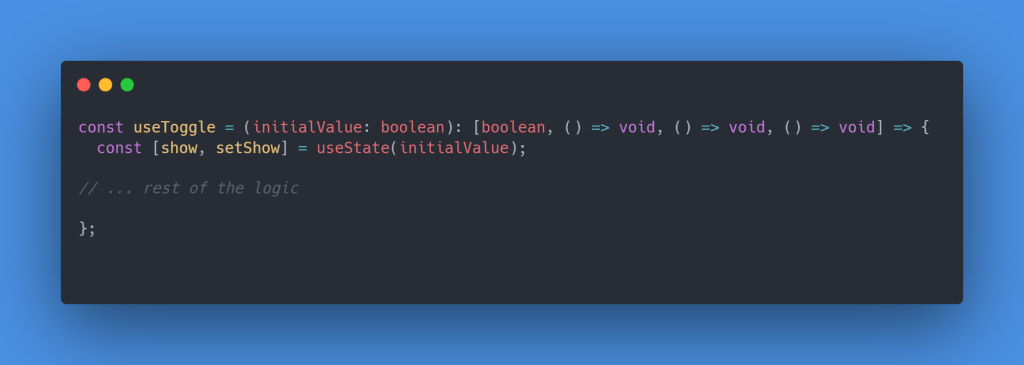
As a little extra we can add an initial state to the hook in case we want it to start off as closed or opened:
Conclusion
And that’s it! Hooks are a great way to abstract logic used in react components.
Here’s an example of the hook in action:
If you see any typos or errors you can edit the article directly on GitHub
Hi, I’m Diego Ballesteros 👋.
Stay on top of the tech industry and grow as a developerwith a curated selection of articles and news alongside personal advice, observations, and insight. 🚀
No spam 🙅♂️. Unsubscribe whenever.


