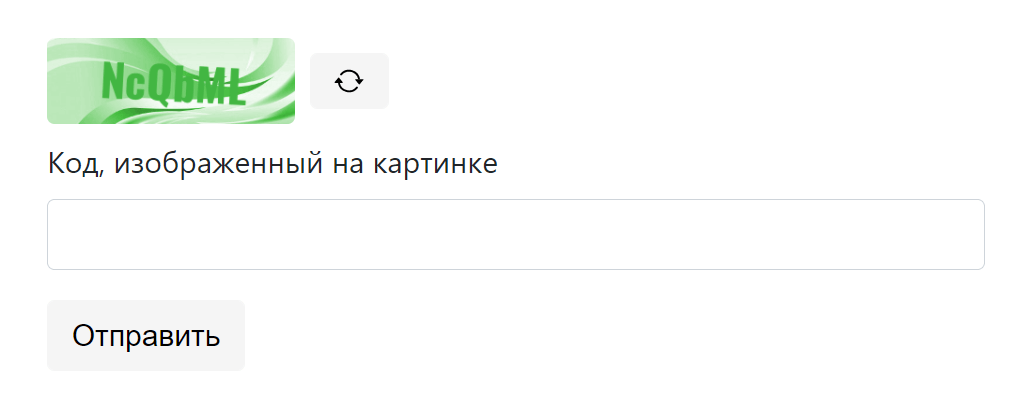
Код, изображенный на картинке
Отправить Генерация кода капчи и изображения Формирование кода капчи и изображения выполним в файле «captcha.php», который поместим в папку «/assets/php»:
Генерирование текста капчи выполняется очень просто. Для этого в переменную $chars помещаются символы, из которых она может состоять. Далее с помощью функции str_shuffle() эти символы случайным образом перемешиваются и посредством substr выбирается первые шесть из них.
Сохранении полученной капчи по умолчанию осуществляется в сессионную переменную. Но если хотите в куки, то установите переменной $use_session значение false :
Если используете протокол HTTPS, то установите шестому аргументу значение true:
setcookie('captcha', $value, $expires, '/', 'test.ru', true, true);Для отправки капчи клиенту создается изображение, имеющее фон «bg.png», на котором с помощью функции imagefttext() пишется текст капчи.
Код для обновления капчи при нажатию на кнопку .captcha__refresh :
// функция для обновления капчи const refreshCaptcha = (target) => { const captchaImage = target.closest('.captcha__image-reload').querySelector('.captcha__image'); captchaImage.src = '/assets/php/captcha.php?r=' + new Date().getUTCMilliseconds(); } // получение кнопки для обновления капчи const captchaBtn = document.querySelector('.captcha__refresh'); // запуск функции refreshCaptcha при нажатии на кнопку captchaBtn.addEventListener('click', (e) => refreshCaptcha(e.target));Добавление обработчика к кнопке выполняется через addEventListener .
Для обработки формы создадим файл «process-form.php» в папке «/assets/php/»
В этом файле будем сравнивать текст капчи, который пользователь ввел в форме с тем, который у нас хранится в сессии или куки.
false]; $code = $_POST['captcha']; if (empty($code)) { $result['errors'][] = ['captcha', 'Пожалуйста введите код!']; } else { $code = crypt(trim($code), '$1$itchief$7'); $result['success'] = $captcha === $code; if (!$result['success']) { $result['errors'][] = ['captcha', 'Введенный код не соответствует изображению!']; } } echo json_encode($result);В качестве результата будем возвращать JSON. В случае успеха:
В противном случае, success присвоим значение false , а в errors поместим ошибки:
{ success: false, errors: [ ['captcha', 'Пожалуйста введите код!'] ] }По умолчанию этот файл сравнивает капчу со значением, находящимся в сессии. Если в «captcha.php» сохраняете капчу в куки, то здесь необходимо закомментировать секцию 1a и раскомментировать 1b:
// 1a //session_start(); //$captcha = $_SESSION['captcha']; //unset($_SESSION['captcha']); //session_write_close(); // 1b $captcha = $_COOKIE['captcha']; unset($_COOKIE['captcha']); setcookie('captcha', '', time() - 3600, '/', 'test.ru', false, true);Если используете протокол HTTPS, то замените шестой аргумент на значение true :
//setcookie('captcha', '', time() - 3600, '/', 'test.ru', true, true);Код для отправки формы на сервер через AJAX и обработки полученного результата:
const form = document.querySelector('#form'); form.addEventListener('submit', (e) => { e.preventDefault(); try { fetch(form.action, { method: form.method, credentials: 'same-origin', body: new FormData(form) }) .then((response) => { return response.json(); }) .then((data) => { document.querySelectorAll('input.is-invalid').forEach((input) => { input.classList.remove('is-invalid'); input.nextElementSibling.textContent = ''; }); if (!data.success) { refreshCaptcha(form.querySelector('.captcha__refresh')); data.errors.forEach(error => { console.log(error); const input = form.querySelector(`[name="${error[0]}"]`); if (input) { input.classList.add('is-invalid'); input.nextElementSibling.textContent = error[1]; } }) } else { form.reset(); form.querySelector('.captcha__refresh').disabled = true; form.querySelector('[type=submit]').disabled = true; document.querySelector('.form-result').classList.remove('d-none'); } }); } catch (error) { console.error('Ошибка:', error); } }); В этом коде отправка данных через AJAX выполняется посредством fetch() . Получение данных формы с использованием FormData .
Для отправки и получения cookie посредством fetch() установим:
Если в success находится значение false , то будем помечать поля, которые не прошли валидацию и выводить подсказки:
if (!data.success) { refreshCaptcha(form.querySelector('.captcha__refresh')); data.errors.forEach(error => { console.log(error); const input = form.querySelector(`[name="${error[0]}"]`); if (input) { input.classList.add('is-invalid'); input.nextElementSibling.textContent = error[1]; } }) }
Если в success содержится значение true , то будем очищать поля и выводить сообщение об успешной отправки формы:
form.reset(); form.querySelector('.captcha__refresh').disabled = true; form.querySelector('[type=submit]').disabled = true; document.querySelector('.form-result').classList.remove('d-none');Источник
Create Custom Captcha in HTML CSS & JavaScript Hey friends, today in this blog, you’ll learn how to create Custom Captcha in HTML CSS & JavaScript. In the earlier blog, I have shared how to Detect User Browser using JavaScript, and it’s time to create a simple captcha program. Mostly, Captcha is used on the comment or contact form of the websites to restrict robots (bot) from commenting on a blog post or sending a message to the admin. There can be random images or codes in the captcha, and the users must have to select correct images or match the codes to complete their task. In this small project [Custom Captcha in JavaScript], there is an image with the random 6 characters and numbers. You can also refresh the captcha code and get a new one using the reload button. In the input field, you have to enter the captcha codes that are shown on the image. If your codes matched with the captcha codes, then there is appears a success message else there appears an error message. If you’ve matched the codes, then after 4 seconds there will be generated a new one captcha code. Recommended Book: Rich Dad Poor Dad Pdf I hope you liked this simple captcha program and want to get source codes but don’t worry I have given codes and source code files at the bottom of this page from where you can copy-paste codes the source code files. But before copying codes, let’s understand the basic codes and concepts of this program. At first, in the JavaScript file, I have stored all characters and numbers in the array, then inside for loop, using Math.random() function I got 6 random characters from the given array. And passed these codes or characters in the captcha by adding space between each character. After this, I got user-entered values, split them, and joined them with space (‘ ‘) so users don’t need to enter spaces to match the codes. Once I joined the user values then I matched this user value with the captcha codes. If the value is not matched I’ve shown an error message, and if the value is matched I’ve shown a success message and generate the new random codes after 4 seconds using the setTimeout() function.
Create Custom Captcha in JavaScript [Source Codes] To create this program [Custom Captcha in JavaScript] . First, you need to create three Files: HTML, CSS & JavaScript File . After creating these files just paste the following codes into your file. First, create an HTML file with the name of index.html and paste the given codes into your HTML file. You’ve to create a file with .html extension and remember the image that is used on this program will not appear.
Last, create a JavaScript file with the name of script.js and paste the given codes in your JavaScript file. Remember, you’ve to create a file with .js extension.
const captcha = document.querySelector(".captcha"), reloadBtn = document.querySelector(".reload-btn"), inputField = document.querySelector(".input-area input"), checkBtn = document.querySelector(".check-btn"), statusTxt = document.querySelector(".status-text"); //storing all captcha characters in array let allCharacters = ['A', 'B', 'C', 'D', 'E', 'F', 'G', 'H', 'I', 'J', 'K', 'L', 'M', 'N', 'O', 'P', 'Q', 'R', 'S', 'T', 'U', 'V', 'W', 'X', 'Y', 'Z', 'a', 'b', 'c', 'd', 'e', 'f', 'g', 'h', 'i', 'j', 'k', 'l', 'm', 'n', 'o', 'p', 'q', 'r', 's', 't', 'u', 'v', 'w', 'x', 'y', 'z', 0, 1, 2, 3, 4, 5, 6, 7, 8, 9]; function getCaptcha()< for (let i = 0; i < 6; i++) < //getting 6 random characters from the array let randomCharacter = allCharacters[Math.floor(Math.random() * allCharacters.length)]; captcha.innerText += ` $`; //passing 6 random characters inside captcha innerText > > getCaptcha(); //calling getCaptcha when the page open //calling getCaptcha & removeContent on the reload btn click reloadBtn.addEventListener("click", ()=>< removeContent(); getCaptcha(); >); checkBtn.addEventListener("click", e =>< e.preventDefault(); //preventing button from it's default behaviour statusTxt.style.display = "block"; //adding space after each character of user entered values because I've added spaces while generating captcha let inputVal = inputField.value.split('').join(' '); if(inputVal == captcha.innerText)< //if captcha matched statusTxt.style.color = "#4db2ec"; statusTxt.innerText = "Nice! You don't appear to be a robot."; setTimeout(()=>< //calling removeContent & getCaptcha after 2 seconds removeContent(); getCaptcha(); >, 2000); >else < statusTxt.style.color = "#ff0000"; statusTxt.innerText = "Captcha not matched. Please try again!"; >>); function removeContent() That’s all, now you’ve successfully created a Custom Captcha in HTML CSS & JavaScript . So this is all for today. Also Read
Источник
Установака recaptcha v2 на сайт Пример подключения ReCaptcha на сайт, регистрация в API, вставка кода в форму, проверка правильности введенной капчи.
Регистрация сайта в сервисе ReCaptcha Итак, сначала нужно добавить сайт в ReCaptcha API перейдя по ссылке https://www.google.com/recaptcha/admin/create (нужна авторизация), в форме нужно указать название и домен сайта где будет использоваться капча.
Вывод на сайте Одна капча на странице Чтобы вывести капчу в форме, нужно подключить api.js и добавить
c классом g-recaptcha и атрибутом data-sitekey с открытым ключом.
Пример: Несколько recaptcha на странице Форма #1 Форма #2 Пример: Проверка заполнения капчи в PHP После отправки формы, на стороне сервера, введённый ответ капчи (будет в $_POST['g-recaptcha-response'] ) нужно отправить на https://www.google.com/recaptcha/api/siteverify вместе с секретным ключом и получить положительный или отрицательный ответ. Данное действие можно реализовать двумя способами:
Вариант на curl (через POST) $error = true; $secret = 'СЕКРЕТНЫЙ_КЛЮЧ'; if (!empty($_POST['g-recaptcha-response'])) < $curl = curl_init('https://www.google.com/recaptcha/api/siteverify'); curl_setopt($curl, CURLOPT_RETURNTRANSFER, true); curl_setopt($curl, CURLOPT_POST, true); curl_setopt($curl, CURLOPT_POSTFIELDS, 'secret=' . $secret . '&response=' . $_POST['g-recaptcha-response']); $out = curl_exec($curl); curl_close($curl); $out = json_decode($out); if ($out->success == true) < $error = false; >> if ($error) Вариант на file_get_contents $error = true; $secret = 'СЕКРЕТНЫЙ_КЛЮЧ'; if (!empty($_POST['g-recaptcha-response'])) < $out = file_get_contents('https://www.google.com/recaptcha/api/siteverify?secret=' . $secret . '&response=' . $_POST['g-recaptcha-response']); $out = json_decode($out); if ($out->success == true) < $error = false; >> if ($error) Проверка reCAPTCHA в JS/jQuery Источник