CSS: lighten an element on hover
Assuming an element is at 100% saturation, opacity, etc. how can I have its background become slightly lighter when it is hovered? The use case is that I’m allowing a user to hover over any element on a page. I don’t want to go around determining each colors equivalent at 80% opacity. One method is to change the opacity: 0.4 but I only want the background to change.
is it a colour you want to change or an background image? If the colour you can use a HSL() value and increase the lightness value (the last one).
7 Answers 7
It’s a long time ago but you can do something like this:
You can change the 100px into a number you want. I took a large one to cover the whole element.
It isn’t a very beautiful solution but it works!
This is absolutely sweet! the best thing is it works on elements with any kind of background or gradient etc. This should be the accepted answer IMO. Note that the inset value should be last not first though.
This also works to darken an element if you change the three 255 to 0 which will change white to black.
Here’s an easy way to do it:
This actually is a good quick and easy solution if you don’t need to support IE11. Filter’s are the future for sure though, rather than having to use a pseudo element hack. However answer should be edited to remove the -webkit prefix.
This helped me with a transparent PNG vuetify.js v-img, as the box-shadow solution was brightening the whole squared image as opposed as just the image, maybe I wasn’t targetting .v-image__image correctly or whatever, but why bother with that if this just worked, thanks!
I’m using box-shadow property to control the brightness of the background color, by placing a translucent overlay
.btn < background-color: #0077dd; display: inline-flex; align-content: center; padding: 1em 2em; border-radius: 5px; color: white; font-size: 18px; margin: 0.5em; cursor: pointer; >.btn.brighten:hover < box-shadow: inset 0 0 0 10em rgba(255, 255, 255, 0.3); >.btn.darken:hover
Brighten on Hover Darken on Hoveryou should use the RGBa method ( background-color:rgba(R,G,B,alpha); ) to do this:
AND if you strongly need to make it work in IE8 or lower too here is how it comes:
note that the startColorstr and endColorstr values are built like this #AARRGGBB (where AA is the Alpha channel) and must be the same if you don’t want a gradient effect from a color to another.
@roXon both pseudo-elements and rgba() are included in the CSS3 specification. Using CSS3 doesn’t necessarily preclude support for IE8. I was just pointing out a possible drawback of using rgba() .
i just think that we are now on v10 of IE, an (awful) browser that automatically updates itself together with the OS. people who use v8 or lower just dont know how to use a computer. Anyway i’m updating my answer with the IE8(and lower) solution.
I would use a :after pseudo-element instead of a conventional background. It’s supported in IE8, where rgba() isn’t.
Lorem ipsem gimme a dollar!
.hoverme < position: relative; >.hoverme:after < content: ""; position: absolute; top: 0; left: 0; bottom: 0; right: 0; background-color: #fff; z-index: -1; >.hoverme:hover:after
For a smoother result, add a CSS3 transition:
The previous snippet was copied and pasted from http://css3please.com
You can do this with only CSS using filter: brightness(); but it is only currently supported in WebKit browsers. See http://jsfiddle.net/jSyK7/
You want to change the background-color lightness of any element that is hovered without using opacity. Unfortunately. I don’t think this is possible without setting specific background-color values for your hovers.
The use case is that I’m allowing a user to hover over any element on a page. I don’t want to go around determining each colors equivalent at 80% opacity.
There is one alternative that I can think of but it would require a translucent PNG overlay on the entire element, which will also cover any of the element’s contents. Thereby not solving your problem.
Фильтры CSS и ховер эффекты
В прошлой статье я показала несколько кодов с ховер эффектами на css для картинок. Сегодня немного расскажу о фильтрах. Фильтры css — это те же фильтры, что и в графических редакторах. Фотографии и рисунки с фильтрами можно добавить в статью в редакторе блога, в режиме хтмл или в гаджеты. Так же можно применить эффекты к оформлению внешнего вида блога. Фильтры можно применять как с ховер эффектом, так и без него. Применение фильтров сss притормаживает загрузку сайта.
Фильтры
blur — размытие по Гауссу. Чем больше значение радиуса, тем больше размытие.
brightness — яркость изображения. Чем больше значение, тем ярче изображение.
contrast — контрастность изображения. Значение задается в % или в десятичных дробях.
drop-shadow — тень.
grayscale — черно-белое изображение. Чем больше значение, тем сильнее эффект.
hue-rotate — меняет цвета изображения в зависимости от заданного угла поворота в цветовом круге.
invert — негатив изображения. Значение задается в %. 0% не применяет фильтр, 100% полностью преобразует цвета.
opacity — добавляет прозрачность элементу. Значение задается только в %, 0% делает элемент полностью прозрачным, а 100% не оказывает никакого эффекта.
saturate — насыщенность цвета. Значение 0% убирает цветность, а 100% не оказывает никакого эффекта. Значения от 0% до 100% уменьшают насыщенность цвета, выше 100% — увеличивают насыщенность цвета. Значение может задаваться как в %, так и целым числом, 1 эквивалентно 100%.
sepia — эффект, имитирующий старину и «ретро». Значение 0% не изменяет внешний вид элемента, а 100% полностью воспроизводит эффект
Эффекты для картинок

описание картинки » src=»https://inshabashka.blogspot.com/2019/08/%D0%B2%D0%B0%D1%88%D0%B0%20%D0%BA%D0%B0%D1%80%D1%82%D0%B8%D0%BD%D0%BA%D0%B0″/>

описание картинки » src color: blue;»>ваша картинка »/>

описание картинки » height color: purple;»>281 » src color: blue;»>ваша картинка » width color: purple;»>400 »/>

описание картинки » height color: lime;»>283 » src color: blue;»>ваша картинка » width color: lime;»>400 »/>

адрес картинки » alt color: red;»>описание » >

описание картинки » height color: red;»>270 » src color: blue;»>ваша картинка » width color: red;»>400 »/>

описание » height color: orange;»>270 » src=»https://inshabashka.blogspot.com/2019/08/%D0%B0%D0%B4%D1%80%D0%B5%D1%81%20%D0%BA%D0%B0%D1%80%D1%82%D0%B8%D0%BD%D0%BA%D0%B8″ width color: orange;»>400 »/>
Оранжевым в коде выделила размер.

описание картинки » height color: orange;»>283 » src=»https://inshabashka.blogspot.com/2019/08/%D0%B2%D0%B0%D1%88%D0%B0%20%D0%BA%D0%B0%D1%80%D1%82%D0%B8%D0%BD%D0%BA%D0%B0″ width color: orange;»>400 »/>

описание картинки » height color: red;»>282 » src color: blue;»>картинка » width color: red;»>400 »/>
Ширину и высоту картинки в коде выделила красным.
Насыщенность цвета на картинке

описание картинки » src color: red;»>ваша картинка »/>
Хотелось бы сказать, что эффекты и фильтры можно использовать вместе и по раздельности. На сайте https://codepen.io/SitePoint/pen/KrXybm нашла замечательную картинку, оформленную фильтрами. На картинке используется изменение яркости и контрастности, так же добавлен эффект сепия. Очень красиво смотрится! И сложно поверить что сделана картинка из фильтров, анимации на css.

Генераторы фильтров
- https://www.cssfilters.co/
- https://cssgenerator.org/filter-css-generator.html
- https://www.cssfiltergenerator.com/
- https://atlogex.com/css-online-filter-image-generate/
- https://cssportal.com/css-image-filter-generator/
- http://doodlenerd.com/css-effect/css-filter-generator
- https://webcode.tools/css-generator/blur (много генераторов на одном сайте)
- https://www.bestagencies.com/tools/filter-effects-css-generator/
- https://ilyashubin.github.io/FilterBlend/
- http://blog.mojtabaseyedi.com/css-filters/
- http://ds-overdesign.com/filter/
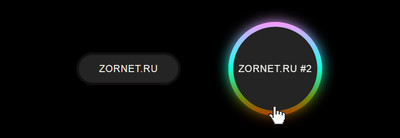
Эффект свечения при наведении на HTML и CSS
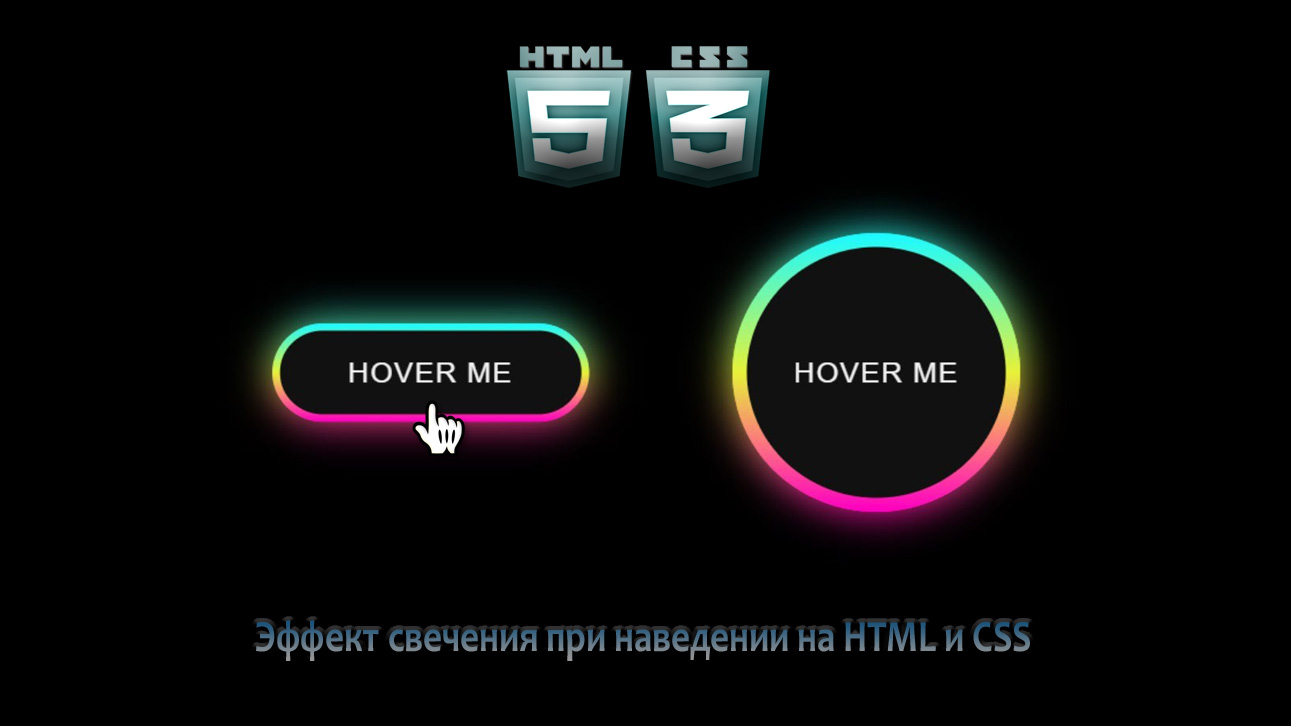
Что таким же образом можно самостоятельно подключить под разные элементы, где вам нужно видеть такой яркий эффект, это от разного строение, до простой кнопки. Как уже можно понять, что изначально эти кнопки находятся на начальной стадии, когда на них нет эффектов свечения. Но когда вы наведете на него курсор, он начнет светиться на заднем плане, что отлично смотрится на темном фоне, а также на светлом, где просто стилистику цвета подгоняем под свой стиль сайта.
При проверки по корректной работе:
.kentrovos <
display: flex;
text-align: center;
align-items: center;
justify-content: center;
>
.adekopas <
position: relative;
margin: 0 50px;
background: #111;
>
.knopas <
height: 68px;
width: 218px;
border-radius: 50px;
>
.cumerence <
height: 196px;
width: 196px;
border-radius: 50%;
>
.adekopas button, .adekopas span <
position: absolute;
top: 50%;
left: 50%;
transform: translate(-50%, -50%);
>
.adekopas button <
background: #252424;
color: #eceaea;
outline: none;
border: none;
font-size: 20px;
z-index: 9;
letter-spacing: 1px;
text-transform: uppercase;
cursor: pointer;
>
.knopas button <
height: 58px;
width: 208px;
border-radius: 50px;
>
.cumerence button <
height: 176px;
width: 176px;
border-radius: 50%;
>
.adekopas span <
height: 100%;
width: 100%;
background: inherit;
>
.knopas span <
border-radius: 50px;
>
.cumerence span <
border-radius: 50%;
>
.adekopas:hover span:nth-child(1) <
filter: blur(7px);
>
.adekopas:hover span:nth-child(2) <
filter: blur(14px);
>
.adekopas:hover <
background: linear-gradient(#11ecd8, #efd80e, #ec0dd1);
animation: rotate 1.5s linear infinite;
>
@keyframes rotate <
0% <
filter: hue-rotate(0deg);
>
100% <
filter: hue-rotate(360deg);
>
>
@media (max-width: 640px) <
.kentrovos <
flex-wrap: wrap;
flex-direction: column;
>
.adekopas <
margin: 50px 0;
>
>
Надеюсь, вам понравился этот эффект свечения и вы поняли основные коды и концепции. Если вы новичок и у вас есть базовые знания HTML и CSS, вы также можете создать этот тип анимации.