- Шрифты CSS
- Смотрите также:
- How to include a font in CSS
- Importing a font via HTML
- Importing a font via CSS
- Using the @import rule
- Defining a font (font in a folder)
- How to Import Google Fonts in CSS File
- Create HTML
- Add CSS
- Example of importing two Google Fonts with the @import rule:
- Example of importing a Google Font with the @import rule:
- Example of importing Google Fonts with the tag:
- How to use google fonts, and comply with privacy policy rules?
Шрифты CSS
Шрифты на сайте являются одним из основных факторов, отвечающих за качество и степень восприятия представленной на сайте информации. Всем известно, что стандартная коллекция шрифтов довольно скудна и скучна, поэтому очень часто становится необходимым использование сторонних шрифтов. Также шрифты HTML помогают в создании собственного стиля компании.
Достаточно богатую коллекцию шрифтов имеет сервис Google Fonts. Также с помощью него довольно просто подключить шрифт к себе на сайт.
Существует 2 основных способа, как подключить шрифт к сайту:
- С помощью HTML: Между тегами необходимо вставить строку следующего содержания:
@import url(http://fonts.googleapis.com/css?family=Ubuntu);Также сторонние шрифты можно подключить с помощью JavaScript, но ввиду малой актуальности данного метода мы его здесь приводить не будем.
После подключения нужного шрифта мы сможем его использовать следующим образом:
Здесь шрифт Ubuntu применяется к тегу H1 (Название шрифта указывается в свойстве font family.) и цвет шрифта устанавливается с помощью тега color.
При использовании шрифтов от Google необходимо помнить, что отображение нужного шрифта может не поддерживаться в некоторых браузерах (кроме Google Chrome).
В конструкторе сайтов «Нубекс» имеется встроенная коллекция веб-шрифтов, которые можно выбирать непосредственно в настройках дизайна сайта.
Смотрите также:
How to include a font in CSS
Adding a font to a page can be done with both HTML and CSS. Depending on your requirements you can use any of the approaches.
In this article, I will guide you through both approaches in detail of including a font.
Importing a font via HTML
Including a font with HTML is useful when you need to include a Google Font or any other 3rd party font that is hosted on a remote server.
To do that you can use the element with the href attribute that is equal to the URL of the font in the of your page.
href="https://fonts.googleapis.com/css2?family=Roboto&display=swap" rel="stylesheet"> Google Fonts will offer you a ready code snippet that you can insert into your HTML code.
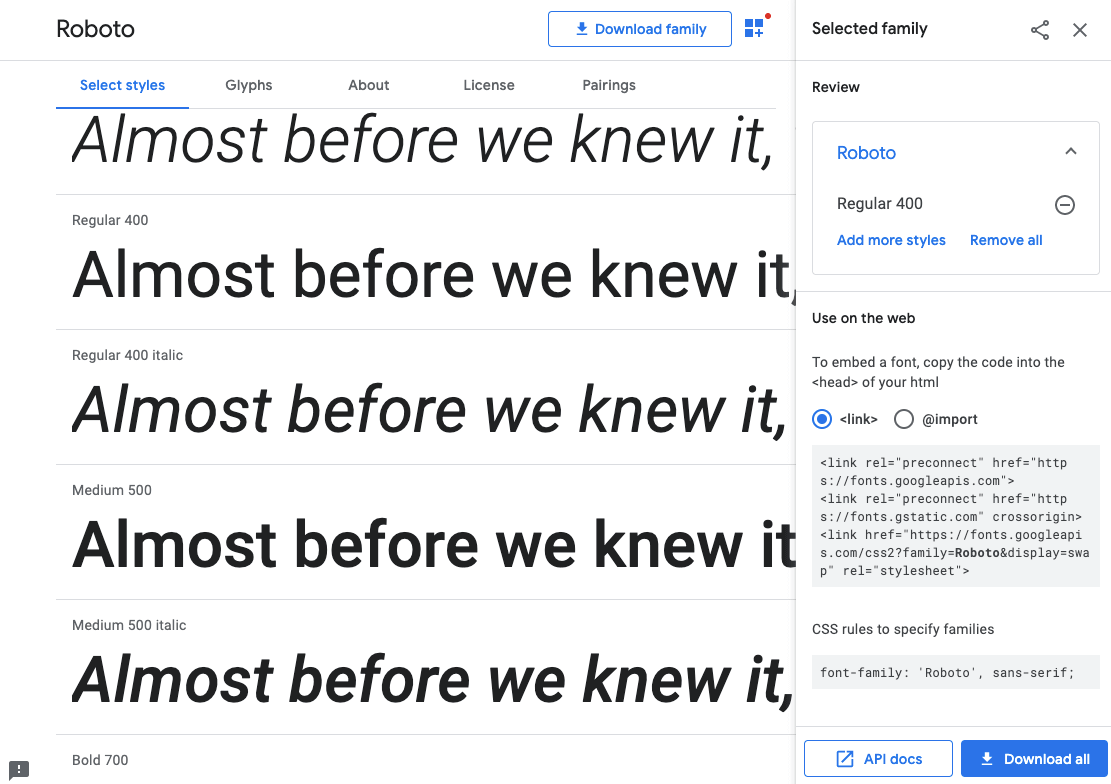
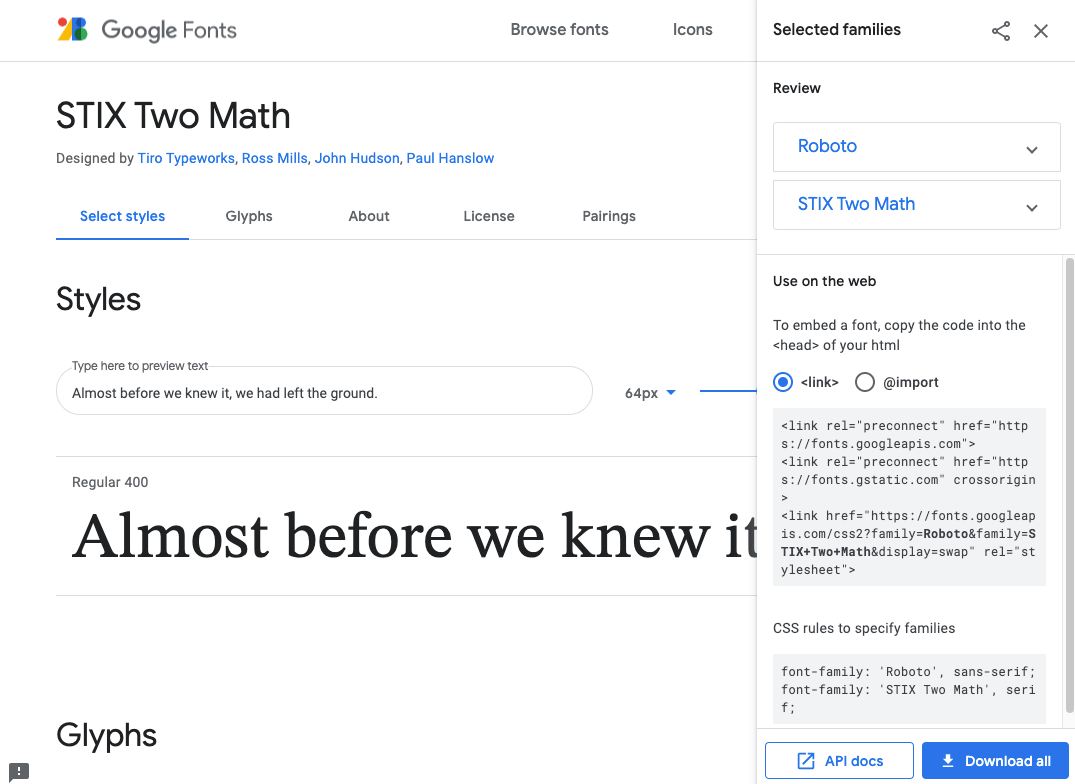
That way you can add multiple fonts to your page. For each font, you can specify a element with a unique URL. However, Google Fonts allows you to select multiple fonts and it will generate a single element with all the fonts included as a URL query.
To then apply an imported font to a text use the font-family property.
p font-family: 'Roboto', sans-serif; > Google Fonts is a fast and easy way to include multiple fonts on your page. However, there are some points you should consider when using this approach, such as:
- The request to the remote server may fail, which will result in a font not being loaded;
- The request response time may take longer than from a self-hosted font, which affects page loading time;
- There can be privacy issues with loading Google Fonts (see GDPR).
Importing a font via CSS
You can also include a font with CSS. This approach is quite handy when you don’t have access to the HTML of the page as well as it is more flexible and allows for more customization.
Using the @import rule
The first way to include a font is to use the @import rule. Inside your CSS file or inside the tag on your page define the @import rule with the specified URL of the font.
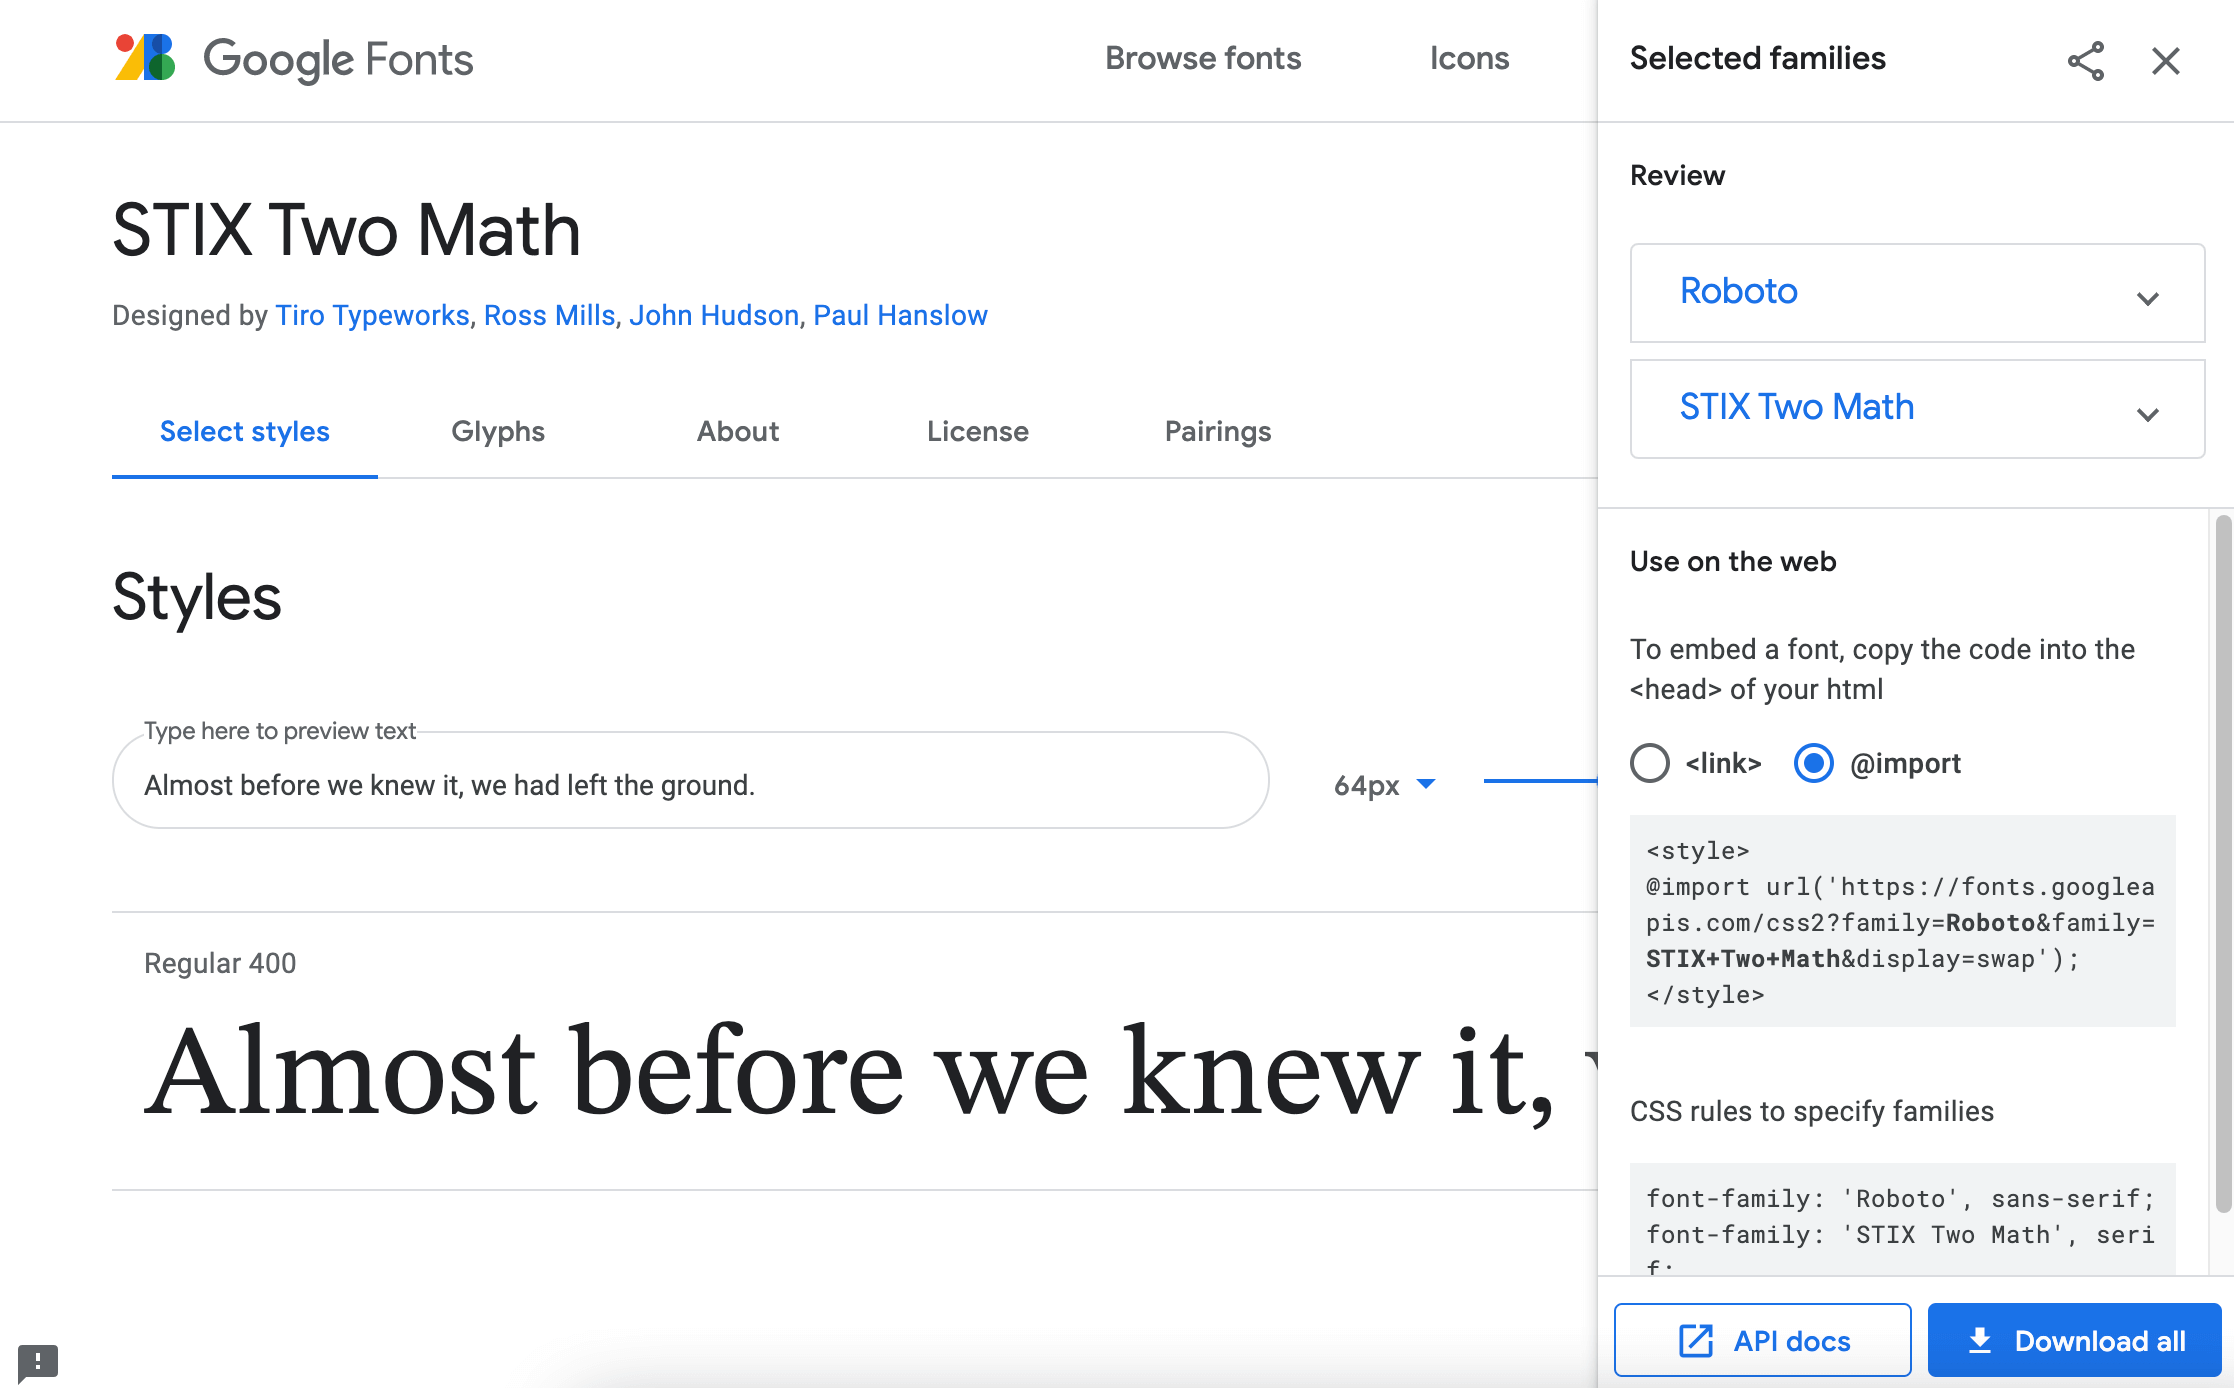
@import url('https://fonts.googleapis.com/css2?family=Roboto&display=swap'); If you’re importing Google Fonts, then like in the example above they provide you with code snippet for the @import .
Use the font-family property the same way when applying the font to the text.
body font-family: 'Roboto', sans-serif; > Defining a font (font in a folder)
If you’re concerned about the page load time or the GDPR related issues, or if you have a custom font that’s not a Google Font, you can self-host a font.
In this case, you’ll need to have the font files stored in a separate folder of your project.
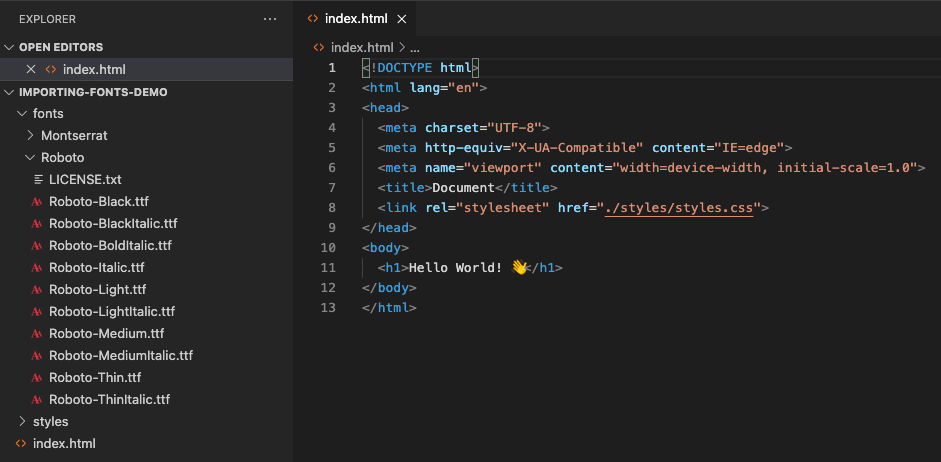
And then you’ll need to define your custom font in the CSS file using the @font-face rule by specifying the font name and providing the path to your font files.
@font-face font-family: "Roboto"; src: url("/fonts/Roboto-Medium.ttf") format("truetype"); font-weight: 400; > @font-face font-family: "Roboto"; src: url("/fonts/Roboto-Bold.ttf") format("truetype"); font-weight: 700; > To apply this font, again you’ll need to use font-family property:
body font-family: 'Roboto', sans-serif; font-weight: 400; > h1 font-family: inherit; font-weight: 700; > How to Import Google Fonts in CSS File
An essential part of any design is the chosen font. Google Fonts is a free service of web fonts that allows us to use a large variety of fonts in our CSS file.
- Find the font and click it (a card with the font), then, click «+ Select this style». On the right side, you’ll see a container with the name «Selected family».
- Click «Embed» and choose or @import depending on where you need to add the font (in HTML or CSS).
- Copy/paste the codes you need.
First, we’ll demonstrate an example with the @import rule.
Create HTML
h1>Lorem Ipsum h1> p> Lorem Ipsum is simply dummy text of the printing and typesetting industry. Lorem Ipsum has been the industry's standard dummy text ever since the 1500s, when an unknown printer took a galley of type and scrambled it to make a type specimen book. p>Add CSS
- Import the “Muli” and “Quicksand” Google Fonts for the and , respectively.
- Specify the font-family for each of the elements ( and ).
- Style the two elements separately using the following properties: color, font-weight, font-style, font-size, line-height, letter-spacing, and other properties.
@import url('https://fonts.googleapis.com/css?family=Muli&display=swap'); @import url('https://fonts.googleapis.com/css?family=Quicksand&display=swap'); body < font-family: 'Muli', sans-serif; color: rgba(0, 0, 0, 0.8); font-weight: 400; line-height: 1.58; letter-spacing: -.003em; font-size: 20px; padding: 70px; > h1 < font-family: 'Quicksand', sans-serif; font-weight: 700; font-style: normal; font-size: 38px; line-height: 1.15; letter-spacing: -.02em; color: rgba(0, 0, 0, 0.8); -webkit-font-smoothing: antialiased; >Now, you can see the final code.
Example of importing two Google Fonts with the @import rule:
html> html> head> title>Title of the document title> style> @import url('https://fonts.googleapis.com/css?family=Muli&display=swap'); @import url('https://fonts.googleapis.com/css?family=Quicksand&display=swap'); body < font-family: 'Muli', sans-serif; color: rgba(0, 0, 0, 0.8); font-weight: 400; line-height: 1.58; letter-spacing: -.003em; font-size: 20px; padding: 70px; > h1 < font-family: 'Quicksand', sans-serif; font-weight: 700; font-style: normal; font-size: 38px; line-height: 1.15; letter-spacing: -.02em; color: rgba(0, 0, 0, 0.8); -webkit-font-smoothing: antialiased; > style> head> body> h1>Lorem Ipsum h1> p> Lorem Ipsum is simply dummy text of the printing and typesetting industry. Lorem Ipsum has been the industry's standard dummy text ever since the 1500s, when an unknown printer took a galley of type and scrambled it to make a type specimen book. p> body> html>In the example above, we imported only two Google Fonts. They must always be the first line in the CSS file. It isn’t recommended to import too many fonts so as to provide better loading speed.
Let’s see another easier example where we import only one font.
Example of importing a Google Font with the @import rule:
html> html> head> title>Title of the document title> style> @import url('https://fonts.googleapis.com/css2?family=Lora&display=swap'); h1 < font-family: 'Lora', serif; color: #000000; text-align: center; > style> head> body> h1>Lorem Ipsum h1> body> html>It is also possible to import Google Fonts using the HTML tag. You must add it to the header.
Example of importing Google Fonts with the tag:
html> html> head> title>Title of the document title> link href="https://fonts.googleapis.com/css?family=Dosis&display=swap" rel="stylesheet"> style> h1 < font-family: 'Dosis', sans-serif; color: #777777; text-align: center; > style> head> body> h1>Lorem Ipsum h1> body> html>How to use google fonts, and comply with privacy policy rules?
You can use Google Fonts without importing them from the Google Fonts URL by using the @font-face rule. This method allows you to download the font files and host them on your own server, so you can comply with privacy policy rules in your country.
Here’s an example of how to use Google Fonts with @font-face in a separate CSS file:
- Go to the Google Fonts website (https://fonts.google.com/) and choose the font you want to use.
- Click on the «Select This Font» button to add the font to your collection.
- In the collection drawer that appears at the bottom of the page, click on the «Customize» button to select the font styles and character sets you want to use.
- Once you’ve made your selections, click on the «Embed» tab to view the code you need to add to your CSS file.
- Copy the @font-face rule from the code and paste it into your CSS file. Here’s an example:
/* Import the font using @font-face */ @font-face < font-family: 'Open Sans'; font-style: normal; font-weight: 400; src: local('Open Sans Regular'), local('OpenSans-Regular'), url('/fonts/OpenSans-Regular.ttf') format('truetype'); > /* Use the font in your CSS */ body < font-family: 'Open Sans', sans-serif; >In this example, we’re importing the Open Sans font using the @font-face rule. The font is being downloaded from the URL «/fonts/OpenSans-Regular.ttf» on our own server, but you can host it anywhere you like. We’re also specifying a local font name, which will be used if the font is already installed on the user’s computer. Finally, we’re using the font in the body of our CSS.
Note that you’ll need to include the font file on your server and change the URL in the @font-face rule to point to the correct location.