- How I built a mood changing animation using CSS masks
- How I built a mood changing animation using CSS masks
- CSS Mask Animation Looking Very Jittery
- Mask box animation with CSS?
- SVG Animation with CSS and SVG mask
- Как я создал меняющую настроения анимацию с помощью масок CSS
- Приступим
- Создание базовой маски
- Добавление анимации
- Применение функциональных возможностей
- Одно важное замечание
- Анимированные маски CSS.
- свойство маски css:
How I built a mood changing animation using CSS masks
Now has this cool option which allows multiple images to be used as masks. This is what we have now: One of the most important properties of CSS masks is , which positions the mask from the top left corner relative to its parent.
How I built a mood changing animation using CSS masks
“shallow focus photography of black monkey” by Tobias Mrzyk on Unsplash
Remember the cartoons we used to watch during our childhood? At that time they were the epitome of animations. Nowadays, animations aren’t just limited to cartoons — we come across them almost everyday when we check our phone or look at any device which has a screen.
Today, animation is used not only to attract attention but to enhance the user experience and guide user flow. In any good design, animations are added in such a way that they blend with the common flow, thus creating a seamless user experience.
So, in this article we will build a simple animation of a face with different expressions, and we’ll learn a little bit of CSS in that process.
Getting started
We will use a CSS technique which is somewhat rare among web developers, but that designers use quite often. It is called masking .
So what comes to your mind when you hear “mask?”
You’re probably picturing a cover on top of something. That’s all we need to understand.
Wait — but this article is related to coding and using CSS animation…
Don’t worry! We’ll get right to it.
Creating the basic mask
Let say we have a w ith a background: green; and it looks something like this:
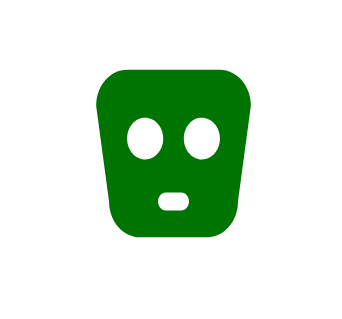
If we apply a CSS property mask-image: url(face.svg); on the , you’ll be amazed to see what we get:
You might be thinking that something is odd here. The face.svg was placed over the , but it took up the color o f the back ground. This is the opposite of what you might have expected. This happens because o f the mas k-type property which makes the opaque part of the svg transparent. This allows the background color to be visible.
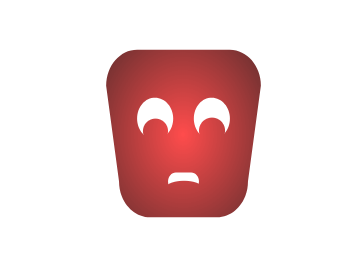
Let’s not get deeper into that now. Just keep in mind that we can use background-color to change the color of the mask. If you are familiar with different ways of using background-color , we can also use gradients and write a simple gradient which fills red in the center and radially spreads into black outwards. The code for that is the following:
background-image: -webkit-radial-gradient( hsla(0, 100%, 50%, .7), hsla(0, 100%, 20%, .8), hsla(0, 100%, 10%, 1));Adding the animation
Now let’s add some animation to this empty face. For this I have expression.svg which looks like the below image. For simplicity, I have created all the svgs with the same width and height, so that we avoid aligning the face and expression manually.
Now mask-image has this cool option which allows multiple images to be used as masks. So we can do this: mask-image: url(face.svg), url(expression.svg); . This is what we have now:
One of the most important properties of CSS masks is mask-position , which positions the mask from the top left corner relative to its parent. And I can position multiple masks using the property mask-position just like mask-image .
So to make the face sad, we can use something like this: mask-position: 0 0, 0 12px; . And the result is this:
The first position 0 0 is for the face.svg , and the second 0 12px is for expression.svg . This pushes it 12px from above and results in the above expression.
Applying functionality
Now let’s animate these expressions on hover. So the complete code we get after applying the hover pseudo class is the following:
transition: mask-position .5s ease-out;> mask-position: 0 0, 0 0; /* To make the happy expression */ transition: mask-position .1s linear;> After playing with the CSS a bit more, we can do this:
This is one of the methods we can use to build those gripping animations we come across almost daily.
One Important Note
The masking properties might not work across all the browsers. So to make them work in all the browsers, just prepend browser specific labels like -webkit- , -moz- & -0- .
You can look at the complete code here on github and codepen.
Thanks for reading! I hope you learned something.
Splash Image Mask using Html CSS, How to make a slick CSS animation from Upload (TV series title sequence) Rob OLeary — Jun 6 Display html form values in …
CSS Mask Animation Looking Very Jittery
I’m looking to create an effect with CSS masking where the masked image moves very slowly while the mask shape remains static. Right now I’m doing it with opposite animations, but as you can see it’s looking very jittery. Any ideas or suggestions are much appreciated! I am not opposed to a non-CSS-only solution either.
.masked-section < height: 800px; background-image: url(https://images.unsplash.com/photo-1420768255295-e871cbf6eb81?ixlib=rb-0.3.5&ixid=eyJhcHBfaWQiOjEyMDd9&s=fecaea6c506b84475edf1e4164944c38&auto=format&fit=crop&w=1050&q=80); background-size: cover; overflow:hidden; >.mask < mask-image: url(https://www.webascender.com/Portals/0/Blog/SVG-101/apple.svg); -webkit-mask-image: url(https://www.webascender.com/Portals/0/Blog/SVG-101/apple.svg); display: block; width: 120vw; height: auto; margin: 0 auto; mask-mode: alpha; -webkit-mask-mode: alpha; mask-repeat: no-repeat; -webkit-mask-repeat: no-repeat; mask-size: 15%; -webkit-mask-size: 15%; mask-position: 31vw 150px, center; -webkit-mask-position: 31vw 150px, center; animation: test 100s infinite linear; >@keyframes test < 25% < transform: translate(-31vw, -150px); mask-position: 62vw 300px, center; -webkit-mask-position: 62vw 300px, center >50% < transform: translate(0, 0); mask-position: 31vw 150px, center; -webkit-mask-position: 31vw 150px, center;>75% < transform: translate(-31vw, -150px); mask-position: 62vw 300px, center; -webkit-mask-position: 62vw 300px, center; >> Use clip-path on a div containing the image. Apply the transitions to the image inside the div.
To use the clip-path you need to craft a svg for that like this:
And place it in the document.
Then link the clip-mask by applying clip-path: url(#svgPath) to the div.
CSS ONLY Animate Draw Circle with border-radius and, I tried to develop a way using javascript event listener to listen for when the animation is complete and rotate the half circle accordingly to get the full circle, but the problem I’m having is there is some lag time for when the event hits and the javascript to run the transform. the animation will complete, then the … Code sampleposition: absolute;border: solid 25px transparent;border-top-color: blue;border-left-color: blue;border-radius: 50%;Feedback
Mask box animation with CSS?
How does one accomplish a solid image wipe, from bottom to top, in CSS? I dont think Im using the right keywords but I need to do this https://codepen.io/viljamis/pen/KdBoYZ without the gradient. This definitely has an answer I just cant find the right syntax.
How can I modify this to be solid and bottom to top?
Try this one for your alternative ( You can check the snippet below with the hover mouse )
CSS Mask Animation Looking Very Jittery, I’m looking to create an effect with CSS masking where the masked image moves very slowly while the mask shape remains static. Right now I’m doing it with opposite animations, but as you can see it’s . Stack Overflow. About; Products For Teams; Stack Overflow Public questions & answers; Stack …
SVG Animation with CSS and SVG mask
I’ve started drawing a doughnut in SVG. And for some reason my mask doesnt work when I animate the bigger circle. (Bug on Chrome version 90.0.4430.212) I only plan to animate the bigger circle and not the whole SVG/Doughnut (I don’t want the smaller circle to animate I only want the bigger circle to scale). How do you animate SVG elements with a mask?
#myCircle < animation-name: scaleKeyframe; animation-duration: 1000ms; animation-iteration-count: infinite; transform-origin: 5px 5px; animation-play-state: paused; >svg:hover #myCircle < animation-play-state: running; >@keyframes scaleKeyframe < from < transform: scale(1); >to < transform: scale(0.1); >>I would still appreciate an answer about animating the element only and keeping the mask steady.
Just wrap your circle in a element, then apply the mask to that instead.
Unfortunately, the bug is affecting this as well. Fixed in Chrome 91.0.4472.77
#myCircle < animation-name: scaleKeyframe; animation-duration: 1000ms; animation-iteration-count: infinite; animation-play-state: paused; transform-origin: 5px 5px; >svg:hover #myCircle < animation-play-state: running; >@keyframes scaleKeyframe < from < transform: scale(1); >to < transform: scale(0.1); >>25 Days of CSS Animations: Teaching Myself CSS, 25 Days of CSS: Egg Head in Love — An animated version of a Dribble shot by MBE. 25 Days of CSS: Eggstraterrestrial — a twist on Marjo Sobrecary’s pen Glowing Meteor. 25 Days of CSS: Sun Blocked — a recreation of Gal Shir’s Dribbble animation. 25 Days of CSS: Beauty and the Beast’s Enchanted Rose — a twist …
Как я создал меняющую настроения анимацию с помощью масок CSS
Помните мультфильмы, которые мы смотрели в детстве? В то время они были олицетворением анимации. Сейчас анимация – это не только мультфильмы, мы встречаем ее почти каждый день, проверяя телефон или используя любое устройство, имеющее экран.
Сегодня анимация используется не только для привлечения внимания, но и для улучшения взаимодействия с пользователем, облегчения навигации. В любом хорошем дизайне анимацию добавляют таким образом, чтобы она сочеталась с общей концепцией, создавая тем самым удобный пользовательский интерфейс.

В этой статье мы создадим простую анимацию лица с разными выражениями, а в процессе узнаем немного о CSS.
Приступим
Мы будем использовать технику CSS, редко применяемую веб-разработчиками, но к которой довольно часто прибегают дизайнеры. Она называется маскирование.
Что приходит в голову, когда вы слышите слова «маска»? Вероятно, вы представили что-то, скрывающее суть. Это все, что нам нужно знать.
Подождите — но статья связана с написанием и использованием анимации CSS… Без паники! Все правильно!
Создание базовой маски
Положим, у нас есть тег div с background: green; и это выглядит примерно так:

Если мы применим свойство CSS mask-image: url (face.svg); к тегу div , то вы будете поражены, увидев результат:
Вы можете подумать, что это странно. Картинка face.svg была помещена поверх div , но приняла цвет фона. Это противоречит нашим ожиданиям. Происходит подобное из-за свойства mask-type , которое делает непрозрачную часть svg прозрачной. Тем самым цвет фона становится видимым.
Давайте не будет углубляться. Просто имейте в виду, что можно использовать background-color , чтобы изменить цвет маски. Если вы знакомы с различными способами использования background-color , то можете также применять градиенты и написать простой градиент, который заполнит центр красным цветом и радиально распространит черный цвет по краям. Код будет выглядеть следующим образом:
background-image: -webkit-radial-gradient( hsla(0, 100%, 50%, .7), hsla(0, 100%, 20%, .8), hsla(0, 100%, 10%, 1));
Добавление анимации
Теперь добавим анимацию на это пустое лицо. Для этого используем expression.svg , которое вы видите на изображении ниже. Для простоты я создал все файлы svg одинаковой ширины и высоты, поэтому не приходится выравнивать лица и выражения вручную.

Сейчас mask-image обладает классной опцией, которая позволяет использовать несколько изображений в качестве масок. Поэтому мы можем сделать так: mask-image: url (face.svg), url (expression.svg); . Вот что получилось:

Одним из самых важных свойств CSS масок является mask-position , благодаря которому маска располагается в верхнем левом углу относительно родительского элемента. И я могу расположить несколько масок, используя свойство mask-position так же, как mask-image . Чтобы сделать лицо грустным, используем что-то вроде этого: mask-position: 0 0, 0 12px; . Вот что получилось.
Первая позиция 0 0 для face.svg , а вторая 0 12px — для expression.svg . Это привело к переносу на 12px и придало лицу необходимое выражение.
Применение функциональных возможностей
Теперь давайте анимируем эти выражения при наведении курсора. Полный код, который мы получим после применения псевдокласса hover будет таким:
Поиграв еще чуть-чуть со свойствами CSS, мы можем сделать так:
Это один из методов, который можно использовать для создания тех самых захватывающих анимаций, с которыми мы сталкиваемся почти ежедневно.
Одно важное замечание
Маскирование может работать не во всех браузерах. Чтобы заставить его работать во всех браузерах, просто добавьте специальные метки браузера, такие как -webkit- , -moz- и -0- .
Вы можете посмотреть полный код на github и codepen. Спасибо! Надеюсь, было полезно.

Заглядывайте на VPS.today — сайт для поиска виртуальных серверов. 1500 тарифов от 130 хостеров, удобный интерфейс и большое число критериев для поиска самого лучшего виртуального сервера.
Анимированные маски CSS.
Сегодня мы узнаем, как анимировать css-маски, опираясь на положение курсора, чтобы создать уникальный эффект для вашего следующего веб-проекта.

Маскировка в css позволяет нам «вырезать» (маскировать) элемент, либо через изображение, svg или градиент, имея возможность установить, какая часть элемента будет видна или нет в зависимости от прозрачности изображения, svg или градиента.
Как мы видим в этом примере, наше изображение, которое будет служить маской, — это логотип яблока, он полностью черный с прозрачным фоном, а наш элемент для маскировки имеет розовый фон.

* Изображение применяется как маска к розовому элементу, я проиллюстрировал это таким образом, чтобы увидеть, как действует прозрачный фон изображения, это было бы только два элемента, позже мы увидим это.

Самая темная часть нашего изображения, svg или градиента делает элемент видимым, а самая прозрачная часть скрывает элемент.
свойство маски css:
Свойство css mask — это сокращение для таких свойств, как mask-image, mask-repeat, mask-position, https://developer.mozilla.org/es/docs/Web/CSS/mask.
Оно работает аналогично свойству background в css, мы можем установить изображение с помощью url, если хотим, чтобы маска повторялась или нет, таким образом мы получаем больше контроля над эффектами нашей маски.
Теперь давайте испачкаем руки… 😎
Для нашего эффекта мы продублируем наш элемент .hero .

Hi, I am Kim,
I am a web developer. . Чтобы улучшить доступность нашего контента, мы установили для дублирующего элемента значение aria-hidden="true" , чтобы он не упоминался дважды программами чтения с экрана.