- Linking Image in HTML: How to create links from images
- How do you Create a Hyperlink?
- How do you Create an image in HTML?
- Image as a link
- Image and Text as a Link
- Image Links and the Alt Attribute
- Advanced Technique: Image as a Link using CSS
- Advanced Technique: Using a Button
- Advanced Technique: Image Map
- Using a Linking Image in HTML
- Recent Posts
- Как правильно написать alt-текст
- Когда alt-текст нужен
- Как правильно писать
- Примеры использования
- Картинка
- Ссылка
- Диаграмма
- Картинка с текстом
- Figure и figcaption
- Когда alt-текст не нужен
- Как не стоит писать
- Что будет, если забыть про alt-текст
- Искусственный интеллект и alt
- Литература
Linking Image in HTML: How to create links from images
We are going to take a beginner friendly look at how to create image links on your website.
We will look at which HTML tags you need to use in the code.
If you have never done this before, don’t worry! I will guide you through the whole process.
By the end of this article, you will be creating image links all over your web page and the Internet.
We are also going to look at some more advanced techniques towards the end of the article if you are feeling brave.
Grab a coffee, let’s dive in!
How do you Create a Hyperlink?
To get links on your home page you need to create a hyperlink. To do this in HTML you need to use an tag. Each tag has two parts the opening and closing tag.
In the above, you can see that the open tag:
Creates the start of the hyperlink. Then we close the tag with:
Any text that we write between the open and close tag is your link text. For Example:
To turn this into a link we need to add a URL. To do this we add the URL to the href attribute. The URL can point to anywhere on the internet. For this example we are going to use the PageDart homepage:
a href="https://pagedart.com"> My Great Link a>Make sure to include the full URL with HTTPS at the front.
That is all there is to create a text-only link in HTML. Next, let’s look at how we can add an image to a web page using HTML.
How do you Create an image in HTML?
To add an image to your web page use an img tag.
This tag is a bit different from an a tag in that it does not have an opening and closing tag.
To create an img tag you need to give the tag a source file. Use the src attribute to do this:
This will add an image to the screen like this:

Now we have an image we need to turn it into a link. To do that we need to add a tag inside the tags creating a linking image in HTML.
Let’s look at an example next.
Image as a link
To turn an image into a link you need to add the tag inside the tag. So taking our earlier example the source code would look like this:
a href="https://pagedart.com"> img src="/favicon-32x32.png"> a>Which would produce this HTML:
If you are using WordPress then you can add this HTML code to your page using the text view in the page editor.
You can also add text and images inside the link, let’s look at this.
Image and Text as a Link
The example above showed how to add only an image as the link.
What if we wanted to add both an image and text to a link.
Well, in this case, we need to make sure that we add the text before we close the tag:
a href="https://pagedart.com"> img src="/favicon-32x32.png"> PageDart Home a>

There is one more attribute on the tag that we have not discussed and you should be using.
Image Links and the Alt Attribute
Images on the internet should have an alt attribute. This is a text description of the image.
Screen readers use the alt text to help visually impaired users. The screen readers will read out the text description when it finds an image.
To do this we add an alt attribute to the img tag like this:
a href="https://pagedart.com"> img alt="PageDart.com" src="/favicon-32x32.png"> a>Now when the screen reader reads this image it will say “PageDart.com” out loud.
It is important to follow best practices when writing image alt text.
Make sure you think about the person who is using the screen reader. Write your alt text description for them and describe the image as best you can.
This is all you need to create linking images in HTML. Yet, there are a few more advanced techniques that you can use. If you are feeling brave we will look at these next.
Advanced Technique: Image as a Link using CSS
A more advanced technique is to use CSS. CSS stands for Cascading Style Sheet and it allows you to change how a HTML page looks.
With CSS you can set a background image on an element such as our tag.
Here we would have HTML that looks like this:
style> a < background-image: url("/favicon-32x32.png"); display: block; height:32px; width:32px; > style> a href="https://pagedart.com">a>
We can use a similar technique with a tag.
Advanced Technique: Using a Button
In this example, we are going to use the tag instead of the tag.
We can create the same output as the example above using this HTML:
style> .link < background-image: url("/favicon-32x32.png"); border: 0; height:32px; width:32px; > style> script> function goHome() < return window.open("https://pagedart.com", "_blank") > script> input type="button" class="link" onclick="goHome()"/>Which creates this output:


Here we are using JavaScript to open a new browser tab. Sending the user to the PageDart home page.
I have no idea why you would ever do this! But, I wanted to show you what is possible and how flexible HTML, CSS and JavaScript can be.
The last example I am going to show is using an image map.
Advanced Technique: Image Map
Image maps are single images with clickable areas. They have lost popularity over the years but they are still part of the HTML5 specification. This means that browsers such as Internet Explorer, Chrome and Safari will support them.
Charts are good examples of Image Maps such as organizational charts, like this:
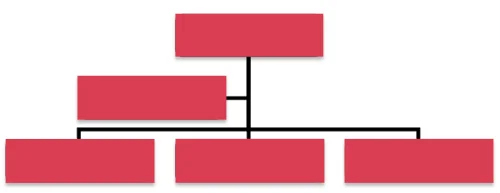
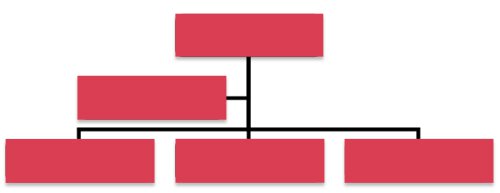
Then to make each pink area a clickable link we would create a map like this:
img src="org.png" alt="Staff Organisation Chart" usemap="#Map"> map name="Map" id="Map"> area shape="rect" coords="176,14,323,58" href="…" alt="Chairman" > area shape="rect" coords="81,75,226,114" href="…" alt="Secretary" > area shape="rect" coords="6,138,155,182" href="…" alt="Marketing Director" > area shape="rect" coords="175,138,323,182" href="…" alt="Sales Director" > area shape="rect" coords="345,136,496,186" href="…" alt="Finance Director" > map>We have added the attribute usemap to the img tag.
Then within the map tag we have an area tag. Each of these areas creates a clickable area that acts as a button.
Using a Linking Image in HTML
We have looked at five different ways to add an image as a link on your web page:
- An image as a link
- Image and text as a link
- Using CSS to set an image as a link
- Using a button as a link
- Using image maps
All these can turn images into links. You should now have the confidence to try this yourself.
We have also looked at accessibility and how to set Alt text to help the visually impaired.
Recent Posts
In this tutorial we will add Google search to a website using the custom site search tool
In this tutorial we are going to look at how to create a WordPress plugin.
We look at how to add a search bar in HTML to your website and search connect it to Google search
Как правильно написать alt-текст
Alt — обязательный атрибут тега . Это альтернативное описание для изображений, которые не видят пользователи:
- из-за медленного соединения;
- из-за неправильного пути или имени файла в атрибуте src ;
- так как пользуются скринридерами.
Перед тем, как перейти к примерам, разберёмся с необходимостью альтернативного текста в разных ситуациях.
Когда alt-текст нужен
У любого изображения, которое иллюстрирует или дополняет текст. Например, для изображений в теге , если у ссылки нет текстового содержимого.
Как правильно писать
- Кратко. Максимальная рекомендуемая длина — 125 символов. Один из самых популярных скринридеров JAWS не любит длинные строки. Очень длинные строки он может зачитать как три картинки, хотя это было всего лишь одна длинная строка.
- Чётко. Нужно ответить на вопрос, что именно изображено на картинке? Какую функцию она выполняет?
- Уникально. Не повторяйте текст, который уже есть на странице.
- Не начинайте со слов «картинка» или «изображение».
- Отталкивайтесь от окружающего контента.
- Следуйте правилам языка, на котором составляется описание: пунктуация, орфография.
Примеры использования
Картинка

Так можно описать, если в статье есть текст, который рассказывает о фотографии.
Если текста нет, например, у нас галерея изображений, тогда нужно описать картинку более детально:
Ссылка
Начинать текст с «ссылка» не нужно, роль уточнения играет сам тег .
Диаграмма

Если текста со статистикой нет, то придётся всю статистику вынести в alt :
Картинка с текстом

Просто переносим текст в alt :
Figure и figcaption

Всё равно пишем нормальный alt , так как в figcaption обычно маленькое описание:
Таня ушла на разминку

Когда alt-текст не нужен
Когда картинка декоративная и не имеет смысла.
- Аватарка: имя пользователя и так у нас уже есть.
- Превью к статье: у нас уже есть заголовок, и этого будет достаточно.
- Иконки в кнопке.
Как не стоит писать
Если картинка оформительская и не требует alt , то не нужно писать туда пробел или его аналоги.
Если так делать, то скринридеры, либо начнут говорить, что это «картинка» (бессмыслица), либо прочитают «пробел» (ещё более бессмысленно).
Что будет, если забыть про alt-текст
Основных проблем две: пользователи ничего не увидят, а скринридеры могут прочитать неправильно или не то. Например, NVDA ничего не скажет, JAWS скажет «Графическое изображение без описания», а VoiceOver скажет название файла.
Но иногда бывают картинки, которым не добавляют alt . Например, это поиск «рыжий кот», и в поисковой выдаче показываются тысячи рыжих котов. Смысла указывать alt нет.
Чаще всего в такой ситуации вообще удаляют alt :
Но в этом случае некоторые скринридеры начнут читать src , что ещё хуже. Поэтому лучше оставлять пустой alt . Из двух зол выбирают наименьшее.
Искусственный интеллект и alt
ИИ в социальных сетях неплохо справляется с генерацией текстов для изображений. Можно ознакомиться в Фейсбуке, Инстаграме или Гугл-картинках.

Если посмотреть сейчас на автоматическую генерацию текстов, то там всегда присутствует доля предположения — «на изображении может находиться 1 человек».

С абстрактными картинками всё ещё хуже, так как ИИ вообще не понимает, что происходит.
Литература
«Доктайп» — журнал о фронтенде. Читайте, слушайте и учитесь с нами.