- How to Style a Horizontal Line
- Change the size and position of a horizontal rule
- Example of changing the width and position of a horizontal rule:
- Result
- Example of changing the height and background color of the horizontal rule:
- Example of adding a horizontal rule without a border:
- Example of adding a horizontal line with the border-top property:
- Additional style for horizontal lines
- Example of adding different styles to horizontal lines:
- Use a background image as a horizontal rule
- Example of adding a background image as a horizontal line:
- How to add attributes to a horizontal line across the page?
- Оформление горизонтальных линий HR
- Вариант 1
- Вариант 2:
- Вариант 3:
- Вариант 4:
- Вариант 5:
- Вариант 6:
- Вариант 7:
- Вариант 8:
- Вариант 9:
- Вариант 10:
- Смотрите также:
- Добавить комментарий:
- Комментарии:
- How TO — Style HR (Horizontal Ruler/Line)
- Example
- Related Pages
- COLOR PICKER
- Report Error
- Thank You For Helping Us!
How to Style a Horizontal Line
A horizontal rule is commonly used as content or section divider. As a horizontal rule the element is used. Originally the
element was styled using attributes. Nowadays, in HTML5, the
element tells the browser that there is a paragraph-level thematic break. Let’s see how to style the
element with CSS below.
Change the size and position of a horizontal rule
The
element is styled with CSS rules instead of attributes. Change the width of the horizontal line by setting the width property and then center it using the margin property.
Example of changing the width and position of a horizontal rule:
html> html> head> title>Title of the document title> style> hr < width: 70%; margin-left: auto; margin-right: auto; > style> head> body> h1>Center Horizontal Line h1> hr /> body> html>Result
If you want to change the thickness, or height of your horizontal line, add the height property to your
style. In this case, you can also set the background-color property for the thick horizontal line.
Example of changing the height and background color of the horizontal rule:
html> html> head> title>Title of the document title> style> hr < width: 100%; height: 30px; margin-left: auto; margin-right: auto; background-color: #b7d0e2; > style> head> body> h1>Horizontal Line with Height and Background Color h1> hr /> body> html>Set the border property to «none» to remove the border of your thick horizontal line.
Example of adding a horizontal rule without a border:
html> html> head> title>Title of the document title> style> hr < width: 100%; height: 30px; margin-left: auto; margin-right: auto; background-color: #b7d0e2; border: 0 none; > style> head> body> h1>Horizontal Line with Height and Background Color h1> hr /> body> html>You can change the color of the horizontal line by setting the border-top property and defining the color. Follow the example to see an illustration of it.
Example of adding a horizontal line with the border-top property:
html> html> head> title>Title of the document title> style> hr < border-top: 5px solid #095484; > style> head> body> h1>Horizontal Line with Height and Background Color h1> hr /> body> html>Additional style for horizontal lines
Go further with horizontal lines by giving different styles to your
element’s border. Check the example code to see what stunning horizontal lines are presented.
Example of adding different styles to horizontal lines:
html> html> head> title>Title of the document title> style> .hr1 < border: 0; height: 3px; background: #095484; background-image: linear-gradient(to right, #ccc, #095484, #ccc); > .hr2 < border: 0; height: 3px; background-image: linear-gradient(to right, rgba(0, 0, 0, 0), rgba(9, 84, 132), rgba(0, 0, 0, 0)); > .hr3 < height: 15px; border: 0; box-shadow: inset 0 12px 12px -12px rgba(9, 84, 132); > .hr4 < border-top: 3px double #095484; > .hr5 < background-color: #fff; border-top: 2px dashed #095484; > .hr6 < border-top: 3px dotted #095484; > .hr7 < height: 30px; border-style: solid; border-color: #095484; border-width: 1px 0 0 0; border-radius: 20px; > .hr8 < display: block; content: ""; height: 30px; margin-top: -31px; border-style: solid; border-color: #095484; border-width: 0 0 1px 0; border-radius: 20px; > style> head> body> h3>Gradient Horizontal Line h3> hr class="hr1" /> h3>Gradient Transparent h3> hr class="hr2" /> h3>Single-direction Drop Shadow h3> hr class="hr3" /> h3>Double h3> hr class="hr4" /> h3>Dashed h3> hr class="hr5" /> h3>Dotted h3> hr class="hr6" /> h3>Rounded Corners h3> hr class="hr7" /> hr class="hr8" /> body> html>Use a background image as a horizontal rule
If you want to set an ornament or image as a horizontal rule for your website, you can add a background image to your horizontal rule with the help of the CSS background property. Also, set the height equal to the height of your image (or how much part you want from the image), and border: none, so as your image will look like as a horizontal line.
Example of adding a background image as a horizontal line:
html> html> head> title>Title of the document title> style> .hr1 < height: 25px; background: url(/uploads/media/default/0001/01/e7a97bd9b2d25886cc7b9115de83b6b28b73b90b.jpeg) no-repeat center; border: none; > .hr2 < height: 25px; background: url(/uploads/media/default/0001/01/295e26d0bdf4d635c8887a6b0f37b61d7c69c5fc.png) no-repeat center; border: none; > .hr3 < height: 25px; background: url(/uploads/media/default/0001/01/09a69b0ad1525926a508356955843cf84306fd85.png) no-repeat center; border: none; > .hr4 < height: 20px; background: url(/uploads/media/default/0001/01/12fbe0b5b3d06c7e379d646068faa12f70452638.png) no-repeat center; border: none; > .hr5 < height: 50px; background: url(/uploads/media/default/0001/01/7d5f2a204567da4df1c1d7e5017d7b510ef56619.jpeg) no-repeat center; border: none; > .hr6 < height: 70px; background: url(/uploads/media/default/0001/01/fb69fe21cc880d96b3267efaa88cd72288a77fef.png) no-repeat center; border: none; > style> head> body> h1>Horizontal Lines with Images h1> hr class="hr1" /> br /> hr class="hr2" /> br /> hr class="hr3" /> br /> hr class="hr4" /> br /> hr class="hr5" /> hr class="hr6" /> body> html>How to add attributes to a horizontal line across the page?
You can add attributes to a horizontal line in HTML by using the
tag and adding the desired attribute(s) as HTML attributes within the opening tag. Here is an example:
label="Horizontal line across the page">In this example, we have added three attributes to the
element:
- style: This attribute sets the inline style of the element. In this case, we have set the border property to create a solid black line. You can use any CSS property here to style the line as desired.
- id: This attribute sets the unique identifier for the element. This can be used to target the element with JavaScript or CSS.
- class: This attribute sets the CSS class(es) for the element. This can be used to apply common styles to multiple elements with the same class.
- aria-label: This attribute is used to provide an accessible label for the element. It is read out loud by screen readers and is helpful for users who are visually impaired.
You can add any valid HTML attribute to the
tag in this way.
Оформление горизонтальных линий HR

Все примеры не имеют классы и привязаны непосредственно к самому тегу.
Вариант 1
Простой пример с двумя точками.
Вариант 2:
Пример с тремя точками, которые плавно меняют свой цвет.
Вариант 3:
Несколько точек с использованием SVG.
Вариант 4:
Еще один пример на SVG c анимацией.
background-image : url ( «data:image/svg+xml;charset=utf8,%3Csvg xmlns=’http://www.w3.org/2000/svg’ xmlns:xlink=’http://www.w3.org/1999/xlink’ xmlns:ev=’http://www.w3.org/2001/xml-events’ viewBox=’0 0 20 4’%3E%3Cstyle type=’text/css’%3E.squiggle
Вариант 5:
Вариант 6:
Наклонная линия с градиентом и контентом по середине (на примере это солнышки).
background : linear-gradient ( to right, transparent 50%, #fff 50% ) , linear-gradient ( to right, #337AB7, #BFE2FF ) ;
Вариант 7:
Еще одна линия с градиентом и небольшой анимацией.
Вариант 8:
Пример горизонтальной линии с тенью.
background-image : radial-gradient ( farthest-side at 50% -50%, rgba ( 0, 0, 0, 0.5 ) , rgba ( 0, 0, 0, 0 ) ) ;
background-image : linear-gradient ( 90deg, rgba ( 0, 0, 0, 0 ) , rgba ( 0, 0, 0, 0.75 ) 50%, rgba ( 0, 0, 0, 0 ) ) ;
Вариант 9:
Зигзагообразная линия, сделанная линейным градиентом.
background-image : linear-gradient ( 315deg, rgba ( 191, 226, 255, 1 ) 30%, transparent 30% ) , linear-gradient ( 45deg, rgba ( 191, 226, 255, 1 ) 30%, transparent 30% ) ;
background-image : linear-gradient ( 135deg, rgba ( 191, 226, 255, 1 ) 30%, transparent 30% ) , linear-gradient ( 225deg, rgba ( 191, 226, 255, 1 ) 30%, transparent 30% ) ;
Вариант 10:
И еще один простенький пример с применением линейного градиента без переходов.
background-image : linear-gradient ( to right, #BFE2FF 50%, #337AB7 50%, #337AB7 60%, #ff9100 60%, #ff9100 70%, #05b5e6 70%, #05b5e6 80%, #b448b8 80%, #b448b8 90%, #BFE2FF 90%, #BFE2FF 100% ) ;
- Опубликовано: 22.08.2019 / Обновлено: 11.09.2022
- Рубрики: Весь сайт, Вкладки, блоки и списки
- Метки: CSS, Авторское, Сборники
- 18544 просмотра
Смотрите также:
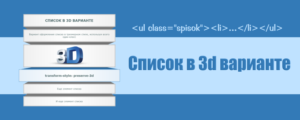
Список ul li в 3d варианте
Вариант оформления списка в трехмерном стиле, используя всего один класс

Параллакс подвал
Интересный эффект появления футера сайта из под страницы
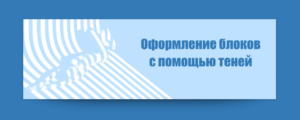
Тени для блоков
Несколько вариантов оформления блоков с помощью теней.
Добавить комментарий:
Комментарии:
Добрый день. Вариант 5 уезжает за границу экрана справа. И таким образом появляется полоса прокрутки по горизонтали, пока весь ползунок не заедет за правую границу экрана. Как поправить подскажите пожалуйста?
Отличный сайт и годный контент. Не много прокачал вариант 7. Хотел поделиться модификацией и закинуть код в коммент, а сайт ругается, либо запрещенный тег или слишком часто пишу, хотя там только html и css.
Интересно, но ваш вариант ИМХО больше подходит для разделения секций (как Вариант 6), это цельная линия и стрелка вниз, показывающая что ниже еще есть информация.
Линиями я обычно отделяю абзацы или заголовки, это для себя в основном и делал.
Но ваш вариант пригодится, Спасибо! Там можно увеличить стрелку, покрасить и даже привязать на стрелку событие.
How TO — Style HR (Horizontal Ruler/Line)
You can use the border property to style a hr element:
Example
/* Red border */
hr.new1 border-top: 1px solid red;
>
/* Dashed red border */
hr.new2 border-top: 1px dashed red;
>
/* Dotted red border */
hr.new3 border-top: 1px dotted red;
>
/* Thick red border */
hr.new4 border: 1px solid red;
>
/* Large rounded green border */
hr.new5 border: 10px solid green;
border-radius: 5px;
>
Related Pages

COLOR PICKER


Report Error
If you want to report an error, or if you want to make a suggestion, do not hesitate to send us an e-mail:
Thank You For Helping Us!
Your message has been sent to W3Schools.
Top Tutorials
Top References
Top Examples
Get Certified
W3Schools is optimized for learning and training. Examples might be simplified to improve reading and learning. Tutorials, references, and examples are constantly reviewed to avoid errors, but we cannot warrant full correctness of all content. While using W3Schools, you agree to have read and accepted our terms of use, cookie and privacy policy.