- CSS Tutorial
- Examples in Each Chapter
- CSS Example
- CSS Examples
- Use the Menu
- CSS Templates
- CSS Exercises
- CSS Quiz
- My Learning
- CSS References
- 🔥(Complete) Beginner’s CSS Guide: Complete with Samples and Easy-to-Follow Tips
- Basic CSS Syntax
- CSS Selectors
- CSS Properties
- CSS Units
- CSS Comments
- Conclusion
- Learn CSS in 5 minutes — A tutorial for beginners
- A quick tutorial on the design language of the web.
- Getting Started
- 1. Inline CSS
- 2. Internal CSS
- 3. External CSS
- CSS Selectors
- 1. Element
- 2. Class
- 3. ID
- Fonts & Colors
- Conclusion
CSS Tutorial
CSS is the language we use to style an HTML document.
CSS describes how HTML elements should be displayed.
This tutorial will teach you CSS from basic to advanced.
Examples in Each Chapter
This CSS tutorial contains hundreds of CSS examples.
With our online editor, you can edit the CSS, and click on a button to view the result.
CSS Example
body <
background-color: lightblue;
>
h1 color: white;
text-align: center;
>
p font-family: verdana;
font-size: 20px;
>
Click on the «Try it Yourself» button to see how it works.
CSS Examples
Learn from over 300 examples! With our editor, you can edit the CSS, and click on a button to view the result.
Use the Menu
We recommend reading this tutorial, in the sequence listed in the menu.
If you have a large screen, the menu will always be present on the left.
If you have a small screen, open the menu by clicking the top menu sign ☰ .
CSS Templates
We have created some responsive W3.CSS templates for you to use.
You are free to modify, save, share, and use them in all your projects.
CSS Exercises
CSS Quiz
Test your CSS skills with a quiz.
My Learning
Track your progress with the free «My Learning» program here at W3Schools.
Log in to your account, and start earning points!
This is an optional feature. You can study W3Schools without using My Learning.

CSS References
At W3Schools you will find complete CSS references of all properties and selectors with syntax, examples, browser support, and more.
🔥(Complete) Beginner’s CSS Guide: Complete with Samples and Easy-to-Follow Tips
CSS (Cascading Style Sheets) is a fundamental technology that is used to add style and layout to web pages. It allows web developers to control the look and feel of their website, including the colors, fonts, spacing, and layout. In this guide, I will cover everything you need to know about CSS, from the basics to advanced techniques. I will also provide samples to help you get started with your own CSS code.
Basic CSS Syntax
The syntax of CSS is relatively simple. CSS uses selectors to identify which HTML elements the styles should be applied to, and then specifies the styles themselves. Here is an example of the basic syntax of CSS:
In this example, »selector» identifies the HTML element that the styles should be applied to. The »property» is the attribute of the HTML element that you want to style, and the »value» is the specific styling you want to apply to that attribute.
CSS Selectors
The element selector selects all instances of a particular HTML element. For example, to select all paragraphs on a page, you would use the following code:
- Class Selector Class selectors are used to select elements that have a particular class attribute. Classes are useful when you want to apply the same styling to multiple elements on a page. To use a class selector, add a . before the class name. For example, to select all elements with the class «example», you would use the following code:
- ID Selector ID selectors are used to select a single element with a specific ID attribute. IDs are useful when you want to apply unique styling to a particular element. To use an ID selector, add a # before the ID name. For example, to select the element with the ID «header», you would use the following code:
CSS Properties
CSS properties define the specific styling that should be applied to an HTML element. There are hundreds of CSS properties available, but i will cover some of the most commonly used properties.
- Background Color The background-color property is used to set the background color of an HTML element. Here is an example of how to set the background color of a div element to red:
- Font Family The font-family property is used to set the font family for an HTML element. The font family is a collection of font styles that can be applied to text. Here is an example of how to set the font family for all h1 elements to Arial:
- Font Size The font-size property is used to set the size of the text in an HTML element. Here is an example of how to set the font size for all p elements to 16 pixels:
- Margin The margin property is used to set the margin (space) around an HTML element. You can set different margins for each side of the element using the following syntax:
- Padding The padding property is used to set the padding (space) inside an HTML element. You can set different paddings for each side of the element using the following syntax:
- Border The border property is used to create a border around an HTML element. You can specify the style, width, and color of the border using the following syntax:
CSS Units
CSS uses different units to define measurements such as size, spacing, and positioning. Here are some of the most commonly used CSS units:
- Pixels (px)
Pixels are the most commonly used unit in CSS. One pixel is equal to one dot on the computer screen. Pixels are a fixed unit, which means that their size will remain the same regardless of the size of the screen or the device being used. - Percentages (%)
Percentages are a relative unit that is based on the size of the parent element. For example, if the parent element is 200 pixels wide, and you set the width of the child element to 50%, the child element will be 100 pixels wide. - Em (em)
The em unit is also a relative unit that is based on the font size of the parent element. For example, if the font size of the parent element is 16 pixels, and you set the font size of the child element to 1.5 em, the font size of the child element will be 24 pixels (1.5 x 16). - Rem (rem)
The rem unit is similar to the em unit, but it is based on the font size of the root element (usually the element). This means that the rem unit is not affected by the font size of the parent element.
CSS Comments
CSS comments are used to add notes to your code that will not be displayed on the website. Comments are useful for reminding yourself of why you made a particular design decision, or for leaving notes for other developers who may be working on the same project. Here is an example of how to add a comment to your CSS code:
Conclusion
In this guide, we have covered the basics of CSS syntax, selectors, properties, units, and comments. CSS is a powerful tool for web developers, and with a little practice, you can create stunning websites that look and feel exactly the way you want them to. Remember to experiment with different styles and techniques, and don’t be afraid to ask for help if you get stuck. Happy coding!
Learn CSS in 5 minutes — A tutorial for beginners

Per Harald Borgen
A quick tutorial on the design language of the web.
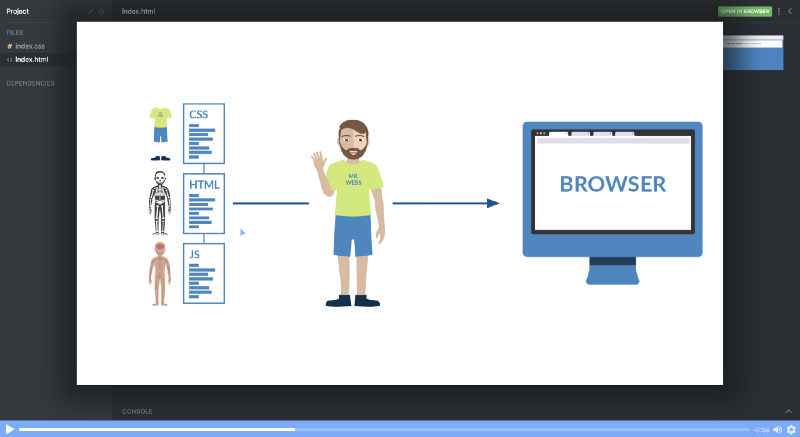
CSS (Cascading Style Sheets) is what makes web pages look good and presentable. It’s an essential part of modern web development and a must-have skill for any web designer and developer.
In this article, I’ll give you a quick introduction to help you get started with CSS.
We’ve also launched a free full-length CSS course on Scrimba. Click here to check it out.
I’m assuming that you have a basic understanding of HTML, but other than that there are no prerequisites for this tutorial.
Getting Started
Let’s start with learning how we can include CSS in our projects. There are typically three ways we do that.
1. Inline CSS
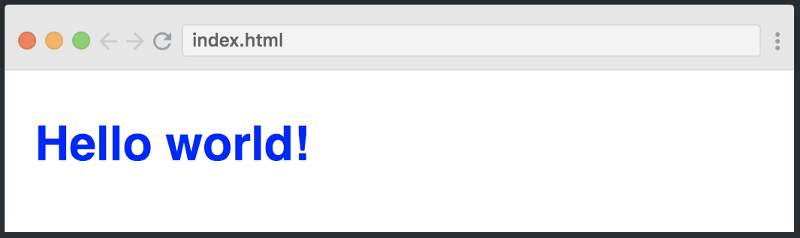
First off, we can include CSS directly in our HTML elements. For this, we make use of the style attribute and then we provide properties to it.
Here we’re giving it the property of color , and setting the value to blue , which results in the following:
We can also set multiple properties inside the style tag if we wanted. However, I don’t want to continue down this path, as things start to get messy if our HTML is cluttered with lots of CSS inside it.
This is why the second method to include CSS was introduced.
2. Internal CSS
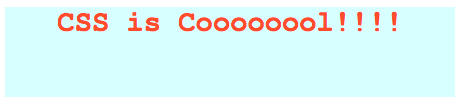
The other way to include CSS is using the style element in the head section of the HTML document. This is called internal styling.
In the style element, we can give the styling to our HTML elements by selecting the element(s) and provide styling attributes. Just like we applied the color property to the h1 element above.
3. External CSS
The third and most recommended way to include CSS is using an external stylesheet. We create a stylesheet with a .css extension and include its link in the HTML document, like this:
In the code above, we have included the link of style.css file using the link element. We then write all of our CSS in a separate stylesheet called style.css so that it’s easily manageable.
This stylesheet can also be imported into other HTML files, so this is great for reusability.
CSS Selectors
As we discussed earlier, CSS is a design language which is used to style HTML elements. And in order to style elements, you first have to select them. You’ve already seen a glimpse of how this works, but let’s dive a bit deeper into CSS selectors, and look at three different ways you can select HTML elements.
1. Element
The first way to select an HTML element is by simply using the name, which is what we did above. Let’s see how it works:
The example above is almost self-explanatory. We are selecting different elements like h1 , p , div and giving them different style attributes. The font-size controls the size of the text, color sets the text color, and margin adds spacing around the element.
2. Class
Another way of selecting HTML elements is by using the class attribute. In HTML, we can assign different classes to our elements. Each element can have multiple classes, and each class can also be applied to multiple elements as well.
In the code above, we have assigned the class of container to the div element. In the stylesheet, we select our class using .className format and giving it a 10px margin.
3. ID
Like classes, we can also use IDs to select HTML elements and apply styling to them. The only difference between class and ID is that one ID can be assigned to only one HTML element.
The example above displays how we assign an ID to the paragraph element and later use the ID selector in the stylesheet to select the paragraph and apply the style to it.
Fonts & Colors
CSS provides us with literally hundreds of options for playing around with fonts and colors and making our HTML elements look pretty. We can choose from two types of font family names:
1. Generic Family: a group of font families with a similar look (like ‘Serif’ or ‘Monospace’)
2. Font Family: a specific font family (like ‘Times New Roman’ or ‘Arial’)
For colors, we can use predefined color names, or RGB, HEX, HSL, RGBA, HSLA values.
As you can see in the above example, we have a div element with the class of container . Inside this div, there is an h1 tag with some text inside it.
In the stylesheet, we select the container class and set its width , height , background-color , and text-align .
Finally, we select the .heading1 class — which is applied to the h1 tag — and give it the attributes of font-family and color .
Conclusion
You might feel a bit overwhelmed by all this information, but don’t worry.
Just check out our free Intro to CSS course on Scrimba and you’ll be a web design ninja in less than an hour.
Thanks for reading! My name is Per Borgen, I’m the co-founder of Scrimba – the easiest way to learn to code. You should check out our responsive web design bootcamp if want to learn to build modern website on a professional level.