- CSS container queries are finally here
- Introduction
- What are container queries?
- Container queries syntax
- Browser support
- Use cases for CSS container queries
- Outro
- I wrote an ebook
- Css how container width is calculated using css
- How container width is calculated in bootstrap for different devices
- Calculate with Bootstrap container width in Sass
- How does width/height get calculated on position:absolute container with text in it and width:auto;height:auto?
- Calculating a container width is incorrect when based on REM as apossed to PX
- Determining the dimensions of elements
- How much room does it use up?
- What’s the size of the displayed content?
- How big is the content?
- See also
- Found a content problem with this page?
CSS container queries are finally here
I can’t contain my excitement while writing the first few words for this article. Ladies and gentlemen, CSS container queries are finally here! Yes, you read that right. They’re currently supported in Google Chrome (105) and soon in Safari 16. This is a huge milestone for web development. For me, I see it just like when we started building responsive websites via media queries, which is a game changer. Container queries are equally important (from my point of view, at least).
When I wrote the first article on container queries back in April 2021, the syntax changed several times, and I see this as a chance to write a fresh article and keep the previous one for reference. In this article, I will explain how container queries work, how we can use them, and what the syntax looks like, and share a few real-life examples and use cases.
Are you ready to see the new game-changer CSS feature? Let’s dive in.
Introduction
When designing a component, we tend to add different variations and change them either based on a CSS class, or the viewport size. This isn’t ideal in all cases and can force us to write CSS based on a variation class or a viewport size.
Consider the following example.
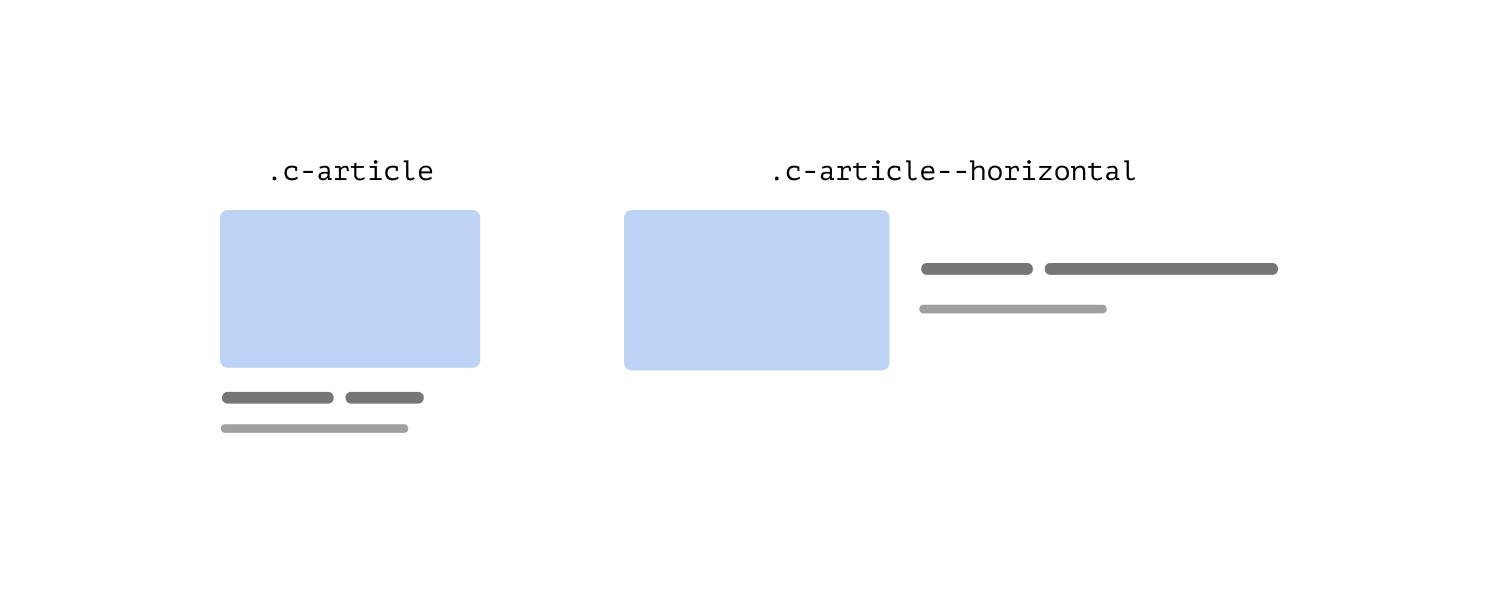
We have a card component that should switch to a horizontal style when the viewport is large enough. At the first glance, that might sound okay. However, it’s a bit complex when you think about it more deeply.
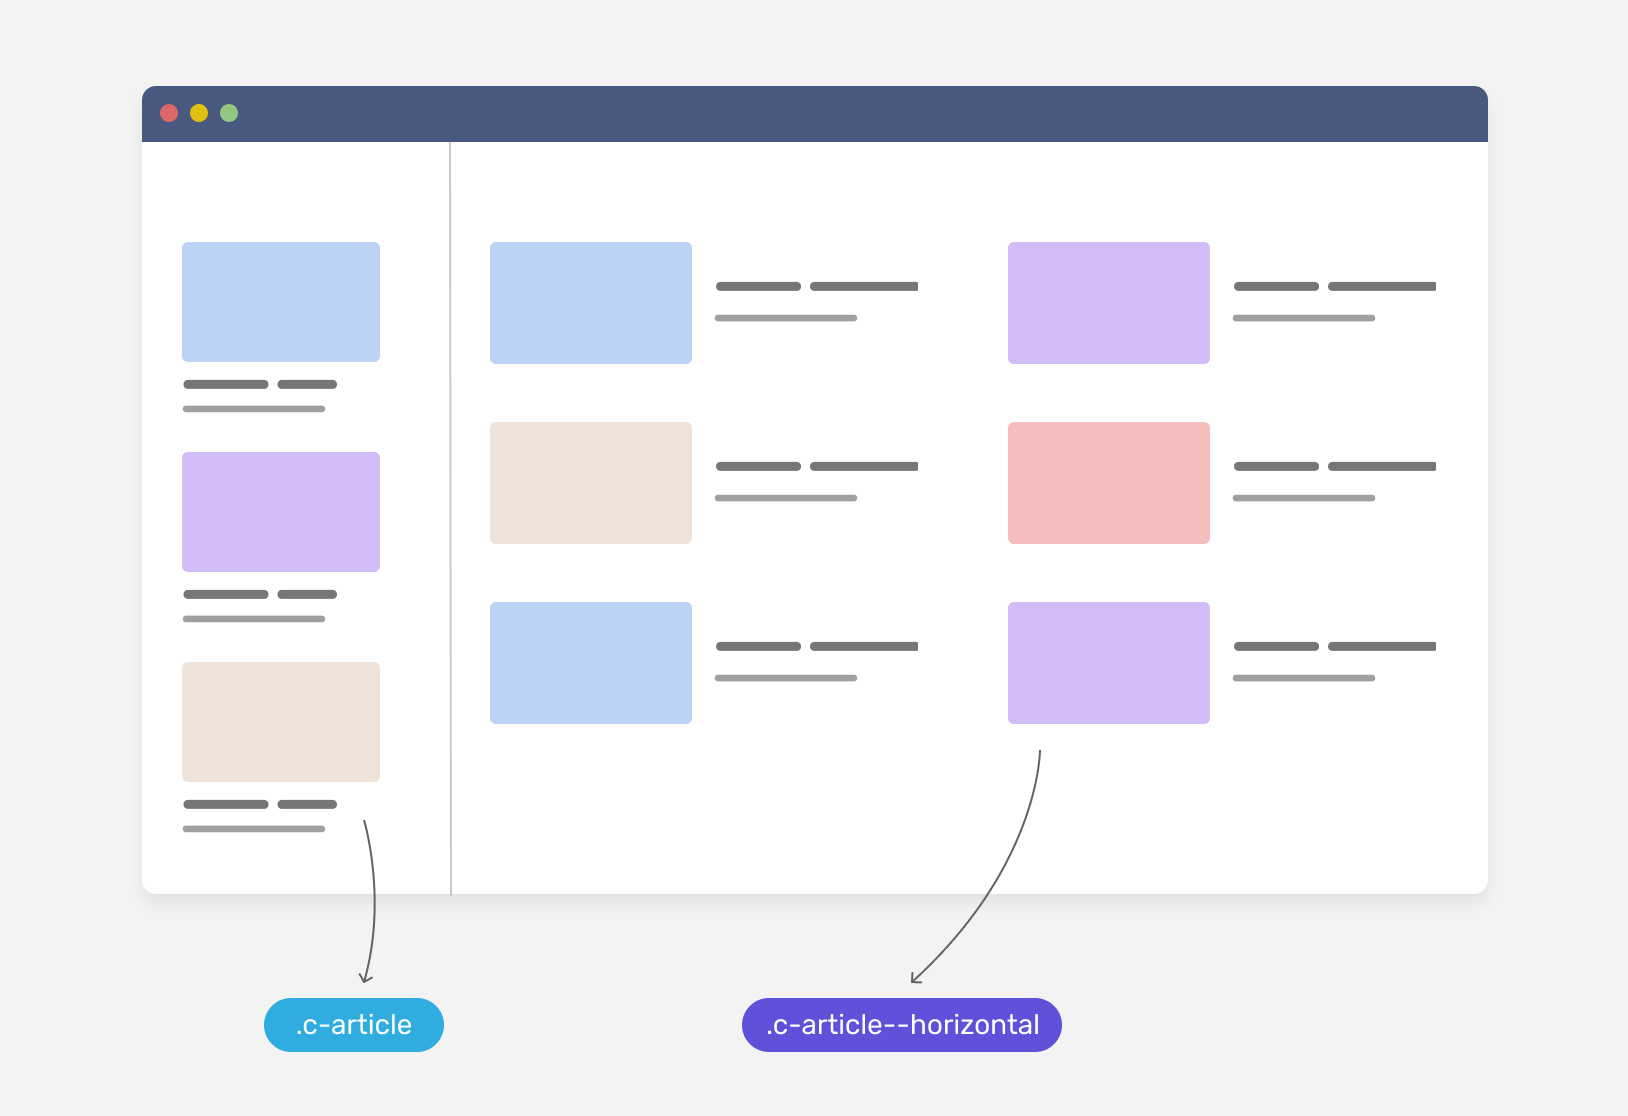
If we want to use the same card in different places, like in a sidebar where the space is tight, and in the main section where we have more space, we’ll need to use class variations.
.c-article /* Default stacked style */ > @media (min-width: 800px) /* Horizontal style. */ .c-article--horizontal display: flex; align-items: center; > > If we don’t apply the variation class to the card component, we might end up with something like the following.
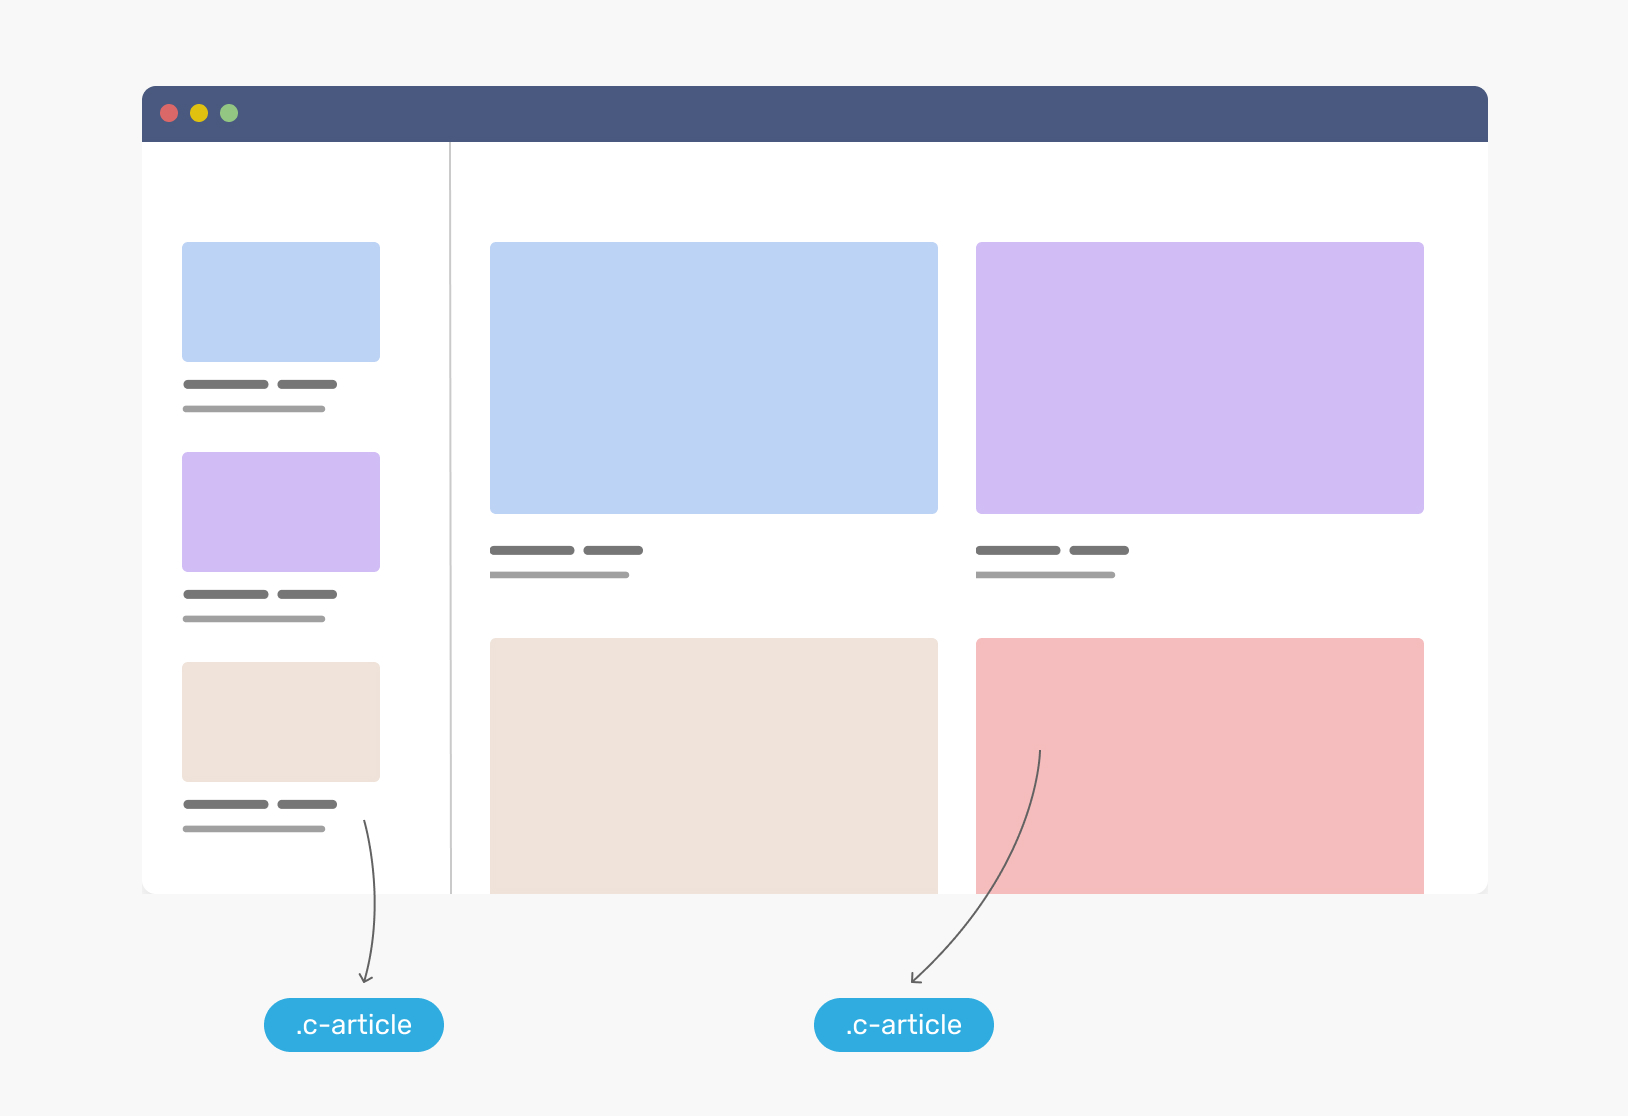
Notice how the card component in its stacked version is too large. For me, this doesn’t look good from a UI perspective.
With container queries, we can simply write CSS that responds to the parent or container width. Consider the following figure:
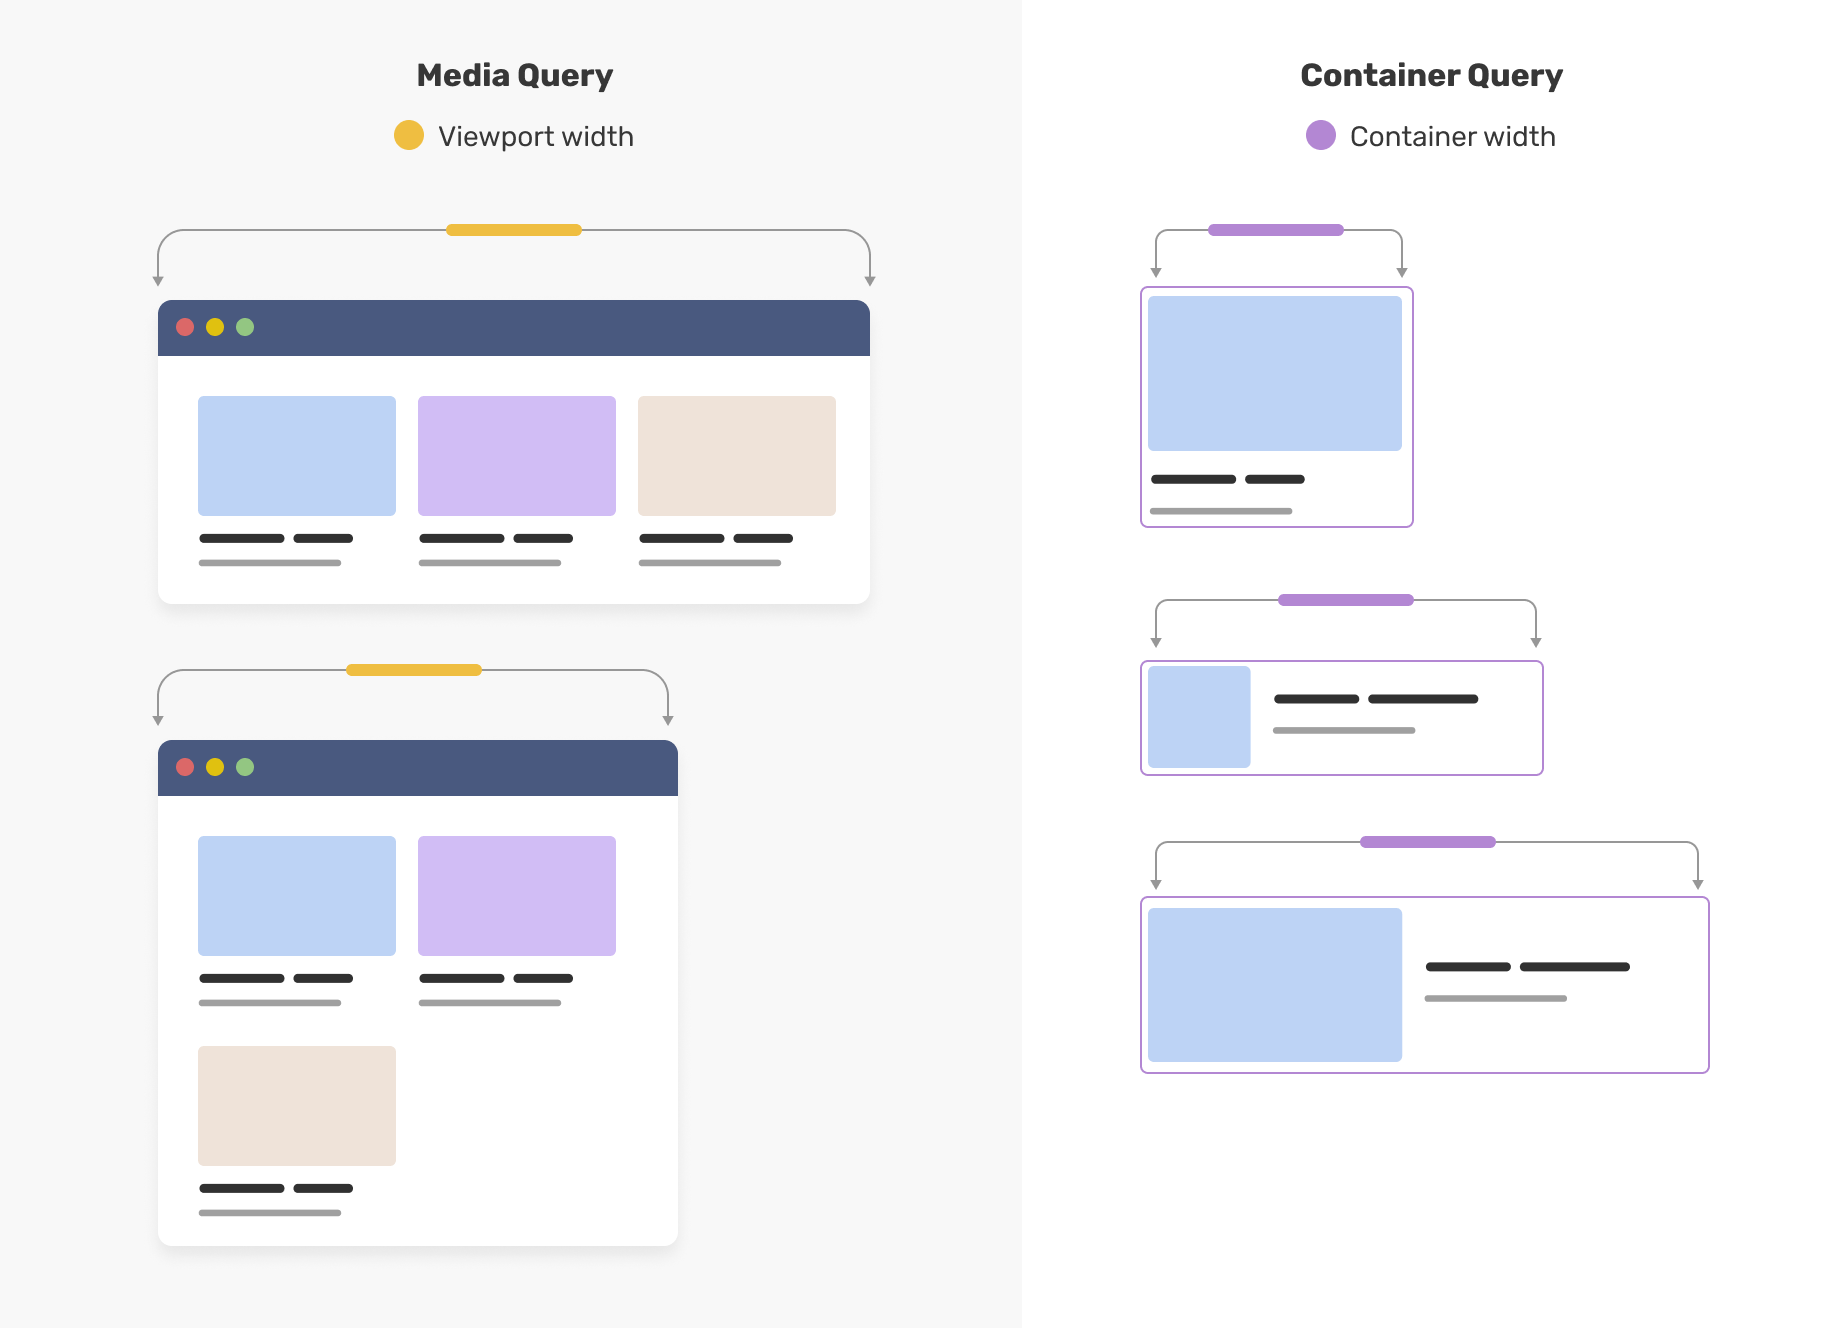
Notice how in a media query, we query a component based on the viewport or the screen width. In container queries, the same happens, but on the parent level.
What are container queries?
A way to query a component against the closest parent that has a defined containment via the container-type property.
That’s it. It’s just how we used to write CSS in media queries, but for a component level.
Container queries syntax
To query a component based on its parent width, we need to use the container-type property. Consider the following example:
.wrapper container-type: inline-size; > With that, we can start to query a component. In the following example, if the container of the .card element has a width equal to 400px or larger, we need to add a specific style.
@container (min-width: 400px) .card display: flex; align-items: center; > > While the above works, it can become a bit overwhelming when having multiple containers. To avoid that, It’s better to name a container.
.wrapper container-type: inline-size; container-name: card; > Now, we can append the container name next to @container like the following:
@container card (min-width: 400px) .card display: flex; align-items: center; > > Let’s revisit the initial example and see how we can get benefit from container queries to avoid having multiple CSS classes.
.wrapper container-type: inline-size; container-name: card; > .c-article /* Default stacked style */ > @container card (min-width: 400px) /* Horizontal style. */ .c-article display: flex; align-items: center; > > Browser support
Container queries are now supported in Chrome 105, and soon in Safari 16.
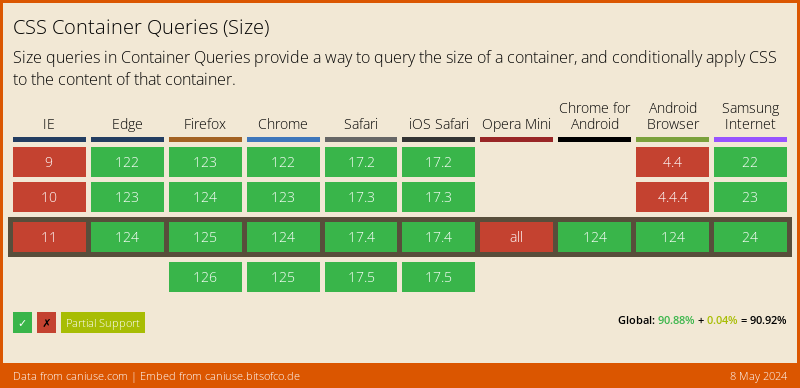
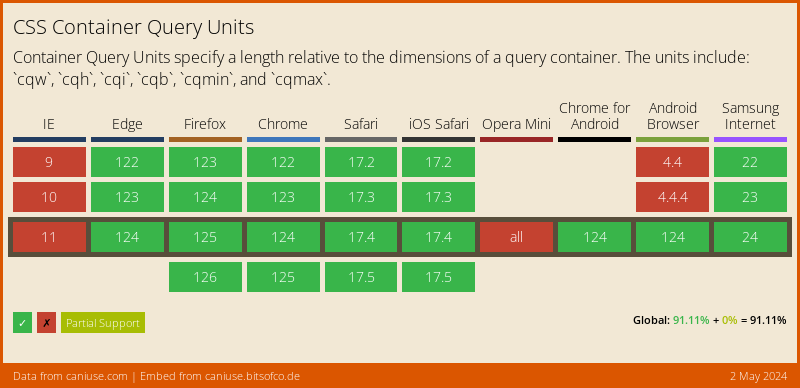
The same applies to container query units, too.
Also, there is a polyfill that you can use today. I haven’t tested it yet, but it’s within the plan.
Use cases for CSS container queries
With the stable launch of container queries in Google Chrome, I’m excited to add a new little project which is lab.ishadeed.com. This is inspired by Jen Simmons’s CSS grid experiments. It includes fresh demos for container queries that you can play with them your browser.
The lab has 10 different examples for you to explore how container queries are really helpful. I’m planning to add more in the future.
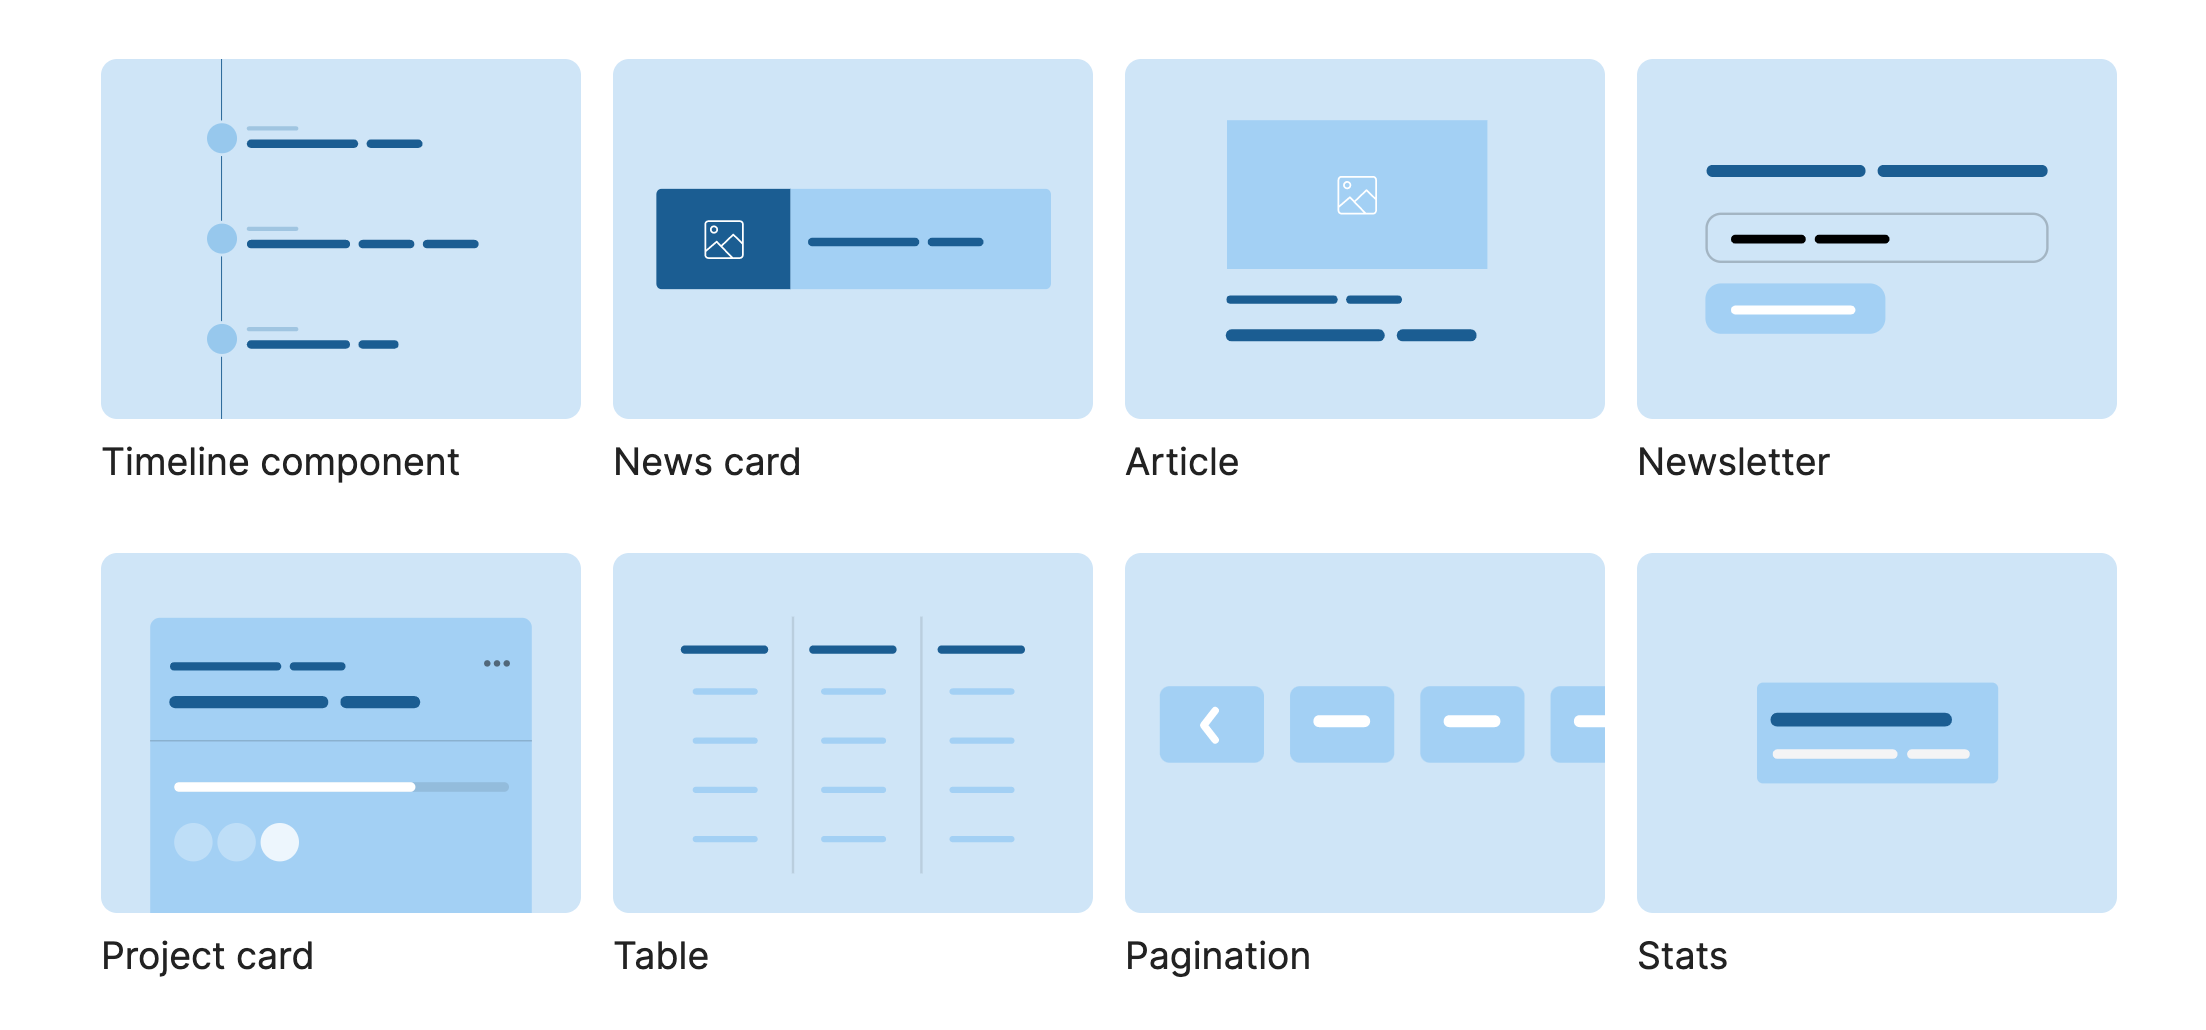
You can check them from this link. Happy resizing!
Outro
This is a big day for CSS, and I can’t wait to see what you will create with CSS container queries.
I wrote an ebook
I’m excited to let you know that I wrote an ebook about Debugging CSS.
If you’re interested, head over to debuggingcss.com for a free preview.
Css how container width is calculated using css
Here’s a nice visual demo: http://www.codeply.com/go/Sul9kw8Kne Aside from the container width, take a look at this article about the BS3 grid Solution 2: First of, If you want a container to equal to device width use For the Grid system there are two concepts Boxed layout (.container provide this) wide layout (.container-fluid provide this) in bootstarp there is no pixels for grid every thing in in percentage (%) only. If you had a constant font size, let’s say of , this is how it will look: Solution: rem = relative font size to the root element, or html element.
How container width is calculated in bootstrap for different devices
The Bootstrap .container is used as a centered container, if you want full-width on all devices use .container-fluid
The 62px is actually 62.5px at the small breakpoint. 62.5 x 12 = 750px, and this includes the 15px padding around each column. The gutter is within the column since padding is used (as opposed to a margin where the gutter would be outside the column).
Here’s a nice visual demo: http://www.codeply.com/go/Sul9kw8Kne
Aside from the container width, take a look at this article about the BS3 grid
First of, If you want a container to equal to device width use
container-fluid instead of container For the Grid system there are two concepts
in bootstarp there is no pixels for grid every thing in in percentage (%) only. all media quire break points are setup through bootstartp it self you may change those values through bootstrap customizer http://getbootstrap.com/customize/.
Css — SCSS — Get container width as height, Using 100% in calc for the calculation of height will use the percentage height of the container and not the percentage width of the container.
Calculate with Bootstrap container width in Sass
$container-max-widths is a list of values mapped to the keys ( sm , md , lg , xl ). You need to get a value from the xl key of $container-max-widths .
Example for xl you need this:
To use all the breakpoints you need to cycle trough all the list:
@each $size-name in map-keys($container-max-widths) < $size-value: map-get($container-max-widths , $size-name); .is-style-container-50 < @include media-breakpoint-up($size-name)< max-width: $size-value / 2; >> > You can also build another list with 50% of values and use it with the Bootstrap mixin for add max-widths to his containers make-container-max-widths($max-widths: $container-max-widths, $breakpoints: $grid-breakpoints) :
$container-mid-max-widths: ( sm: #, md: #, lg: #, xl: # ); .mid-container < // Using Bootstrap Mixin: make-container-max-widths($max-widths: $container-max-widths, $breakpoints: $grid-breakpoints) @include make-container-max-widths( $container-mid-max-widths , $grid-breakpoints ); > $container-max-widths: ( sm: 540px, md: 720px, lg: 960px, xl: 1140px ); This is a SASS map (https://sass-lang.com/documentation/values/maps), not a CSS instruction. I don’t have enough informations to help you further but hope this hint will help.
How does width/height get calculated on position:absolute container, Since both the box’s width and the font size is calculated by the width of the container (which is in this case, the same size as the
How does width/height get calculated on position:absolute container with text in it and width:auto;height:auto?
If we turn off top and transform , this is how it looks:

Then, the block is moved to the center (using those top and transform ), but its width is determined by the «squeeze» caused by left (remember that it’s a div, so by default it wants to be 100% of the parent’s width).
It means that the amount of «squeezing» is dependent on the screen width.
The thing is font-size is also dependent on the screen width : 3vw .
Since both the box’s width and the font size is calculated by the width of the container (which is in this case, the same size as the viewport itself), you get that constant size.
If you had a constant font size, let’s say of 2rem , this is how it will look:
Aspect-ratio — CSS: Cascading Style Sheets, 4 days ago · The aspect-ratio CSS property sets a preferred aspect ratio for the box, which will be used in the calculation of auto sizes and some other
Calculating a container width is incorrect when based on REM as apossed to PX
rem = relative font size to the root element, or html element. For most browsers that is defined as 16px. You would need to inspect the root element to verify its effective font size.
Max-width — CSS: Cascading Style Sheets, 7 days ago · The max-width CSS property sets the maximum width of an element. It prevents the used value of the width property from becoming larger than
Determining the dimensions of elements
There are several properties you can look at in order to determine the width and height of elements, and it can be tricky to determine which is the right one for your needs. This article is designed to help you make that decision. Note that all these properties are read-only. If you want to set the width and height of an element, use width and height or the overriding min-width and max-width , and min-height and max-height properties.
How much room does it use up?
If you need to know the total amount of space an element occupies, including the width of the visible content, scrollbars (if any), padding, and border, you want to use the HTMLElement.offsetWidth and HTMLElement.offsetHeight properties. Most of the time these are the same as width and height of Element.getBoundingClientRect() , when there aren’t any transforms applied to the element. In case of transforms, the offsetWidth and offsetHeight returns the element’s layout width and height, while getBoundingClientRect() returns the rendering width and height. As an example, if the element has width: 100px; and transform: scale(0.5); the getBoundingClientRect() will return 50 as the width, while offsetWidth will return 100.

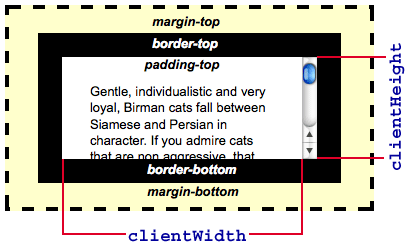
What’s the size of the displayed content?
If you need to know how much space the actual displayed content takes up, including padding but not including the border, margins, or scrollbars, you want to use the Element.clientWidth and Element.clientHeight properties:
How big is the content?
If you need to know the actual size of the content, regardless of how much of it is currently visible, you need to use the Element.scrollWidth and Element.scrollHeight properties. These return the width and height of the entire content of an element, even if only part of it is presently visible due to the use of scroll bars.
For example, if a 600×400 pixel element is being displayed inside a 300×300 pixel scrollbox, scrollWidth will return 600 while scrollHeight will return 400.
See also
Found a content problem with this page?
This page was last modified on Feb 19, 2023 by MDN contributors.
Your blueprint for a better internet.