- border
- Пример
- Все о свойстве border
- Основы
- Border-Radius
- Несколько границ
- Изменение углов
- CSS фигуры
- Создание Speech Bubble
- Итог
- CSS Borders
- CSS Border Style
- Example
- border
- Try it
- Constituent properties
- Syntax
- Values
- Description
- Borders vs. outlines
- Formal definition
- Formal syntax
- Examples
- Setting a pink outset border
- HTML
- CSS
- Result
- Specifications
- Browser compatibility
- See also
- Found a content problem with this page?
- MDN
- Support
- Our communities
- Developers
border
Свойство border отвечает за отрисовку видимой границы блока. Часто видимую границу блока называют рамкой.
Само свойство border является шорткатом (короткой записью) и объединяет в себе значение для нескольких полных свойств:
Пример
Скопировать ссылку «Пример» Скопировано
Украсим текстовую карточку цветной сплошной рамкой.
Повседневная практика показывает, .
div class="element"> p>Повседневная практика показывает, . p> div>
Зададим рамку толщиной 5 пикселей, сплошную, цвета #ED6742:
.element border: 5px solid #ed6742;>.element border: 5px solid #ed6742; >

🛠 Ещё немного про треугольники. А точнее, стрелки. Их тоже можно создать при помощи border , но тут понадобится подключить свойство transform , чтобы повернуть элемент с рамками на 45 градусов в нужную сторону:
div class="arrows"> div class="arrow _prev">div> div class="arrow _next">div> div> .arrows max-width: 1200px; height: 250px; margin: 0 auto; background-color: #f1f1f1;> .arrow /* Рисуем квадрат */ width: 50px; height: 50px; /* Задаём левую рамку */ border-left: 5px solid #ff0001; /* Задаём нижнюю рамку */ border-bottom: 5px solid #ff0001;> .arrow._prev /* Поворачиваем квадрат нижним левым углом влево */ transform: rotate(45deg);> .arrow._next /* Поворачиваем квадрат нижним левым углом вправо */ transform: rotate( -135deg );>.arrows max-width: 1200px; height: 250px; margin: 0 auto; background-color: #f1f1f1; > .arrow /* Рисуем квадрат */ width: 50px; height: 50px; /* Задаём левую рамку */ border-left: 5px solid #ff0001; /* Задаём нижнюю рамку */ border-bottom: 5px solid #ff0001; > .arrow._prev /* Поворачиваем квадрат нижним левым углом влево */ transform: rotate(45deg); > .arrow._next /* Поворачиваем квадрат нижним левым углом вправо */ transform: rotate( -135deg ); >
Чем не стрелки для слайдера? 🤗
🛠 Часто встречающийся дизайнерский приём — появление рамки вокруг элемента при наведении на него курсора мыши.
Если просто добавлять рамку по селектору :hover , то элемент будет дёргаться. Причина в том, что размер элемента увеличивается на ширину рамки. Чтобы подобных подёргиваний не происходило, изначально задайте рамку нужной толщины, но установите ей прозрачный цвет ( transparent ). А по наведению курсора просто меняйте цвет на нужный. Profit! Вы прекрасны 😄
Все о свойстве border
Все знакомы с css параметром border, но есть ли вещи, которые мы не знаем о нем?
Основы
border-width: thick; border-style: solid; border-color: black;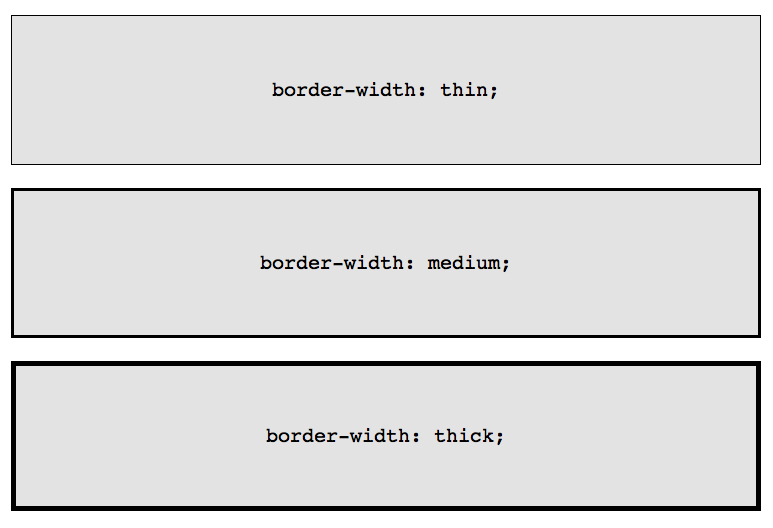
Например у параметра border-width есть три параметра: thin, medium, thick:
Если необходимо менять цвет границы при наведении на объект:
Border-Radius
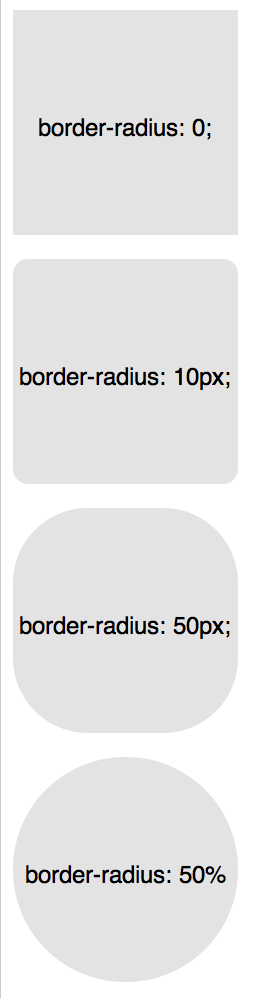
border-radius — это новый параметр CSS3 для отображения закругленных углов, который корректно работает во всех современных браузерах, за исключением Internet Explorer 8 (и более старых версий).
Для каждого угла можно назначить свое закругление:
border-top-left-radius: 20px; border-top-right-radius: 0; border-bottom-right-radius: 30px; border-bottom-left-radius: 0;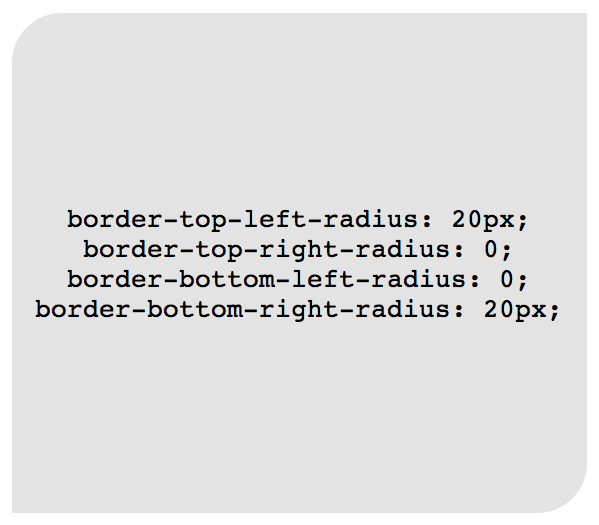
В приведенном примере необязательно назначать «0» border-top-right-radius и border-bottom-left-radius, если они не наследуют значения, которые должны быть изменены.
Всю конструкцию можно сжать в одну строку:
/* top left, top right, bottom right, bottom left */ border-radius: 20px 0 30px 0;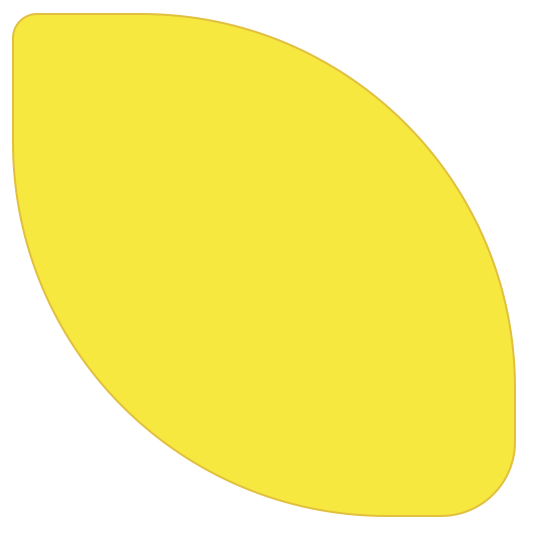
Здесь описаны самые простые и популярные примеры применения параметра border. Перейдем к более сложным.
Несколько границ
Border-Style
solid, dashed, and dotted — самые популярные значения параметра border-style, но давайте рассмотрим другие, например, groove and ridge.
border: 20px groove #e3e3e3;border-color: #e3e3e3; border-width: 20px; border-style: groove;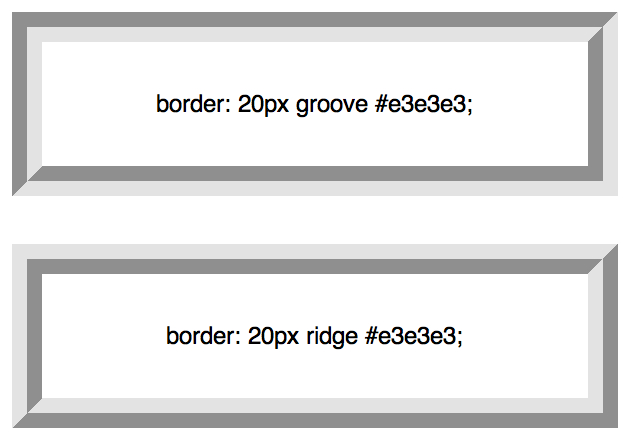
Outline

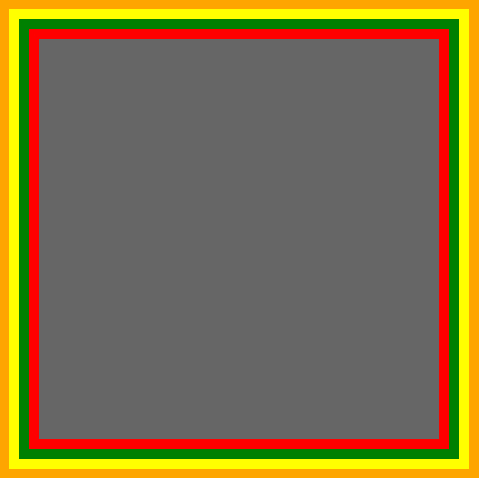
Этот способ отлично работает, но ограничен созданием двойной рамки. Если вам необходимо отобразить несколько границ элемента, то необходимо использовать другую технику.
Псевдоэлементы
.box < width: 200px; height: 200px; background: #e3e3e3; position: relative; border: 10px solid green; >/* Create two boxes with the same width of the container */ .box:after, .box:before < content: ''; position: absolute; top: 0; left: 0; bottom: 0; right: 0; >.box:after < border: 5px solid red; outline: 5px solid yellow; >.box:before

Возможно это не самое элегантное решение, однако оно работает
Box-Shadow
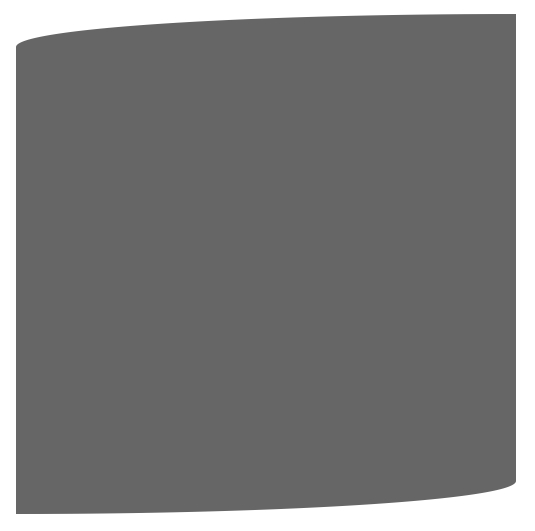
Изменение углов
border-radius: 50px / 100px; /* horizontal radius, vertical radius */border-top-left-radius: 50px 100px; border-top-right-radius: 50px 100px; border-bottom-right-radius: 50px 100px; border-bottom-left-radius: 50px 100px;Эта техничка бывает полезна, если необходимо имитировать искривление, а не закругление. Например, так можно получить эффект скрученной бумаги:
CSS фигуры
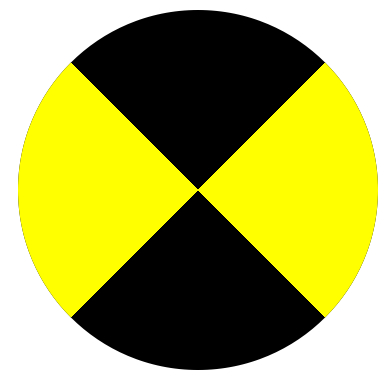
Наиболее частым примером использования CSS фигур является отображение стрелок. Чтобы понять, как это работает, необходимо разобраться с использованием отдельного border-color для каждой стороны и установкой значения «0» для width и height:
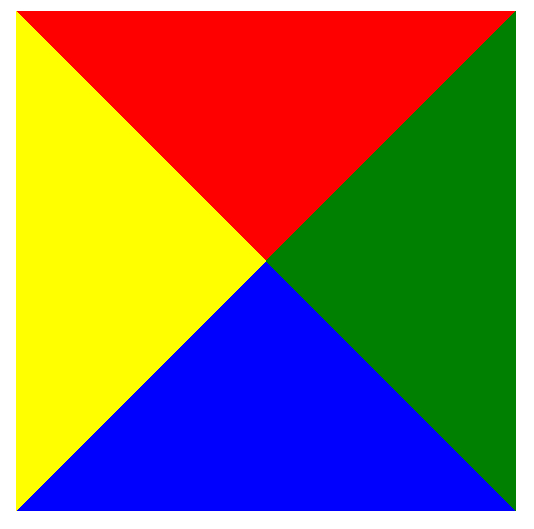
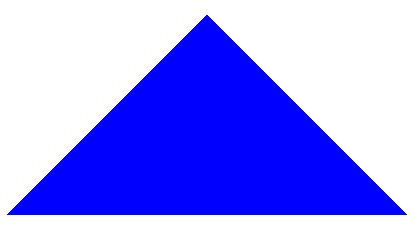
А теперь оставляем только синий треугольник:
Создание Speech Bubble
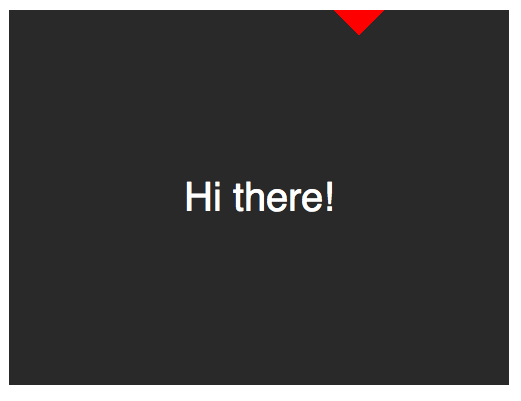
Теперь нужно расположить стрелку-треугольник в нужном месте. Вот наш цветной квадратик:
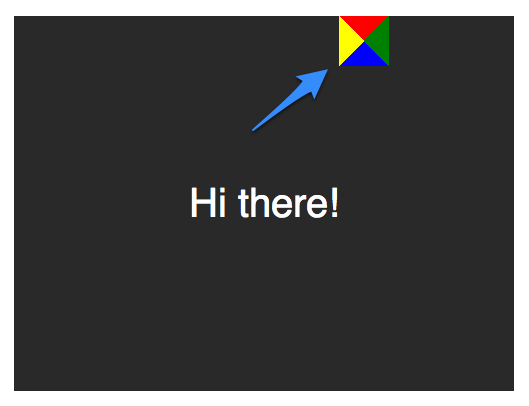
Оставляем только четверть квадратика:
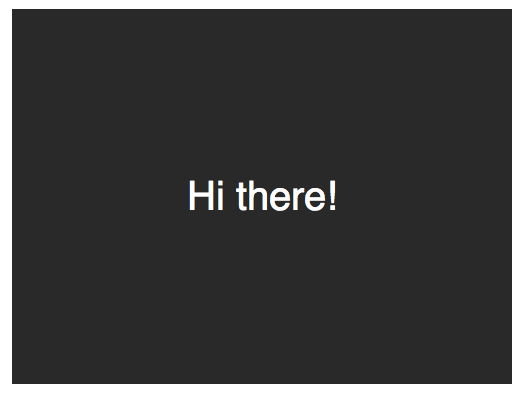
Теперь перемещаем ниже и закрашиваем:
.speech-bubble < /* … other styles */ border-radius: 10px; >.speech-bubble:after < content: ''; position: absolute; width: 0; height: 0; border: 15px solid; border-top-color: #292929; top: 100%; left: 50%; margin-left: -15px; /* adjust for border width */ >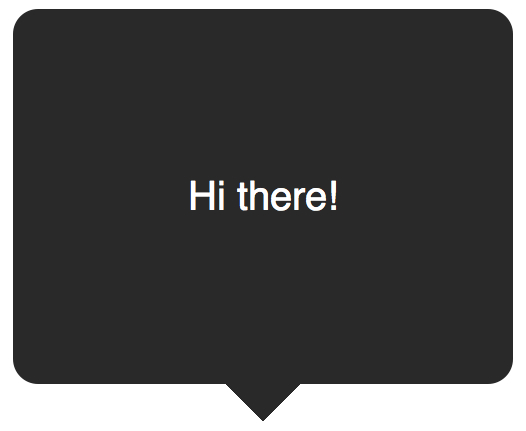
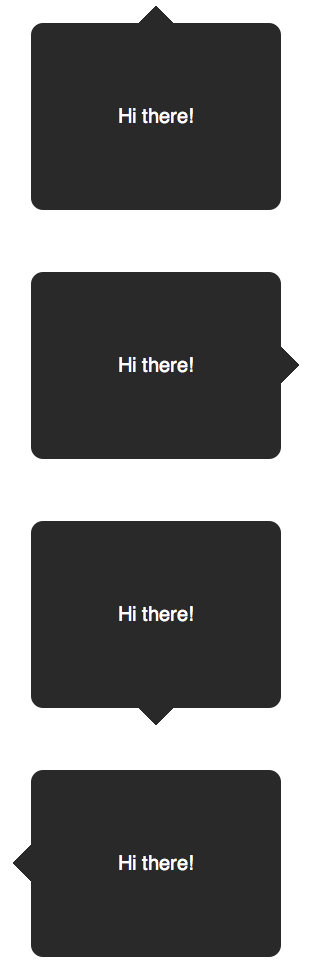
Примеры применения:
/* Speech Bubbles Usage: Apply a class of .speech-bubble and .speech-bubble-DIRECTIONHi there*/ .speech-bubble < position: relative; background-color: #292929; width: 200px; height: 150px; line-height: 150px; /* vertically center */ color: white; text-align: center; border-radius: 10px; font-family: sans-serif; >.speech-bubble:after < content: ''; position: absolute; width: 0; height: 0; border: 15px solid; >/* Position the Arrow */ .speech-bubble-top:after < border-bottom-color: #292929; left: 50%; bottom: 100%; margin-left: -15px; >.speech-bubble-right:after < border-left-color: #292929; left: 100%; top: 50%; margin-top: -15px; >.speech-bubble-bottom:after < border-top-color: #292929; top: 100%; left: 50%; margin-left: -15px; >.speech-bubble-left:after
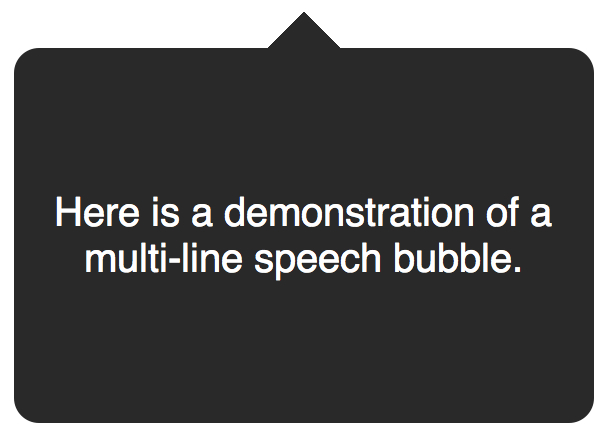
Вертикальное центрирование текста
минус использования line-height при вертикальном центрировании в ограничении текста одной строкой. Для решения этой проблемы, можно применить display: table к нашему Speech Bubble и display: table-cell к тексту:
.speech-bubble < /* other styles */ display: table; >.speech-bubble p
Еще один пример нестандартного использования границ:
Итог
Использование параметра border не ограничивается одним лишь «1px solid black», с помощью границ можно создавать различные фигуры, причем достаточно один раз написать CSS-класс и применять его к множеству элементов на странице.
CSS Borders
The CSS border properties allow you to specify the style, width, and color of an element’s border.
I have borders on all sides.
I have a red bottom border.
I have a blue left border.
CSS Border Style
The border-style property specifies what kind of border to display.
The following values are allowed:
- dotted — Defines a dotted border
- dashed — Defines a dashed border
- solid — Defines a solid border
- double — Defines a double border
- groove — Defines a 3D grooved border. The effect depends on the border-color value
- ridge — Defines a 3D ridged border. The effect depends on the border-color value
- inset — Defines a 3D inset border. The effect depends on the border-color value
- outset — Defines a 3D outset border. The effect depends on the border-color value
- none — Defines no border
- hidden — Defines a hidden border
The border-style property can have from one to four values (for the top border, right border, bottom border, and the left border).
Example
Demonstration of the different border styles:
A groove border. The effect depends on the border-color value.
A ridge border. The effect depends on the border-color value.
An inset border. The effect depends on the border-color value.
An outset border. The effect depends on the border-color value.
Note: None of the OTHER CSS border properties (which you will learn more about in the next chapters) will have ANY effect unless the border-style property is set!
border
The border shorthand CSS property sets an element’s border. It sets the values of border-width , border-style , and border-color .
Try it
Constituent properties
This property is a shorthand for the following CSS properties:
Syntax
/* style */ border: solid; /* width | style */ border: 2px dotted; /* style | color */ border: outset #f33; /* width | style | color */ border: medium dashed green; /* Global values */ border: inherit; border: initial; border: revert; border: revert-layer; border: unset;
The border property may be specified using one, two, or three of the values listed below. The order of the values does not matter.
Note: The border will be invisible if its style is not defined. This is because the style defaults to none .
Values
Sets the thickness of the border. Defaults to medium if absent. See border-width .
Sets the style of the border. Defaults to none if absent. See border-style .
Sets the color of the border. Defaults to currentcolor if absent. See border-color .
Description
As with all shorthand properties, any omitted sub-values will be set to their initial value. Importantly, border cannot be used to specify a custom value for border-image , but instead sets it to its initial value, i.e., none .
The border shorthand is especially useful when you want all four borders to be the same. To make them different from each other, however, you can use the longhand border-width , border-style , and border-color properties, which accept different values for each side. Alternatively, you can target one border at a time with the physical (e.g., border-top ) and logical (e.g., border-block-start ) border properties.
Borders vs. outlines
Borders and outlines are very similar. However, outlines differ from borders in the following ways:
- Outlines never take up space, as they are drawn outside of an element’s content.
- According to the spec, outlines don’t have to be rectangular, although they usually are.
Formal definition
- border-width : as each of the properties of the shorthand:
- border-top-width : medium
- border-right-width : medium
- border-bottom-width : medium
- border-left-width : medium
- border-top-style : none
- border-right-style : none
- border-bottom-style : none
- border-left-style : none
- border-top-color : currentcolor
- border-right-color : currentcolor
- border-bottom-color : currentcolor
- border-left-color : currentcolor
- border-width : as each of the properties of the shorthand:
- border-bottom-width : the absolute length or 0 if border-bottom-style is none or hidden
- border-left-width : the absolute length or 0 if border-left-style is none or hidden
- border-right-width : the absolute length or 0 if border-right-style is none or hidden
- border-top-width : the absolute length or 0 if border-top-style is none or hidden
- border-bottom-style : as specified
- border-left-style : as specified
- border-right-style : as specified
- border-top-style : as specified
- border-bottom-color : computed color
- border-left-color : computed color
- border-right-color : computed color
- border-top-color : computed color
- border-color : as each of the properties of the shorthand:
- border-bottom-color : a color
- border-left-color : a color
- border-right-color : a color
- border-top-color : a color
- border-bottom-width : a length
- border-left-width : a length
- border-right-width : a length
- border-top-width : a length
Formal syntax
border =
||
||=
|
thin |
medium |
thick=
none |
hidden |
dotted |
dashed |
solid |
double |
groove |
ridge |
inset |
outsetExamples
Setting a pink outset border
HTML
div>I have a border, an outline, and a box shadow! Amazing, isn't it?div>
CSS
div border: 0.5rem outset pink; outline: 0.5rem solid khaki; box-shadow: 0 0 0 2rem skyblue; border-radius: 12px; font: bold 1rem sans-serif; margin: 2rem; padding: 1rem; outline-offset: 0.5rem; >Result
Specifications
Browser compatibility
BCD tables only load in the browser
See also
Found a content problem with this page?
This page was last modified on Jul 18, 2023 by MDN contributors.
Your blueprint for a better internet.
MDN
Support
Our communities
Developers
Visit Mozilla Corporation’s not-for-profit parent, the Mozilla Foundation.
Portions of this content are ©1998– 2023 by individual mozilla.org contributors. Content available under a Creative Commons license.